
On this page
Start here
Quick answer
A stuck window usually has a lock that has not fully released, an obstruction or ice bond at the sash and frame, a binding hinge or operator, or a sash that has shifted out of alignment. Keep your hands clear of the glass and hardware, identify whether the lock or hinge side is stopping movement, and inspect only the visible areas from a safe position. Do not force the handle or sash, pry the frame, chip ice, apply concentrated heat, or remove hardware as a first step. If the glass, frame, hinge, lock, or escape-window function is damaged, or the sash remains stuck after one safe inspection, stop and arrange window service.
Before you begin
Safety first
- This article covers ordinary-access observation and one normal operation only. Do not pry, chip ice, apply concentrated heat, remove lock or hinge hardware, reach through broken glass, climb, or work on an unstable sash.
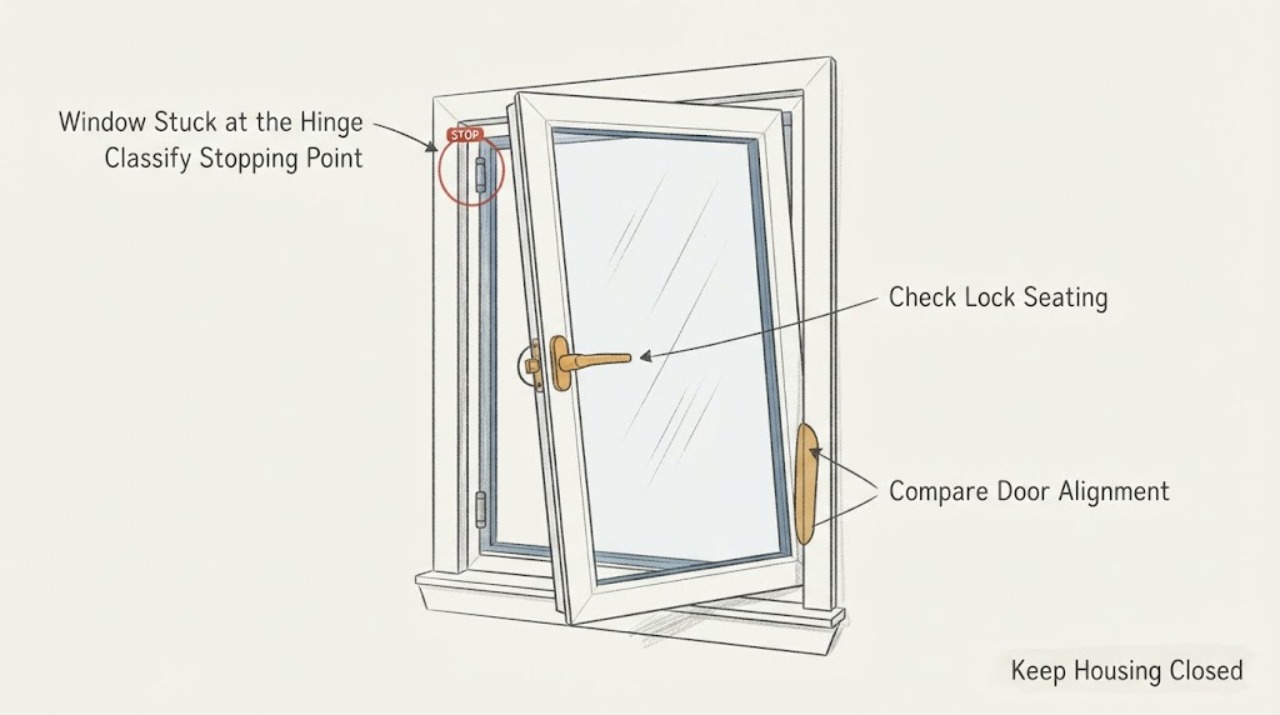
Work through in order
Diagnostic checks
Use only checks that match the exact appliance or system and its official guide.
-
Check 1
From inside and with the area clear, operate the handle or lock only through its normal range while watching the sash edge, lock side, and hinge side; do not pull hard on the sash or put fingers into the gap.
Expected result: Record whether the lock does not release, the handle moves but the sash stays seated, the sash moves and catches at one corner, or the handle and sash move normally but the window will not latch.
Next step: Use the matching branch below and photograph the stopping point; do not repeat the operation with increasing force.
Stop if: Stop immediately for broken glass, a cracked or separating frame, a loose sash, a sharp exposed part, or any movement that could drop or swing the sash.
Why this matters
Why: A lock that never releases points to the lock or keeper; movement that catches on one side points to an obstruction, hinge/operator bind, ice, or alignment; a latch that misses after movement points to alignment or a damaged locking part.
-
Check 2
With the sash supported by its normal closed position, look at the visible lock, keeper, and surrounding frame for paint, a displaced keeper, dirt, a bent piece, or an object preventing the lock from reaching its released position; remove only loose surface debris that comes away without contact with the mechanism.
Expected result: Note whether the lock is visibly blocked, the keeper is out of line, the lock is loose or damaged, or the path is clear but the handle still will not release.
Next step: If the path is clear and the lock remains stuck, leave it in place and arrange window service with the window type, lock position, photos, and the exact stopping point.
Stop if: Do not remove the lock, keeper, screws, trim, or sash, and do not operate a damaged or loose lock as a test.
Why this matters
Why: A clear loose obstruction can explain the jam; a shifted keeper or damaged lock requires model-specific alignment or replacement, not a generic part or force applied to the handle.
-
Check 3
Inspect the hinge side, frame reveal, weatherstrip, and sill from a stable indoor position without opening the sash; compare the visible gap at the top, bottom, and lock side and look for loose material, paint, swelling, or a hinge that is visibly displaced.
Expected result: Record whether the gap is even, whether the sash rubs at one corner, whether a seal is bonded to the frame, and whether the frame or hinge has visible damage or movement.
Next step: Keep the sash closed if it is stable, photograph the hinge and reveal, and request the manufacturer's adjustment procedure or a qualified window technician rather than improvising an adjustment.
Stop if: Stop for a loose sash, frame separation, water-damaged or soft material, a hinge pulled from the frame, or any need to reach outside or remove hardware.
Why this matters
Why: A consistent reveal with a local loose obstruction supports a limited cleaning check; a changing reveal, corner rub, displaced hinge, or swollen frame supports an alignment or structural service diagnosis.
-
Check 4
If the jam appeared after freezing weather, observe the weatherstrip, sash edge, and frame for frost or an ice bond from a safe indoor position; allow ordinary room-temperature thawing and keep the window undisturbed while it clears.
Expected result: Note whether the frost disappears and normal operation returns, whether water appears at the sill, or whether the sash remains stuck after the visible ice has cleared.
Next step: After thawing, try the manufacturer's normal lock and hinge operation once; if it still sticks or the frame is wet or damaged, stop and arrange service.
Stop if: Do not chip or scrape bonded frost, pour hot water on the window, use concentrated heat, or force the sash or handle.
Why this matters
Why: A temporary ice bond is plausible when operation returns after thawing. Persistent binding, water at the sill, or repeated freezing suggests damaged weatherstripping, drainage, frame movement, or another issue that needs assessment.
-
Check 5
From ground level or another ordinary safe viewpoint, inspect the exterior side only if it is already visible; look for an impact mark, a loose covering, an object against the sash, or a visibly displaced frame without reaching through the opening or accessing a roof or elevated exterior.
Expected result: Record whether the outside is clear, whether a covering or debris is contacting the sash, or whether the frame, glass, flashing, or exterior hardware is visibly damaged.
Next step: Keep the window closed and protected from weather if stable, photograph the exterior from the safe viewpoint, and provide those images to the manufacturer or window technician.
Stop if: Do not climb, lean out, place equipment against the window, or attempt an exterior repair from an unsafe position.
Why this matters
Why: A removable object that is safely reachable may explain the bind; damaged glazing, flashing, frame, or elevated access changes this from a household check to professional work.
-
Check 6
After one safe inspection and, where applicable, a natural thaw, try the normal manufacturer operation once and confirm that the window can open, close, and lock without rubbing or abnormal resistance; do not use this test to challenge a stuck mechanism.
Expected result: Record whether the sash now travels smoothly, the lock engages and releases normally, or the original bind remains or has returned.
Next step: If it remains stuck or is an emergency escape window, keep the area clear, use another safe exit where available, and book window service with the observations and photos.
Stop if: Stop all operation for damaged glass, an unstable sash, a broken handle or hinge, a blocked escape route, or a window that cannot be secured safely.
Why this matters
Why: A smooth repeat operation supports a temporary obstruction or ice-bond explanation but still warrants monitoring. Any recurring bind, failed lock, or window designated for escape means the operating system is not dependable.
Use your observations
Decision map
Find the observation that best matches what you see, then follow the next safe action.
-
PATH 01Safety boundary
What you see
The handle or lock does not reach its normal released position while the sash remains seated.
Do this next
Inspect only the visible lock path, document any misalignment or damage, and request model-specific window service if the path is not cleared by loose surface debris.
Why this path and its safety boundary
Why it matters: The lock, keeper, or the sash-to-frame alignment is the focused issue; forcing the handle can damage the operating part.
Safety stop: Do not remove the lock or keeper, loosen fasteners, or pry the sash.
-
PATH 02Safety boundary
What you see
The lock releases but the sash catches or rubs at one corner or along the hinge side.
Do this next
Keep the sash stable, photograph the reveal and hinge, and use only the exact manufacturer adjustment procedure through a qualified or safely supported service path.
Why this path and its safety boundary
Why it matters: A displaced sash, hinge/operator issue, frame movement, or obstruction is more likely than a lock-only fault.
Safety stop: Do not keep cycling the sash or attempt an adjustment without the product-specific guide and a safe work position.
-
PATH 03Safety boundary
What you see
Frost or ice is visible and the window becomes normal after an ordinary safe thaw.
Do this next
Use the normal operation once, dry visible moisture safely, and arrange service if the condition recurs or the seal/frame is damaged.
Why this path and its safety boundary
Why it matters: The immediate bind was likely weather-related, but recurring ice, wetness, or damaged weatherstrip still needs attention.
Safety stop: Do not scrape bonded frost, apply concentrated heat, or force movement while ice remains.
-
PATH 04Safety boundary
What you see
The glass, frame, hinge, lock, or exterior covering is damaged, or inspection would require unsafe height access.
Do this next
Keep people away from the window, take photos only from a safe position, and contact the manufacturer or qualified window service.
Why this path and its safety boundary
Why it matters: The failure and injury risk cannot be resolved by ordinary-access troubleshooting.
Safety stop: Do not reach through broken glass, lean out, climb, or disassemble the window.
-
PATH 05Safety boundary
What you see
The window remains stuck after the safe checks, cannot be secured, or is needed as an emergency escape opening.
Do this next
Stop operation, keep the route clear, use another safe exit when available, and arrange prompt window service with the exact observations.
Why this path and its safety boundary
Why it matters: The operating system is not reliable enough for continued experimentation or emergency use.
Safety stop: Do not leave a damaged or unsecured sash in use and do not delay service when escape access is compromised.
Helpful context
Understand the symptom
First separate a lock problem from a hinge or frame bind
“Stuck” does not identify one failed part. If the lock or handle does not reach its normal released position, the sash may still be held by the keeper. If the handle releases but the sash drags at one corner, rubs the frame, or moves only a short distance, alignment, a hinge or operator, paint, debris, or an ice bond is more likely. Stop before the handle becomes harder to turn or the sash flexes; the observation that changes the next step is where movement stops, not how much force it takes to move it.
Cold weather can make a sound window appear mechanically failed
Frost or ice can bond the weatherstrip to the frame and can keep the sash from closing or opening normally. A frozen window is not a reason to pry, scrape aggressively, or use concentrated heat. Let a safe, ordinary thaw occur, keep water away from electrical operators, and repeat the normal manufacturer operation only when the bond has visibly cleared. If the problem returns with frost or the frame has been distorted by moisture, request service rather than forcing the hardware.
Preserve emergency egress and keep adjustments model-specific
A window used for emergency escape must remain operable. Andersen warns against painting or weatherstripping a window shut and says broken sash locks, balances, and operating parts should be repaired promptly. Some casement windows can be aligned with a manufacturer-specific hinge procedure, but adjustment tools and part handing vary by product. Do not copy a hinge adjustment from another window or remove a lock without the exact manufacturer guide and a supported, accessible work position.
Only after diagnosis
Potential parts
- window lock or keeper
Consider this only if the lock path is clear but the lock or keeper is visibly damaged or remains misaligned after the window type and model are confirmed.
Lock handing, vintage, and keeper design vary by window type; confirm the exact manufacturer, model, and replacement instructions before ordering. - casement hinge or operator hardware
Consider this only if a qualified assessment finds a displaced, worn, or damaged hinge or operator rather than an obstruction, ice bond, or frame problem.
Hinge and operator geometry is product-specific and may be handed; use the manufacturer's identification and service guidance. - window weatherstrip
Consider this only if the weatherstrip is damaged, detached, or repeatedly bonding and the window manufacturer identifies it as the correct service part.
Confirm the profile and window series before ordering; weatherstrip is not a substitute for correcting a shifted frame or hinge.
When checks do not resolve it
Need a professional?
Safety scope: This article covers ordinary-access observation and one normal operation only. Do not pry, chip ice, apply concentrated heat, remove lock or hinge hardware, reach through broken glass, climb, or work on an unstable sash.
Common questions
FAQ
Why is my window stuck even though the handle turns?
The lock may have released while the sash is still binding at a hinge side, frame corner, weatherstrip, obstruction, or shifted reveal. Observe where movement stops, avoid increasing force, and arrange model-specific service if the visible path is clear.
Can frost make a window stick?
Yes. Ice can bond weatherstripping or frost can prevent the sash from closing normally. Let it clear through ordinary safe thawing; do not chip, scrape aggressively, use concentrated heat, or force the handle or sash.
Should I adjust the hinge when a casement window is stuck?
Only with the exact manufacturer's procedure, the correct window identity, and a safe supported work position. Hinge tools, handing, and adjustment limits vary, so an out-of-line or damaged sash is usually a reason to request window service rather than copy an adjustment from another model.
What should I do if the stuck window is an emergency escape window?
Stop experimenting, keep the area clear, use another safe exit when available, and arrange prompt service. A window that cannot open, close, or secure reliably should not be treated as dependable emergency egress.
Can I remove the window lock or use a generic replacement?
Do not remove the lock as a first troubleshooting step or choose a generic part. Lock and keeper designs depend on the window type, model, age, and handing; provide those details and photos to the manufacturer or a qualified window technician.
Read the exact guide
Official sources
- Window and door safety tipsAndersen Windows · General official Andersen window-safety guidance; local emergency-egress requirements and the installed product instructions also apply.
- I cannot open / close my manual VELUX roof windowVELUX · Official VELUX support for VELUX roof windows; operation varies by centre-pivot, top-hung, and flat-roof models.
- Adjust Sash on Andersen® A-Series Casement WindowAndersen Windows · Official Andersen A-Series casement guidance; do not generalize its adjustment tool or procedure to another window.
- 3.0 Window IssuesCanada Mortgage and Housing Corporation · Government technical guidance on residential window issues and cold-weather maintenance; product-specific instructions control a particular window.
- Order Replacement Locks for Andersen® Casement and Awning WindowsAndersen Windows · Official Andersen replacement-lock guidance; lock design and handing depend on the specific window series and age.
- Safety guideline to find type sign / gather product information safelyVELUX · Official VELUX safety guidance for identifying VELUX products; its safe-access principles are not a substitute for product-specific repair instructions.
- Envelope PenetrationCanada Mortgage and Housing Corporation · Government building-envelope guidance; it supports risk boundaries for frost and water but does not replace a window manufacturer's procedure.
Community feedback
Share a repair observation
Share a plain-text repair observation. Accepted observations are published automatically; this page may take a moment to update.