
On this page
Start here
Quick answer
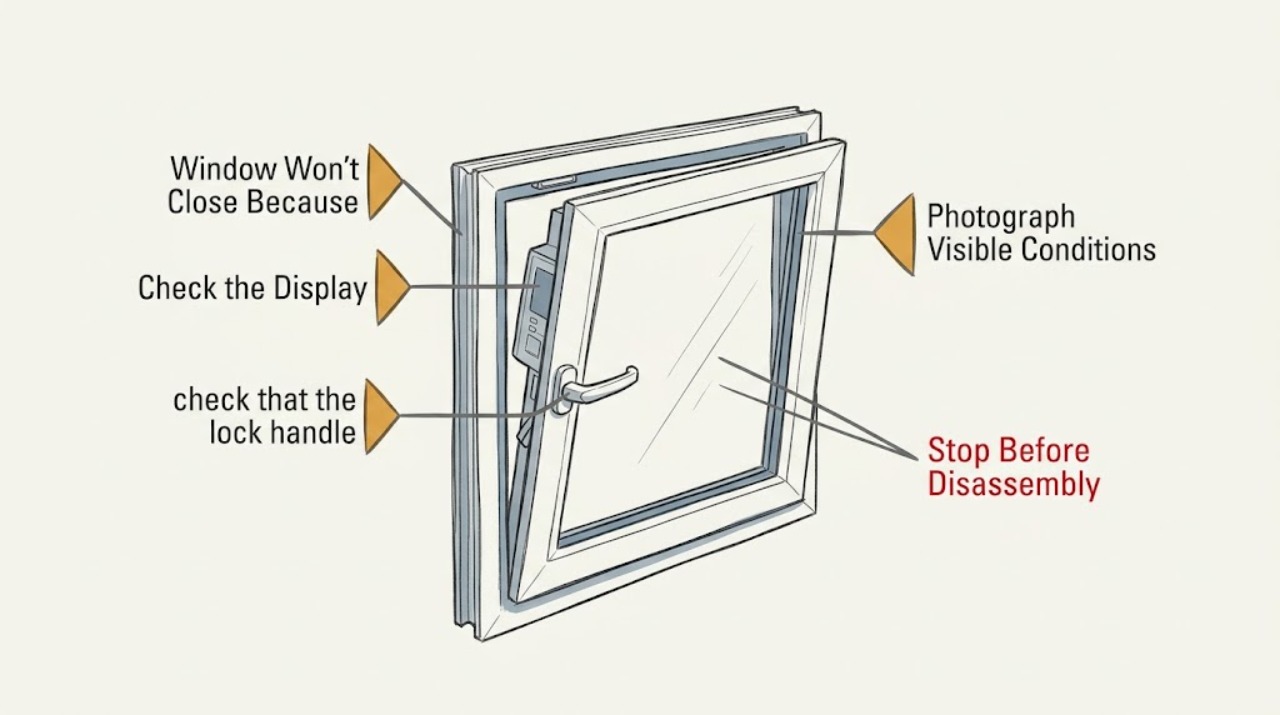
If a window will not close because the lock will not engage, stop forcing the handle and identify the window style and lock parts first. With the sash supported and the area safe, open it only as far as needed to inspect for a visible obstruction, a shifted keeper or strike, a lock cam left in the closed position, or a sash that rubs or sits unevenly in the frame. Close the sash gently and see whether the lock aligns without pressure. A small adjustment may be appropriate only when the exact manufacturer's guide explicitly covers that model; do not drill, remove hardware, alter a fall-control device, or work from an unsafe height. Keep a window with a failed lock closed and secured away from children until repaired. Arrange qualified window service for cracked glass, a loose or dropped sash, damaged hardware, a frame that is out of square, a window above a safe reach, or a lock that still will not engage after the safe external checks.
Work through in order
Diagnostic checks
Use only checks that match the exact appliance or system and its official guide.
-
Check 1
Keep people away from the opening, support the sash without leaning out, and inspect from a safe standing position for cracked glass, a dropped sash, loose hardware, an unsecured upper-floor opening, or a fall-control device that has been disengaged.
Expected result: A fall, glass, structural, or egress hazard is present, or the window is stable and can be inspected without climbing or reaching outside.
Next step: For a hazard, secure the room and arrange qualified window service. Do not climb, lean through the opening, remove a limiter, or use the window as an escape route until its operation is restored. If stable, identify the window and lock style.
Stop if: Stop for a loose or falling sash, cracked glass, a high or exterior-side repair, a defeated opening-control device, or any need to climb or lean out.
Why this matters
Why: Safety takes priority over getting the lock to turn; a stable, accessible window permits limited external checks.
-
Check 2
Identify whether the unit is casement, awning, sliding, single-hung, or double-hung, then photograph the handle, lock cam, keeper or strike, sash, and any manufacturer label or etched identifier.
Expected result: The window type and hardware are clear, or the lock style, product identity, or moving sash cannot be identified safely.
Next step: Use the exact manufacturer's operation or adjustment guide. If the identity is unclear, stop at photographs and arrange a window professional rather than borrowing a procedure from another style.
Stop if: Stop for concealed hardware, a broken handle, missing screws, a lock that moves independently of the sash, or any need to remove trim.
Why this matters
Why: Lock adjustment is design-specific; an unknown mechanism makes a generic screw adjustment unsafe and can disable tilt, egress, or opening-control functions.
-
Check 3
With the sash open only enough for safe access, check that the lock handle or cam is in its open position, the keeper or strike is not visibly blocked, and no dirt, paint, weatherstrip, or object prevents the sash from seating; do not force the handle against resistance.
Expected result: The cam is still closed, an obstruction is visible, the sash seats evenly after a gentle clean, or the lock remains misaligned with a clear opening.
Next step: Remove only loose surface debris and return the lock to the documented open position. Close the sash gently and retest. Do not scrape, pry, lubricate with an unapproved product, or remove safety hardware.
Stop if: Stop for swollen or rotten material, glass contact, a lock that binds, damaged weatherstrip, or any need to pry the sash or keeper.
Why this matters
Why: A lock left in the engaged position or a simple visible obstruction can prevent closure; a clear opening with misalignment points toward sash, hinge, strike, or frame geometry.
-
Check 4
Close the sash gently while observing the gap around its perimeter and the point where the cam meets the keeper or strike; note rubbing, a slanted gap, a sash that drops, or hardware that aligns only when pushed.
Expected result: The reveal is uneven, the sash rubs the frame, the cam hits the keeper, the sash sits square and the lock still misses, or the window cannot be held safely in position.
Next step: Use the exact manufacturer's adjustment guide only if it explicitly covers the observed model and the work is safe at ground level. Otherwise, photograph the contact point and arrange service.
Stop if: Stop for a sash that drops, a frame that is twisted or out of square, an upper-story window, or any adjustment requiring force or unsafe support.
Why this matters
Why: An uneven reveal or rubbing supports an alignment, hinge, installation, or frame issue; a square sash with a clean miss points more directly to lock or keeper position.
-
Check 5
If the window has a limiter or window opening-control device, confirm only from the manufacturer's instructions that it is fully reset when the sash is closed; do not remove, bypass, or defeat the device to make the lock engage.
Expected result: The device is disengaged, the sash cannot reach its fully closed position, or the device is intact and the lock still will not engage.
Next step: Follow the exact safety-device instructions once. If full closure cannot be reached or the device does not reset, secure the window and arrange qualified repair while preserving egress and child safety.
Stop if: Stop for a missing or loose limiter, an opening above a child's reach hazard, a blocked egress window, or any attempt to defeat fall protection.
Why this matters
Why: An opening-control device can limit movement for fall safety and may re-engage only after full closure; a device that prevents safe closure or is damaged needs model-specific service.
-
Check 6
Record the window type, manufacturer identifier, lock travel, contact point, perimeter gap, sash movement, and photographs of the keeper or strike before arranging service; keep the window closed and secured without forcing the lock.
Expected result: The lock engages after a safe correction, remains loose or misaligned, or the sash still will not close fully.
Next step: Use qualified window service for persistent failure, damaged hardware, frame movement, high access, or any safety-device issue. Do not replace a lock or alter its keeper from appearance alone.
Stop if: Stop for recurring binding, a loose sash, cracked glass, water intrusion, a failed fall-control device, or any internal frame repair.
Why this matters
Why: A successful gentle correction suggests a state or obstruction issue; persistent failure indicates lock, keeper, hinge, sash, frame, or safety-device diagnosis is needed.
Use your observations
Decision map
Find the observation that best matches what you see, then follow the next safe action.
-
PATH 01Next step
What you see
The sash is loose or dropping, glass is cracked, the opening is high, or a child or pet could fall through.
Do this next
Arrange qualified service and follow the exact model guidance.
Why this path and its safety boundary
Why it matters: Secure the area and arrange qualified window service; do not climb, lean out, or defeat a limiter or opening-control device.
-
PATH 02Next step
What you see
The lock cam or handle is in the engaged position while the sash is open, or a loose obstruction prevents seating.
Do this next
Arrange qualified service and follow the exact model guidance.
Why this path and its safety boundary
Why it matters: Return the lock to its documented open position and remove only loose surface debris, then test closure gently without force.
-
PATH 03Next step
What you see
The sash rubs, drags, has an uneven reveal, or the cam contacts the keeper before the sash is seated.
Do this next
Arrange qualified service and follow the exact model guidance.
Why this path and its safety boundary
Why it matters: Follow only the exact model's safe adjustment guide; persistent misalignment, frame movement, or unsafe access needs a window professional.
-
PATH 04Next step
What you see
A window opening-control device or limiter prevents full closure or does not reset.
Do this next
Arrange qualified service and follow the exact model guidance.
Why this path and its safety boundary
Why it matters: Do not remove or bypass it. Use the manufacturer's safety instructions once and arrange qualified service if it remains damaged or misaligned.
-
PATH 05Next step
What you see
The sash closes evenly but the lock still misses the keeper, binds, or has loose or broken hardware.
Do this next
Arrange qualified service and follow the exact model guidance.
Why this path and its safety boundary
Why it matters: Keep the window secured and arrange model-specific hardware service; do not enlarge holes, reposition a strike, or replace a lock by guesswork.
-
PATH 06Next step
What you see
A documented open lock position or loose surface obstruction was corrected and the sash now closes without pressure.
Do this next
Arrange qualified service and follow the exact model guidance.
Why this path and its safety boundary
Why it matters: Test the lock once and monitor the gap and handle travel. If the issue returns, stop repeated adjustments and request service.
Helpful context
Understand the symptom
A lock problem is often an alignment problem
The lock handle, cam, keeper or strike, sash, and frame must meet in the correct position. If the sash rubs the frame, has an uneven reveal, or the handle stops before its normal travel, forcing the lock can bend hardware or damage the frame. Check the sash position before assuming the lock itself has failed.
Identify the window before changing anything
Casement, awning, sliding, single-hung, and double-hung windows use different locking and support parts. Find the manufacturer's label or etched identifier and use the matching guide. A procedure for one sash or lock design can disable the tilt, opening-control, or egress function of another.
Keep fall protection and egress intact
A screen is not a fall barrier, and a window opening-control device may be part of the safety design. Keep children away from an unsecured opening, do not defeat a limiter, and do not leave a required escape window stuck or blocked. If the window is high, heavy, or difficult to support, stop and use a qualified technician.
Use gentle checks, then hand off the repair
Clean visible debris, return a lock cam or handle to the open position when the manufacturer's guide says to do so, and test closure without force. If the sash still will not close or the lock will not engage, record the gap and hardware behavior and arrange service instead of repeatedly adjusting screws.
Only after diagnosis
Potential parts
Only when the exact window model and qualified diagnosis confirm worn, broken, or misaligned locking hardware; a lock that will not engage may instead reflect sash alignment.
Only after model-specific diagnosis identifies the contact or alignment failure; do not reposition hardware by guesswork.
Only if the manufacturer's safety instructions and a qualified inspection identify a damaged or failed device; never remove it to make the lock work.
When checks do not resolve it
Need a professional?
The lock still will not engage after the sash closes evenly and visible obstructions are removed., The sash rubs, drags, drops, or has an uneven reveal or a frame that appears twisted., The lock, keeper, strike, hinge, handle, or weatherstrip is damaged or loose., A limiter or window opening-control device will not reset, or closure would defeat fall safety or egress., The window is above a safe reach, heavy, difficult to support, or requires exterior access., Repair would require drilling, removing trim or glass, altering a safety device, or applying force to the lock.
Common questions
FAQ
Why won't my window close when the lock will not engage?
The sash may be crooked, rubbing the frame, or meeting the keeper before it is fully seated. The lock cam may also be left in the engaged position or blocked by debris. Check alignment and lock position gently before suspecting a broken lock.
Should I force a window lock that will not turn?
No. Forcing the handle can damage the lock, keeper, sash, or frame. Return the cam to its documented open position and arrange service if the sash does not close evenly or the lock still binds.
Can a window opening-control device stop the window from closing?
A safety device can limit opening and may require the sash to close fully before it resets. Follow the exact manufacturer's instructions, but do not remove or bypass the device. Persistent failure needs qualified service.
Can I move the keeper or strike to fix a window lock?
Only use a model-specific manufacturer's adjustment procedure that explicitly covers your window. If the sash is rubbing, the frame is out of square, or the window is difficult to support, stop and use a qualified window professional.
When should I call a window professional?
Call when the lock remains misaligned after safe checks, the sash drops or rubs, glass or hardware is damaged, a limiter will not reset, or the work requires height, exterior access, force, drilling, or removal of trim or glass.
Read the exact guide
Official sources
- Adjust Sash on Andersen A-Series Casement WindowAndersen Windows · Opened official Andersen support article for A-Series casements; it is an example and the exact window model guide takes precedence.
- Pella Owners Manual: Troubleshooting Casement WindowsPella · Opened official Pella owner-manual resource; exact Pella series and hardware require the matching manual.
- Window Opening Control DevicesMarvin · Opened official Marvin product-safety page; opening-control devices vary by product and local safety requirements.
- Operation and Adjustment Guide for Wood French Casement WindowsAndersen Windows · Opened official Andersen service guide for a wood French casement design; it demonstrates model-specific lock alignment and must not be generalized to another window.
Community feedback
Share a repair observation
Share a plain-text repair observation. Accepted observations are published automatically; this page may take a moment to update.