
On this page
Start here
Quick answer
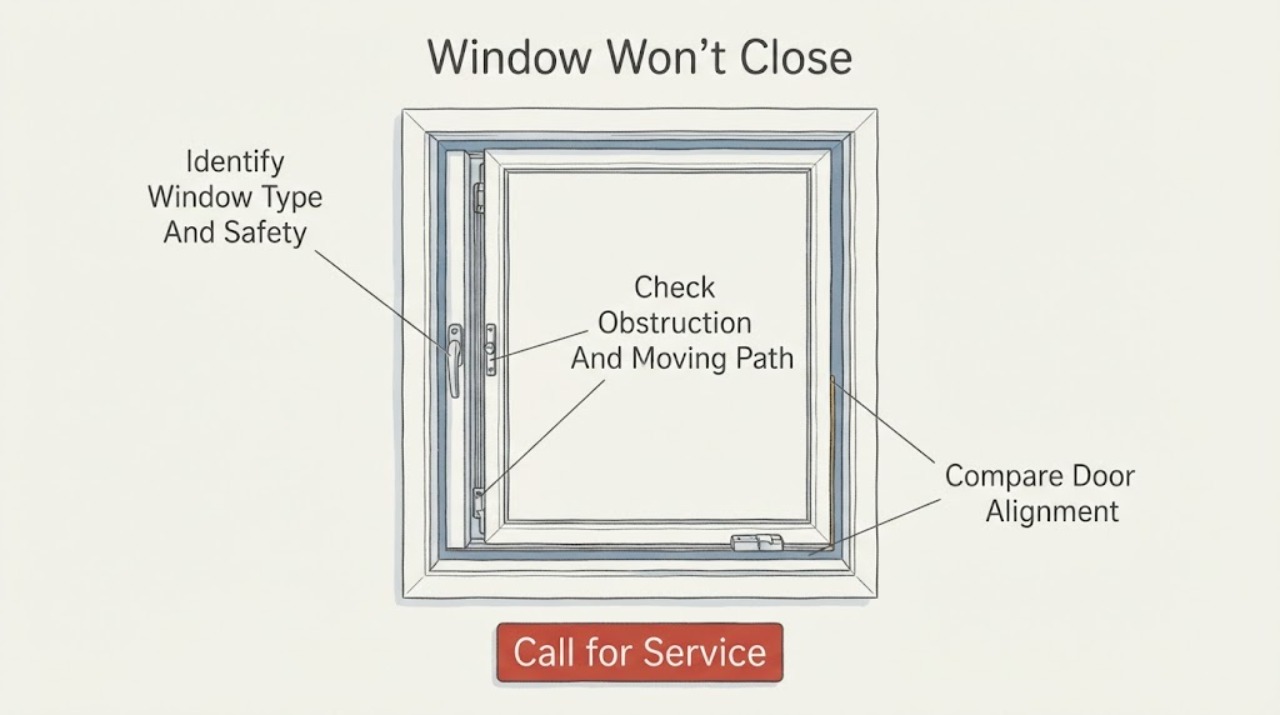
If a window will not close, stop before forcing the sash or lock. From inside, identify whether it is a slider, double-hung, casement, awning, or another type, then look for a curtain, object, dirt, loose weatherstrip, or clothing caught in the moving path. Operate it only through its normal range and note whether it binds, rubs, sits crooked, or reaches the frame but will not latch. A consistent uneven gap or a sash that drags points toward alignment, hardware, frame, or installation trouble rather than a simple latch problem. Keep the opening protected and arrange qualified window service for cracked glass, a loose or unsupported sash, a rotten or swollen frame, failed operator or lock, a window needed for emergency egress, or any closure problem that remains after the safe checks.
Before you begin
Safety first
- This article supports stable interior observation, clearing an obvious loose obstruction, and one normal closure check. Hardware adjustment, sash removal, glazing, frame or installation repair, water management, and lead-paint work require qualified or exact manufacturer-directed service.
Work through in order
Diagnostic checks
Use only checks that match the exact appliance or system and its official guide.
-
Check 1
From inside the room, identify whether the window slides, lifts, cranks outward, or is fixed, and inspect the glass, sash, frame, and operator from a stable standing position; keep clear of a loose, cracked, or unsupported sash.
Expected result: Record a stable intact window, cracked glass, a sash that has dropped or shifted, a loose frame, exposed sharp material, or a window that is part of an emergency-escape opening.
Next step: Keep people clear, support or close the opening only if it can be done without force, and arrange qualified window service for glass, sash, frame, operator, or egress concerns.
Stop if: Do not lean out, climb, carry a loose sash, handle broken glass, or force an unstable window into its frame.
Why this matters
Why: Window type determines the moving path and hardware. Damage, instability, or egress importance changes the task from routine obstruction checking to a safety and service decision.
-
Check 2
With the window unloaded, inspect the visible sill, track, meeting rail, hinges or operator area, latch side, and weatherstrip for curtains, objects, dirt, loose seal material, or clothing caught in the path; remove only an obvious loose obstruction without tools.
Expected result: Record an obstruction that clears, debris or a damaged weatherstrip, a clear path with the same binding, or an obstruction that cannot be removed without disassembly.
Next step: Close the window normally after clearing the loose item; arrange service for damaged seals, concealed debris, repeated binding, or anything that needs hardware or trim access.
Stop if: Do not pry the sash, cut the weatherstrip, insert tools into tracks, or remove trim, balances, hinges, or operators during this check.
Why this matters
Why: A clear improvement after removing a loose obstruction supports a local interference problem. Persistent binding with a clear path points toward sash alignment, hardware, frame movement, or installation rather than simple dirt.
-
Check 3
Operate the window through its normal movement once and compare the gap between sash and frame along the top, bottom, and latch or hinge sides; stop if it rubs, drops, twists, or requires unusual force.
Expected result: Record an even reveal and normal movement, one corner rubbing, a sash that sits crooked, a crank or track that turns without moving the sash, or a sash that reaches the frame but leaves an uneven gap.
Next step: Document the affected corner and window type and use the exact manufacturer guide or a qualified window professional for adjustment; do not apply a generic adjustment sequence.
Stop if: Do not force the handle, lift a heavy sash alone, remove hardware, or continue operating a sash that is loose, cracked, or out of the frame.
Why this matters
Why: An uneven reveal or dragging sash is consistent with alignment, operator, hinge, balance, or frame trouble. A normal reveal with a latch that does not engage points more toward lock or keeper alignment.
-
Check 4
When the sash is in its normal closed position and the frame is stable, inspect the visible lock, keeper, frame, sill, and trim for misalignment, paint buildup, swelling, rot, water staining, or a latch that misses its receiver; do not force the lock to compensate.
Expected result: Record a latch that engages normally, a clean but missed keeper, paint or material blocking closure, a swollen or rotten frame, water damage, or a latch or operator that is loose or broken.
Next step: Remove only superficial loose material that is safe and does not disturb old paint; arrange qualified service for frame damage, water entry, loose hardware, or persistent latch misalignment.
Stop if: Do not chip paint around an old window, drill the keeper, plane the frame, or conceal water damage with sealant.
Why this matters
Why: A clean missed keeper can reflect sash or frame alignment. Swelling, rot, water damage, loose hardware, or a broken latch indicates a window or building-envelope repair rather than a simple setting change.
-
Check 5
After the safe checks, record whether the window closes, latches, and remains operable without unusual force, and note any draft, water entry, or security gap; use only a temporary interior barrier that does not block required egress or ventilation while arranging service.
Expected result: Record normal closure restored, closure improved but latch still fails, an opening that cannot be secured, continued water or air entry, or a window that must remain open for escape or ventilation.
Next step: Arrange qualified window or building-envelope service and provide the window type, binding location, gap pattern, hardware behavior, and any water or damage observations.
Stop if: Do not seal the window permanently, block an emergency-escape opening, leave a loose sash unsecured, or continue using a damaged window in severe weather.
Why this matters
Why: A window that still cannot close has an unresolved mechanical, frame, or installation issue. A temporary covering can reduce exposure but does not repair alignment, hardware, water management, or safety operation.
Use your observations
Decision map
Find the observation that best matches what you see, then follow the next safe action.
-
PATH 01Safety boundary
What you see
A loose curtain, object, dirt, or material caught in the moving path is found and closure improves when it is removed.
Do this next
Close and latch normally once, then arrange service if rubbing, a gap, or repeat interference remains.
Why this path and its safety boundary
Why it matters: The immediate fault is likely local interference, but the seal and latch still need a normal closure check.
Safety stop: Do not insert tools, cut the weatherstrip, or force the sash around an obstruction.
-
PATH 02Safety boundary
What you see
The window rubs, drags, twists, drops, or shows an uneven sash-to-frame reveal.
Do this next
Keep operation to a minimum and use the exact manufacturer guide or qualified window service for adjustment and repair.
Why this path and its safety boundary
Why it matters: Alignment, balance, hinge, operator, frame, or installation trouble is possible.
Safety stop: Do not force the handle, lift a heavy sash alone, or remove concealed hardware.
-
PATH 03Safety boundary
What you see
The sash reaches the frame with an even gap, but the lock or keeper does not engage.
Do this next
Do not force the lock; arrange qualified service or follow the exact manufacturer instruction for the identified window model.
Why this path and its safety boundary
Why it matters: Lock or keeper alignment, hardware wear, or a model-specific operator issue may remain.
Safety stop: Do not drill, bend, or relocate the keeper or substitute a latch without confirming the window system.
-
PATH 04Safety boundary
What you see
The frame or sill is swollen, rotten, loose, water-stained, or the sash or glass is damaged.
Do this next
Protect the opening without blocking required operation and arrange qualified window or building-envelope service.
Why this path and its safety boundary
Why it matters: A building-envelope, glazing, structural, or water-management repair may be needed; a surface adjustment will not restore safe closure.
Safety stop: Do not plane, drill, paint over, or seal active water damage or unstable material.
-
PATH 05Safety boundary
What you see
The window still will not close after the safe checks, or it is needed for emergency escape or ventilation.
Do this next
Arrange qualified service promptly and keep the window in the safest operable state available; provide the observed failure pattern.
Why this path and its safety boundary
Why it matters: The unresolved problem affects weather protection, security, or safe egress and needs a model-appropriate assessment.
Safety stop: Do not seal the opening shut, leave a loose sash unsecured, or keep forcing the mechanism.
Helpful context
Understand the symptom
Do not turn a stiff window into a broken one
A window can stop closing because something is in the track, the sash has shifted, the operator or lock is not aligned, the frame has swollen or moved, or the opening was installed out of square. Forcing the handle or sash can damage the lock, weatherstrip, glass, or operator. Start with a safe visual comparison of the opening and the sash position.
The window type determines what can move
Sliding and double-hung windows move in tracks, while casement and awning windows use a crank or operator to bring the sash against the frame. Andersen notes that an A-Series casement sash that drags, rubs, will not close, or will not lock may need model-specific adjustment. Do not apply a generic tool procedure to an unidentified window.
Keep weather protection and emergency operation in view
A window that cannot close can admit rain and reduce security, while a window that is sealed shut can block required ventilation or emergency escape. ENERGY STAR also flags complicated trim and pre-1978 lead-paint work for professional attention. If the sash or glass is unstable, leave it in the safest position available and arrange service.
Safety boundary
Stop conditions
- Do not force a sash, crank, handle, latch, or lock; stop for rubbing, dropping, twisting, cracked glass, or an unstable frame.
- Do not remove trim, balances, hinges, operators, or concealed hardware during a general model-free check.
- Do not drill, bend, plane, or relocate hardware, and do not seal active water damage or a window shut.
- If old paint may be disturbed, especially in a pre-1978 home, stop before creating dust and obtain lead-safe guidance.
- Arrange qualified window or building-envelope service for persistent failure, frame or water damage, unsafe glass, failed hardware, or an opening required for emergency egress or ventilation.
When checks do not resolve it
Need a professional?
Arrange qualified window service when the sash drags or sits crooked, the lock will not engage, hardware is loose or broken, the frame is swollen or rotten, water enters, glass is damaged, or the window remains unable to close after an obvious obstruction is removed. Use a building-envelope professional for installation or wall-opening problems and obtain lead-safe guidance before disturbing old paint or trim.
Safety scope: This article supports stable interior observation, clearing an obvious loose obstruction, and one normal closure check. Hardware adjustment, sash removal, glazing, frame or installation repair, water management, and lead-paint work require qualified or exact manufacturer-directed service.
Common questions
FAQ
Why will my window not close?
Check for an obvious obstruction first, then observe whether the sash drags, sits crooked, reaches the frame with an uneven gap, or misses the lock. These clues separate a track or obstruction problem from alignment, hardware, frame, or installation trouble.
Can I force a window shut if it is stuck?
No. Forcing the sash, crank, or lock can damage the glass, operator, weatherstrip, or frame. Stop for unusual force, rubbing, a dropped sash, damaged glass, or a loose frame and arrange qualified service.
How do I know whether the window is out of alignment?
Operate it normally once and compare the gap between sash and frame along each side. Rubbing, a crooked sash, or an uneven reveal points toward alignment, hardware, balance, hinge, operator, or frame trouble; use the exact manufacturer guide or a professional.
Should I remove the window trim to fix a window that will not close?
Not as a general first step. Trim work can disturb paint, expose hidden conditions, or deflect the frame and worsen opening or closing. Use a qualified professional for concealed gaps, complicated trim, water damage, or old paint concerns.
When should I call a professional for a window that will not close?
Arrange service for damaged glass, a loose or rotten frame, water entry, a dropped or crooked sash, failed hardware or lock, a persistent closure failure, or a window required for emergency escape or ventilation. Obtain lead-safe guidance before disturbing old paint.
Read the exact guide
Official sources
- Adjust Sash on Andersen® A-Series Casement WindowAndersen · Andersen A-Series casement guidance used to illustrate why model-specific alignment instructions matter; it does not establish a repair for an unidentified window.
- Sealing Behind Window & Door Trim ProjectENERGY STAR · ENERGY STAR project guidance used for identifying window perimeter conditions; it is not a model-specific hardware adjustment manual.
- High Performing Windows or Storm WindowsENERGY STAR · ENERGY STAR guidance used for general residential window closure and condition triage; exact window instructions and local building requirements control.
Community feedback
Share a repair observation
Share a plain-text repair observation. Accepted observations are published automatically; this page may take a moment to update.