
On this page
Start here
Quick answer
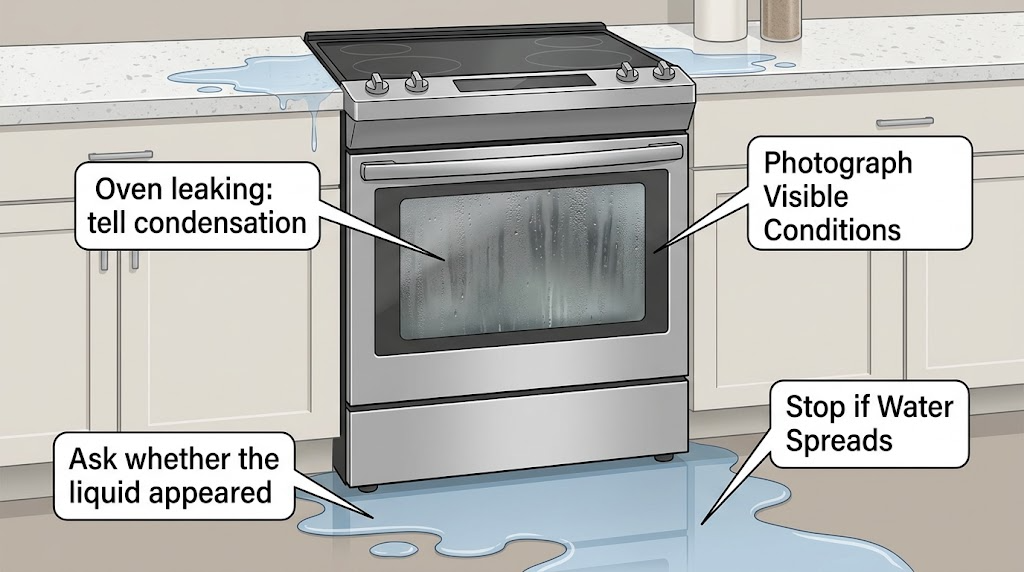
First identify what is leaking and where it starts: a few clear drops on the door or floor after cooking can be steam condensation, especially with high-moisture food, while water pooling under the range, entering a control area, or continuing when the oven is cool is not normal. Turn the oven off and let it cool before wiping or inspecting; check that vents are clear, the door closes, and any optional steam reservoir is not overfilled. Stop using the appliance for a persistent leak, damaged door or seal, gas odor, smoke, or water near electrical parts, and arrange qualified service. Do not remove panels or attempt gas, heating, or wiring repairs.
Work through in order
Diagnostic checks
Use only checks that match the exact appliance or system and its official guide.
-
Check 1
Turn the oven off, keep the door closed while it is hot, and wait until the cavity and any liquid are cool enough to approach safely; then photograph the liquid's color, texture, amount, and exact starting point without removing panels or reaching behind the appliance.
Expected result: Moisture is only on the door or nearby floor after cooking, water is pooled inside the cavity, liquid starts under the range or wall oven, or there is smoke, a gas odor, or water near controls and wiring.
Next step: For smoke, gas odor, fire, or water near electrical parts, stop use and follow the safety boundary below. Otherwise continue only after cooling, and keep the photo and timing for the model-specific manual or technician.
Why this matters
Why: Location and timing separate likely steam or a cooking spill from a concealed plumbing, reservoir, door, or electrical fault. Smoke, gas odor, or wet electrical parts create a safety boundary rather than a cleaning problem.
-
Check 2
Ask whether the liquid appeared after roasting, baking, or cooking a food with substantial water content, and whether it disappears as the oven reaches temperature or after the cool oven is wiped dry.
Expected result: Moisture follows high-moisture food and is limited to the door, seal, vent path, floor, or cabinet; or it continues during dry cooking and after the oven has cooled.
Next step: For temporary condensation, wipe only after cooling and observe whether it recurs with the same cooking conditions. For continuing liquid, stop using the oven and arrange qualified service rather than sealing vents or applying a household caulk.
Why this matters
Why: Official oven guidance says steam from high-moisture food, and in gas ovens from combustion, can condense temporarily. Persistent liquid is less consistent with normal condensation and needs a source check.
-
Check 3
With the oven cool, look at the visible door perimeter, gasket, latch area, rack position, and any food or soil buildup that could prevent the door from closing fully; clean only accessible residue with a soft cloth and do not move or cut the gasket.
Expected result: The door is blocked or misaligned, a rack or bakeware prevents closure, residue is built up at the contact area, the gasket is torn or displaced, or the door closes normally.
Next step: Remove only an obvious obstruction and make one supervised test if no hazard is present. If the latch, hinge, gasket, or frame is damaged, or liquid still escapes, leave the oven off and request service; do not remove the door or adjust hinges without model instructions.
Why this matters
Why: A door that cannot close can release more steam and heat, while a damaged or displaced seal can change where moisture escapes. The door gasket is a sealing and heat-control boundary, not a part to reshape casually.
-
Check 4
Inspect the oven's visible upper and lower vent openings and the surrounding cabinet space for foil, towels, cookware, or debris blocking airflow; do not insert tools into the vent or cover it to redirect moisture.
Expected result: A vent is blocked or covered, the vent path is clear, or moisture still reaches the floor or cabinet despite clear vents.
Next step: Remove only an external obstruction after the oven is cool, then observe one normal cooking cycle if the manual permits. If liquid persists, stop use and arrange a qualified inspection rather than dismantling the vent path.
Why this matters
Why: Vents allow air and steam to leave the appliance; blocking them can worsen circulation and condensation and can affect cooling. A clear vent with persistent water points away from a simple airflow obstruction.
-
Check 5
Only if this Admiral oven is explicitly equipped with a steam function or water container, compare the fill level and removal method with its exact manual; keep the container level while removing it and check for visible overflow or water at the valve seat after cooling.
Expected result: The model has no water feature, the reservoir was overfilled, water remained at the valve seat after removal, or the container and drain procedure match the manual but water still leaks.
Next step: If overfilled or incorrectly removed, cool the oven, empty and reinstall the container exactly as directed, and make one supervised test. If water returns or the model has no such feature, stop use and request service; do not improvise a drain cycle.
Why this matters
Why: Steam-oven guidance identifies overfilling, incorrect container removal, residual water, and condensation as distinct possibilities. Those checks do not apply to a conventional Admiral oven without a documented water system.
-
Check 6
After cooling, wipe a small interior food spill with a soft cloth and mild detergent only if the exact manual permits it; never pour water into a hot cavity, use liquid to flush a vent, or use a cleaner that the manual does not specify.
Expected result: The liquid was a one-time food spill inside the cavity and does not return, or clear liquid reappears from a seam, vent, door edge, or underside.
Next step: If the spill is gone and no safety symptom returns, keep the cavity dry and follow the manual's cleaning schedule. If liquid reappears, stop the oven and arrange professional diagnosis; do not remove the bottom panel or heating element to find it.
Why this matters
Why: A food spill is different from water entering from an appliance system. Reappearance from a seam or underside suggests an issue that cleaning cannot correct and may conceal electrical or structural damage.
-
Check 7
If no hazard is present and an obvious external condition was corrected, run one brief supervised cycle without opening the hot door repeatedly; note whether the leak begins, where it travels, and whether the oven heats and shuts off normally.
Expected result: No liquid returns, temporary moisture appears and dissipates, the same leak returns, the oven overheats or will not shut off, or a gas or smoke symptom appears.
Next step: Use the oven only when the cycle is stable and the manual permits it. For recurrence, overheating, failure to shut off, gas odor, smoke, or electrical symptoms, stop use and provide the technician the photos, conditions, and timing.
Why this matters
Why: A stable cycle after an obvious condensation or obstruction correction supports a temporary external cause. Recurrence or abnormal heating/control behavior indicates an unresolved appliance fault and should not be tested repeatedly.
Use your observations
Decision map
Find the observation that best matches what you see, then follow the next safe action.
-
PATH 01Next step
What you see
A small amount of moisture appears only on the door, vent path, floor, or cabinet after high-moisture cooking and disappears as the oven heats or cools.
Do this next
Let the oven cool, wipe the moisture, keep vents clear, and monitor; arrange service if it becomes a persistent puddle or damages the cabinet.
-
PATH 02Next step
What you see
Water continues after the oven is cool, pools under the appliance, enters a control area, or returns during ordinary dry cooking.
Do this next
Stop using the oven and request qualified appliance service; do not remove panels, flush vents, or seal the leak yourself.
-
PATH 03Next step
What you see
The door is blocked, does not close, or has a damaged gasket, hinge, latch, or frame.
Do this next
Correct only an obvious external obstruction; leave the oven off and arrange service for a damaged sealing or door component.
-
PATH 04Next step
What you see
A vent is visibly covered or blocked but there is no other hazard.
Do this next
Remove the external obstruction only after cooling, keep the vent open, and make one supervised test if the manual permits; escalate if leaking continues.
-
PATH 05Next step
What you see
The model has a documented steam reservoir or drain function and the container was overfilled or removed incorrectly.
Do this next
Cool the oven, empty and reinstall the container exactly as its manual directs, then test once; service a recurring leak.
-
PATH 06Next step
What you see
You smell gas, hear gas escaping, see smoke or fire, or find water near electrical controls or wiring.
Do this next
Stop use immediately. For gas odor, leave the area and contact the gas supplier or emergency service; for fire, keep the oven door closed, leave if it does not go out, and have the oven professionally checked before reuse.
-
PATH 07Next step
What you see
One supervised cycle is stable after a documented external correction and no liquid or hazard returns.
Do this next
Continue only within the exact manual's limits, keep vents clear, and arrange service if the leak returns.
Helpful context
Understand the symptom
Where the liquid appears changes the diagnosis
A wet door or a small amount of moisture after cooking is not automatically a failed oven. Steam from gas combustion or high-moisture food can condense on cool glass and escape through vents onto a floor or cabinet. A puddle that begins beneath the appliance, enters the controls, continues after the cavity is cool, or has an oily or gas-like character should be treated as a fault or safety issue until a qualified person identifies its source.
Use only model-matched instructions for water features
Some ovens have a steam function or removable water container, but an Admiral model without that feature cannot be diagnosed from a steam-oven procedure. Do not add water, run a drain cycle, or remove a reservoir unless the exact owner's manual describes it. Record the model and the location and timing of the leak for service.
When checks do not resolve it
Need a professional?
Use professional service for recurring leaks, door or seal damage, water near electrical parts, suspected gas or heating faults, and any diagnosis or repair behind the cabinet or control panel.
Common questions
FAQ
Is water on the outside of an Admiral oven always a leak?
No. Steam from high-moisture food, and in a gas oven from combustion, can condense on the door and travel through vents to a floor or cabinet. It should dissipate as the oven reaches temperature or cools; persistent pooling or water from underneath needs service.
What should I check if water is coming from the oven door?
After the oven cools, check for food, a rack, or bakeware preventing full closure and look for a damaged or displaced gasket. Do not reshape or remove the gasket. If the door or seal is damaged, or water returns, leave the oven off and request service.
Could a blocked oven vent cause water to drip?
A blocked vent can worsen air circulation and condensation. Remove only an obvious external obstruction after the oven is cool and keep vents uncovered. If liquid continues with clear vents, treat it as an unresolved fault rather than dismantling the vent.
What if my Admiral oven has a steam reservoir?
Use only the exact model manual. A steam-oven support procedure distinguishes an overfilled container, incorrect removal, residual water, and normal condensation. Cool the oven before handling water; if the container is not part of your model or the leak returns, arrange service.
What should I do if I smell gas while the oven is leaking?
Stop using the oven. Leave the area and contact the gas supplier or emergency service; do not operate switches or continue troubleshooting near the appliance. A gas-range safety incident should be professionally assessed before reuse.
Read the exact guide
Official sources
- Door Not Closing - RangeWhirlpool Product Help · Range guidance; use the exact Admiral manual before adjusting hinges or leveling
- Moisture On Door - RangeWhirlpool Product Help · Whirlpool-family range guidance; use the exact Admiral manual for model-specific features
- Moisture on the Inner WindowWhirlpool Product Help · Gas and electric oven guidance; verify the exact Admiral model manual
- Educational Messages Desk ReferenceNational Fire Protection Association · General household cooking safety
- Oven Door is Not Closing - Checking the LatchWhirlpool Product Help · General Whirlpool-family oven door guidance; exact Admiral door design may differ
- Condensation on Floor or Cabinet - Wall OvenWhirlpool Product Help · Wall-oven guidance; the moisture mechanism may apply to comparable ovens, but exact Admiral construction can differ
- Routine Oven Cleaning - Wall OvenWhirlpool Product Help · Wall-oven cleaning guidance; follow the Admiral manual for its coating and approved cleaners
- CPSC, White Consolidated Industries Announce Recall of Gas RangesU.S. Consumer Product Safety Commission · Gas ranges generally for the safety response; the recalled models and incident are not an Admiral product claim
- Water Dripping or Condensation - Wall OvenWhirlpool Product Help · Steam wall ovens only; do not apply the water-container steps to an Admiral oven without that documented feature
- Running a High Temperature Clean Cycle - Wall OvenWhirlpool Product Help · Wall-oven self-clean guidance; use only where the Admiral model has the corresponding function
Community feedback
Share a repair observation
Share a plain-text repair observation. Accepted observations are published automatically; this page may take a moment to update.