
On this page
Start here
Quick answer
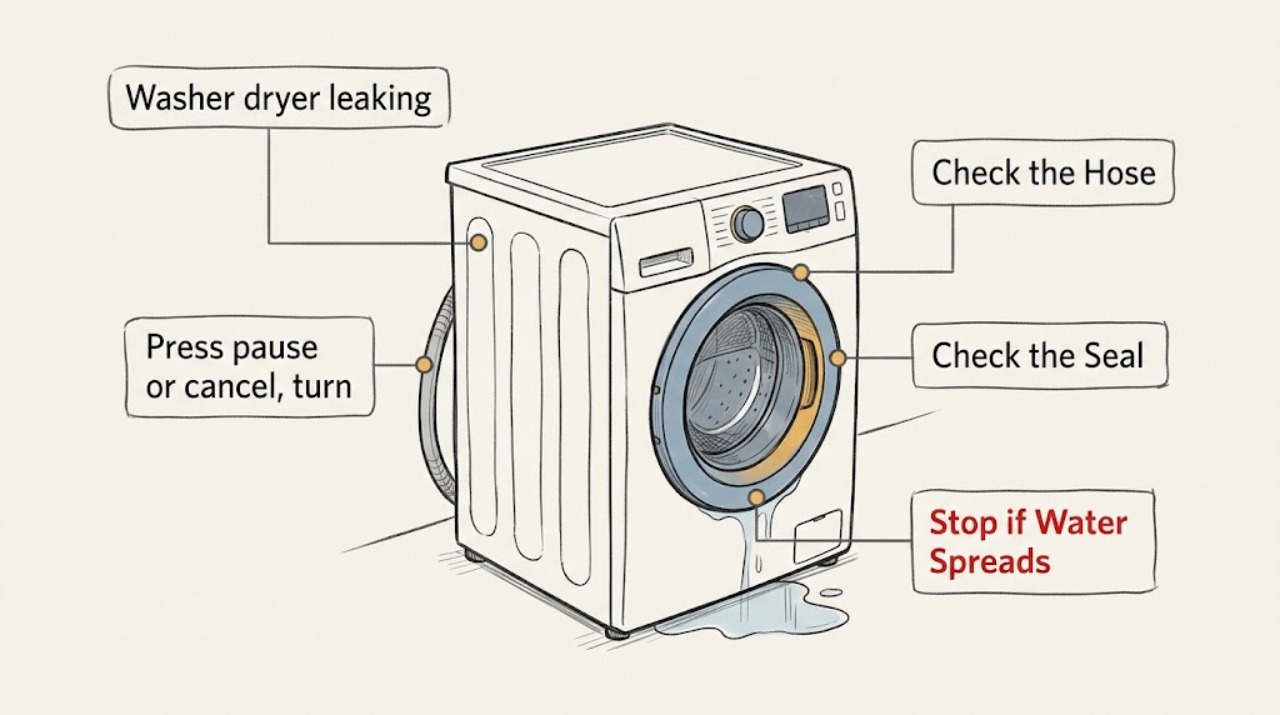
Stop the programme, turn off the water tap, and disconnect power only if you can do so without touching water or a wet electrical connection. Note whether the leak starts during filling, washing, draining, or drying, then inspect the inlet-hose connections, door seal, detergent drawer, and accessible drain-filter area without moving the machine or removing panels. A cracked hose, damaged seal, water under the appliance, or a leak that returns after a safe external check is a stop-use condition; do not run another cycle until the cause is repaired.
Work through in order
Diagnostic checks
Use only checks that match the exact appliance or system and its official guide.
-
Check 1
Press pause or cancel, turn the water tap off, and disconnect the washer dryer from power only if the plug and surrounding floor are dry and safely reachable; note where the first drop appears and which part of the cycle was running.
Expected result: The leak is at the rear during filling, at the door or drawer during washing, at the lower front during draining, or only appears after drying.
Next step: Keep the tap off and follow only the matching external check below. If the plug, outlet, or wiring is wet, do not touch it; call a qualified professional.
Why this matters
Why: The timing and location narrow the next safe check: inlet connections for filling, door or dispenser for front leaks, drain-filter or hose for draining, and model-specific drying components for a drying-only symptom.
-
Check 2
For a leak during filling, inspect the visible tap-side adapter, inlet-hose connection, and connection at the machine without pulling the appliance forward; tighten a loose threaded connection by hand only.
Expected result: The tap or connection is visibly wet, a joint is loose, or the hose is cracked, split, separated, or deformed.
Next step: Leave the water supply off. Do not use pliers or another tool, and do not run a test cycle with a damaged hose; arrange an authorised service visit or model-confirmed hose replacement through a qualified provider.
Why this matters
Why: A loose connection can leak at the joint; a damaged hose cannot be made safe by tightening and can continue sending water behind the machine.
-
Check 3
For water at the front during washing, open the door only after the drum has stopped and inspect the full door seal for a trapped garment, coin, dirt, crack, hole, looseness, or deformation; reduce an overloaded load before any later test.
Expected result: Laundry or a small object is trapped in the seal, the seal is dirty but intact, or the seal is torn, loose, deformed, or still leaks after the obstruction is removed.
Next step: Remove only the accessible obstruction and keep the machine unused if the seal is damaged or the leak returns. Do not try to glue, stretch, or replace the seal without the model procedure and professional help.
Why this matters
Why: A trapped item or overload can hold the door seal away from the glass; a damaged seal is a hardware fault and can let water reach the floor and electrical components.
-
Check 4
If water comes from the detergent drawer or front panel, remove the drawer only as described in the model manual and rinse away visible detergent residue or limescale; check that the drawer and its removable insert are seated correctly.
Expected result: The drawer or spray area is clogged with residue, foam was excessive, or the drawer is clean and correctly seated but water still escapes.
Next step: Use the documented detergent amount and do not run another cycle while the leak persists. Arrange service if the drawer is clear but water still comes from inside the cabinet.
Why this matters
Why: AEG says a dirty drawer or sprinkler plate can divert water out of the dispenser, and excessive detergent can create foam associated with a water-safety warning. A clean drawer with a recurring leak points to an internal water-path fault.
-
Check 5
For water at the lower front during draining, check the accessible drain-pump filter cover and surrounding area; if your model has a filter, unplug the machine, wait until wash water is cool, place a shallow container and towel below it, then clean and refit the filter following the model manual.
Expected result: The filter is loose, damaged, or holding lint/objects, or the filter is intact and firmly refitted but water still appears.
Next step: Keep the water tap off and do not run a cycle if the filter or housing is damaged or the leak returns. Request an authorised service visit rather than reaching into the pump or cabinet.
Why this matters
Why: A filter that is blocked or not sealed can leak during draining. A damaged filter, wet filter housing, or persistent leak after refitting suggests a pump, seal, or internal hose problem.
-
Check 6
If the display shows EF0, EFo, or EF3, or water is collecting under the machine, check only the visible hose, seal, drawer, and filter causes above and record the exact code before leaving the appliance off.
Expected result: The code clears after an identified external cause is corrected, or it returns with no visible cause or with water still underneath.
Next step: Turn off the water supply and do not use the washer dryer until an authorised service centre diagnoses it; never bypass the water-safety system.
Why this matters
Why: AEG associates these warnings with water safety, including leakage, excess foam, or an appliance malfunction. A returning code or water under the cabinet means the internal safety condition has not been resolved.
-
Check 7
After a genuinely dry, accessible correction, inspect the floor and connections during one closely watched short test only if the manual permits it; stop immediately if water, an unusual noise, or an electrical warning appears.
Expected result: No water appears and the appliance completes the test, or any leak reappears from the same or a new location.
Next step: Keep the area dry and monitor only when operation is normal. If the leak returns, leave the tap off and arrange professional repair; do not repeat test cycles to chase the source.
Why this matters
Why: A dry test supports the specific external correction but does not prove an internal hose, valve, pump, or seal is sound. A recurring leak is evidence that the underlying fault remains.
Use your observations
Decision map
Find the observation that best matches what you see, then follow the next safe action.
-
PATH 01Next step
What you see
Water starts at the tap-side or machine-side inlet connection during filling.
Do this next
Turn off the water supply, hand-tighten a loose connection only, and stop using the appliance if the hose is cracked or separated.
-
PATH 02Next step
What you see
Water comes from the front door area.
Do this next
Check for trapped laundry or an overload; a torn, loose, deformed, or repeatedly leaking door seal requires service and no further use.
-
PATH 03Next step
What you see
Water comes from the detergent drawer or appears as excessive foam.
Do this next
Clean the drawer according to the manual, use the documented detergent amount, and escalate if the drawer is clear but the leak returns.
-
PATH 04Next step
What you see
Water appears at the lower front during draining or around the filter cover.
Do this next
With power disconnected and water cool, inspect and refit the accessible filter as instructed; leave the tap off and call service for damage or a persistent leak.
-
PATH 05Next step
What you see
Water is under the cabinet, an EF0/EFo/EF3 warning returns, or the leak source is inside the machine.
Do this next
Do not use the appliance; keep the water supply off and arrange an authorised service visit.
Helpful context
Understand the symptom
When the leak appears is a useful clue
Water at the rear during filling makes the inlet hose or tap connection the first place to look. Water at the front during a wash points toward the door seal, trapped laundry, overload, or detergent drawer. Water at the lower front or underneath during draining points toward the drain-filter area or another drain-path problem. A leak that appears only during drying still deserves a stop-and-inspect response because water can reach electrical parts.
Keep the appliance stationary
Do not pull an integrated appliance out, tilt it, remove panels, or reach behind it to inspect a hose or connector. Use only visible, accessible checks described for your model. If water is near the plug, outlet, or wiring, leave it alone and have a qualified technician or electrician make the area safe.
Only after diagnosis
Potential parts
- inlet water-supply hose
Consider this part only if the visible hose is cracked, split, separated, or deformed after the water supply has been turned off.
Confirm the exact washer-dryer model and the manufacturer's fit information before ordering or fitting any hose. - door seal
Consider this part only if inspection finds a torn, holed, loose, or deformed door seal and the model procedure confirms replacement is required.
Door seals are model-specific; confirm the exact appliance model and approved fit information, and use a qualified technician for replacement. - drain-pump filter or filter seal
Consider this part only if the accessible filter or its sealing surface is visibly damaged and the model manual identifies it as replaceable.
Confirm the exact model and component specification before ordering; a damaged housing or pump needs professional diagnosis.
When checks do not resolve it
Need a professional?
Use professional service for damaged seals or hoses, internal leaks, recurring water-safety warnings, wet electrical areas, and any repair beyond safe visible cleaning and hand checks.
Common questions
FAQ
Can I keep using my AEG washer dryer if it is leaking a little?
No. Turn off the water supply and stop using it until the leak source is corrected. AEG specifically says not to use the appliance when the door seal is damaged and advises service for unresolved water-safety conditions.
Where should I look first when an AEG washer dryer leaks?
Note when the leak starts. Check the inlet hose and connections for a filling leak, the door seal and drawer for a front leak, and the accessible drain-filter area for a draining leak. Keep the water tap off while inspecting.
Can I tighten the AEG inlet hose with pliers?
No. AEG says the inlet connection should be tightened by hand only. If the hose is cracked, split, or separated, turn off the water supply and arrange service rather than trying to repair it with a tool.
What does EF0, EFo, or EF3 mean on a leaking AEG washer dryer?
AEG treats these as water-safety warnings that can involve leakage, excess foam, or an appliance malfunction. Check only the visible hose, drawer, seal, and filter causes; if the warning or water returns, leave the water supply off and request authorised service.
Read the exact guide
Official sources
- Seal on the washing machine's door is damagedAEG · Front-loader washing machines and related washer-dryer door seals
- Washer dryer displays error message EF0, EFo, EF3 or emits 15 beeps / 15 flashesAEG · Integrated and freestanding washer dryers
- Washer dryer displays error message E30, C3 or emits 3 beepsAEG · Integrated and freestanding washer dryers
- How to clean and maintain your AEG washer dryerAEG · AEG washer dryer models; filter features vary by model
- Washer - dryer inlet hose is leakingAEG · Front-loader, top-loader, and washer-dryer appliances
Community feedback
Share a repair observation
Share a plain-text repair observation. Accepted observations are published automatically; this page may take a moment to update.