
On this page
Start here
Quick answer
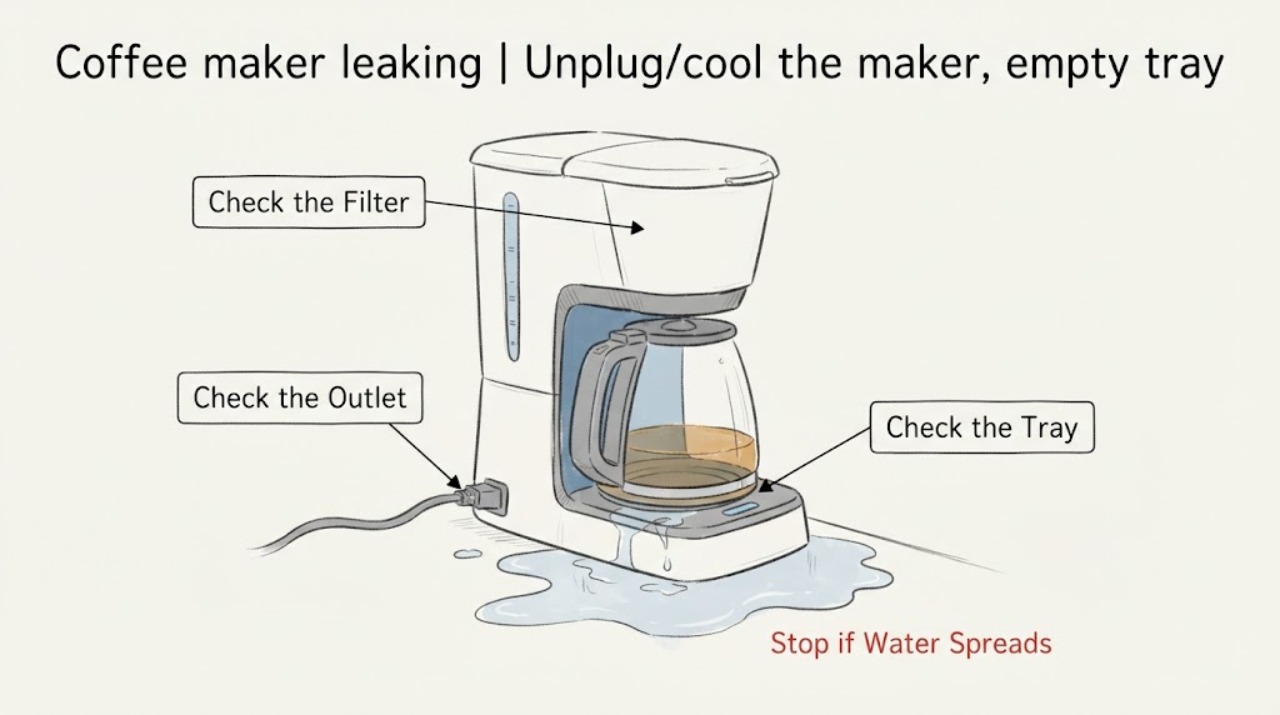
A leaking drip coffee maker is traced by where water first appears: reservoir, basket/dripper, carafe, or base. Check the fill line, filter/basket seating, gasket, grind and filter blockage with the maker unplugged and cool. Stop for a base leak or water near the cord.
Work through in order
Diagnostic checks
Use only checks that match the exact appliance or system and its official guide.
-
Check 1
Unplug/cool the maker, empty tray and carafe, and place a dry towel under reservoir, basket, and base.
Expected result: Wet point is reservoir, basket, carafe, or under housing.
Next step: Follow that path and do not run with water near the cord.
Why this matters
Why: Location separates seating/filter issues from internal leak.
-
Check 2
Check reservoir fill line, lid, outlet, and carafe crack/position.
Expected result: Overfill, damaged container, or mis-seating is visible.
Next step: Correct accessible fill/seating; confirm model fit before replacing a container.
Why this matters
Why: Excess water or poor seating can spill before brewing.
-
Check 3
Inspect filter, dose, grind, and dripper gasket.
Expected result: Filter is clogged/collapsed, dose too high, grind too fine, gasket loose/damaged, or clear.
Next step: Use the measured dose/grind and clean/confirm gasket, then retest once.
Why this matters
Why: These restrictions/seal conditions are documented drip leak causes.
-
Check 4
Empty any drip tray and run one normal brew with basket/carafe seated.
Expected result: Apparent leak disappears, returns at basket, or appears under base.
Next step: Stop for base leak or water near electrics.
Why this matters
Why: A full tray can mimic a leak; base recurrence needs service.
Use your observations
Decision map
Find the observation that best matches what you see, then follow the next safe action.
-
PATH 01Next step
What you see
Tray is full but no new leak occurs in controlled brew.
Do this next
Empty/dry tray and monitor one brew.
Why this path and its safety boundary
Why it matters: Collected spill water may be the apparent leak.
-
PATH 02Next step
What you see
Leak escapes at basket with clogged filter, excess dose, fine grind, or damaged gasket.
Do this next
Correct dose/filter/gasket and retest once.
Why this path and its safety boundary
Why it matters: A restricted/sealing brew path is more likely.
-
PATH 03Next step
What you see
Container leaks or water continues below base after seating/cleaning.
Do this next
Keep unplugged and obtain model-specific service.
Why this path and its safety boundary
Why it matters: Cracked container, valve/seal, or internal housing leak remains possible.
Helpful context
Understand the symptom
A drip coffee maker’s path is different from an espresso machine’s pressure circuit. Locate the first wet point.
Use one measured test after each accessible correction.
When checks do not resolve it
Need a professional?
Arrange service for persistent leak after seating, fill, filter, and gasket checks or any base/internal leak.
Common questions
FAQ
Can too much coffee cause leaking?
Yes. Official drip guidance links excess grounds, clogged filter, and fine grind with water/coffee escaping.
Why does it look like it leaks when idle?
An overfilled drip tray can create that appearance. Empty it and identify the first wet point during one brew.
Should I replace the basket gasket?
Only after damage is confirmed and exact model fit is verified.
Read the exact guide
Official sources
- Support & FAQs for BVMC-KG5 Coffee MakerMr. Coffee · coffee maker leak and brew-head checks
- 〖コーヒー共通〗水やコーヒーが漏れるDe’Longhi · drip coffee maker leak, overflow, dose, filter, gasket, and grind checks
Community feedback
Share a repair observation
Share a plain-text repair observation. Accepted observations are published automatically; this page may take a moment to update.