
On this page
Start here
Quick answer
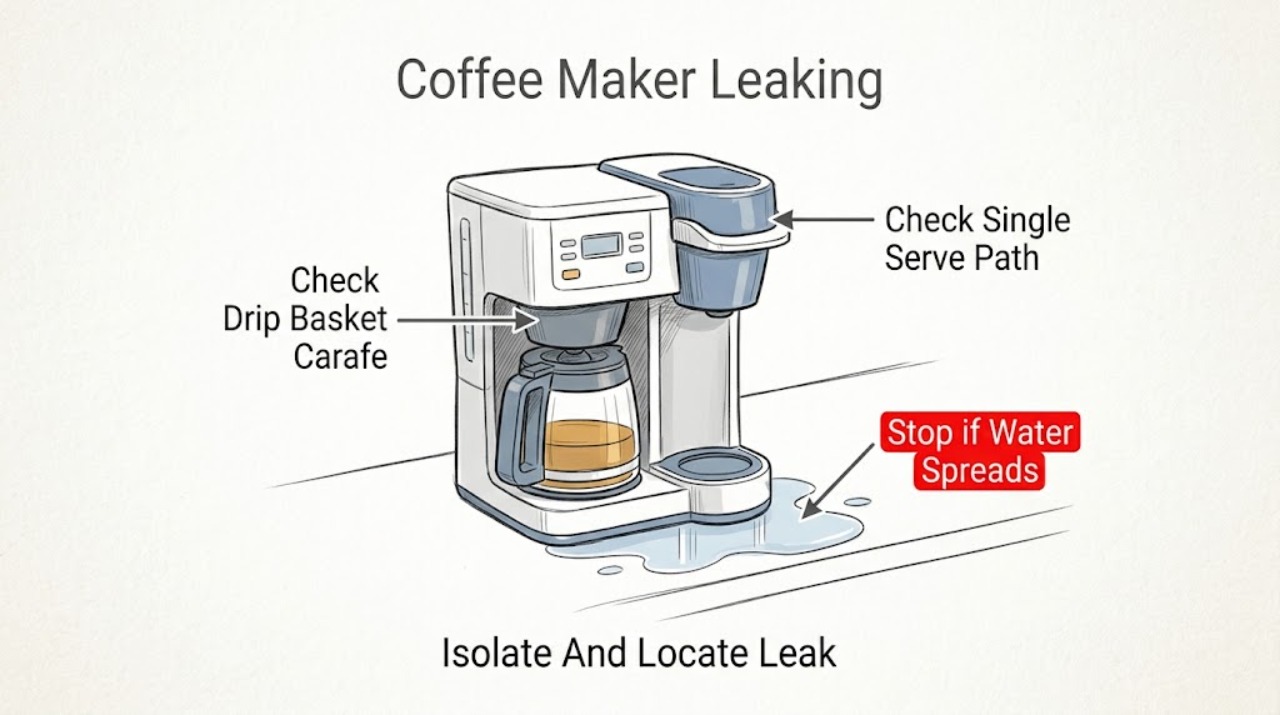
Unplug the coffee maker, keep hot coffee and wet electrical parts away from your hands, and identify where the liquid first appears. On a traditional drip side, Hamilton Beach points to an overfilled reservoir, a basket or carafe that is not seated, an unsuitable or collapsed paper filter, too many grounds, or coffee grounds between sealing surfaces. On a single-serve or FlexBrew side, check that the reservoir, brew basket, pod holder, lid, and cup are seated exactly as the model guide shows; a lid seal, needle area, or overfill can send water onto the counter. A BrewStation tank leak can be related to buildup at the tank seal, but that cleaning step is specific to BrewStation. Clean and reseat only removable parts after the unit is unplugged and cool. Do not open the base, handle exposed wiring, bypass a leak, or keep brewing when liquid reaches the cord, plug, controls, or internal housing. If the leak comes from underneath, from fixed tubing, around a heater, or persists after the model-approved external checks, stop using the machine and arrange Hamilton Beach service or a qualified small-appliance technician.
Before you begin
Safety first
- This article covers unplugging and cooling, locating the first wet spot, inspecting and reseating model-approved removable parts, and cleaning accessible sealing surfaces. Do not open the base, handle fixed tubing or heated/electrical components, or perform live testing.
Work through in order
Diagnostic checks
Use only checks that match the exact appliance or system and its official guide.
-
Check 1
Unplug the coffee maker, keep hot liquid away from skin, and identify the first wet location after the unit is cool: reservoir, brew basket, carafe, single-serve lid, tank, or underside. Do not continue if liquid reached the plug, cord, controls, or base.
Expected result: The leak occurs while idle, only during brewing, at a removable part, from the tank or reservoir, or from beneath the housing.
Next step: Use the drip, single-serve, BrewStation, or internal-leak branch below. Leave the unit unplugged for any liquid near electrical parts.
Stop if: Do not handle a wet plug, energize a wet appliance, or open the housing.
Why this matters
Why: The first wet location separates a removable seal or overflow from a fixed water path or internal electrical hazard.
-
Check 2
For a drip or carafe side, with the unit cool, inspect the reservoir fill level and reseat the removable brew basket, paper filter, and carafe exactly as the model guide shows. Do not use an unverified carafe or basket from another model.
Expected result: The reservoir was overfilled, the basket or carafe was not seated, the paper filter collapsed, grounds are between the filter and basket, or the parts were already correctly seated.
Next step: Empty excess water, correct the clearly identified seating or filter issue, and reassess only with a dry, unplugged setup that has no housing leak. Call service if coffee still escapes or the leak is below the machine.
Stop if: Do not brew with a damaged basket, cracked carafe, collapsed filter, or liquid reaching the base.
Why this matters
Why: Hamilton Beach identifies these loading and seating conditions as common overflow paths; a leak with correctly seated parts is more likely a seal, valve, or internal path problem.
-
Check 3
For a single-serve or FlexBrew path, verify that the removable reservoir, pod holder or brew basket, single-serve lid, cup or travel mug, and any visible seal are seated according to the exact model guide. Handle any piercing needle only when unplugged and cool.
Expected result: The reservoir is out of position, the lid does not fully close, the holder or basket is mis-seated, a cup is not under the outlet, a visible seal is displaced, or all parts are correctly seated.
Next step: Correct only a clearly identified user-level seating issue and reassess with the appropriate mode. Arrange service for a damaged lid, seal, needle assembly, persistent leak, or liquid beneath the housing.
Stop if: Do not force the lid, handle a sharp needle while hot, or open the machine to reach the pump or tubing.
Why this matters
Why: FlexBrew models combine several brew paths, so an incorrect holder, lid, reservoir, or cup position can redirect liquid or cause an overflow without proving an internal leak.
-
Check 4
For a model with a sealed brew basket or BrewStation tank, inspect only the removable seal and sealing surface after unplugging and cooling. Remove loose coffee grounds and confirm the exact model's lid seal or tank is seated; do not press an internal valve beyond the model guide.
Expected result: The seal is missing or displaced, grounds are on the sealing surface, the basket was overfilled, tank-seal buildup is visible, or the removable sealing parts are intact.
Next step: Clean and reseat only the removable part named by the exact guide. Replace or service a damaged seal or persistent tank leak through Hamilton Beach support.
Stop if: Do not dismantle the tank valve, use a non-matching seal, or continue brewing with a leaking removable tank.
Why this matters
Why: Hamilton Beach documents brew-basket seal, grounds, and fill conditions for the Rapid Cold Brew model and tank-seal buildup for BrewStation; these mechanisms are not interchangeable.
-
Check 5
After the removable parts are cool and dry, determine whether liquid is water from the reservoir or coffee from the basket, and whether a drip-stop or carafe-position feature was involved. Compare the sequence only with the exact Use and Care guide.
Expected result: Water overflows before brewing, coffee overflows during brewing, liquid appears when the carafe is removed, or liquid appears with no brewing or removable-part movement.
Next step: Correct only a clear fill, filter, basket, carafe, or drip-stop condition. If liquid appears while idle or from below, leave the unit unplugged and arrange service.
Stop if: Do not run repeated tests, exceed the model's fill marks, or keep brewing after an underside leak.
Why this matters
Why: Hamilton Beach distinguishes reservoir overfill from coffee overflow and carafe or basket seating; an idle or underside leak is outside those user-level overflow checks.
-
Check 6
Record the model and type number, brew mode, first wet location, water or coffee classification, reservoir and basket state, and whether the leak occurs idle or only during brewing. Leave the coffee maker unplugged when the source is beneath the housing, fixed tubing, heater area, controls, or an unresolved seal.
Expected result: The leak stops after a model-approved external correction, persists with correctly seated parts, comes from below, reaches electrical parts, or is accompanied by smoke, burning odor, or repeated electrical interruption.
Next step: Arrange Hamilton Beach or qualified small-appliance service and provide the recorded observations. Replace the appliance if service cannot verify safe operation; do not use it while leaking.
Stop if: Do not open the base, perform electrical tests, bypass a leak, handle damaged wiring, or continue using the appliance with liquid near electricity or heat.
Why this matters
Why: A persistent or underside leak can involve fixed tubing, a tank valve, heater, pump, seal, housing, or wiring and is not safely diagnosed by replacing visible parts at random.
Use your observations
Decision map
Find the observation that best matches what you see, then follow the next safe action.
-
PATH 01Safety boundary
What you see
A traditional drip unit leaks during brewing and the reservoir was overfilled, the basket or carafe was mis-seated, grounds are excessive, or the filter collapsed.
Do this next
Cool and unplug the unit, correct the clearly identified fill or seating issue, and reassess only when the base remains dry.
Why this path and its safety boundary
Why it matters: Hamilton Beach identifies these as water or coffee overflow paths rather than proof of a failed internal tube or heater.
Safety stop: Do not brew with a cracked carafe, damaged basket, or liquid reaching the housing.
-
PATH 02Safety boundary
What you see
A single-serve or FlexBrew unit leaks near the reservoir, lid, holder, needle, or cup and a removable part is out of position or a lid is not fully closed.
Do this next
Follow the exact model guide to reseat the removable parts and use the correct brew path. Call service for a persistent leak, damaged seal, or underside liquid.
Why this path and its safety boundary
Why it matters: The combined brew architecture can redirect water when a reservoir, holder, lid, seal, or cup is not seated; this does not identify an internal pump fault.
Safety stop: Do not force the lid or handle the piercing needle while hot or powered.
-
PATH 03Safety boundary
What you see
Leakage begins at a sealed brew basket or BrewStation tank and the model-specific guide identifies a missing seal, grounds on a sealing surface, overfill, or tank-seal buildup.
Do this next
Unplug and cool the unit, clean and reseat only the documented removable seal or surface, and arrange service for damage or recurrence.
Why this path and its safety boundary
Why it matters: A removable seal or sealing-surface condition is plausible, but Rapid Cold Brew and BrewStation mechanisms are model-specific.
Safety stop: Do not dismantle a tank valve or substitute a seal from another model.
-
PATH 04Safety boundary
What you see
Liquid appears while the coffee maker is idle, emerges from underneath, follows fixed tubing, or persists after removable parts are correctly seated.
Do this next
Leave the coffee maker unplugged and arrange Hamilton Beach or qualified small-appliance service; do not open the base.
Why this path and its safety boundary
Why it matters: An internal reservoir, valve, heater, pump, tube, seal, housing, or wiring problem is more likely than a user-level overflow.
Safety stop: Do not reconnect or continue brewing to locate an underside leak.
-
PATH 05Safety boundary
What you see
Liquid reached the plug, cord, controls, or heated housing, or there is smoke, burning odor, scorching, repeated electrical interruption, or a damaged cord.
Do this next
Keep clear, leave the unit unplugged if that can be done without touching wet or damaged equipment, and arrange qualified service or replacement.
Why this path and its safety boundary
Why it matters: The immediate shock or fire risk overrides all leak diagnosis.
Safety stop: Do not energize, immerse, dry with a heat source, open, or test the appliance.
Helpful context
Understand the symptom
Locate the first point of escape
Wipe the appliance dry only after unplugging it and allowing hot parts to cool. Put a dry towel beneath the machine and observe a short, model-appropriate test only if no liquid reached the cord, plug, controls, or base. Note whether the first wet spot is at the reservoir, brew basket, carafe, single-serve lid, tank valve, or underside. A puddle that appears only after brewing is different from water that leaks while the machine is idle.
Drip and carafe-side leaks
Hamilton Beach's FAQ links water overflow to an overfilled reservoir and coffee overflow to a mis-seated brew basket or carafe, excess grounds, fine or specialty grounds, or a paper filter that collapses. Empty and cool the machine, then reseat the basket, filter, and carafe exactly as the model guide shows. Do not assume a carafe from another model will align with the drip opening or pause-and-serve mechanism.
Single-serve and FlexBrew leaks
FlexBrew models combine a removable reservoir with a single-serve lid, pod holder or brew basket, and sometimes a separate carafe path. Hamilton Beach's product page confirms that this architecture is not the same as a simple one-cup brewer. On the exact model, check that the reservoir, holder, lid, cup rest, and any seal are seated; a clogged needle or a lid that is not fully closed can alter flow or cause an overflow. Sharp piercing needles may be present, so handle removable holders only when unplugged and cool.
Brew-basket seals and BrewStation tanks
Hamilton Beach's Rapid Cold Brew guide gives a specific brew-basket leak path: the clear lid seal must be in place, the basket must not be overfilled, and grounds must not sit on the sealing surface. The FAQ separately attributes a BrewStation tank leak to buildup at the tank seal. These are architecture-specific checks; do not apply a BrewStation tank-valve procedure to a drip or single-serve model.
Water beneath the housing is not a normal repair target
A small amount of liquid in a removable container or a drip caused by an overfilled reservoir is different from liquid emerging from the underside, fixed tubing, heater area, or control housing. Hamilton Beach manuals direct owners to unplug before cleaning and to avoid immersing the cord, plug, or coffee maker. If the source is beneath the appliance or cannot be traced to an accessible removable part, stop using it rather than opening the base.
Use the model guide for parts and service
Record the model and type number from the rating label, the brew mode, where the liquid first appeared, whether the reservoir was full, and whether the leak occurs while idle or only during brewing. Hamilton Beach publishes separate Use and Care guides and replacement parts by product family. A tank, gasket, lid, valve, heater, pump, or tubing should not be selected by appearance alone, and any internal electrical or heated-water repair belongs with qualified service.
Safety boundary
Stop conditions
- Unplug and stop immediately when liquid reaches the cord, plug, controls, base, or heated housing, or when smoke, burning odor, scorching, or electrical interruption appears.
- Do not open the base, access fixed tubing, heater, pump, valve, wiring, or perform electrical tests.
- Do not handle hot coffee, a hot brew basket, or a sharp single-serve needle while servicing removable parts.
- Use only the exact model's reservoir, basket, carafe, lid seal, tank, and cleaning procedure; drip, single-serve, FlexBrew, and BrewStation paths differ.
- Arrange service when a leak comes from underneath, occurs while idle, persists after approved external checks, or requires a non-removable part.
When checks do not resolve it
Need a professional?
Arrange Hamilton Beach or qualified small-appliance service when a leak comes from underneath, a fixed tube, heater, pump, tank valve, or control housing; when a model-approved reservoir, basket, carafe, lid, or seal correction does not stop it; or when the exact model cannot be identified. Stop immediately for liquid near electricity or heat, smoke, burning odor, scorching, a damaged cord, or repeated electrical interruption.
Safety scope: This article covers unplugging and cooling, locating the first wet spot, inspecting and reseating model-approved removable parts, and cleaning accessible sealing surfaces. Do not open the base, handle fixed tubing or heated/electrical components, or perform live testing.
Read the exact guide
Official sources
- Hamilton Beach FAQsHamilton Beach · Hamilton Beach official FAQ spanning multiple coffee-maker families; individual reservoir, basket, tank, and seal instructions vary by model.
- FlexBrew Advanced 5-in-1 Coffee Maker, Removable Dual-Position, Black (49924)Hamilton Beach · Official Hamilton Beach product page for model 49924; it establishes a product-family architecture, not universal compatibility or repair instructions.
- Hamilton Beach Rapid Cold Brew & Hot Coffee Maker (42500) — Use & CareHamilton Beach · Exact Hamilton Beach 42500 manual; its sealed brew-basket and fill instructions must not be generalized to other coffee makers.
- Hamilton Beach FlexBrew Advanced 5-in-1 with Thermal Carafe (49929) — Use & CareHamilton Beach · Exact Hamilton Beach 49929 manual; its five-way architecture, holder, lid, and reservoir instructions are model-specific.
- Hamilton Beach Pro 12 Cup Programmable Coffee Maker (49500) — Use & CareHamilton Beach · Exact Hamilton Beach 49500 manual; traditional drip checks are not a substitute for single-serve, FlexBrew, or BrewStation procedures.
Community feedback
Share a repair observation
Share a plain-text repair observation. Accepted observations are published automatically; this page may take a moment to update.