
On this page
Start here
Quick answer
For a coffee maker that is not draining, unplug and cool it, then check the water path, brew tank, dispensing valve, filter screen, and mineral buildup. Hamilton Beach says decalcification often corrects a clogged pump path and a blocked screen can slow dispensing. Do not open the base.
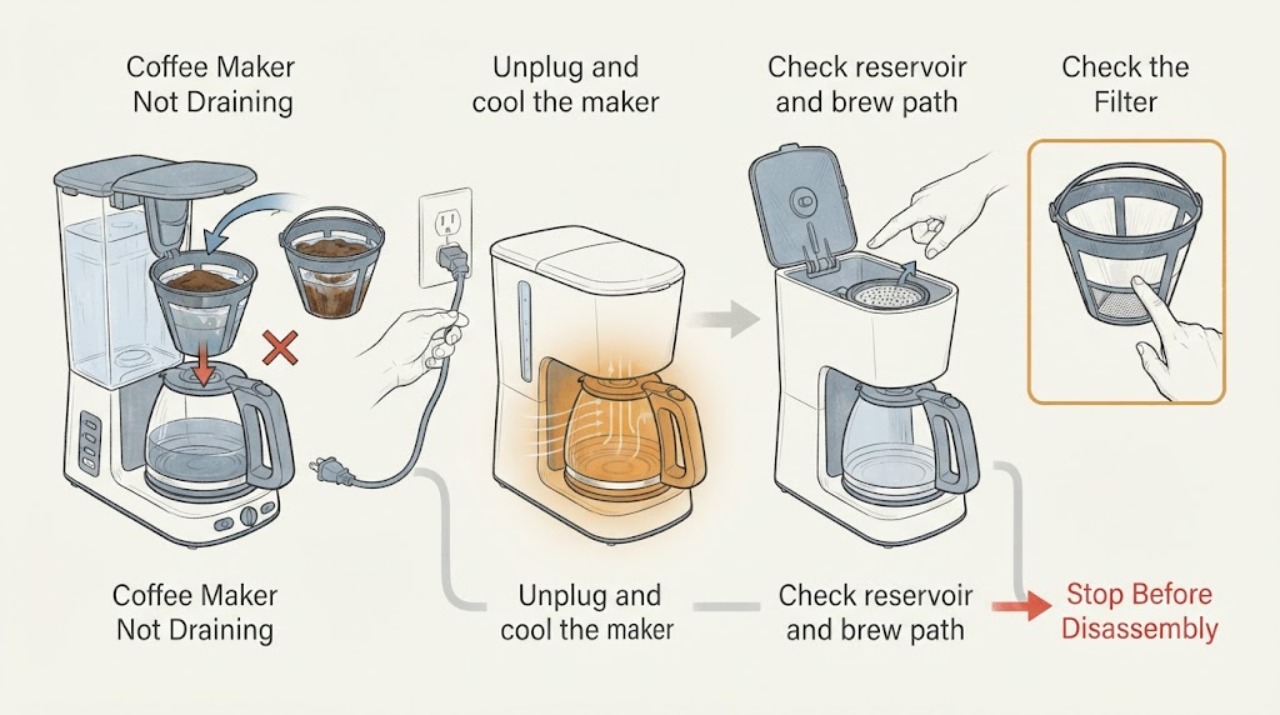
Work through in order
Diagnostic checks
Use only checks that match the exact appliance or system and its official guide.
-
Check 1
Unplug and cool the maker.
Expected result: The symptom is present at startup, mid-cycle, or after a command.
Next step: Use the exact manual and continue one safe external check.
Why this matters
Why: Timing narrows the likely branch.
-
Check 2
Check reservoir and brew path.
Expected result: The condition is abnormal or normal.
Next step: Correct only the visible manual-described condition and retry once.
Why this matters
Why: This condition can prevent normal operation.
-
Check 3
Inspect filter screen or valve.
Expected result: The relevant path is restricted or clear.
Next step: Do not open live or sealed components.
Why this matters
Why: A restriction can explain the symptom; a clear path shifts suspicion inward.
-
Check 4
Run manual-approved cleaning.
Expected result: The code or operating response changes or returns.
Next step: Record the result and stop repeated resets.
Why this matters
Why: A returning result needs model-specific diagnosis.
-
Check 5
Test one short cycle.
Expected result: The unit recovers or remains faulty.
Next step: Arrange qualified service with the record.
Why this matters
Why: One recovery does not prove a repair.
-
Check 6
Stop for leak or hot cord.
Expected result: A safety warning or recurrence is present.
Next step: Disconnect power or supply if safe and obtain service.
Why this matters
Why: Safety and recurrence require service.
Use your observations
Decision map
Find the observation that best matches what you see, then follow the next safe action.
-
PATH 01Next step
What you see
The external setup or setting is abnormal and the symptom clears after correction.
Do this next
Maintain the documented setup and monitor one cycle.
Why this path and its safety boundary
Why it matters: An operating condition was the leading explanation.
-
PATH 02Next step
What you see
The relevant path is blocked, misseated, or restricted and the symptom remains.
Do this next
Stop repeated testing and arrange service.
Why this path and its safety boundary
Why it matters: A flow, interlock, airflow, or drain fault is more likely.
-
PATH 03Next step
What you see
External checks are normal but the symptom or code returns.
Do this next
Keep the unit off and obtain qualified service.
Why this path and its safety boundary
Why it matters: An internal control, sensor, motor, heater, pump, or compressor fault is likely.
-
PATH 04Next step
What you see
Smoke, burning odor, leak, damaged cord, gas, or dangerous heat appears.
Do this next
Disconnect power or supply if safe and obtain service.
Why this path and its safety boundary
Why it matters: A safety fault overrides routine troubleshooting.
Helpful context
Understand the symptom
For a coffee maker that is not draining, unplug and cool it, then check the water path, brew tank, dispensing valve, filter screen, and mineral buildup. Hamilton Beach says decalcification often corrects a clogged pump path and a blocked screen can slow dispensing. Do not open the base.
Use the exact owner manual for model-specific controls, reset, access, and part information. Do not open live or sealed components.
When checks do not resolve it
Need a professional?
A qualified technician may test the relevant power, control, sensor, motor, heater, pump, fan, valve, or sealed-system components.
Common questions
FAQ
What should I check first for Coffee Maker Not Draining?
For a coffee maker that is not draining, unplug and cool it, then check the water path, brew tank, dispensing valve, filter screen, and mineral buildup. Hamilton Beach says decalcification often corrects a clogged pump path and a blocked screen can slow dispensing. Do not open the base.
Can I reset it?
Use only the exact manual's reset after recording the symptom. A returning fault needs service.
When should I stop using it?
Stop for smoke, burning odor, exposed wiring, uncontrolled water or gas, dangerous heat, or recurrence after safe checks.
What should service receive?
Provide model, code or display, timing, settings, load, and external-check results.
Read the exact guide
Official sources
- Hamilton Beach FAQsHamilton Beach · Use for coffee-maker symptom guidance; exact controls and access remain model-specific.
Community feedback
Share a repair observation
Share a plain-text repair observation. Accepted observations are published automatically; this page may take a moment to update.