
On this page
Start here
Quick answer
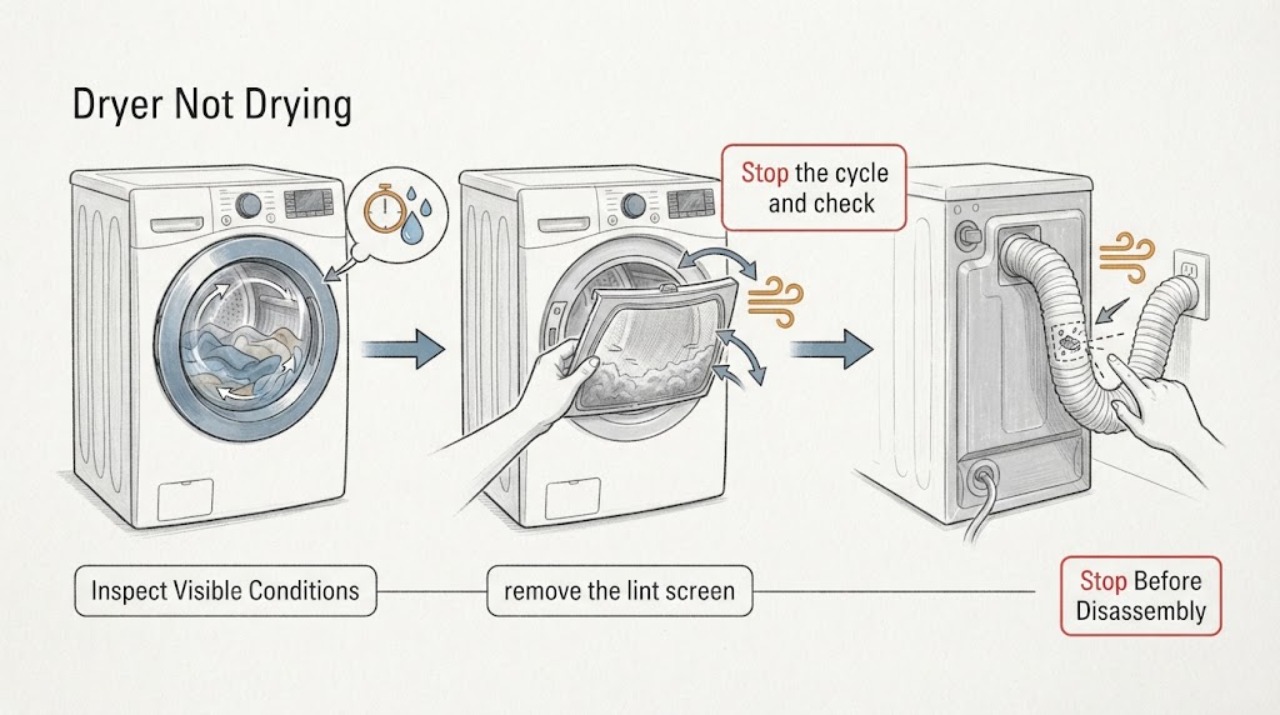
If your Crosley dryer drum runs but clothes stay damp or the cycle takes too long, check the selected cycle and temperature first, then the load, lint screen, and exhaust airflow. Crosley’s opened guide says a clogged screen or blocked or crushed vent reduces drying performance, while a large or tangled load can dry slowly. On sensor cycles, the dryer also needs clothes contacting the moisture sensors, and the dryer must be level. If the outside airflow is absent, the dryer remains cold on a correct heated cycle, a breaker trips, or a safety warning appears, stop using it and arrange qualified service.
Work through in order
Diagnostic checks
Use only checks that match the exact appliance or system and its official guide.
-
Check 1
Identify whether the Crosley dryer is electric or gas, note the selected cycle and temperature, and observe from outside whether the drum turns and the exhaust feels warm. Check that Air Only or another no-heat setting is not selected.
Expected result: The drum turns with warm exhaust air, the exhaust remains cold, or the cycle ends early while the load is damp.
Next step: If the exhaust is cold on a correct heated cycle, stop repeated tests and use the no-heat service path. If it warms, continue with load, lint, vent, and sensor checks.
Why this matters
Why: A running motor does not prove that heat is available. Crosley lists Air Only as a no-heat setting and treats a cold heated cycle differently from poor drying caused by airflow, load, or sensing.
-
Check 2
Stop the cycle and check the load. Separate tangled items, keep the drum from being tightly packed, and match the fabric type and size to the selected cycle. For a small load or a load that ends early, use the model’s suitable Timed or small-load cycle if available.
Expected result: Items are balled or tangled, the drum is overfilled, only heavy seams and waistbands are damp, or the load size and program are appropriate.
Next step: Redistribute or reduce the load so it can tumble freely, choose the appropriate cycle and dryness level, and run one supervised test.
Why this matters
Why: Crosley says a large heavy load may not dry quickly, tangled clothes should be separated, and sensor cycles use the selected dryness level. A small or uneven load can also finish before thicker parts are dry.
-
Check 3
With the dryer off, remove the lint screen and clear lint. If residue is present, clean it using the guide’s nylon-brush and hot-water procedure, let it dry completely, and reinstall it firmly. Never operate with a loose, damaged, blocked, or missing screen.
Expected result: The screen is coated with lint or detergent residue, damaged or missing, or clean and intact.
Next step: Restore a clean, dry, intact screen before testing. If the screen is damaged or lint is accumulating inside the cabinet, arrange qualified service or a ventilation-system cleaning rather than opening the cabinet yourself.
Why this matters
Why: Crosley states that a blocked screen increases drying time and that residue can make the dryer stop before the load is dry. Running without a sound screen can cause overheating and damage.
-
Check 4
Inspect only the accessible exhaust hose and outside hood for crushing, kinks, lint, or obstruction. With no burning odor or other hazard, run the dryer on Air Only briefly and feel for air at the outside hood; do not enter the duct or dismantle the cabinet.
Expected result: Little or no air exits the hood, the vent is blocked or crushed, the vent run is unusually long or has many turns, or airflow is strong and clear.
Next step: Clear only an accessible hood or visible obstruction and have a qualified venting specialist clean or repair the duct when airflow is poor. If airflow is normal, continue with the sensor and level checks.
Why this matters
Why: Crosley’s troubleshooting guide says blocked or crushed vents and poor vent dimensions reduce air movement and performance. It recommends qualified help for cleaning or repairing inaccessible venting.
-
Check 5
For sensor-cycle problems, confirm the dryer stands level and that the load can contact the moisture-sensor strips. If the sensor cycle ends too soon or all loads remain wetter than the selected setting, adjust the dryness level only as the model guide permits, or use a suitable Timed cycle for a controlled test.
Expected result: The dryer rocks or is not level, the load does not contact the sensor strips, the cycle ends early, or sensor contact and leveling are correct.
Next step: Level the dryer using the installation instructions and load it so items tumble and contact the sensors. If the result remains poor with good heat and airflow, stop and arrange service for model-specific sensor or control diagnosis.
Why this matters
Why: Crosley explains that poor sensor contact can shorten a cycle and that leveling is needed for sensor operation. Dryness settings change the point at which a sensor cycle stops, so the symptom does not by itself prove a failed sensor.
Use your observations
Decision map
Find the observation that best matches what you see, then follow the next safe action.
-
PATH 01Next step
What you see
The drum runs and the exhaust is warm, but the lint screen is coated, the vent has weak airflow, or the load is tangled or oversized.
Do this next
Clean the screen, restore accessible airflow, separate or reduce the load, and run one appropriate cycle. Use qualified vent cleaning if the duct is inaccessible.
Why this path and its safety boundary
Why it matters: The pattern points to restricted moisture removal or load conditions rather than an absent heater.
-
PATH 02Next step
What you see
The dryer warms, but a sensor cycle ends early while the load remains damp and the load is small or not contacting the sensor strips.
Do this next
Level the dryer, load it according to the cycle guidance, select a suitable dryness level, or use a suitable Timed cycle for the small load.
Why this path and its safety boundary
Why it matters: Crosley’s guide identifies load size, sensor contact, leveling, and dryness settings as possible explanations for short sensor cycles.
-
PATH 03Next step
What you see
The dryer remains cold on a correct heated cycle, the outside hood has no airflow after accessible checks, or a warning, burning odor, gas odor, or repeated breaker action occurs.
Do this next
Stop using the dryer and arrange qualified appliance or venting service. Do not bypass a safety device, open live electrical parts, or continue repeated test cycles.
Why this path and its safety boundary
Why it matters: This is a heating, exhaust, fuel, electrical, or safety issue beyond ordinary result checks.
Helpful context
Understand the symptom
Why a running dryer can leave clothes damp
Drum movement only proves that the motor is turning. Efficient drying also needs the selected cycle and temperature, an appropriate load that can tumble freely, a clean lint screen, good exhaust airflow, and proper sensor contact on sensor cycles. Use the checks below to separate a drying-result problem from a cold no-heat fault.
Only after diagnosis
Potential parts
- Crosley dryer lint screen
Only consider this category if the installed screen is damaged and the exact model documentation confirms the replacement fit.
Confirm the model number and manufacturer fit information before ordering.
When checks do not resolve it
Need a professional?
Arrange qualified appliance or venting service if the dryer remains cold on a correct heated cycle, the exhaust hood has little or no airflow after accessible checks, the vent needs internal cleaning, sensor-cycle results remain poor after load and leveling checks, or there is smoke, a burning or electrical smell, gas odor, repeated breaker action, visible damage, or a need to open the cabinet. Do not bypass safety devices or perform live electrical or gas work.
Common questions
FAQ
Why does my Crosley dryer run but clothes stay damp?
A running drum does not prove that heat and airflow are adequate. Check the selected cycle, load size, lint screen, outside exhaust airflow, and sensor contact or leveling. If the exhaust is cold on a heated cycle, use the no-heat service path.
Can a small load make a sensor cycle end with damp clothes?
Yes. Crosley’s guide says sensor cycles depend on moisture and sensor contact, and its load guidance calls for suitable small-load quantities. If the cycle ends early, level the dryer, load items so they contact the sensors, adjust the dryness level as allowed, or use a suitable Timed cycle.
When should I stop troubleshooting?
Stop and arrange qualified service when the dryer remains cold on a correct heated cycle, airflow is absent after accessible checks, the duct needs cleaning or repair, the dryer repeatedly trips a breaker, or there is smoke, burning or gas odor, visible damage, or a need to open the cabinet.
Read the exact guide
Official sources
- Use & Care GuideCrosley Corporation · Crosley dryer operation, sensor cycles, lint-screen care, exhaust airflow, and troubleshooting
- Crosley Dryers - CROSLEY HOME PRODUCTSCrosley Home Products · Crosley dryer product category and manufacturer identity
Community feedback
Share a repair observation
Share a plain-text repair observation. Accepted observations are published automatically; this page may take a moment to update.