
On this page
Start here
Quick answer
Stop the dryer and find the first place water appears before choosing a repair path. A vented dryer sends hot, moist air through an exhaust duct; a kinked or restricted duct can collect water or cause condensation around the door. A ventless condenser dryer instead routes extracted water to a removable tank or an external drain, where a loose, kinked, or incorrectly installed hose can leak. A dryer with Steam has a separate cold-water connection: a small drip at the door after steam can be normal, while water behind the dryer points to the hose connection or washer. Use the matching architecture branch, keep water away from electrical or gas parts, and arrange service for an internal leak, a continuing floor puddle, a concealed restriction, or any source that cannot be identified safely.
Before you begin
Safety first
- This article covers identifying the architecture, observing the first wet point, ordinary-access tank and visible hose checks, accessible vent observation, and turning off a Steam water supply before a safe connection check. It does not authorize cabinet removal, internal pump or valve work, live electrical testing, gas work, or concealed building-vent modification.
Work through in order
Diagnostic checks
Use only checks that match the exact appliance or system and its official guide.
-
Check 1
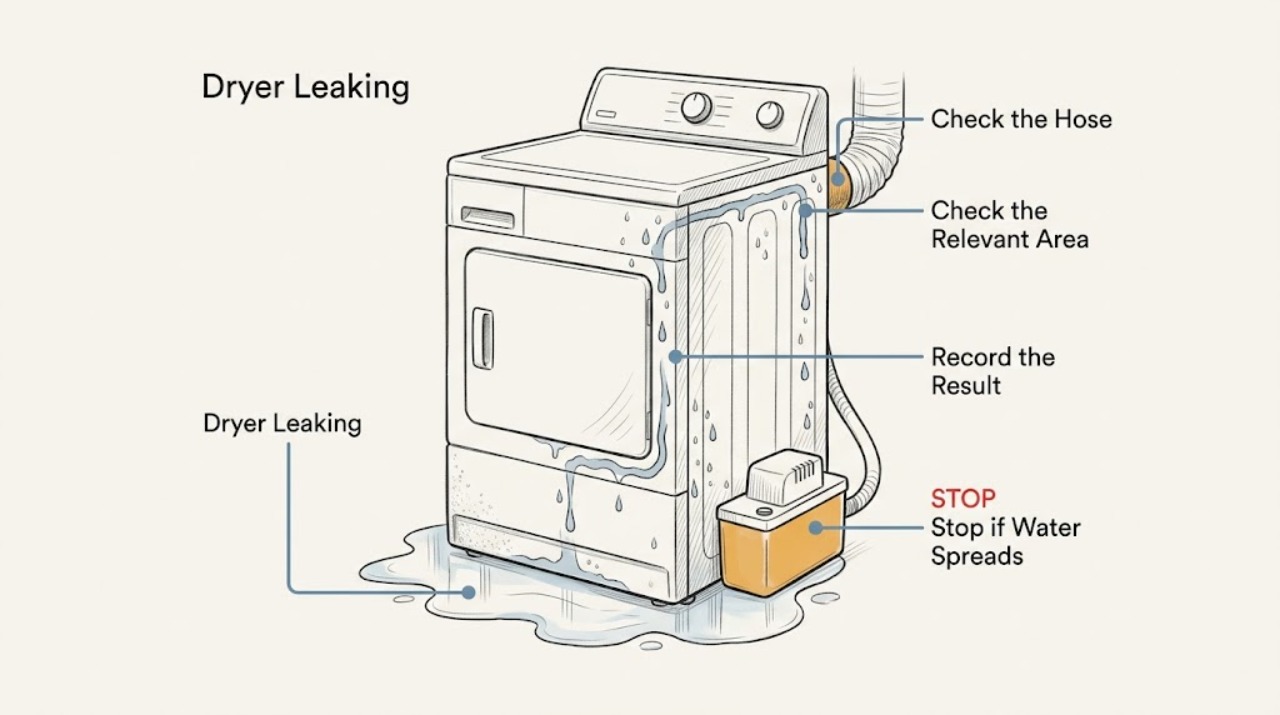
Stop the dryer and record the first wet location without opening panels: inner door or door threshold, rear hose or wall connection, vent outlet, condensate tank or drain hose, or floor underneath. Note whether it occurs during drying, only after Steam, immediately after cleaning, or while idle. Disconnect power only from a dry, safe position.
Expected result: The dryer has an exhaust duct and no water-tank indication; it has a tank or direct drain; it has a Steam water line; water is only a few drops at the door after Steam; or the source is hidden or near electrical/gas parts.
Next step: Continue with only the matching vented, ventless, or Steam branch below. If the source is hidden, water is spreading, or water reaches electrical or gas parts, keep the dryer off and arrange service.
Stop if: Do not run a leaking dryer repeatedly to reproduce the symptom, reach behind a moving appliance, tilt it, or remove cabinet panels.
Why this matters
Why: The dryer architecture and first wet point determine whether to inspect exhaust airflow, condensate drainage, a Steam connection, or a professional-only internal path. A generic tank or hose instruction is unsafe when the appliance is vented or the source is unknown.
-
Check 2
For a confirmed vented dryer, inspect only the accessible exhaust hose, its wall connection, and the outside wall cap for crushing, kinks, lint, debris, a closed damper, or water collecting in the duct. Keep the vent connected during operation, especially for a gas dryer.
Expected result: The hose is kinked or collapsed, the wall cap has weak airflow or an obstruction, water is collecting in the duct, or the visible exhaust path is open but water still appears.
Next step: Correct only accessible routing permitted by the model instructions and arrange professional duct cleaning or appliance service for a concealed restriction, damaged duct, continuing condensation, or any need to alter the building vent. Do not disconnect the vent as a test on a gas dryer.
Stop if: Do not use plastic or improvised ducting, route exhaust indoors, drill the wall, or operate a gas dryer without a safe outdoor vent.
Why this matters
Why: A restricted or poorly routed exhaust can retain heat and humidity and cause sweating or condensation around the door; a clear visible path shifts suspicion toward a concealed duct problem or an internal leak rather than a condensate tank.
-
Check 3
For a confirmed ventless condenser or heat-pump dryer, check the removable water tank if the model has one, or inspect the visible external drain hose and standpipe connection. Empty and reseat the tank as the model manual shows; look for a loose, kinked, submerged, or incorrectly routed hose without disconnecting a wet or inaccessible fitting.
Expected result: The tank is full or not seated, the hose is loose or kinked, the standpipe connection is causing a spill, water is returning from the drain, or the visible path is correct but the floor still gets wet.
Next step: Correct only the ordinary-access tank seating or hose routing specified by the exact model instructions, then monitor one cycle only if the leak has stopped and the area is safe. Request service if water returns, the drain path is hidden, or the source is underneath.
Stop if: Do not bypass a tank sensor, force a hose, pour water into the appliance, open the pump area, or assume a vented dryer has a condensate tank.
Why this matters
Why: Condenser dryers remove water through a tank or external drain, unlike a vented dryer. A full tank or visible hose installation fault can explain the leak; a correct visible path with continued water suggests a pump, internal drain, seal, or other service fault.
-
Check 4
If the dryer has Steam, turn off the cold-water supply before handling the connection and inspect the accessible faucet, hose, connector, and rubber washer for wetness or damage. Separately note whether the only moisture is a small amount at the door after a Steam cycle.
Expected result: Water is behind the dryer at the valve or hose, a washer is missing, the hose is damaged, or only a small door drip appears after Steam with no continuing floor leak.
Next step: Keep the water supply off, restore only an accessible connection using the model instructions, and arrange service for a damaged hose, valve, nozzle, recurring leak, or water near electrical parts. For limited post-Steam condensation, wipe the door and monitor without repeatedly reproducing the leak.
Stop if: Do not pressure-test a damaged hose, overtighten the connection, open the inlet valve housing, or dismiss water that reaches the floor or appears when Steam is not running.
Why this matters
Why: A wet rear connection supports a Steam water-line leak; a small post-Steam door drip can be condensation rather than a failed drain. A larger or recurring puddle is not normal condensation and needs escalation.
Use your observations
Decision map
Find the observation that best matches what you see, then follow the next safe action.
-
PATH 01Next step
What you see
The dryer is vented, there is no tank-based symptom, and the exhaust hose or outside wall cap is kinked, blocked, wet, or producing weak airflow; condensation is visible around the door or duct.
Do this next
Restore accessible, approved vent routing and arrange professional duct or appliance service for concealed or persistent restriction. Keep a gas dryer connected to its safe outdoor vent.
Why this path and its safety boundary
Why it matters: Exhaust restriction or cold-duct condensation is more likely than a water tank or condensate pump.
-
PATH 02Next step
What you see
The dryer is ventless condenser or heat pump, and the tank is full or the visible drain hose is loose, kinked, submerged, or spilling at the standpipe.
Do this next
Empty and reseat the tank or correct only the visible hose arrangement allowed by the exact manual. Stop and request service if the leak returns or appears beneath the cabinet.
Why this path and its safety boundary
Why it matters: The condensate collection or external drain installation is more likely than exhaust condensation.
-
PATH 03Next step
What you see
A Steam dryer has water behind the unit at the cold-water hose or valve, while the drum-door moisture is limited to a small drip after Steam.
Do this next
Turn off the cold-water supply and use the model installation instructions for an accessible connection. Arrange service for damaged hose or valve parts, a continuing puddle, or any leak near electrics.
Why this path and its safety boundary
Why it matters: The rear water connection is the likely leak path; limited door moisture after Steam can be normal condensation and is a different condition.
-
PATH 04Next step
What you see
Water appears underneath or inside the cabinet, the visible architecture-specific checks are correct, the leak occurs while idle, or the source cannot be isolated without moving or opening the dryer.
Do this next
Keep the dryer off, protect the floor and nearby equipment, and arrange qualified appliance service. Provide the model, architecture, first wet point, cycle timing, tank or hose status, Steam status, and any warning.
Why this path and its safety boundary
Why it matters: An internal drain, pump, seal, water valve, or concealed vent problem remains possible; the symptom is outside a safe generic user repair.
Helpful context
Understand the symptom
A leak is a location-and-architecture problem
Water at the door, behind the dryer, in a tank, at a standpipe, or underneath the cabinet can come from different systems. First identify whether the appliance is vented, ventless condenser or heat pump, and whether it has Steam. Read the model's installation instructions before disconnecting a hose or moving the appliance; the examples below describe decision paths, not a universal layout.
Do not apply a tank check to a vented dryer
A vented dryer removes humid air through its exhaust, so a wet duct, blocked wall cap, cold room, or poor routing can create condensation. A ventless condenser dryer removes moisture as water and sends it to a tank or external drain. Treat those as separate mechanisms. Gas dryers must not be operated with the vent disconnected.
Steam adds a separate water supply
Steam-equipped dryers can show water in places that are not condensate-drain failures. Condensation on the inner door after a Steam cycle may drip when the door opens, while water behind the appliance points to the cold-water hose connection or its washer. Turn off the water supply before handling a wet connection and use the exact model instructions.
When checks do not resolve it
Need a professional?
Arrange qualified appliance service for water under the dryer, an internal or hidden source, water near electrical or gas parts, a leak that returns after the matching tank, hose, cover, filter, or vent checks, a damaged Steam valve or hose, or any concealed building-vent restriction. Use a qualified vent professional for inaccessible exhaust work and do not open the cabinet or bypass safety devices.
Safety scope: This article covers identifying the architecture, observing the first wet point, ordinary-access tank and visible hose checks, accessible vent observation, and turning off a Steam water supply before a safe connection check. It does not authorize cabinet removal, internal pump or valve work, live electrical testing, gas work, or concealed building-vent modification.
Common questions
FAQ
Do all dryers have a water tank when they leak?
No. Ventless condenser dryers may send condensed water to a tank or external drain, while vented dryers remove humid air through an exhaust duct. Identify the architecture before checking a tank; applying a tank procedure to a vented dryer can miss an exhaust restriction.
Is water dripping from a dryer door always a leak?
Not always. Manufacturer guidance says a small amount of water can condense on the inner door during a Steam cycle and drip when the door opens. Water that forms a continuing puddle, appears when Steam is not running, or comes from behind the dryer should be treated as a leak and checked through the matching branch.
Can I run the dryer with its vent disconnected to test a leak?
Do not do this on a gas dryer. A disconnected vent can allow combustion products into the room. For any dryer, use the model installation instructions and have concealed or persistent vent problems assessed professionally rather than improvising a disconnected-vent test.
Read the exact guide
Official sources
- Dryer - What is Normal and Not Normal with Steam SettingGE Appliances · Official GE Appliances guidance for dryers with Steam; exact hose, washer, valve, and cycle instructions vary by model.
- Ventless Condenser Dryer - How It DrainsGE Appliances · Official GE Appliances guidance for ventless condenser dryers; tank, standpipe, hose depth, and installation details vary by model.
- Dryer - Things To Check For A Venting IssueGE Appliances · Official GE Appliances guidance used for the documented vented-dryer mechanism; another brand's exact installation instructions control.
Community feedback
Share a repair observation
Share a plain-text repair observation. Accepted observations are published automatically; this page may take a moment to update.