
On this page
Start here
Quick answer
A GE dryer leak has different likely paths depending on the dryer architecture and where the water appears. A ventless condenser dryer collects water in a tank or sends it through a drain hose, and GE says pushing that hose more than 4 inches into the standpipe can cause leaking. A dryer with Steam may drip at the door after a steam cycle, leak from a loose rear water connection or missing rubber washer, or leave a small front puddle when the steam load is too small. A conventional vented dryer has no normal water-drain tank; water around its door or vent can indicate humid air, a kinked or collapsed duct, an obstructed wall cap, or an unheated installation. Stop the dryer, keep water away from electrical parts, identify the exact source without opening panels, and follow the model-specific installation guide. Do not run a gas dryer with its vent disconnected, and stop for a gas odor, smoke, a burning smell, flooding, or a leak that reaches wiring.
Before you begin
Safety first
- This article supports source identification and ordinary-access checks only. Do not energize a wet dryer, work on live electrical parts, open panels, disconnect a gas vent during operation, bypass safety devices, or improvise a water, gas, exhaust, or condensate repair.
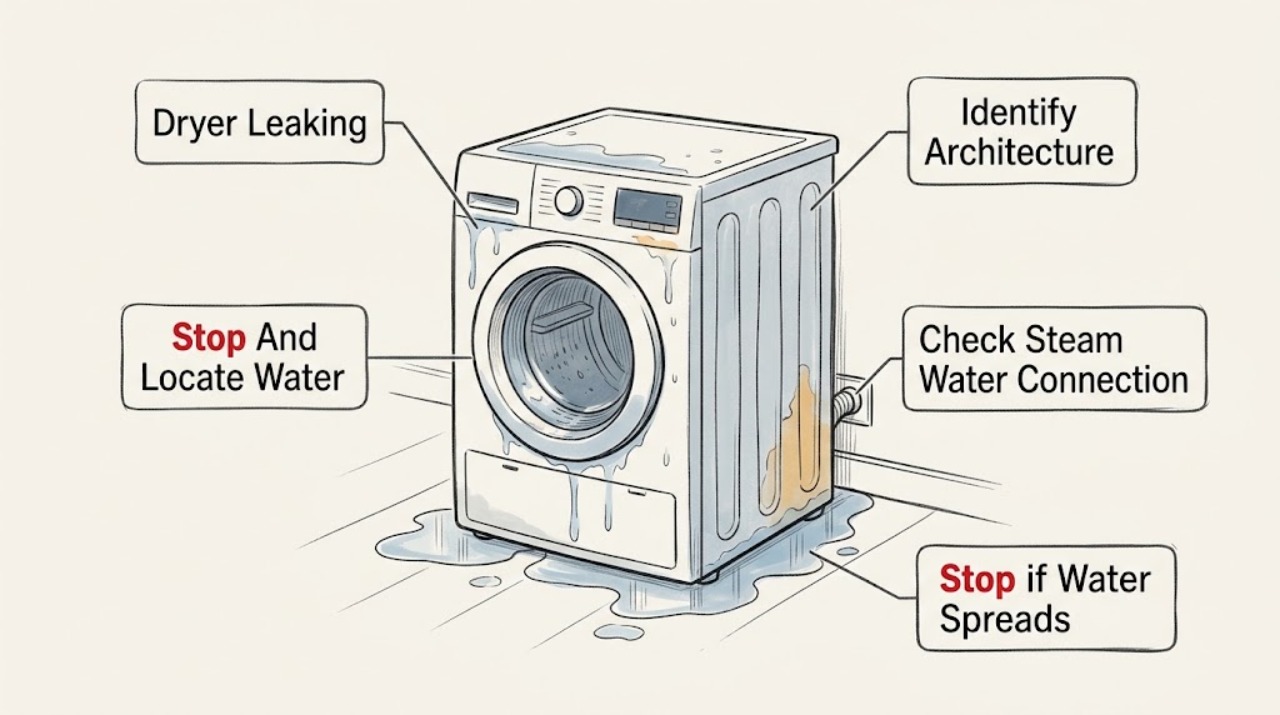
Work through in order
Diagnostic checks
Use only checks that match the exact appliance or system and its official guide.
-
Check 1
Stop the cycle and keep the dryer off. From a dry, stable position, note whether water is at the front door, behind the dryer, under the cabinet, inside a ventless tank or drain area, or only at the outside wall cap. If water is near the receptacle, cord, controls, wiring, or gas connection, disconnect power only if the area is safe and shut off the gas or water supply as appropriate; do not reach behind a wet appliance.
Expected result: The water is a small door drip after Steam, a front puddle after Steam, behind the unit near a water hose, in or near a condensate tank or drain hose, at a vent or wall cap, or in an unknown location.
Next step: Photograph the source and model label, dry the accessible floor only after the appliance is isolated, and continue with the matching check below. Arrange service if water reached electrical parts, the cabinet, or an inaccessible area.
Stop if: Do not pull a wet dryer, open panels, touch wet electrical parts, or operate the appliance to reproduce a leak.
Why this matters
Why: Location narrows the architecture-specific check. A front Steam drip can be condensation, a rear Steam leak can be the water connection, a ventless leak can be the tank or drain arrangement, and a vented leak can be condensation or restricted exhaust. An unknown or electrical-area source is not safe to diagnose by continued operation.
-
Check 2
Use the model label and the owner's or installation guide to determine whether the GE dryer is conventional vented, ventless condenser, a Steam model, or a combination of these features. Look for a removable water reservoir or dedicated condensate drain hose, a cold-water Steam hose, and an exhaust duct to the outside; do not remove covers to identify them.
Expected result: The dryer has a tank or condensate hose, a Steam water connection, an outdoor exhaust duct, or more than one of these arrangements.
Next step: Write down the architecture and exact model before changing any connection. If the manual does not clearly identify the design or the leak source, leave the dryer off and request model-specific service.
Stop if: Do not assume that a ventless condenser dryer has an exhaust vent, or that a conventional vented dryer has a water tank; do not use a procedure for a different GE model.
Why this matters
Why: The correct leak path depends on the design. Ventless water routing, Steam plumbing, and vented exhaust condensation cannot be diagnosed with one generic hose or vent rule.
-
Check 3
If the model has Steam and the water is behind the dryer, close the household water supply to the dryer before handling the hose. From ordinary access, check whether the hose connection at the valve is visibly loose and whether the rubber washer is present; restore only the washer and connection specified for the exact model, without forcing or overtightening it.
Expected result: The rear water connection is dry and correctly sealed, or there is a loose connection, missing washer, damaged hose, or water that continues after the supply is closed.
Next step: After the connection is restored exactly as the model guide specifies and the area is dry, perform only a supervised Steam test if the manual allows it. If water returns, keep the water supply closed and arrange service.
Stop if: Do not loosen a pressurized hose, bypass the water valve, use unapproved sealant, or operate with water near electrical parts.
Why this matters
Why: GE identifies a loose Steam hose connection and a missing rubber washer as causes of water behind the dryer. A damaged hose, valve, or continuing leak is not a reason to keep testing and is not evidence for a particular replacement part.
-
Check 4
If water appears only at the door after Steam, note whether it is a few drops immediately after opening or a continuing puddle during or after the cycle. Confirm that the load size and Steam cycle match the model guide; do not add water, remove cabinet panels, or run a Steam cycle solely to create a leak.
Expected result: A few drops are limited to the inner door after Steam, a small front puddle follows a small Steam load, or water continues without Steam or forms a growing puddle.
Next step: For the limited documented Steam pattern, follow the model's load and cycle guidance and monitor once. For repeated or larger leaks, leave the dryer off and request service with the cycle, load, and location recorded.
Stop if: Do not continue a Steam cycle when water reaches the floor, controls, receptacle, or wiring, or when the door seal or cabinet is damaged.
Why this matters
Why: GE describes inner-door condensation as normal after Steam and links a small front puddle to excess steam from an inadequate load. Continuing water, a large or repeated puddle, or water when Steam is not selected is not established as normal condensation.
-
Check 5
For a conventional vented dryer, disconnect electrical power before inspecting the accessible transition duct. Look for a kinked, collapsed, plastic, or visibly water-filled duct, then inspect the outside wall cap for lint, snow, ice, or a damper that cannot move freely. Clean only the accessible duct by the model-approved method; do not run a gas dryer with the vent disconnected.
Expected result: The vent path is clear and dry with strong outdoor airflow, or the duct is restricted, collapsed, collecting water, the wall cap is blocked, or the dryer is installed in an unheated location.
Next step: Correct only visible, model-permitted external vent conditions and arrange qualified vent cleaning when the duct runs through a wall, ceiling, roof, crawlspace, or other inaccessible area. If the leak persists with a clear exhaust path, stop using the dryer and request appliance service.
Stop if: Do not use plastic or combustible ducting, run a gas dryer without its vent, enter a roof or crawlspace to clean it, or dismantle the cabinet exhaust path.
Why this matters
Why: GE says restricted airflow can retain heat and humidity, cause sweating or water around the door, and lengthen drying time. It also warns that plastic flexible ducting can collect water and that snow or ice should not accumulate around the wall cap. An internal leak is more likely only after the external exhaust and location conditions are ruled out.
-
Check 6
For a ventless condenser dryer, check the removable water tank or reservoir and the accessible drain hose without opening the appliance. Empty the tank as the model guide directs, confirm that the hose is not kinked, and verify that a standpipe connection follows the model's installation instructions; GE specifically warns not to push the dryer drain hose more than 4 inches into the standpipe.
Expected result: The tank is full, the drain hose is displaced or kinked, the hose is inserted too deeply, the standpipe or washstand connection is wet, or the reservoir and drain path appear correct but water still escapes.
Next step: Restore only the exact tank and hose routing in the installation guide, dry the area, and perform one supervised cycle if no electrical or cabinet damage is present. If water returns, leave the dryer off and arrange service.
Stop if: Do not pull out internal condensers or pumps, tilt the dryer, force a hose into a standpipe, or operate with water reaching the base or wiring.
Why this matters
Why: A full tank or incorrect drain routing can explain a ventless leak. GE says pushing the drain hose farther than 4 inches into the standpipe can cause leaking. A correct external arrangement with continued leaking points to an internal seal, pump, condenser, or installation issue that requires model-specific diagnosis.
-
Check 7
After the applicable external check, keep the dryer off until the floor and connections are dry and inspectable. Record whether the leak returns without Steam, with Steam, at the vent, from the tank or drain, or immediately on starting; record whether the dryer is gas or electric and whether drying time, heat, or a vent alert changed.
Expected result: The leak stops after the documented external correction, or it returns, changes location, appears with an error or vent alert, or is accompanied by heat, smoke, odor, or electrical symptoms.
Next step: Leave the dryer out of service and give the technician the model, architecture, leak location, cycle, water source, duct or tank observations, and photos. Use only the exact model manual for any permitted reset or maintenance step.
Stop if: Do not open panels, test energized circuits, bridge a door or safety switch, or keep operating to see whether the leak worsens.
Why this matters
Why: A repeatable leak after external conditions are corrected is not a user-level part diagnosis. A vent alert, excess heat, smoke, gas odor, or electrical symptom raises the urgency and can indicate a fire, shock, combustion, or water-damage hazard.
Use your observations
Decision map
Find the observation that best matches what you see, then follow the next safe action.
-
PATH 01Safety boundary
What you see
Only a few drops appear on the inner door immediately after a Steam cycle, with no continuing puddle and no water near electrical parts.
Do this next
Follow the exact model's Steam load and cycle guidance and monitor one supervised use; request service if the amount grows, reaches the floor, or occurs without Steam.
Why this path and its safety boundary
Why it matters: This matches GE's documented normal Steam condensation pattern more closely than a cabinet leak.
Safety stop: Stop for a growing puddle, damaged door seal, water at the controls or receptacle, smoke, or a burning smell.
-
PATH 02Safety boundary
What you see
Water appears behind a GE Steam dryer near its cold-water hose or valve.
Do this next
Close the water supply, restore only the model-specified washer and connection if safely accessible, and arrange service if the leak returns or the hose is damaged.
Why this path and its safety boundary
Why it matters: A loose connection or missing rubber washer is a documented first distinction; a damaged hose or valve remains possible but is not identified by location alone.
Safety stop: Do not handle a pressurized connection, use unapproved sealant, or operate while water can reach electrical components.
-
PATH 03Safety boundary
What you see
A non-steam, vented dryer has water around the door or vent, longer drying, heat or sweating, a kinked duct, weak wall-cap airflow, or an unheated installation.
Do this next
Keep the dryer off, correct only visible external vent conditions, and use qualified vent cleaning or installation service where access or duct routing is not ordinary and safe.
Why this path and its safety boundary
Why it matters: Restricted or cold exhaust conditions make condensation and retained humidity more likely than a normal water-supply leak.
Safety stop: Do not run a gas dryer with its vent disconnected or continue operating with smoke, a burning smell, excessive heat, or lint accumulation.
-
PATH 04Safety boundary
What you see
A ventless condenser dryer has a full tank, displaced or kinked drain hose, wet standpipe connection, or a hose pushed too deeply into the standpipe.
Do this next
Empty or route the tank or drain hose exactly as the model installation guide specifies, then stop if water returns or has reached the cabinet base.
Why this path and its safety boundary
Why it matters: The condensed-water route is the leading safe distinction; GE specifically warns that more than 4 inches of hose insertion can cause leaking.
Safety stop: Do not tilt the dryer, open internal pump or condenser access not specified by the guide, or keep testing a wet appliance.
-
PATH 05Safety boundary
What you see
The source is underneath or inside the cabinet, water reaches wiring or the receptacle, the leak occurs without Steam and with a correct vent or drain arrangement, or there is smoke, gas odor, or a burning smell.
Do this next
Keep the dryer out of service, control the water or gas supply when safe, and arrange qualified appliance or vent service; use emergency assistance for an active fire or immediate gas hazard.
Why this path and its safety boundary
Why it matters: The leak is not safely explained by an ordinary external check and may involve water damage, internal seals or pumps, airflow overheating, combustion, or electrical parts.
Safety stop: Do not open panels, energize a wet dryer, run a gas dryer without its vent, or try to reproduce the fault.
Helpful context
Understand the symptom
Start with the leak location and dryer design
Water at the front, rear, vent, tank, or underneath does not identify the same fault. GE ventless condenser models remove moisture into a removable reservoir or a drain hose. Steam models have a cold-water connection and can leave condensation on the inner door. Conventional vented models send hot, moist air outdoors instead of collecting it in a tank. Find the model number and determine which arrangement is present before tightening a hose, moving a duct, or ordering a part.
Why a vented dryer can appear to leak
GE says a kinked or collapsed vent can reduce airflow and collect water, while excess heat and humidity can make the drum or cabinet sweat. Snow or ice should not accumulate around the outside wall cap, and an unheated location can promote condensation. These clues make the exhaust path and installation the first checks for a non-steam, vented dryer; they do not prove that an internal dryer component is leaking.
Treat water near an electrical or gas dryer as a safety issue
Do not keep running a dryer while water is reaching the receptacle, cord, terminal area, controls, motor area, or gas components. If the floor is wet, keep clear of the appliance until power can be disconnected safely and the water source is controlled. GE warns that water-damaged appliances can present fire or shock hazards and that a gas dryer must not be operated without its exhaust duct connected outdoors.
A little steam-cycle water is not the same as a persistent leak
GE describes a small amount of water dripping from the inner door after a Steam cycle as normal condensation. It also distinguishes a small front puddle caused by excess steam from an inadequate steam load and water behind the dryer caused by a loose hose connection or missing rubber washer. Continued water after the cycle, a growing puddle, or a leak unrelated to Steam should be treated as a fault and checked by location.
Safety boundary
Stop conditions
- Stop using the dryer for water near the receptacle, cord, controls, wiring, motor, terminal area, or gas components; disconnect power only when the area is safe and do not touch wet electrical parts.
- For a gas dryer, never operate with the exhaust duct disconnected or venting indoors; stop for a gas odor, smoke, flame abnormality, or burning smell and seek appropriate emergency or qualified help.
- Do not open panels, test energized wiring, tilt the dryer, bypass a door or safety switch, or substitute a pump, valve, hose, seal, or control based only on leak location.
- Do not force pressurized Steam connections, use unapproved sealant, push a ventless drain hose deeply into a standpipe, or continue testing after water reaches the cabinet base or floor.
- Arrange qualified service when a leak returns after the documented external correction, its source is inaccessible, the vent or drain route is inside a wall or ceiling, or the dryer has water damage.
Only after diagnosis
Potential parts
- Steam water hose washer or hose assembly
Consider this category only if the exact Steam model and a safe inspection confirm a missing washer or damaged hose is the source of a rear water leak.
Confirm the exact model, connection type, hose rating, and manufacturer fit information; close the water supply before handling and do not compensate for a mismatch with sealant or force. - ventless condenser drain hose or reservoir seal
Consider this category only when the exact ventless model's tank or drain arrangement is correct but a qualified diagnosis identifies a damaged hose, reservoir seal, or related water-routing component.
Confirm the exact ventless model and installation design; do not substitute a hose, seal, pump, or reservoir based only on dimensions or appearance.
When checks do not resolve it
Need a professional?
Arrange qualified GE appliance or vent service when the leak is not limited to the documented small Steam condensation pattern, returns after a model-approved hose, tank, drain, or vent correction, comes from underneath or inside the cabinet, reaches electrical or gas components, or appears with excess heat, a vent alert, smoke, burning smell, or abnormal drying. Provide the exact model, gas or electric type, vented or ventless and Steam features, leak location, cycle, load, water source, tank or duct observations, and photos.
Safety scope: This article supports source identification and ordinary-access checks only. Do not energize a wet dryer, work on live electrical parts, open panels, disconnect a gas vent during operation, bypass safety devices, or improvise a water, gas, exhaust, or condensate repair.
Common questions
FAQ
Why is my GE dryer leaking water from the front door?
If the dryer has Steam, GE says a few drops on the inner door after a Steam cycle can be normal condensation, and a small front puddle can result from an inadequate Steam load. A growing puddle, water when Steam is off, or water reaching controls or the floor is not a normal pattern; stop use and arrange service.
Why is there water behind my GE dryer?
On a Steam model, check the cold-water hose connection only after closing the water supply; GE identifies a loose connection or missing rubber washer as possible causes. On a vented non-steam dryer, water behind or near the vent can reflect condensation or restricted exhaust. If the connection and visible vent are correct but water returns, keep the dryer off and request service.
Can a dryer vent cause water to leak?
A restricted or collapsed vent can retain hot, moist air, and GE says that can make a dryer sweat or cause water to condense around the door. Inspect the accessible transition duct and outside wall cap, but do not run a gas dryer with its vent disconnected and do not enter inaccessible ductwork as a DIY test.
Why does my GE ventless dryer leak from its drain?
Check whether the reservoir is full, the drain hose is kinked or displaced, or the hose is inserted too deeply. GE specifically warns that pushing the ventless dryer drain hose more than 4 inches into a standpipe can cause leaking. Match the tank or hose arrangement to the exact installation guide and stop if the leak returns.
Should I keep running a GE dryer that is leaking?
No. Stop for water near electrical or gas components, a wet floor, smoke, burning smell, gas odor, excessive heat, or an inaccessible source. Disconnect power only when it is safe, control the water or gas supply as appropriate, and arrange qualified service rather than opening panels or repeatedly reproducing the leak.
Read the exact guide
Official sources
- Dryer - Things To Check For A Venting IssueGE Appliances · Official GE Appliances support article for vented dryers; follow the exact model installation instructions for duct routing and testing.
- Ventless Condenser Dryer - How to Maintain Optimum PerformanceGE Appliances · Official GE Appliances support article for ventless condenser dryer models; maintenance details must be matched to the exact owner's manual.
- Dryer - Check Vent Sensor AlertGE Appliances · Official GE Appliances support article for models equipped with a Check Vent alert or equivalent vent monitoring; exact model instructions control.
- 49-90028v12GE Appliances · Official GE Appliances installation and use guide for the model family identified in the PDF; current model instructions take precedence.
- Ventless Condenser Dryer - How It DrainsGE Appliances · Official GE Appliances support article for ventless condenser dryer designs; exact model installation instructions control.
- Appliances - Water Damage InformationGE Appliances · Official GE Appliances safety guidance for appliances exposed to water or flooding, used here to set the stop-use boundary for a wet dryer.
- Dryer - What is Normal and Not Normal with Steam SettingGE Appliances · Official GE Appliances support article for GE gas or electric dryers equipped with a Steam feature; cycle behavior and connections are model-specific.
Community feedback
Share a repair observation
Share a plain-text repair observation. Accepted observations are published automatically; this page may take a moment to update.