
On this page
Start here
Quick answer
First identify whether the Dyson is a cordless trigger-held model, a corded upright or canister with a power switch, or a robot or wet-cleaning model with different controls. Release the trigger or switch and disconnect the machine from its charger or dock as the exact model instructions allow. If a corded machine keeps running, unplug it by the plug when that is safe; never pull the cord. Dyson's own troubleshooting paths include a machine that will not switch off because a switch is stuck, and they also identify blockage or a filter problem as common reasons a vacuum's thermal protection can intervene. After safe isolation and cooling, check only the external trigger or switch area and model-approved airflow, bin, brush, hose, and filter items. If the control is stuck, the motor continues after the user-accessible power isolation, the machine is abnormally hot, or there is smoke, arcing, burning odor, a damaged cord, a swollen or hot battery, or repeated protection operation, leave it out of service and arrange qualified repair. Do not open the motor, control, battery pack, or sealed system, bypass a switch, or perform energized testing.
Before you begin
Safety first
- The user may read the model label, observe the documented controls, unplug by an accessible plug when safe, disconnect a charger or dock, remove a battery only when the exact model manual describes it and the battery is cool and undamaged, and inspect model-approved external bin, hose, brush, and filter items after power isolation and cooling. Internal switches, controls, relays, motors, battery packs, chargers, wiring, sealed airflow paths, liquid systems, disassembly, and all energized testing are for qualified service personnel.
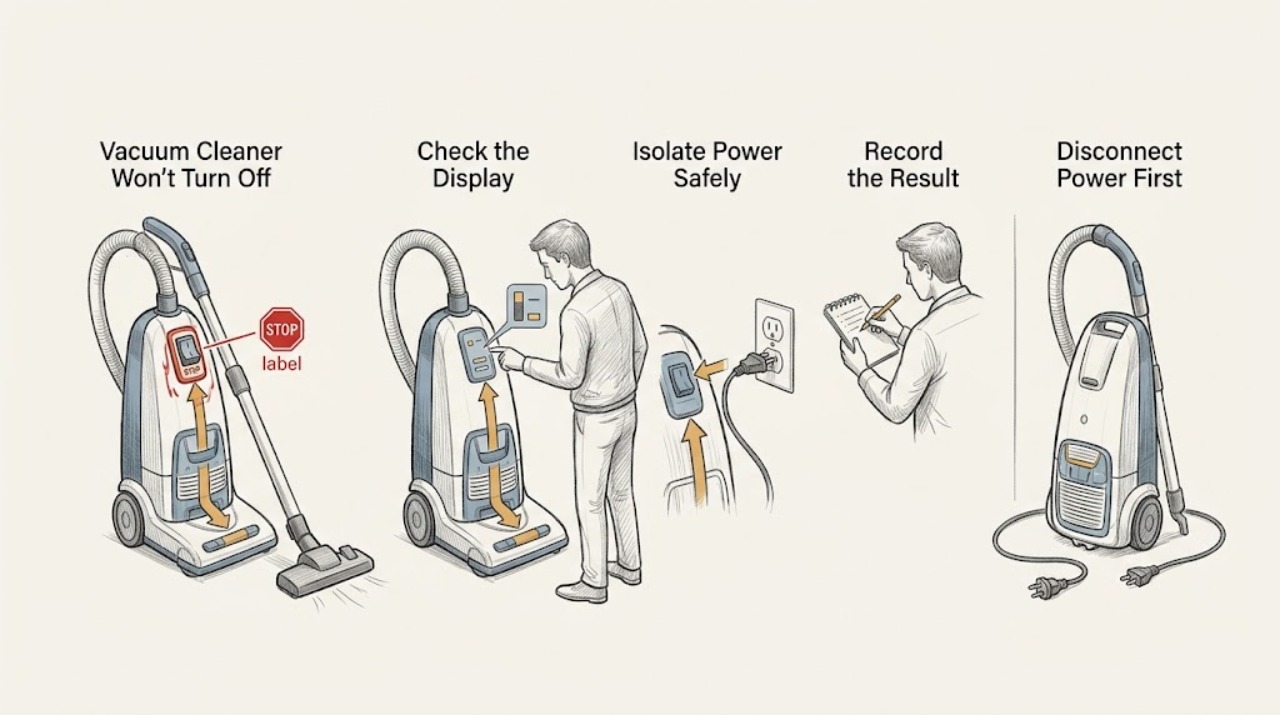
Work through in order
Diagnostic checks
Use only checks that match the exact appliance or system and its official guide.
-
Check 1
Read the full model from the rating label or the exact product documentation before pressing controls. With the cleaner safely positioned, identify whether operation uses a held trigger, a latching power switch, a dock or app command, or a wet-cleaning or robot-specific control. Release the documented control once and observe without forcing it.
Expected result: The trigger or switch returns freely and the motor stops; the trigger or switch remains depressed or feels mechanically stuck; the control is normal but the motor continues; or the product is a robot or wet-cleaning model whose control sequence is not identified.
Next step: Use only the exact model's documented stop control. If the control is stuck, do not pry it or hold it in a different position; continue with safe isolation and service escalation. If the architecture is unclear, stop troubleshooting until the model guide is identified.
Stop if: Do not dismantle the handle, switch housing, dock, control board, or battery pack, and do not bypass a trigger or interlock.
Why this matters
Why: A control that remains down makes a stuck trigger or switch more likely. A freely released control followed by continued running shifts concern toward an internal control, relay, motor, or model-specific command path. An unidentified robot or wet-cleaning architecture cannot be diagnosed safely from a cordless-stick assumption.
-
Check 2
If there is no smoke, spark, burning odor, abnormal heat, moisture, or visible damage, isolate power without opening the machine: unplug a corded cleaner by the plug, and release the cordless control and disconnect the charger or dock. Remove a detachable battery only if the exact model instructions identify that as a normal user step and the battery is cool and undamaged.
Expected result: The motor stops after the documented user-accessible isolation; the machine cannot be isolated without opening it; the cord, charger, or battery is hot or damaged; or the machine continues with the control released and safe isolation completed.
Next step: Keep the machine unplugged or disconnected and let it cool before any external inspection. If isolation is impossible without disassembly, or any power component is damaged or hot, leave it out of service and arrange qualified repair.
Stop if: Never pull the cord, open a battery pack, probe live wiring, or handle a smoking, sparking, leaking, swollen, or very hot machine.
Why this matters
Why: Stopping at isolation makes the immediate symptom a control-state or run-command issue rather than proof of a particular replacement part. An appliance that cannot be safely isolated, or a hazardous power component, requires service. Continued operation after normal isolation is an abnormal result and should not be chased with repeated tests.
-
Check 3
With power isolated and the cleaner cool, inspect only the outside of the trigger, switch, and its surrounding handle area. Remove an obvious loose surface obstruction with a dry cloth or gentle hand movement only if the exact guide permits it; do not spray liquid or insert a tool into the control.
Expected result: The control is visibly held down, does not return smoothly, has a cracked housing, or returns normally with no external obstruction.
Next step: Do not use the cleaner if the control is stuck, damaged, or requires force. Photograph the control state, record the model, and arrange model-matched service; if it is normal, proceed only to the cooled airflow checks.
Stop if: Do not remove the handle cover, drill, lubricate, bridge, tape, or otherwise defeat the trigger or power switch.
Why this matters
Why: A physically stuck or damaged control supports a switch or trigger assembly fault, but the external observation cannot establish which internal component failed. A control that moves normally makes a hidden control or motor fault more likely if the machine still runs.
-
Check 4
After power isolation and cooling, inspect the user-accessible bin, inlet, wand, hose, cleaner-head opening, and brush area for an obvious blockage or tangled material. Follow only the exact model guide for removing the bin, wand, hose, brush bar, or filter; keep hands and tools away from any powered brush. If a filter is washable on that model, wash and dry it only as directed and refit it only when completely dry.
Expected result: Airflow openings are clear; a visible blockage or tangled material is found; the filter is overdue, wet, damaged, or not seated; or there is no user-accessible obstruction but the machine was abnormally hot or repeatedly stopped.
Next step: Clear only the model-approved external obstruction, reinstall a completely dry and undamaged filter where the guide permits, and make at most one supervised normal test after the machine is cool. If the symptom returns, keep it out of service and request qualified diagnosis.
Stop if: Do not run the cleaner with a wet, missing, damaged, or incorrectly fitted filter; do not open the motor or sealed airflow path; and do not use compressed air or sharp tools inside the machine unless the exact guide explicitly permits it.
Why this matters
Why: A restriction or incorrectly maintained filter can reduce airflow and contribute to overheating protection on Dyson vacuums. A clear path does not prove the motor or control is healthy, and a wet or damaged filter must not be used. Repeated overheating or continued running after the safe checks points beyond an owner-level blockage check.
-
Check 5
Once the control is free, any approved blockage is cleared, the filter is correctly dry, and the machine is cool, perform one short, supervised test using the exact model's normal stop control. Keep the plug or user-accessible disconnect available and stop immediately if the machine behaves abnormally.
Expected result: The cleaner starts and stops normally; it runs on after the control is released; it becomes hot or noisy again; a warning or cutout returns; or smoke, sparks, burning odor, a leak, or a protection trip occurs.
Next step: If the symptom repeats or any hazard appears, stop, isolate power only when safe, and arrange qualified Dyson or appliance service with the exact model and observed sequence. Do not keep cycling power or continue using it unattended.
Stop if: Stop immediately for smoke, arcing, burning odor, abnormal heat, damaged insulation, a hot or swollen battery, liquid ingress, or repeated household protection operation.
Why this matters
Why: A normal test after a documented maintenance correction is reassuring but does not justify replacing an unconfirmed part. A repeat of the no-stop symptom or thermal warning after the external checks makes an internal switch, control, motor, battery, charger, or airflow fault more likely. Any hazard overrides further diagnosis.
Use your observations
Decision map
Find the observation that best matches what you see, then follow the next safe action.
-
PATH 01Safety boundary
What you see
The exact model uses a trigger or power switch, and the control remains down, does not return freely, or the machine stops only when the control is manipulated.
Do this next
Keep the machine disconnected and do not force, lubricate, tape, or bypass the control. Arrange model-matched qualified service and report whether the motor stopped when power was isolated.
Why this path and its safety boundary
Why it matters: A stuck or damaged user control is more likely than a blocked hose or normal operating behavior, but the observation cannot identify the internal switch or trigger assembly by itself.
Safety stop: Do not open the handle or control housing or operate the cleaner with a stuck control.
-
PATH 02Safety boundary
What you see
The trigger or switch returns normally, but the motor continues after the documented stop command and safe user-accessible power isolation has been completed, or the machine cannot be isolated without opening it.
Do this next
Do not continue testing. Leave the cleaner out of service and arrange qualified repair, giving the exact model, control type, and the point at which the motor stopped or failed to stop.
Why this path and its safety boundary
Why it matters: An internal control, relay, motor, battery, charger, or model-specific command fault is more likely than a simple external obstruction.
Safety stop: No panel removal, battery-pack opening, live measurement, or forced mechanical stop.
-
PATH 03Safety boundary
What you see
The vacuum was unusually hot, had reduced airflow, stopped or warned during use, or resumes the no-stop symptom or thermal behavior after an accessible blockage or filter check.
Do this next
Keep it off until cool, perform only model-approved external checks, and use a washable filter only when it is completely dry. Escalate a repeated cutout, excessive heat, odor, or abnormal operation.
Why this path and its safety boundary
Why it matters: Dyson's general troubleshooting guidance associates thermal protection with overheating and commonly directs attention to blockages and filters. A clean external path does not rule out an internal airflow, motor, or control fault.
Safety stop: Do not restart a hot machine, run without the correct dry filter, or open the motor or sealed airflow path.
-
PATH 04Safety boundary
What you see
The product is a Dyson robot, wet cleaner, wet/dry product, or another model whose stop control, dock behavior, battery access, or filter procedure is not identified from its exact guide.
Do this next
Record the exact model and use its Dyson support journey or manual. If the unit will not stop using the documented control, keep it disconnected when safe and arrange qualified service.
Why this path and its safety boundary
Why it matters: The broad vacuum symptom is under-specified for a safe model-specific procedure; a dock, app, fluid system, or different interlock may change both diagnosis and shutdown steps.
Safety stop: Do not apply a cordless-stick trigger procedure, remove covers, drain a wet system, or open a dock or battery based only on the brand name.
-
PATH 05Safety boundary
What you see
Smoke, sparks, burning odor, a damaged cord or charger, abnormal heat, liquid ingress, a hot or swollen battery, repeated protection operation, or a leak is present.
Do this next
Stop handling it, disconnect power only if that can be done without contact with a hazard, keep people away, and obtain qualified service or appropriate emergency assistance for an active fire or smoke event.
Why this path and its safety boundary
Why it matters: The symptom has crossed from routine external troubleshooting into an immediate electrical, battery, heat, or liquid hazard; the root cause cannot be safely separated by owner checks.
Safety stop: Do not restart, charge, move a damaged battery, spray liquid, or open the machine to investigate.
Helpful context
Understand the symptom
Start with the Dyson control architecture
Not turning off does not identify one universal part. Cordless stick models may run only while a trigger is held, corded uprights and canisters commonly use a power switch, and robot or wet-cleaning products can use a dock, app, or model-specific control sequence. Dyson's vacuum support catalog covers several different families, so record the full model and use its own guide before assuming that a button, trigger, battery, or dock behaves like another Dyson product. A motor that stops when the documented control is released is a different result from one that continues with the controls released.
Keep power isolation and cooling separate from diagnosis
If the machine is hot, smells of burning, shows smoke or sparks, has a damaged cord or charger, or has a hot, swollen, or damaged battery, stop handling it and move to professional help when safe. For a normal corded machine, disconnect at the plug; for a cordless model, release the control and disconnect it from charging, and remove a battery only when the exact model manual describes that as a user action and there is no battery hazard. Dyson describes a thermal safety system that can stop a vacuum when it overheats, usually after a blockage or filter issue; do not restart a hot machine just to test it.
Treat V15 instructions as model-specific evidence
Dyson's V15 support page illustrates why model matching matters: it describes filter washing, blockage and filter alerts, and requires a washed filter to be completely dry before refitting. Those details are useful only for a V15 or a model whose own guide gives the same instruction. Do not apply a V15 button sequence, filter location, battery procedure, or alert meaning to an upright, canister, robot, or wet-cleaning Dyson without checking that product's guide.
Only after diagnosis
Potential parts
- trigger or power-switch assembly
Consider this only when the exact model is identified and the external control is stuck or a qualified technician confirms that the switch or trigger assembly is the failed part.
Dyson control layouts vary across cordless, upright, canister, robot, and wet-cleaning families; verify the full model and manufacturer fit information before ordering. - model-specific filter
Consider this only when the exact model guide calls for a filter replacement and inspection finds a damaged, permanently clogged, or otherwise unusable filter rather than merely an overdue wash.
Filter shape and maintenance rules are model-specific; confirm the full model and manufacturer fit information, and do not substitute an unverified filter. - battery or charger
Consider this only after safe isolation and qualified diagnosis link the continuing-run or control symptom to the battery or charger rather than the trigger, control, motor, or airflow path.
Battery and charger fitment is model-specific and safety-critical; do not open or test a damaged battery and verify the exact model with the manufacturer.
When checks do not resolve it
Need a professional?
Safety scope: The user may read the model label, observe the documented controls, unplug by an accessible plug when safe, disconnect a charger or dock, remove a battery only when the exact model manual describes it and the battery is cool and undamaged, and inspect model-approved external bin, hose, brush, and filter items after power isolation and cooling. Internal switches, controls, relays, motors, battery packs, chargers, wiring, sealed airflow paths, liquid systems, disassembly, and all energized testing are for qualified service personnel.
Common questions
FAQ
Why will my Dyson vacuum not turn off when I release the trigger or switch?
First confirm the exact product family and whether the trigger or switch returns freely. Dyson has a troubleshooting path for a switch stuck down, but a control that moves normally while the motor continues can indicate an internal control or motor fault. Isolate power safely and arrange qualified service rather than opening the handle or bypassing the control.
Can a blockage or dirty filter cause a Dyson vacuum to behave abnormally?
Dyson says its vacuum safety system can respond to overheating, commonly when the machine is blocked or filters need washing. Unplug or disconnect the machine when safe, let it cool, and inspect only the blockage and filter items covered by the exact model guide. A filter must be completely dry before refitting when the model permits washing it.
Should I remove the battery when my cordless Dyson will not stop?
Do not open the battery pack. Release the documented control and disconnect the charger or dock; remove a detachable battery only if the exact model guide identifies that as a normal user step and the battery is cool and undamaged. A hot, swollen, damaged, or wet battery is a stop condition requiring qualified help.
Are Dyson V15 filter or trigger instructions valid for every Dyson vacuum?
No. Dyson supports cordless stick, upright, canister, handheld, robot, wet, and wet/dry families. The V15 page is evidence for V15-specific behavior, while another family's controls, filter access, dock, or shutdown sequence may differ. Match every instruction to the full model.
When should I stop troubleshooting a Dyson vacuum that will not turn off?
Stop for smoke, sparks, burning odor, abnormal heat, a damaged cord or charger, a hot or swollen battery, liquid ingress, or repeated protection operation. Also stop when the control remains stuck, the machine cannot be safely isolated, or the motor continues after the documented control and safe isolation checks. Keep it out of service and give a qualified technician the exact model and observed sequence.
Read the exact guide
Official sources
- Support | Troubleshooting | DysonDyson · The general safety explanation is useful for Dyson vacuum troubleshooting, while the filter location, removal, washing interval, and controls remain model-specific.
- Support | Dyson V15 Detect™ vacuumDyson · The filter, blockage, alert, and battery details are specific to the V15 Detect support journey and are examples, not universal instructions for every Dyson vacuum.
- Support | Troubleshooting | DysonDyson · The journey includes a specific 'machine won't switch off - switch stuck down' path, but the exact controls and repair instructions must be matched to the user's model.
- Support | Vacuum cleaners | DysonDyson · This page establishes that Dyson support is organized across distinct vacuum families; it does not make one control or maintenance procedure universal.
- Support | Troubleshooting | DysonDyson · Use the safety sequence as general Dyson guidance, but use the exact model journey for the cooling interval and filter or blockage procedure.
Community feedback
Share a repair observation
Share a plain-text repair observation. Accepted observations are published automatically; this page may take a moment to update.