
On this page
Start here
Quick answer
First identify what is leaking. A rotten-egg or unburned-gas odor, a hiss, or a suspected leak at the range means leave immediately, do not operate lights, switches, appliances, or a phone inside, and contact the gas supplier or emergency services from outside; do not move the range to inspect its connector. Steam or moisture around the door or cooktop can be normal during cooking, and a small amount of heat around the door is expected because a gas oven is not airtight. Liquid, grease, scorching, smoke stains, a door that will not close, or a persistent gas odor is not a routine spill. Once the oven is cold and there is no gas emergency, unplug it before ordinary cleaning, record the exact location and timing of the leak, inspect only visible, user-accessible areas, and use the model manual. Do not remove burners or panels, test a gas connection with a flame, relight a failed pilot, or operate the oven after delayed ignition, a boom, a door blowout, yellow/orange flames, or a suspected gas fault. Arrange qualified gas-appliance service when the source is not a simple removable spill or normal vent moisture.
Before you begin
Safety first
- If gas is suspected, leave immediately and call the gas supplier or emergency services from outside. Do not operate switches, flames, phones, or the appliance inside, and do not move the range. For non-gas checks, isolate power before cold cleaning; never open gas or electrical panels or bypass safety devices.
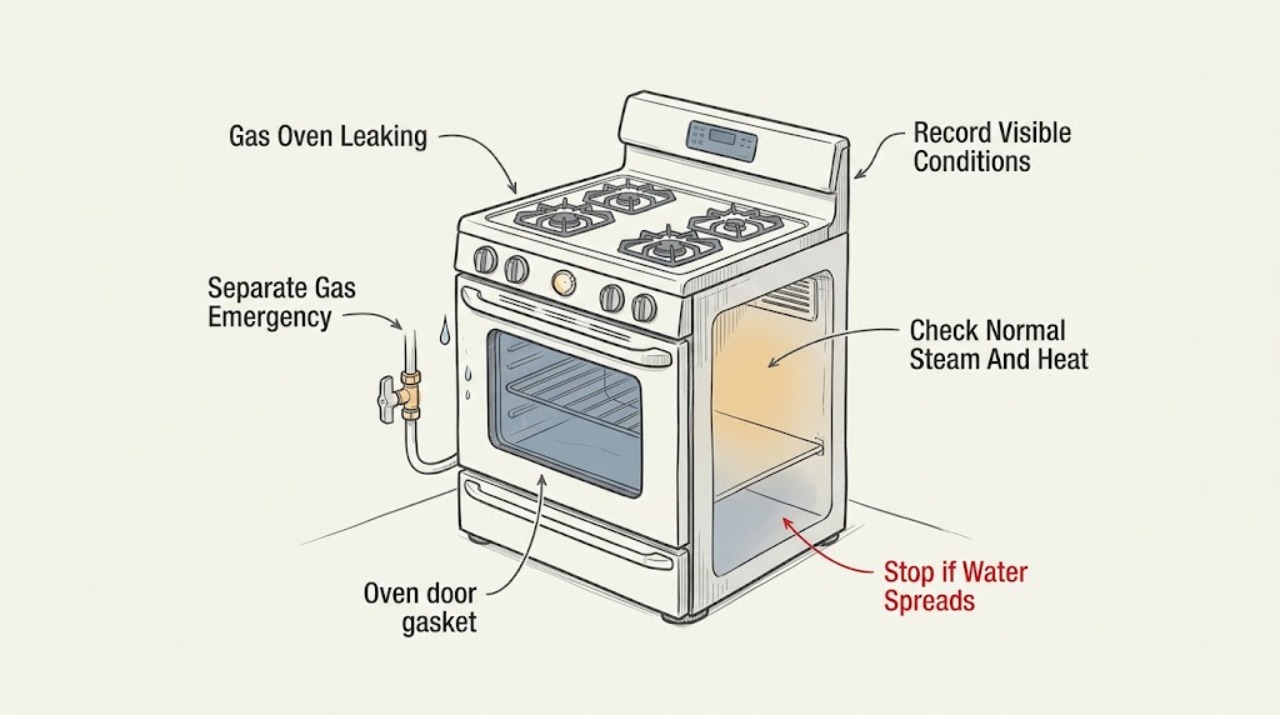
Work through in order
Diagnostic checks
Use only checks that match the exact appliance or system and its official guide.
-
Check 1
From where you are, identify whether the report is a rotten-egg or unburned-gas odor, a hiss, or a suspected gas leak rather than liquid, steam, or ordinary oven heat. Do not approach the rear connection, move the range, light a match, or operate any switch to investigate.
Expected result: Record only what can be noticed without entering or manipulating the suspected area: gas odor or hiss present, no gas odor, liquid or grease present, steam or moisture present, or the substance is unknown.
Next step: If gas is possible, leave immediately, warn others as you exit if this can be done without delay, and contact the gas supplier or emergency services from outside. If there is no gas indication, let the oven cool before any ordinary check.
Stop if: Do not use a phone, light, switch, appliance, flame, or vehicle ignition inside the suspected gas area, and do not move the appliance to inspect its connector.
Why this matters
Why: Gas odor, hissing, or an unknown substance with possible gas odor must be treated as a gas emergency. Liquid, steam, or heat without gas odor follows a different path, but an uncertain smell should never be classified as harmless.
-
Check 2
Only when there is no gas emergency and the oven is off and cool, record where the material appears: inside the cavity, under the door, on the cooktop, at the vent, around the frame, or behind/under the appliance; note whether it appears during preheat, baking, broiling, cooling, or while the appliance is off.
Expected result: Classify the symptom as liquid or grease, steam or water droplets, warm air, smoke or scorching, or an odor without a visible source; note whether it repeats with a particular food or cycle.
Next step: Photograph the cooled area and continue with the matching visible inspection; do not run another cycle merely to reproduce an unsafe symptom.
Stop if: Stop if gas odor, smoke, scorching, electrical damage, water near electrical parts, or an unexplained chemical odor is present.
Why this matters
Why: Cooking moisture or warm vent air can be normal. A liquid trail may be a spill or a seal/cleaning issue. Smoke, scorching, repeated residue, or a leak while the oven is off needs service investigation. A gas odor overrides this classification and returns to the evacuation branch.
-
Check 3
For a clear steam or warm-air report with no gas odor, compare the location with the model's vent and door design without touching hot surfaces or blocking the vent. Let moisture on the door or cooktop dissipate after the oven cools.
Expected result: Determine whether the material is vapor that appears only while cooking moist food, condensation between door glass, or heat around the door; contrast it with liquid that pools, a persistent wet trail, smoke, or scorching.
Next step: If it matches normal vapor or heat and disappears as described, monitor without blocking the vent. If it leaves liquid, stains, or abnormal heat, use the door and moisture inspection branches and arrange service if it persists.
Stop if: Do not cover the vent, touch the gasket while hot, wipe liquid into the gasket, or use the oven if smoke or scorching appears.
Why this matters
Why: GE identifies steam from the oven vent, moisture around the door, and some heat around the door as normal design behavior. Persistent liquid, smoke stains, scorching, or a door that does not align is not established as normal venting.
-
Check 4
With the oven cold and power isolated, inspect the closed door, racks, hinges, and visible gasket for a torn, displaced, dirty, or compressed section; verify the door closes evenly without force. Do not wet or scrub a woven fiberglass gasket unless the model manual specifically permits it.
Expected result: Record a normal even door position, a new-installation gap, a gasket tear or displacement, a bent or misaligned hinge, racks obstructing closure, scorching or smoke staining, or a door that cannot close.
Next step: Remove only a visible rack-position obstruction if the manual allows it and retest once when cool. For gasket, hinge, scorching, or alignment damage, stop using the oven and request qualified service.
Stop if: Do not bend hinges, pull the door apart, wet a fiberglass gasket, glue a seal, or operate an oven with smoke stains or a door that will not close.
Why this matters
Why: GE says some heat leakage and designed openings are normal, while major leakage with scorching or smoke stains can indicate a damaged gasket or hinge requiring service. A door that cannot close can allow heat and combustion products to escape abnormally.
-
Check 5
After the oven is cold and there is no gas concern, inspect the cavity floor, racks, door threshold, cooktop, drip area, and accessible burner or vent openings for food or grease residue. Remove only a loose spill using the exact model cleaning instructions, keeping liquid away from the gasket and controls.
Expected result: Note whether the residue matches a recent spill or high-moisture food, whether it returns without cooking, whether it is oily or water-like, and whether it reaches a burner, vent, control, or electrical area.
Next step: Clean only the confirmed removable spill as the manual directs and monitor once. Stop and request service for recurring liquid, damage, or any residue near gas or electrical components.
Stop if: Do not pour water into the cavity, spray the gasket, disassemble a burner, use a flame to dry or test residue, or operate with liquid near electrical parts.
Why this matters
Why: A one-time spill or cooking moisture can explain a liquid mark. A recurring leak while off, residue entering a control or burner area, or unknown fluid may indicate a damaged component, cleaning product reaction, or gas-system issue and requires service assessment.
-
Check 6
If there is no gas odor, no smoke or scorching, the door is closed, and the model manual allows a normal bake observation, note whether ignition is prompt and stable from the designed viewing position without reaching into the oven or attempting to adjust gas components.
Expected result: Record normal ignition, no ignition, a delayed ignition with a boom or door movement, a flame that is completely yellow or orange after proper fuel conversion, repeated clicking, or gas odor before or after ignition.
Next step: Stop using the oven for any abnormal ignition or flame result and arrange qualified gas-appliance service. Do not attempt pilot, burner, air-shutter, valve, or igniter repair from this article.
Stop if: Do not relight a failed pilot, hold a control open, use a match to test ignition, adjust the burner, or repeat a delayed ignition.
Why this matters
Why: GE identifies delayed ignition, a boom, door blowout, and completely yellow/orange flames as service or gas-professional conditions. Gas odor at any point returns to the emergency branch; no ignition can involve the igniter, controls, gas supply, or other components.
-
Check 7
For a non-gas, non-hot inspection such as cleaning a removable spill or checking a visible door component, isolate electrical power using the normal plug or breaker method described by the model instructions and wait for the oven to cool; do not move the appliance.
Expected result: Confirm the controls are off and the oven is cool before handling an accessible part; note whether the issue disappears after a permitted cleaning or remains when the appliance is off.
Next step: Restore power only for a normal, supervised, model-approved test after the inspection is complete. If the leak remains or the source is not obvious, leave the appliance off and arrange service.
Stop if: Do not move a gas appliance, remove panels, access live wiring, disconnect gas tubing, or re-energize after liquid has reached electrical parts.
Why this matters
Why: A safe cold inspection can separate residue from an active appliance fault. Power isolation does not make gas-line work safe and does not authorize cabinet, connector, burner, or control disassembly.
-
Check 8
Prepare a service handoff with the GE model, fuel type, exact leak substance and location, timing, odor or sound, door and gasket condition, ignition result, photos taken while cold, and whether the appliance was moved or exposed to water.
Expected result: Escalation is indicated by any gas odor or hiss, recurring liquid, water near electrics, smoke or scorching, delayed ignition, yellow/orange flame, door or hinge damage, unknown source, or a fault that returns after a permitted cleaning.
Next step: Keep the oven out of service until the responsible gas supplier, emergency responder, manufacturer, or qualified appliance technician gives a safe return-to-use decision.
Stop if: Do not continue cooking, move the range, bypass a safety valve or door, or test the gas connection yourself.
Why this matters
Why: These results can involve the gas path, ignition, burner, safety valve, door, gasket, vent, controls, or building connection. A generic part or seal cannot safely resolve an unidentified leak.
Use your observations
Decision map
Find the observation that best matches what you see, then follow the next safe action.
-
PATH 01Safety boundary
What you see
A rotten-egg or unburned-gas odor, hiss, or unexplained possible gas leak is present.
Do this next
Leave immediately without operating switches, appliances, flames, or a phone inside, then contact the gas supplier or emergency services from outside.
Why this path and its safety boundary
Why it matters: Treat it as a gas emergency; the odor is not a normal liquid or heat leak.
Safety stop: Do not move the range to inspect the connector or re-enter until the responsible authority says it is safe.
-
PATH 02Safety boundary
What you see
Only steam, moisture, or modest warm air appears at the designed vent or door area during cooking and disappears as expected without odor, smoke, or staining.
Do this next
Keep vents clear, let surfaces cool, and monitor. Use the model manual if moisture persists or changes into a liquid leak.
Why this path and its safety boundary
Why it matters: GE identifies these effects as normal airflow or cooking-moisture behavior for many gas ranges and ovens.
Safety stop: Stop for gas odor, smoke, scorching, abnormal heat, or a door that will not close.
-
PATH 03Safety boundary
What you see
A cooled inspection finds a one-time food, grease, or water residue matching recent cooking and no gas or electrical hazard.
Do this next
Clean only as the model manual directs, dry the accessible area, and monitor once without deliberately reproducing the event.
Why this path and its safety boundary
Why it matters: A removable spill is plausible, but liquid must stay away from the gasket, controls, burners, vents, and electrical areas.
Safety stop: Stop for recurring liquid, unknown fluid, water near electrics, or residue entering an appliance component.
-
PATH 04Safety boundary
What you see
The door is misaligned, will not close, the gasket is torn or displaced, or the oven face has scorching or smoke stains.
Do this next
Stop using the oven and arrange qualified appliance service with model photos and the symptom timing.
Why this path and its safety boundary
Why it matters: This is not normal vent moisture; heat containment, hinge alignment, gasket condition, or combustion behavior requires service.
Safety stop: Do not wet, glue, trim, bend, or substitute the gasket by appearance, and do not keep cooking to compare results.
-
PATH 05Safety boundary
What you see
Ignition is delayed, produces a boom, moves the door, does not light, or the flame is completely yellow or orange after proper conversion.
Do this next
Turn the appliance off if it can be done without exposure, stop using it, and arrange qualified gas-appliance service.
Why this path and its safety boundary
Why it matters: GE treats these as repair-service or gas-professional conditions involving ignition, airflow, gas pressure, or another component.
Safety stop: Do not relight, adjust, or test the burner or pilot with a match, and treat any gas odor as an evacuation emergency.
-
PATH 06Safety boundary
What you see
The source is not visible, the leak recurs while the oven is off, liquid reaches a component, or the symptom remains after a permitted cold cleaning.
Do this next
Leave the oven out of service and arrange model-specific appliance or gas service; provide photos and the exact timing.
Why this path and its safety boundary
Why it matters: The condition is not established as a simple spill or normal moisture and may involve a gas, water, seal, vent, or electrical component.
Safety stop: Do not move the range, remove panels, disconnect tubing, or keep operating it to reproduce the leak.
Helpful context
Understand the symptom
Leak can mean gas, liquid, heat, or steam
A gas oven can appear to leak in several different ways. Unburned gas is a fire and explosion emergency. A wet spot or grease trail is a liquid or food-spill problem. Steam at the vent or condensation around the door can be a normal result of cooking moisture. Heat around the door is also not automatically a gasket failure: GE explains that the oven needs airflow and does not have an airtight door seal. Diagnose the substance and location without putting yourself near a suspected gas source.
Treat gas odor as an evacuation decision, not a DIY test
A faint or strong rotten-egg odor, hissing, or an unexplained gas smell is enough to stop. Do not use a flame to search for a leak, do not operate an electrical switch or phone inside, and do not pull the range forward to look at the connector. From a safe location outside, contact the gas supplier or emergency services and follow their instructions. Only a qualified professional should inspect or repair the gas path.
Do not seal a real oven fault with a gasket or cleaner
If the oven door has scorching or smoke stains, a damaged gasket, a broken or misaligned hinge, delayed ignition, a boom, a door that blows open, or flames that are completely yellow or orange after a proper fuel conversion, stop using the appliance and arrange service. GE also cautions that its woven fiberglass door gasket can be damaged by cleaning and that some door openings are intentional for airflow. Use the exact model manual rather than wetting, gluing, trimming, or substituting a gasket by appearance.
Only after diagnosis
Potential parts
- oven door gasket
Consider this category only when a cold inspection and the exact GE manual or technician diagnosis confirm a damaged or displaced gasket causing abnormal heat loss, scorching, or smoke staining.
Match the full GE model and gasket location, preserve designed airflow openings, and confirm installation method; do not choose a seal by appearance or use it to hide hinge or frame damage. - oven door hinge or alignment hardware
Consider this category only when the door is misaligned, cannot close, or the hinge is visibly damaged and a qualified diagnosis identifies the hinge or alignment as the cause.
Confirm the exact model, door construction, hinge side, and safe installation procedure; spring-loaded door hardware can cause injury and should not be forced. - gas oven ignition or burner service component
Consider this category only after a qualified gas-appliance diagnosis identifies delayed ignition, no ignition, unstable flame, or a failed component; a gas odor is not a parts-ordering signal.
Confirm the full GE model, fuel type, conversion status, safety controls, and manufacturer fit information through a qualified technician; never bypass or alter gas safety devices.
When checks do not resolve it
Need a professional?
Safety scope: If gas is suspected, leave immediately and call the gas supplier or emergency services from outside. Do not operate switches, flames, phones, or the appliance inside, and do not move the range. For non-gas checks, isolate power before cold cleaning; never open gas or electrical panels or bypass safety devices.
Common questions
FAQ
Is it normal for a GE gas oven to leak heat around the door?
Some warm air or heat around the door can be normal because GE says the oven needs airflow and is not airtight. Scorching, smoke stains, a damaged gasket, a broken hinge, abnormal heat, or a door that will not close is not a normal heat leak; stop using the oven and arrange service.
Is steam or water around a GE oven door a gas leak?
Cooking moisture can vent onto the cooktop or form around or between door glass, especially with moist food. A pooled or recurring liquid, unknown substance, smoke, scorching, or any rotten-egg odor needs a separate safety decision; gas odor means leave immediately and call from outside.
What should I do if my GE gas oven smells like gas?
Treat unburned-gas odor or hissing as an emergency. Leave without operating lights, switches, appliances, flames, or a phone inside; do not move the range; then contact the gas supplier or emergency services from outside. Do not try to locate the leak with a flame or by inspecting the connector yourself.
Can I replace the GE oven gasket to stop a leak?
Only after a cold inspection and the exact model instructions or a technician confirm that a damaged gasket is the cause. GE notes that some gasket openings and modest heat around the door are designed behavior, while a torn gasket, hinge fault, scorching, or smoke stains needs service.
When should I stop using a GE gas oven that is leaking?
Stop for any gas odor or hiss, delayed ignition, a boom, a door blowout, completely yellow or orange flames, smoke, scorching, recurring liquid, water near electrical parts, a door that will not close, or an unknown source. Keep the range in place and arrange qualified gas-appliance or emergency service.
Read the exact guide
Official sources
- Gas Range & Wall Oven - Oven Will Not Come OnGE Appliances · GE gas range and wall-oven support guidance; model-specific instructions control access and diagnosis.
- Gas Range - Gas OdorsGE Appliances · GE Appliances support guidance for gas ranges; the exact appliance manual and local gas authority control a particular installation.
- Certain Older Gas Connectors May Be DangerousU.S. Consumer Product Safety Commission · CPSC consumer safety notice for gas-appliance connectors; it does not identify the connector in a particular GE installation.
- Range - Moisture Build-Up on Cooktop Surface or Around the DoorGE Appliances · GE range support guidance for cooking moisture; persistent liquid, damage, and model-specific concerns require service assessment.
- Range & Wall Oven - Oven Gasket Not Sealing ProperlyGE Appliances · GE range and wall-oven support guidance; the installed model's manual controls door removal and repair.
- Range & Wall Oven - Cleaning Oven GasketGE Appliances · GE range and wall-oven gasket care guidance; the exact owner's manual controls a particular model.
- Gas Range - What is Normal Operation vs What Requires ServiceGE Appliances · GE Appliances support guidance for gas cooking appliances; model-specific instructions and qualified gas service control repairs.
Community feedback
Share a repair observation
Share a plain-text repair observation. Accepted observations are published automatically; this page may take a moment to update.