
On this page
Start here
Quick answer
For the GE GUAP240EM4WW stacked washer/dryer, do not choose a pump, tub seal, or hose from the puddle location alone. Stop the washer from a dry position, keep away from water near the outlet or cabinet, and close the household water valves once power is safely off and the valves can be reached without entering a wet electrical area. Record whether water first appears while the unit is idle, filling, agitating, draining, or spinning, then photograph the first wet point rather than the place water traveled to. GE separates front gasket or dispenser leaks, front overflow or suds, rear supply and drain connections, and household drain backflow into different checks. A matching GUAP240EM4WW case reports a drip beginning from the bottom center after the tub reached several inches of water but before the motor started; that pattern makes the fill-level/tub-seal path worth professional inspection, but it does not prove a seal or any single part. Keep the stacked unit out of use for an underside or recurring leak and do not tip, open panels, or run it with a wet electrical area.
Before you begin
Safety first
- Do not unplug while standing in water, touch wet electrical equipment, loosen a pressurized hose, slide or tip the stacked appliance, remove panels, reach under the tub, bypass a lid or door control, or run a cycle with a hidden leak or wet electrical area. Stop for flooding, uncontrolled filling, a damaged cord or outlet, repeated breaker trips, or water near electrical parts.
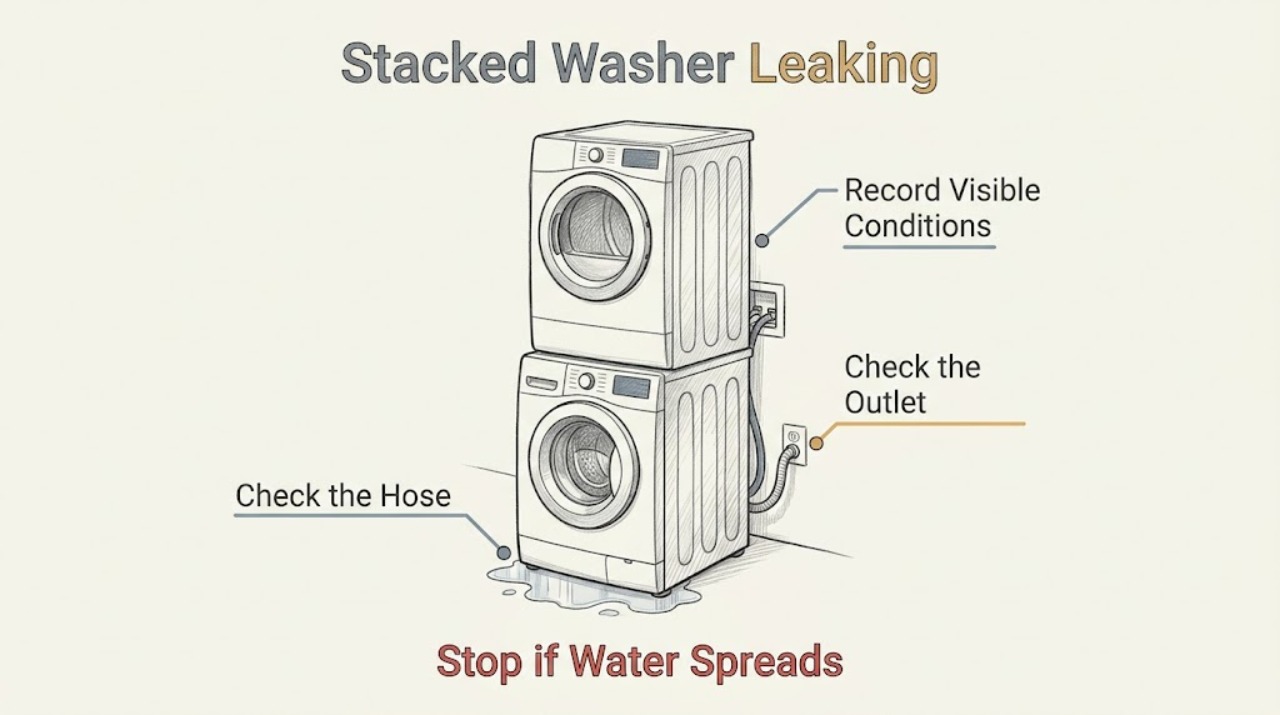
Work through in order
Diagnostic checks
Use only checks that match the exact appliance or system and its official guide.
-
Check 1
Stop the cycle from a dry, safe position. If water is spreading toward the plug, outlet, cord, or cabinet wiring, keep clear; do not unplug while standing in water. Once power is safely off and you can reach the household hot and cold valves without entering a wet electrical area, close them. Do not restart a flooding or underside-leaking stacked unit.
Expected result: Water is a few drops, a steady stream, or flooding; it continues while the washer is idle; the outlet, cord, or cabinet is wet, hot, discolored, or damaged; or the leak stops when the cycle and supply are stopped.
Next step: Keep the unit out of use, protect the floor without covering electrical equipment, and arrange qualified appliance service. For active electrical danger or flooding that cannot be contained safely, leave the area and obtain appropriate emergency help.
Stop if: Do not touch a wet plug or outlet, reset a tripping breaker, or operate the washer with water near electrical parts.
Why this matters
Why: A leak that continues while idle can remain pressurized at the supply or inlet path. Water near electrical equipment or a substantial leak is a safety boundary, not a normal observation test.
-
Check 2
Write down the exact phase when water first appeared: while idle, as the tub filled, during agitation, when the pump drained, or during spin. Record whether the tub was empty or partly filled and whether the motor or basket had begun moving before the first drop.
Expected result: The leak starts while idle or filling, only after agitation, only during drain or spin, or from the bottom center before any motor movement.
Next step: Use the matching phase branch and give the timeline to the technician. Do not deliberately fill or spin the unit again to reproduce a leak that has already reached the floor or underside.
Stop if: Do not place hands under the tub, reach into a moving basket, or run the machine with panels removed.
Why this matters
Why: Idle or fill timing keeps the pressurized supply, fill hose, valve, tub, and seal paths open. Agitation can expose splash, suds, or an overflow path. Drain or spin timing makes the drain hose, standpipe, household plumbing, pump path, or movement-related leak more relevant. A bottom-center drip before movement is a distinct pattern that cannot be labeled a pump failure from timing alone.
-
Check 3
From ordinary access with water closed and power safely off, photograph the first wet point and trace only visible water: front door or gasket, dispenser, rear fill connection, rear drain hose, standpipe or floor drain, top-load front corner, or underside. Do not move the stacked unit or remove a panel to see farther.
Expected result: The first wet point is visible at a door/gasket or dispenser, at a rear hose or plumbing connection, at the front overflow area, at the underside, or remains unknown while only the floor is wet.
Next step: Follow only the corresponding branch. If the source is underneath or hidden, keep the unit off and arrange service rather than guessing a pump, seal, or tub part.
Stop if: Do not slide or tip a stacked appliance, loosen a pressurized fitting, probe under the cabinet, or remove panels.
Why this matters
Why: The first wet point is more informative than the floor puddle. GE identifies gasket debris and blocked dispenser ports, front overflow or suds, rear hose and installation issues, and household drain blockage as different paths. An underside or hidden source cannot be safely identified by location alone.
-
Check 4
If the first wet point is at the front, inspect only the visible door or lid seal and dispenser area. Look for fibers or clothing caught in a gasket, a torn or deformed seal, detergent buildup, a dispenser door left ajar, or blocked dispenser ports. Remove only loose residue that the exact model manual permits; do not force or replace the seal by appearance.
Expected result: The gasket or dispenser is visibly dirty or obstructed, the seal is damaged, the dispenser backs up during fill, or the front is dry while water appears elsewhere.
Next step: Use the GUAP240EM4WW manual for any permitted cleaning or detergent placement, then keep the unit off and request service if the leak returns or the seal is damaged.
Stop if: Do not glue, stretch, puncture, or force the gasket, and do not run a cycle with a damaged seal or wet electrical area.
Why this matters
Why: GE says debris can cause small front-load gasket leaks and blocked dispenser ports can back up fill water and overflow the dispenser. A torn seal, recurring leak, or water from the cabinet or underside is not a cleaning-only result.
-
Check 5
If water appears from a top-load-style front corner or during agitation, record whether the tub was overfilled, the load was overloaded or out of balance, and whether excessive suds rose above the basket. Do not open a lid over a moving basket and do not add chemicals to suppress suds.
Expected result: The leak is at the front-left overflow route, heavy suds are present, the load is tightly packed or out of balance, or the unit still leaks when no soap is used in a model-permitted supervised check.
Next step: Use the correct HE detergent amount and load guidance from the exact manual, and arrange service for overfill, recurrence, or an unknown source.
Stop if: Do not bypass the lid or water-level control, run repeated no-soap tests, or continue operation while water approaches electrical parts.
Why this matters
Why: GE says front-corner leaks are commonly associated with overflow and that excessive detergent can create suds that push water over the basket. A leak without soap, an overfill, or a recurring leak moves the case to service rather than more detergent experiments.
-
Check 6
With household water closed and power safely off, inspect accessible rear fill hoses, faucet connections, rubber washers, the drain-hose attachment, standpipe, and floor drain without pulling the stacked appliance forward. Look for a bulged or damaged hose, a missing washer, an incorrectly seated drain hose, or water backing up from the standpipe.
Expected result: A supply connection leaks while idle, the hose or washer is damaged or missing, the drain hose is loose or inserted incorrectly, or the standpipe backs up during drain or spin.
Next step: Keep the supply closed and photograph the connection. Use plumbing service for a blocked or overflowing household drain and qualified appliance service for damaged hoses, valves, or a recurring leak; do not replace a valve or pump from the puddle location.
Stop if: Do not loosen a pressurized fitting, force a stuck hose, move the stacked unit alone, or keep the washer connected to a leaking supply.
Why this matters
Why: GE associates rear leaks with hose installation, fill or drain hose damage, and plumbing. Water backing up in the standpipe during spin points toward household plumbing, while a supply leak that continues while idle remains pressurized and urgent.
-
Check 7
If the drip begins from the bottom center after the tub fills but before movement, or if there is a loud bearing-like noise, write down the fill level, delay before the drip, whether the tub stayed dry after the cycle, and whether the basket feels rough only when power is isolated. Do not remove the front or bottom panel to verify the source.
Expected result: The bottom-center pattern repeats before motor movement, loud or grinding noise accompanies spin, the underside is wet but the hoses and pump are dry, or the source cannot be seen safely.
Next step: Keep the unit off and provide the technician the photos and timing. Ask for the first source to be traced and for the tub, seal, bearing, pump, hoses, and cabinet path to be assessed before a part is selected.
Stop if: Do not run another fill or spin, force the basket, tip the unit, or accept a pump or seal diagnosis based only on where the floor became wet.
Why this matters
Why: This pattern is similar to the exact GUAP240EM4WW public case and makes a tub, seal, bearing, or related structural path worth professional inspection, but neither the case nor the timing proves one failed part. A wet underside can also be water traveling from above.
Use your observations
Decision map
Find the observation that best matches what you see, then follow the next safe action.
-
PATH 01Next step
What you see
Water continues while the washer is idle, or a supply hose, faucet connection, valve area, or wet electrical component is visible.
Do this next
Keep power and household water isolated from a safe position and arrange qualified appliance service. Do not touch wet electrical equipment or loosen the hose.
Why this path and its safety boundary
Why it matters: A pressurized supply or inlet path is more likely than an agitation or drain-only leak, and the electrical area increases the safety risk.
-
PATH 02Next step
What you see
The first wet point is a front gasket or dispenser during fill or wash, and debris, residue, clothing, a torn seal, or dispenser backup is visible.
Do this next
Follow only the GUAP240EM4WW manual's permitted cleaning and detergent steps. Keep the unit off if the seal is damaged or the leak returns.
Why this path and its safety boundary
Why it matters: A front seal or dispenser path is more likely than a rear hose, but a damaged seal or recurring leak still needs model-specific service.
-
PATH 03Next step
What you see
The leak starts at the front during agitation with heavy suds, overfill, or a tightly packed/out-of-balance load, and no hidden or rear source is visible.
Do this next
Correct detergent amount and load only as the exact manual allows, then stop and arrange service if the leak recurs or water level is abnormal.
Why this path and its safety boundary
Why it matters: Overflow or oversudsing is plausible under GE's guidance, but leaking without soap or a repeated overfill points to a water-level or appliance service issue.
-
PATH 04Next step
What you see
The leak begins during drain or spin, the drain hose/standpipe is wet, or household plumbing backs up.
Do this next
Keep the washer off, preserve the hose and backflow photos, and use appliance or plumbing service according to the confirmed first wet point.
Why this path and its safety boundary
Why it matters: A drain-hose installation issue, hose damage, pump path, or household plumbing restriction is more likely than a front gasket. GE notes that standpipe backflow may require a plumber.
-
PATH 05Next step
What you see
The GUAP240EM4WW bottom-center drip begins after the tub reaches several inches of water but before motor movement, especially with loud or rough basket operation, or the source is underneath and hidden.
Do this next
Keep the stacked unit out of use and request qualified inspection that traces the first wet point and assesses the tub, seal, bearing, pump, hoses, and cabinet path before parts are ordered.
Why this path and its safety boundary
Why it matters: The timing is consistent with a fill-level/tub or structural leak pattern and resembles the exact-model public report, but it does not identify a seal, bearing, gearcase, or pump conclusively.
Helpful context
Understand the symptom
GUAP240EM4WW is the full model identity to provide to a GE technician. Because this is a stacked unit, the visible puddle may be several inches away from the source. GE's official leak overview directs owners to separate front-load, top-load, rear-leak, and overflow guidance, so begin with the phase when water first appeared and the first wet component you can see safely.
The exact-model public report is a useful timing pattern, not a diagnosis: water began dripping from the bottom center after the tub had filled to several inches, before the motor or lower mechanism started, and the user also reported a very loud spin and rough hand rotation. That combination supports stopping and requesting inspection of the tub, seal, bearing, and related structure; it does not justify buying a seal, gearcase, or pump from the report alone.
Only after diagnosis
Potential parts
- fill or drain hose and sealing washer
Consider a hose or washer only when the exact GUAP240EM4WW installation identity and a visible, confirmed hose connection failure support it. A rear or floor leak alone is not enough because water can travel along the cabinet or floor.
Verify the complete model and the hose end, routing, and washer configuration against GE literature; do not use a generic hose or loosen a pressurized connection as a diagnostic test. - tub, seal, bearing, or related washer structure
Consider this class only after a qualified technician traces an underside or bottom-center leak to the tub or structural path and documents the associated noise or movement finding. The exact-model public case is a pattern, not proof of a part failure.
Confirm the complete model and the diagnosed assembly before ordering; do not select a seal, bearing, gearcase, or tub from leak location, noise, or a community reply alone. - drain pump or water inlet valve
Consider a pump or valve only when the leak phase, first wet point, and model-specific inspection establish that component as the source. Do not infer it from a puddle under the unit.
Verify the exact model and failure evidence before any part selection; internal access and live testing belong to qualified service.
When checks do not resolve it
Need a professional?
Call qualified GE appliance service for a first wet point at the underside, tub, valve, pump, or cabinet; a recurring leak; a leak during idle or fill; loud or rough basket operation; a damaged seal; or any diagnosis requiring internal access. Call a plumber when household drainage backs up or cannot accept the discharge.
Safety scope: Do not unplug while standing in water, touch wet electrical equipment, loosen a pressurized hose, slide or tip the stacked appliance, remove panels, reach under the tub, bypass a lid or door control, or run a cycle with a hidden leak or wet electrical area. Stop for flooding, uncontrolled filling, a damaged cord or outlet, repeated breaker trips, or water near electrical parts.
Have this ready
- Provide GUAP240EM4WW, the full rating-label and serial details requested by the provider, the phase and fill level at first leakage, photos of the first wet point and hose or standpipe routing, whether water continues while idle, electrical-area observations, detergent and load details, noise history, and every prior repair.
Common questions
FAQ
Does water under a GE GUAP240EM4WW mean the pump is leaking?
No. GE says the apparent location can be misleading, and leaks can involve fill hoses, drain hoses, plumbing, front overflow or dispenser paths, or internal components. Find the first wet point and the cycle phase before any part decision.
What does a leak from the bottom center before the motor starts suggest?
It keeps a fill-level, tub, seal, bearing, or another structural path open. A matching GUAP240EM4WW report described that timing, but neither timing nor the community discussion proves one failed part. Keep the stacked unit off and have the source traced professionally.
Can I run the washer with the panel removed to find the leak?
No. Do not remove panels, tip the stacked unit, reach under the tub, or run it with water near electrical parts. Record the phase and visible first wet point from ordinary access and give that information to a qualified technician.
When is the leak probably household plumbing rather than the washer?
If water backs up from the standpipe or floor drain during drain or spin, GE identifies household plumbing as a possible cause and says a plumber may be needed. Photograph the backflow and keep the washer off until the drain path is corrected.
Read the exact guide
Official sources
- Front Load Washer - Leaking WaterGE Appliances · Official GE washer leak guidance used for the safety sequence, front gasket/dispenser distinction, hose checks, and household drain boundary; apply the exact GUAP240EM4WW manual for model-specific access.
- Owner's Manual & Installation Instructions | GE AppliancesGE Appliances · Official GE literature portal opened to establish that the complete model number is required to retrieve the matching manual and installation information for GUAP240EM4WW; it is not a leak diagnosis by itself.
- Washer - Leaking in RearGE Appliances · Official GE guidance used for rear hose, drain-hose installation, standpipe backflow, and supply-connection branching; it does not select a GUAP240EM4WW pump or valve.
- Washer - Leaking TroubleshootingGE Appliances · Official GE leak overview used to distinguish front-load, top-load front, rear, overflow, and oil-leak guidance; it does not identify a GUAP240EM4WW part.
- Help a sister out- GE washing machine leakingReddit r/appliancerepair · Exact GUAP240EM4WW community report used only for a phase and symptom pattern; replies and attempted repair do not establish a universal cause or replace GE model documentation.
Community feedback
Share a repair observation
Share a plain-text repair observation. Accepted observations are published automatically; this page may take a moment to update.