
On this page
Start here
Quick answer
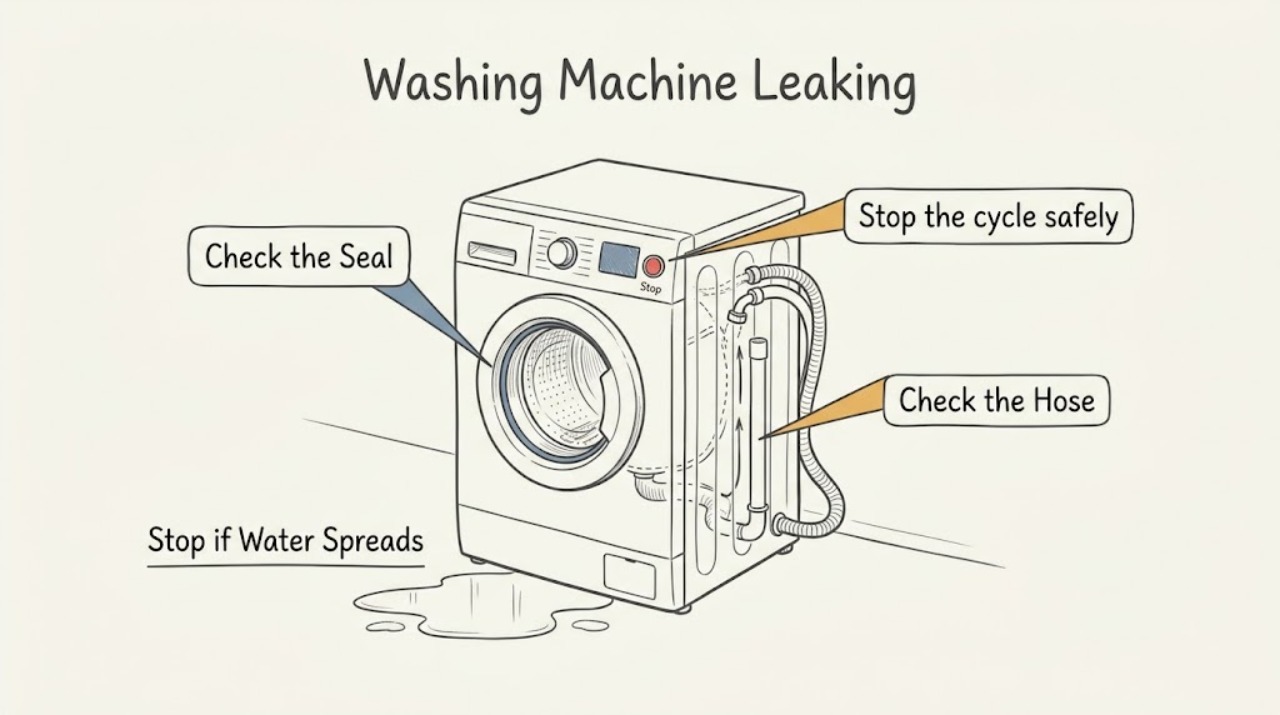
When a GE washing machine leaks, stop the cycle and identify whether water is coming from the front door or dispenser, the rear hoses or drain, underneath the cabinet, or a top-load overflow path. For flooding, GE says to pause or turn the washer off at the controls or breaker—never unplug while standing in water—then shut off the household water valves once power is safely off. Check the front-load door gasket for soil, fibers, or clothing caught in the seal; check the dispenser for buildup; inspect rear fill and drain hose connections only after shutting off the water; and check whether the standpipe or household drain backs up. A leak that continues when the washer is off, comes from underneath, returns after these external checks, or involves a damaged gasket, tub, pump, valve, or seal needs service. Do not run repeated cycles over a wet floor, reach into a moving drum, remove panels, or use a temporary clamp or tape as a repair.
Work through in order
Diagnostic checks
Use only checks that match the exact appliance or system and its official guide.
-
Stop the cycle safely and map the leak timing
Pause or turn the washer off at the controls as soon as water appears. If water is flooding or near electrical equipment, use the breaker or other safe power-isolation method without standing in water; after power is safely off, close the hot and cold household water valves. Do not open a front door or lid against moving water or reach into the drum. Record whether the leak began during filling, dispensing, washing, spinning, draining, or while idle.
Expected result: Water continues with the washer off; the leak stops when the water valves are closed; it appears only when filling or dispensing; it appears during drain or spin; or the area is flooded or near electrics.
Next step: Once the area is safe and the machine is off, trace the first wet point from the front, rear, and accessible underside without moving the washer. Continue to the matching gasket, dispenser, hose, drain, or top-load branch; arrange service if the source is hidden.
Stop if: Stop immediately for water near electrical equipment, a damaged cord or outlet, uncontrolled flooding, smoke, burning odor, or any need to move the washer through standing water.
Why this matters
Why: A leak while idle or one that stops only after the supply valves close points toward the inlet valve or supply hoses. A fill or dispenser leak follows the incoming-water path; a drain or spin leak follows the drain hose, standpipe, overflow, or tub path. Flooding changes the first priority to safe isolation and water damage control.
-
Check a front-load door gasket and detergent dispenser
For a front-load model, with the washer off and the drum stationary, inspect the rubber door gasket's visible edge, underside, and folds for fibers, soil, soap buildup, a trapped garment, tear, or displacement. Confirm the detergent drawer or door is fully closed. If the leak starts at the dispenser, remove and clean only the accessible tray and ports using the exact owner's manual; do not force the drawer or pour water into the cabinet.
Expected result: Debris or fabric is caught in the gasket; the gasket is torn or out of position; the dispenser is ajar or visibly clogged; the leak appears from the dispenser during filling; or the gasket and dispenser are clean and secure.
Next step: Remove only accessible debris, close the dispenser correctly, and run no more than one supervised model-approved check if the floor and electrical area are dry. If the leak returns or the seal is damaged, stop using the washer and arrange service.
Stop if: Do not run without a correctly seated gasket, force a drawer or door, remove the rubber seal, reach behind the drum, or continue if water is under the cabinet or near electricity.
Why this matters
Why: GE links small front-load leaks to debris on the door seal and larger dispenser-area leaks to tray or port blockage. A torn or displaced gasket, recurring dispenser backup, or clean front path with continued water points to a door, dispenser box, hose, tub, or internal seal issue.
-
Inspect rear fill hoses and the drain connection
With the washer powered off and the hot and cold household water valves closed, inspect the two fill-hose connections, rubber washers, screens, and visible hose surfaces for a drip, crack, missing washer, or damaged fitting. Check that the drain hose is secured in the correct washer port and standpipe or drain outlet without a kink or an installation that creates back-pressure. Do not pull the washer out alone or loosen a pressurized connection.
Expected result: A fill hose drips at the faucet or washer; a rubber washer is missing or damaged; the drain hose is loose, kinked, or incorrectly inserted; the standpipe backs up during drain or spin; or all visible connections are dry and correctly installed.
Next step: Keep the water valves closed until a damaged hose or connection is repaired with model-appropriate parts and installation. If the standpipe backs up, arrange plumbing service; if connections are correct but the washer leaks below, arrange appliance service.
Stop if: Stop for a pressurized spray, a split hose, water near electrical components, a hose that will not loosen safely, or any need to move the machine through water.
Why this matters
Why: GE identifies rear leaks as commonly related to hose installation, damaged hoses, or plumbing. A drip at a fill connection is different from a standpipe that overflows during drain or spin; a dry external path with water still appearing underneath shifts suspicion to an internal component.
-
Check top-load overflow, suds, and level conditions
For a top-load model leaking from the front or rear, note whether water or suds rise above the basket during filling or agitation. Check the detergent amount and type against the exact model guidance, and confirm the washer is level rather than relying on the puddle position. Do not remove the cabinet or attempt to redirect an overflow tube.
Expected result: The leak is sudsy; the washer is overloaded or out of balance; water splashes over the basket; the leak appears near a designed overflow path; or the washer leaks with no excess suds and a normal load.
Next step: Correct only the model-approved detergent or load condition and verify leveling, then stop if water returns. Do not repeat cycles to flush a suspected internal leak; arrange service for recurring or non-suds leakage.
Stop if: Stop for overflow, uncontrolled water, detergent contamination that continues, a rocking washer, a damaged cabinet, or any need to open the machine.
Why this matters
Why: GE says top-load front leaks can result from oversudsing, excessive splashing, an out-of-balance or overloaded condition, and that an uneven floor can make a rear leak appear at the front. A normal load with no suds and recurring water suggests a valve, tub, hose, seal, or other fault.
-
Decide whether the remaining leak is plumbing or appliance service
After the safe external checks, compare the source with the machine's cycle. If water backs up from the household standpipe or drain, document the plumbing path; if water originates inside the cabinet, from below the tub, or while the machine is idle with the supply closed, do not operate it to reproduce the symptom. Photograph the source and gather the model and serial information.
Expected result: The household drain overflows; the leak is from a visible hose or seal; water enters from inside the cabinet; water appears while the washer is off; or no external source can be confirmed.
Next step: Arrange a plumber for a confirmed household drain blockage or backup and GE or qualified appliance service for an internal, idle, recurring, or unidentified leak. Keep the water valves closed and the washer out of use until the source is repaired.
Stop if: Stop immediately for structural floor damage, mold-contaminated water, water near electricity, a leaking internal component, or any need to remove panels, tilt the washer, or open the tub.
Why this matters
Why: A standpipe or household drain backup is a plumbing branch, while an internal leak or idle leak with supply isolated is an appliance branch. An unconfirmed source can still hide floor or cabinet damage and should not be chased with repeated water tests.
Use your observations
Decision map
Find the observation that best matches what you see, then follow the next safe action.
-
PATH 01Safety boundary
What you see
The washer is flooding or water is near electrical equipment.
Do this next
Stop the cycle at the controls or safe breaker, never unplug while standing in water, then close the household water valves once power is safely isolated and obtain qualified help.
Why this path and its safety boundary
Safety stop: True
-
PATH 02Safety boundary
What you see
A front-load leak starts at the door gasket or detergent dispenser and debris or buildup is visible.
Do this next
Clean only the accessible gasket, folds, tray, or ports as the model manual permits, close the dispenser, and stop if the leak returns or the gasket is damaged.
Why this path and its safety boundary
Safety stop: Continue with the rear hose, drain, or internal-leak branch.
-
PATH 03Safety boundary
What you see
A rear fill or drain connection drips, is damaged, or the standpipe backs up.
Do this next
Keep the water supply closed; arrange the appropriate hose repair or plumbing service and do not run another cycle over the leak.
Why this path and its safety boundary
Safety stop: Continue with the top-load or internal appliance branch.
-
PATH 04Safety boundary
What you see
A top-load washer produces excessive suds, splashes over the basket, or leaks only with an overloaded or out-of-balance load.
Do this next
Correct the model-approved detergent or load condition and verify level; if water returns with a normal load and no excess suds, stop and arrange service.
Why this path and its safety boundary
Safety stop: Do not attribute recurring water to detergent without locating its source; continue to service diagnosis.
-
PATH 05Safety boundary
What you see
The leak is internal, occurs while idle with the supply isolated, recurs after external checks, or cannot be located safely.
Do this next
Keep the washer out of use, close the water valves, protect the floor, and arrange GE or qualified appliance service with photos and cycle details.
Why this path and its safety boundary
Safety stop: True
Helpful context
Understand the symptom
Locate the first wet point, not just the puddle
Water can travel along the cabinet or an uneven floor, so the puddle's front edge may not be the entry point. Note whether the leak occurs while filling, dispensing detergent, agitating, spinning, draining, or when the washer is idle. Compare the front door and dispenser, rear hose connections, standpipe, and underside without moving the machine into a flooded area. GE provides separate paths for these locations because each points to a different check.
Treat the door gasket and dispenser as different leak paths
On a front-load washer, a small leak at the door can be caused by fibers, soil, soap, or a garment caught in the rubber seal. Water from the dispenser can instead indicate buildup blocking the tray or ports. Clean only the accessible parts and follow the exact owner's manual; a torn gasket, distorted door, recurring dispenser backup, or leak from below the tub is not fixed by wiping the visible edge.
Protect the floor and stop before internal repairs
If water is flooding, stop the washer at its controls or breaker and shut off the water once the area is safe. Do not unplug while standing in water. Rear leaks can be a hose, drain-hose installation, or household plumbing issue, while a leak from inside the cabinet may involve a pump, valve, tub, or seal. Once the safe external checks are complete, recurring water is a service boundary rather than a reason to run another test cycle.
Safety boundary
Stop conditions
- For flooding or water near electricity, stop the cycle at the controls or safe breaker and do not unplug while standing in water.
- Close the hot and cold water valves before checking fill hoses and keep them closed for a recurring or internal leak.
- Do not reach into a moving drum, force a door or dispenser, remove the door gasket, or dismantle the cabinet as a leak test.
- Do not move the washer alone through standing water, use tape or an improvised clamp as a hose repair, or run repeated cycles over a wet floor.
- Stop for smoke, burning odor, damaged wiring, uncontrolled water, structural floor damage, mold-contaminated water, or an unidentified internal source.
Only after diagnosis
Potential parts
- front-load door gasket
Consider this class only when a front-load leak is confirmed at a torn, displaced, or permanently damaged door gasket after permitted cleaning and closure checks.
Confirm the complete GE model and gasket profile; do not remove or reseat a gasket as a generic test while the machine is powered. - detergent dispenser tray or dispenser seal
Consider this class only when a recurring dispenser-area leak remains after accessible buildup and ports are cleaned according to the model manual and qualified diagnosis identifies the component.
Verify the exact model and dispenser design; do not force the drawer or substitute a tray from another series. - fill hose or hose washer
Consider this class only when a visible fill connection or hose is damaged, missing its sealing washer, or confirmed to leak after the water supply is shut off.
Use model- and installation-appropriate hose components and check for leaks only in a safe dry area with connections properly secured. - drain hose or drain pump component
Consider this class only when the drain hose or pump path is confirmed as the source after visible installation and household plumbing checks and qualified diagnosis.
Confirm the complete GE model and isolate power before service; do not open panels or select a pump from a puddle location alone.
When checks do not resolve it
Need a professional?
Arrange GE or qualified appliance service for a torn or displaced door gasket, recurring dispenser leak, leak from underneath or inside the cabinet, water entering while the washer is off with the supply isolated, a damaged hose or valve, an unidentified source, or any leak that returns after the safe external checks. Arrange plumbing service for a household standpipe or drain backup. Stop immediately for flooding, water near electricity, a damaged cord or outlet, uncontrolled overflow, structural floor damage, or a need to remove panels, tilt the washer, or open the tub.
Common questions
FAQ
What should I do first if my GE washing machine is leaking?
Stop the cycle and locate the first wet point. For flooding, turn the washer off at the controls or safe breaker and do not unplug while standing in water; once power is safely off, close the household water valves. Then identify whether the source is the door, dispenser, rear hoses, drain, overflow, or underneath.
Can a GE front-load door gasket cause a leak?
Yes. GE says soil, soap, fibers, or clothing caught in the rubber door gasket can cause small leaks. Clean only the accessible gasket and folds as the model manual permits; a torn, displaced, or recurringly leaking gasket needs service.
Why is my GE washer leaking from the back?
GE identifies fill hoses, missing or damaged hose washers, drain-hose installation, and a household standpipe or plumbing backup as possible rear-leak paths. Close the water valves before checking fill hoses and arrange plumbing service if the standpipe overflows.
Why does a GE top-load washer leak from the front?
GE says front leakage can be related to overflow or excessive splashing, oversudsing, an overloaded or out-of-balance load, or a rear leak appearing at the front because of an uneven floor. Check the detergent and load condition and verify level before assuming a tub failure.
When should I call service for a leaking GE washer?
Call for a recurring, internal, underneath, idle, or unidentified leak, a damaged gasket, hose, valve, pump, or tub seal, or a leak that remains after safe external checks. Stop for flooding, water near electricity, uncontrolled overflow, structural floor damage, or any need to remove panels or tilt the washer.
Read the exact guide
Official sources
- Top Load Washer - Leaking Water in FrontGE Appliances · GE explains top-load front leaks from overflow or excessive splashing, oversudsing, overload or out-of-balance conditions, and uneven-floor effects.
- Washer - Leaking in RearGE Appliances · GE guidance for rear leaks covers drain-hose installation, standpipe backup, fill-hose washers and damage, water shutoff before hose checks, and service escalation.
- Washer - Leaking TroubleshootingGE Appliances · GE organizes washer leak diagnosis by front-load, top-load front, rear, overflow, and oil-leak symptoms, emphasizing that location helps choose the correct branch.
- Front Load Washer - Leaking WaterGE Appliances · GE guidance for front-load leaks covers door-gasket debris, dispenser blockage, fill and drain hoses, standpipe installation, detergent and suds, flooding safety, and service escalation.
- Washer - Leveling the LegsGE Appliances · GE explains how level, firm floor contact, and model-specific leg procedures affect washer stability and leak-source interpretation.
Community feedback
Share a repair observation
Share a plain-text repair observation. Accepted observations are published automatically; this page may take a moment to update.