
On this page
Start here
Quick answer
If a GE washing machine does not fill, first check that power is present, the cycle was actually started, and both hot and cold supply faucets are fully open. If it fills slowly or shows a fill-related message, check the accessible inlet hoses and screens only after unplugging the machine and shutting off both faucets. GE notes that model-specific fill behavior differs between top-load and front-load machines, and that some newer top-loaders use timed or load-sensing fill; a smaller water level can therefore be normal. Stop for a leak, damaged hose or cord, flooding, repeated breaker trips, or any need to open panels. If the safe external checks do not restore filling, arrange qualified GE appliance service with the full model number and observed symptoms.
Before you begin
Safety first
- This guide is limited to ordinary control checks, faucet and visible hose inspection, and model-approved external screen care after power and water are isolated. Do not open panels, test live voltage, bypass a lid or door lock, disassemble the fill valve, or continue after a leak, flood, electrical odor, or repeated breaker trip.
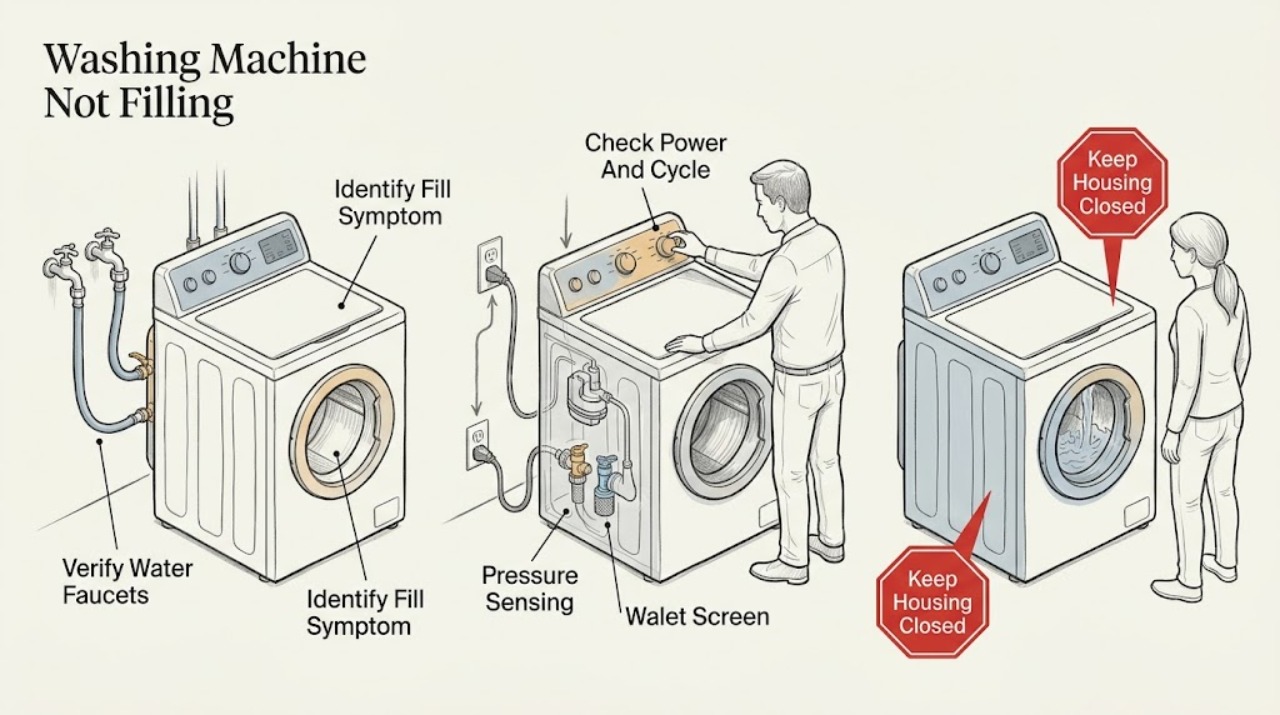
Work through in order
Diagnostic checks
Use only checks that match the exact appliance or system and its official guide.
-
Check 1
With the washer empty of loose items, select the normal cycle shown in the exact GE manual and start it once, then observe the first fill stage without changing controls repeatedly.
Expected result: Record whether the washer is top-load or front-load, whether any water enters, whether the cycle is paused, whether the controls show Fill or H2O Supply, and whether the machine starts a drain or lock-out sequence.
Next step: Continue to the power, cycle, and faucet checks when no hazard is present; use the exact manual for any displayed message or model-specific fill sequence.
Stop if: Stop for flooding, an electrical smell, sparks, a damaged cord, a loose hose, water near electrical equipment, or a machine that repeatedly trips the breaker.
Why this matters
Why: A completely dry tub, a slow trickle, a normal lower water level, and a fill-related display are different paths. A lower level can be normal on load-sensing models; no water or a timeout keeps supply, screens, controls, and service checks active.
-
Check 2
Check the household breaker or fuse and confirm the washer plug is securely connected to its intended wall outlet; then verify that Start, Pause, or the mechanical timer is set to the beginning of the chosen cycle.
Expected result: Note whether the controls have power, whether the breaker or fuse is open, whether Start or Pause was pressed, and whether a mechanical timer is pushed in or not at the cycle start position.
Next step: Restore a safe connection or restart the cycle once if there is no hazard; if the breaker opens again or the washer remains unresponsive, leave it off and arrange qualified service.
Stop if: Do not reset a repeatedly tripping breaker, use an extension lead, touch exposed wiring, or remove a control or cabinet cover.
Why this matters
Why: No power or a cycle that was never started can look like a no-fill fault. A powered washer with a correctly started cycle and no water shifts attention to faucets, hoses, screens, pressure, or service.
-
Check 3
From the rear connection area without moving the washer, verify that both the hot and cold supply faucets are fully open and that the visible inlet hoses are connected without sharp kinks or crushing.
Expected result: Record whether one faucet is closed, whether hot or cold supply is absent, whether a hose is kinked, and whether there is any drip or spray at a connection while the washer is idle.
Next step: Close both faucets and arrange hose or plumbing service for a leak or damaged hose; if the connections are dry and open, continue with the safe screen and pressure branch.
Stop if: Stop for active leaking, a split hose, corroded connection, flooding, a hose that will not turn without force, or a need to pull the washer into an unsafe position.
Why this matters
Why: A closed faucet, missing hot or cold supply, or a restricted hose can stop or slow filling. A wet connection or damaged hose is a leak-risk condition, not an invitation to start a cycle and watch it worsen.
-
Check 4
If the model manual permits ordinary hose access, unplug the washer, turn both supply faucets off, place a towel and container below the connections, and inspect the hose and washer inlet screens for sediment or scale without forcing or drilling them.
Expected result: Note whether a screen is visibly blocked, damaged, missing, or clean; also record whether the hose connection seals are intact and whether the hose can be reattached without cross-threading.
Next step: Only perform the model-approved gentle rinse or soft-brush cleaning, reinstall the screens and hoses, turn the faucets on slowly, check for leaks, and retry once; arrange service if filling remains absent or slow.
Stop if: Do not pry out a screen unless the exact GE procedure allows it, use sharp tools to enlarge an opening, open the cabinet, or reconnect a hose that does not seat squarely.
Why this matters
Why: Sediment or scale at an inlet screen can cause slow filling or a timeout. A damaged screen, uncertain model arrangement, or clean screens with no fill keeps a pressure, fill-valve, sensor, or control fault in the professional branch.
-
Check 5
After the faucets, hoses, and screens pass the safe check, observe whether the washer fills at a steady rate and compare the result with the model's installation and fill guidance; do not create a pressurized hose test by disconnecting a live connection.
Expected result: Record no flow, a weak flow from one side, a slow flow from both sides, a normal flow with a low programmed level, or a fill that times out and shows an error.
Next step: Use the exact manual for model-specific pressure and water-level information; request qualified appliance or plumbing service when flow is inadequate or the washer still cannot reach its fill sequence.
Stop if: Stop if testing would require a gauge on a live connection, moving the washer over wet flooring, opening a valve or control, or continuing after a leak or flood risk.
Why this matters
Why: One-sided or weak flow supports a supply, hose, or screen restriction. Normal flow with a smaller level may reflect load sensing or the model's fill algorithm. Confirmed water supply with a persistent fill error points toward sensing, valve, or control service.
-
Check 6
Find the full model number from the GE rating label and compare the washer type, display message, fill behavior, and the completed safe checks with the exact owner manual.
Expected result: Record the model number, top-load or front-load style, cycle and options, whether water entered, faucet and hose status, screen condition, any error text, and whether the issue is no fill or slow fill.
Next step: Provide the complete record to qualified GE appliance service and ask for diagnosis of the supply path and fill controls; do not choose an internal part from the symptom alone.
Stop if: Stop further troubleshooting if the manual calls for cabinet access, live testing, bypassing a lid or door lock, or any procedure outside ordinary safe access.
Why this matters
Why: The model number determines the fill algorithm, access instructions, and compatible diagnostic path. A persistent no-fill result after the external checks supports service for the inlet valve, pressure or water-level sensing, controls, or another model-specific fault.
Use your observations
Decision map
Find the observation that best matches what you see, then follow the next safe action.
-
PATH 01Next step
What you see
The machine fills and runs, but the water level looks lower than an older washer.
Do this next
Check the exact model's load-sensing or water-level guidance before treating the level as a fault; newer GE top-load fill behavior can use a timed or sensed amount.
-
PATH 02Next step
What you see
The controls have no power, the breaker is open, or the cycle was paused or never started.
Do this next
Restore only a safe plug, breaker, or cycle setting once. If power drops again or controls remain unresponsive, leave the washer off and arrange qualified service.
-
PATH 03Next step
What you see
One or both hot and cold faucets are closed, supply is absent, or a visible hose is kinked.
Do this next
Correct the faucet or hose condition only when there is no leak and safe ordinary access; otherwise close the faucets and arrange plumbing or appliance service.
-
PATH 04Next step
What you see
An inlet screen is visibly blocked and the model manual permits its safe external cleaning.
Do this next
Unplug the washer, shut off both faucets, clean the screen only by the model-approved gentle method, reconnect without cross-threading, check for leaks, and retry once.
-
PATH 05Next step
What you see
Both faucets are open and screens are clear, but water enters slowly or a fill timeout remains.
Do this next
Use the exact model installation guidance to assess household pressure and restrictions; arrange plumbing or appliance service rather than opening the fill valve or control.
-
PATH 06Next step
What you see
Supply is confirmed but an H2O Supply or similar fill message persists, or the washer stays dry after safe checks.
Do this next
Leave the washer off and arrange qualified GE appliance service for the water valve, sensing, controls, or another model-specific fault; provide the full model number and all observations.
Helpful context
Understand the symptom
First distinguish no water from a normal low-water fill
A newer GE top-load washer may use automatic load sensing or a selected load-size setting and may use less water than an older machine. That is different from a tub that remains dry, a fill that times out, or a machine that shows a fill-related message. Note the washer style, whether any water enters, whether the drum or basket begins its expected sequence, and whether the problem is no fill or slow fill before changing settings.
Keep the water and electrical checks at ordinary safe access
GE's support instructions identify the hot and cold faucets, power connection, cycle controls, and inlet screens as the initial checks. Unplug the washer before cleaning or disconnecting a hose, turn both water faucets off, and protect the floor from residual water. Do not remove a cabinet panel, bypass a lid or door interlock, energize exposed wiring, or dismantle a fill valve to prove a fault.
A fill error can involve supply, screens, pressure, or sensing
Both a restricted water path and a control or pressure-sensing issue can prevent the washer from reaching its intended fill. GE's fill guidance calls for sufficient water pressure and clear screens, while its H2O Supply guidance says a confirmed open supply with the message still present needs service. Use the exact model manual for the machine's fill algorithm and any display message instead of assuming every GE washer uses the same sequence.
Only after diagnosis
Potential parts
- inlet hose screen
Consider this category only if the exact model uses a replaceable screen and inspection confirms the screen is damaged or cannot be cleaned, while the supply path is otherwise adequate.
Confirm the full model number and the manufacturer's fit information; do not enlarge an opening or omit the screen. - water inlet hose
Consider this category only if a hose is visibly split, kinked beyond recovery, leaking, or otherwise unsuitable after the water is shut off.
Confirm hose length, connection type, material, and exact model or installation requirements before ordering; inspect for leaks after safe reconnection. - water inlet valve
Consider this category only after qualified diagnosis confirms that the washer has adequate supply and the internal inlet valve is not opening or is leaking.
Use the full model number and professional diagnosis; do not infer valve failure from a dry tub alone or install an unverified part.
When checks do not resolve it
Need a professional?
Arrange qualified appliance or plumbing service when both faucets and the safe external checks pass but the washer still does not fill, when filling is persistently slow, when a fill-related display remains, or when the model requires cabinet access. Close the water faucets and leave the washer unplugged for active leaking, a split hose, flooding, damaged cord, repeated breaker trips, electrical odor, or any need to bypass an interlock.
Safety scope: This guide is limited to ordinary control checks, faucet and visible hose inspection, and model-approved external screen care after power and water are isolated. Do not open panels, test live voltage, bypass a lid or door lock, disassemble the fill valve, or continue after a leak, flood, electrical odor, or repeated breaker trip.
Common questions
FAQ
Why does my GE washing machine have no water entering?
Check power, the started cycle, both hot and cold faucets, and visible hose restrictions first. If those pass, unplug the washer, shut off both faucets, inspect the inlet screens using the model-approved method, and arrange service if the machine remains dry.
Why is my GE washer filling more slowly than expected?
Low household pressure, a kinked hose, or sediment at an inlet screen can slow filling. GE also notes that fill behavior is model-specific and that a newer load-sensing top-loader may use less water than an older washer.
Should both water faucets be open on a GE washer?
GE's no-fill guidance says to make sure the hot and cold washer faucets are fully open. A missing hot or cold supply can produce a no-fill or slow-fill symptom depending on the model and selected cycle.
Can I replace the GE washer fill valve myself?
Do not open the cabinet or replace an internal valve from the symptom alone. Record the full model number and the results of the safe external checks, then arrange qualified service for valve, sensing, wiring, or control diagnosis.
Read the exact guide
Official sources
- Front Load Washer - No FillGE Appliances · Supports power, hot and cold supply, inlet screens, cycle state, and service boundary for GE front-load washers.
- Washer - Slow Water FillGE Appliances · Supports isolating low pressure or clogged screens and the safe sequence for power, water shutoff, hose removal, screen care, leak check, and service.
- Support for GE Washers and DryersGE Appliances · Supports finding model or serial information and using model-specific manuals and support resources.
- Top Load Washer - Fill FunctionGE Appliances · Supports distinguishing normal sensed water levels from slow or restricted filling and using model-specific pressure guidance.
- Washer - H2O Supply ErrorGE Appliances · Supports checking the water supply and escalating a persistent supply message to service.
- Top Load Washer - No FillGE Appliances · Supports power, faucet, cycle, inlet-screen, lock-out, and service checks for GE top-load washers.
Community feedback
Share a repair observation
Share a plain-text repair observation. Accepted observations are published automatically; this page may take a moment to update.