
On this page
Start here
Quick answer
Stop the Haier dryer and let it cool if the sound is accompanied by a burning smell, smoke, scraping, metal-on-metal contact, a loose drum, or excessive shaking. With power off and the drum stopped, remove loose objects from the drum, check that the load is not overfilled, confirm the dryer is level and all four feet support it, and make sure the door closes completely. Check the lint filter and the visible external vent for lint or obstruction, but do not open the cabinet or reach around a moving drum. A brief sound from clothing or a load-related vibration may stop after the load is corrected; a noise that continues with an empty drum, a drum that turns freely when it should not, a slipping or broken drive, repeated overheating, or any persistent abnormal sound needs qualified dryer service.
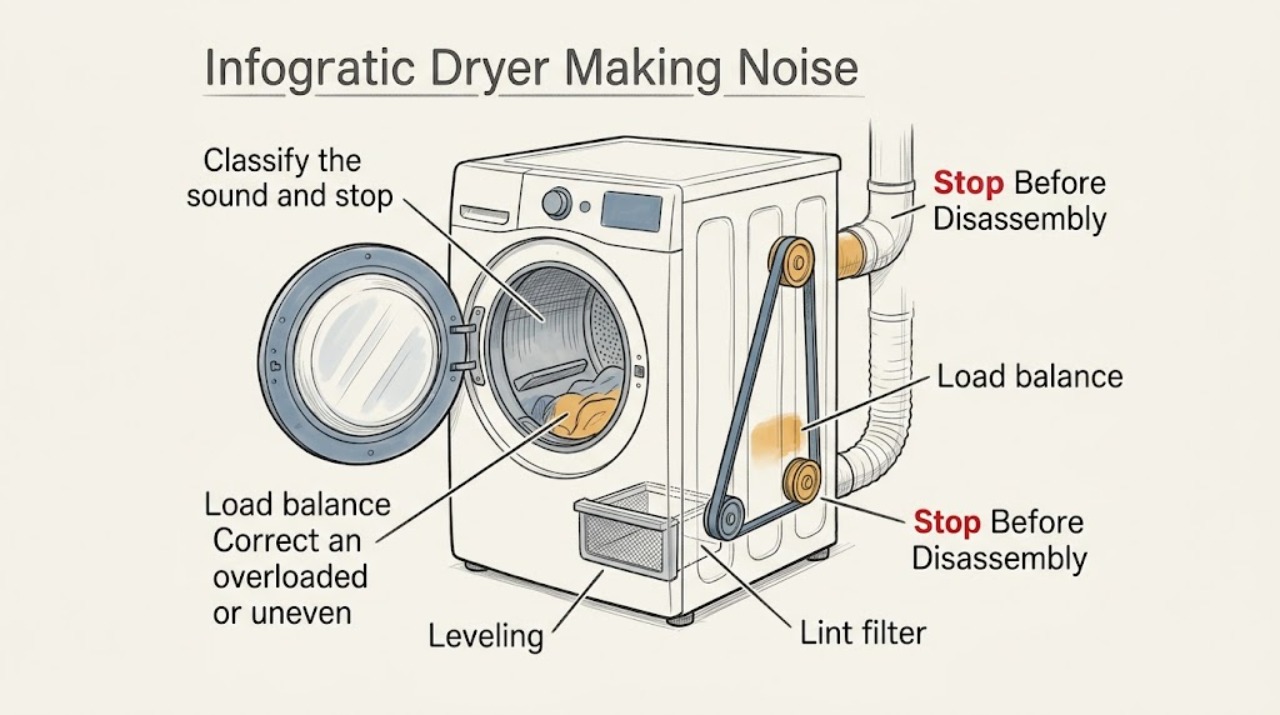
Work through in order
Diagnostic checks
Use only checks that match the exact appliance or system and its official guide.
-
Classify the sound and stop for heat or fire symptoms
Press the normal Stop or Power control and wait for the drum to stop. From outside the cabinet, note whether the sound is a rattle that follows clothes, a thump or vibration, a squeal or scrape, a grinding sound, or a bang. Look and smell for smoke, a burning odor, scorched fabric, a very hot cabinet, or a blocked front or vent area.
Expected result: The sound is limited to a load-related rattle or mild vibration with no heat symptom, or there is scraping, grinding, smoke, burning odor, scorched fabric, extreme heat, or violent movement.
Next step: For smoke, burning odor, scorching, extreme heat, or violent movement, leave the dryer off and disconnect power or gas only if it is safe; arrange qualified service. Otherwise empty or unload the dryer after it cools and inspect the drum and load.
Why this matters
Why: A load or loose-object noise can be separated from a mechanical or airflow fault by changing the load only after the dryer is stopped. Heat, smoke, or violent movement is a safety boundary, not a noise to test repeatedly.
-
Check the drum and clothing for loose objects
With the dryer stopped and power safely isolated, remove the load and inspect pockets, zippers, hooks, coins, fasteners, and any object that could strike the drum. Turn the empty drum by hand only as far as the model instructions allow and note whether a loose object is visible, the drum rubs at one point, or the drum feels unusually loose. Do not remove the drum, panels, or internal guards.
Expected result: A coin, fastener, garment part, or other loose object is present, or the empty drum still scrapes, grinds, wobbles, or feels abnormally loose.
Next step: Remove only the loose object or garment accessory and perform no more than one short supervised retest with a small, balanced load. If the empty drum is noisy, wobbles, or turns freely in an abnormal way, stop using the dryer and arrange service; do not open the cabinet or replace a drive part yourself.
Why this matters
Why: A loose object can produce a load-specific rattle, while a noise that remains with the drum empty points toward the drum support, idler, motor, belt, or another internal mechanical area. A free-turning drum can also indicate a loose or broken belt according to Haier's drum guidance.
-
Correct an overloaded or uneven load
Compare the load with the model manual and remove bulky or heavy items if the drum is packed or the load is concentrated on one side. Do not run the dryer more than the manual permits; separate bulky items from ordinary clothing and check that no single heavy item is binding the drum. Close the door fully before any retest.
Expected result: The dryer was overloaded, contained heavy wet items, or the load was modest and evenly distributed from the start.
Next step: Run one short cycle with a properly sized, balanced load only if there was no heat or mechanical stop symptom. Stop immediately if the noise returns, the drum hesitates, or the dryer shakes; arrange service rather than repeatedly reducing and restarting loads.
Why this matters
Why: Haier says excessive loading can cause vibration and that heavy wet items can make the drive belt slip. If the sound disappears with a smaller, balanced load, the original load was a likely trigger; a persistent sound without that load needs a different branch.
-
Check level, feet, door, and installation surroundings
With the dryer empty and stopped, check that it stands firmly on a solid floor, does not rock, and has all four feet supporting its weight. Confirm that the door closes and latches completely and that nothing is touching the cabinet or obstructing the front. Do not reach under a powered appliance or move a stacked or heavy dryer alone.
Expected result: The dryer rocks, a foot is not supporting it, the floor is unstable, the door does not latch, or the cabinet is clear, stable, and properly closed.
Next step: Have the dryer safely leveled or the installation corrected according to the manual; do not improvise shims or dismantle a stack. If the door cannot latch normally, stop and arrange service. If the dryer is stable and the door closes, inspect lint and the visible exhaust path.
Why this matters
Why: Haier identifies leveling and equal support at all four legs as checks for excessive vibration. A door that is not completely closed can stop drum operation, while a stable cabinet and secure door make those explanations less likely.
-
Inspect the lint filter and external vent for airflow restriction
After the dryer is cool, clean the lint filter as directed by the model manual and inspect the accessible external vent opening for lint or an obstruction. Keep the front and vent path clear; do not insert tools deep into the duct, remove ductwork from a gas dryer, or open the cabinet to inspect a blower or internal duct.
Expected result: The lint filter or external vent is visibly restricted, or the accessible airflow path is clear while the noise, heat, or vibration remains.
Next step: Clear only the accessible filter or external opening and do not run the dryer if it remains unusually hot or smells burned. If airflow is clear but the noise continues, leave the dryer off and arrange service for internal airflow or mechanical diagnosis.
Why this matters
Why: Haier states that lint and an obstructed external vent reduce airflow and can contribute to longer operation; its stop guidance warns that a blocked front can cause overheating. Airflow maintenance may remove a heat-related symptom, but it does not prove that a mechanical noise is fixed.
-
Perform one controlled retest and set the service boundary
Only if the dryer is cool, stable, correctly closed, free of heat or electrical symptoms, and loaded within the manual's limit, run one brief supervised cycle from outside the appliance. Listen for whether the sound follows the clothes, occurs only during startup, or continues through the cycle; stop the cycle if the drum stalls, the sound becomes a scrape or grind, the cabinet overheats, or the dryer shakes violently.
Expected result: The dryer runs quietly with the corrected load and installation, or the sound persists with an empty or balanced load, the drum stalls or turns freely, or abnormal heat or movement returns.
Next step: If the retest is normal, monitor the next load and keep the lint path clear. If the sound or heat returns, stop using the dryer and arrange qualified service; provide the sound type, when it occurs, load size, drum behavior, level, door, lint, and vent observations.
Why this matters
Why: A quiet controlled retest supports a temporary load, loose-object, or leveling issue. Persistent noise or a drive symptom with those conditions corrected points toward an internal belt, drum support, motor, idler, blower, or control fault that cannot be safely isolated by external checks.
Use your observations
Decision map
Find the observation that best matches what you see, then follow the next safe action.
-
PATH 01Next step
What you see
A loose object or garment fastener caused a load-specific rattle and the noise disappears after the dryer is emptied and the item is removed.
Do this next
Run only one brief supervised retest with a correctly sized load. Stop if the sound returns with the drum empty or with ordinary clothing.
-
PATH 02Next step
What you see
The dryer was overloaded, unstable, or not level, and the sound stops after a safe load or installation correction.
Do this next
Keep loads within the model limit and monitor. Arrange service if the dryer still vibrates, walks, or makes a mechanical sound.
-
PATH 03Next step
What you see
The door does not latch, the drum stalls, or the drum turns freely in a way the model does not describe as normal.
Do this next
Leave the dryer off and arrange qualified service; do not bypass the door switch or open the cabinet to inspect the belt or drive.
-
PATH 04Next step
What you see
The lint filter or external vent is blocked, or the dryer becomes unusually hot or stops mid-cycle.
Do this next
Clear only accessible lint and keep the dryer off if heat persists. Arrange service if overheating, noise, or stopping returns.
-
PATH 05Next step
What you see
The noise persists with an empty or balanced drum, or scraping, grinding, burning smell, smoke, scorching, or violent movement is present.
Do this next
Stop immediately, disconnect power or gas only if safe, and arrange qualified dryer service. Do not continue test cycles or dismantle the appliance.
Helpful context
Understand the symptom
The location and timing of the sound are more useful than a generic label such as rattling. A noise that follows one garment or a loose object can disappear when the drum is emptied. A thump or vibration that changes with load size points toward load balance or leveling. A scrape, squeal, grinding sound, or noise that remains with an empty drum points toward a mechanical or drive issue and should not be diagnosed by repeatedly running the dryer.
Keep the user checks at the door, drum, lint filter, visible vent, controls, and cabinet surroundings. Unplug or disconnect power only when the appliance is stopped and it is safe to do so. Never remove the cabinet, reach into a moving drum, work on a gas connection, bypass the door switch, or keep running a dryer that smells hot or burns clothing.
When checks do not resolve it
Need a professional?
Arrange qualified dryer service when a noise persists with an empty or balanced drum, the drum turns freely or stalls, the door will not latch, the dryer repeatedly overheats or stops, or the sound suggests a belt, drum support, motor, idler, blower, or internal wiring fault. Stop immediately for smoke, burning odor, scorching, violent movement, damaged power or gas connections, or any unsafe condition.
Common questions
FAQ
Why is my Haier dryer making a rattling or thumping noise?
Stop the dryer and check for coins, fasteners, or a garment accessory in the drum, then check whether the load is too large or uneven and whether the dryer rocks. A sound that remains with the drum empty, or any scraping or grinding, needs qualified service.
Can an overloaded Haier dryer make noise?
Yes. Haier identifies overloading as a cause of vibration, and heavy wet items can cause drive-belt slip. Stop the dryer, let the drum stop, reduce and rebalance the load within the model limit, and stop if the sound or shaking returns.
When should I stop using a noisy Haier dryer?
Stop immediately for smoke, burning odor, scorching, violent shaking, extreme heat, a damaged cord or gas connection, scraping or grinding, or a drum that stalls or turns freely abnormally. Leave the dryer off and arrange qualified service rather than removing the cabinet or bypassing a safety switch.
Read the exact guide
Official sources
- Haier Dryer - Vibrating or ShakingHaier Appliances · Haier dryer load size, leveling, feet, and vibration troubleshooting
- Haier Dryer - Dry Time Too LongHaier Appliances · Haier dryer load, lint filter, external vent, airflow, and service troubleshooting
- Haier Dryer - Drum Not TurningHaier Appliances · Haier dryer door, rack-dry setting, load, drum, and drive-belt troubleshooting
- Haier Dryer - Stops Mid-CycleHaier Appliances · Haier dryer door, power, blocked front, overheating, and mid-cycle stopping checks
Community feedback
Share a repair observation
Share a plain-text repair observation. Accepted observations are published automatically; this page may take a moment to update.