
On this page
Start here
Quick answer
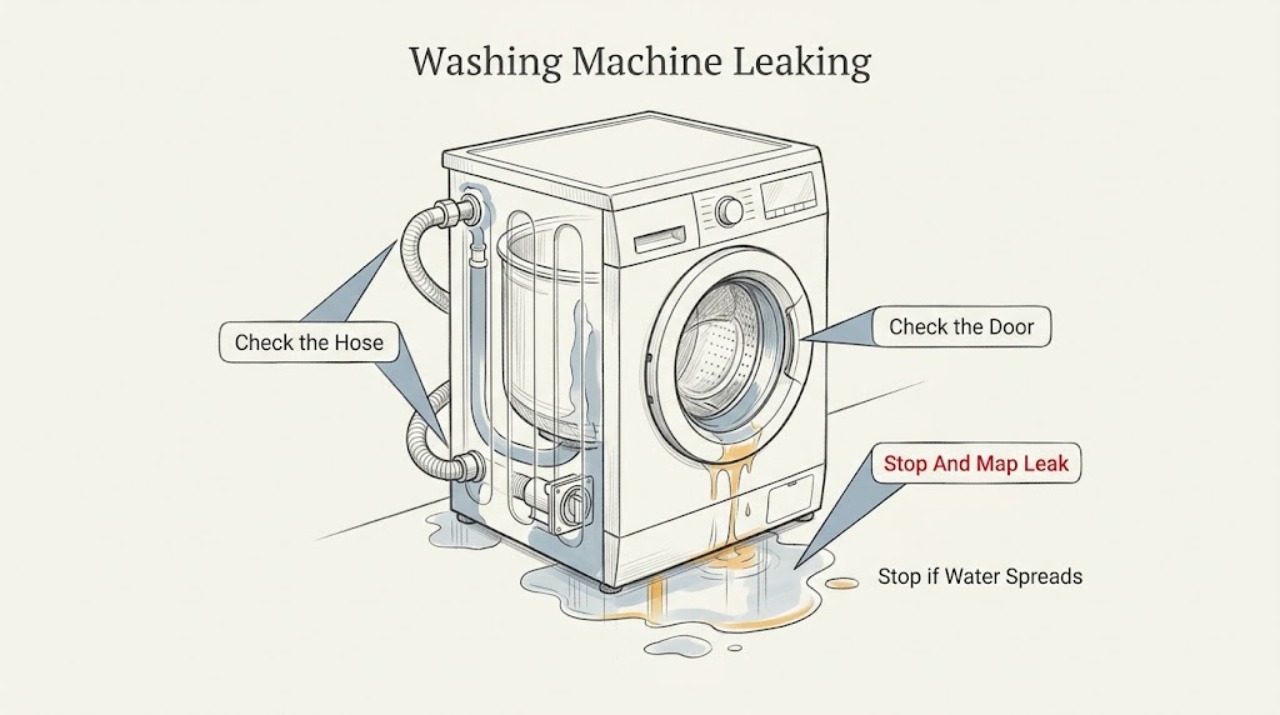
Stop the cycle, keep clear of any water near the plug or outlet, close the water taps, and identify when and where the leak begins before moving the washer. A leak at the rear during filling points to an inlet hose, faucet connection, or valve area; a front leak can come from the door seal or detergent drawer; a leak during draining or spinning points to the drain hose, filter, pump path, or an internal tub seal. Haier says to unplug before checking a fault, keep inlet connections firm, keep the drain path correctly positioned and leak-free, and arrange service when the leak continues, the water level becomes critical, or the source is not accessible. Do not run another cycle to test a leak that reaches electrical parts, produces a burning smell or sparks, or trips the breaker.
Before you begin
Safety first
- This article supports safe external observation, water shutoff, and only the filter or hose steps explicitly covered by the exact model instructions. Do not open panels, access a pump or valve, test live wiring, move a wet appliance, or continue using a washer with an unresolved leak.
Work through in order
Diagnostic checks
Use only checks that match the exact appliance or system and its official guide.
-
Check 1
Stop the washer, cancel the cycle if the controls respond, close both water taps, and disconnect power only from a dry, safe position; do not touch a wet plug, outlet, or control. Without moving the machine through pooled water, look from the front and sides and place a dry towel only where it is safely reachable.
Expected result: Record whether water first appears at the rear inlet connection while filling, at the door or dispenser during washing, at the drain hose or lower filter while draining, or under the cabinet with no visible external source; also record whether filling continues after the cycle is stopped.
Next step: Keep the taps closed and the washer isolated while following only the matching branch below; arrange appliance service immediately for continued filling, uncontrolled flow, water near electrical parts, smoke, burning odor, sparks, or a tripped breaker.
Stop if: Do not pull the washer through standing water, reach behind a wet appliance, restart it to reproduce the leak, or touch electrical equipment with wet hands.
Why this matters
Why: The cycle phase and first wet point separate a supply-side leak from a door or dispenser leak and from a drain or internal leak. Water that continues entering after a stop command, or a leak whose source cannot be seen without moving or opening the cabinet, is not a safe repeated-test condition.
-
Check 2
With the taps closed and power isolated, inspect the visible faucet-to-hose and hose-to-washer connections from outside the cabinet. Check for a loose nut, displaced sealing cushion, cracked or swollen hose, damaged connector, kink, or moisture that begins at the connection rather than along the cabinet.
Expected result: Classify the inlet path as dry and secure, loose but intact, leaking from a damaged seal or hose, or still leaking with the taps closed; note whether the moisture returns only when a tap is opened under a controlled, dry observation.
Next step: If the connection is visibly loose and the exact model instructions allow it, reseat the hose and hand-tighten it as specified, then dry the area and check once with the tap opened while standing clear. If a seal or hose is damaged, the connection will not stay dry, or the fitting needs force, keep the tap closed and request service with photos and the model identity.
Stop if: Do not overtighten, bend the hose sharply, remove a sealing cushion, open the inlet valve, or operate the washer when the hose is cracked, swollen, or spraying.
Why this matters
Why: A loose or incorrectly seated inlet connection can leak during filling, while a split hose, missing cushion, or damaged connector needs the correct replacement or service. A leak with the taps closed can be residual water or a different source; it does not justify opening the valve or cabinet.
-
Check 3
For a front leak that starts during filling or washing, wait until the drum is still and the water is controlled, then inspect the visible door gasket, glass contact area, and detergent drawer or compartment. Remove only loose lint, hair, or detergent residue that is reachable without a tool, and verify that the door closes without fabric trapped in the seal.
Expected result: Look for a torn, folded, displaced, or pierced gasket; an object caught at the door; a drawer that is overfilled with residue; water or foam tracking from the drawer; or a clean, intact front with water appearing from below it.
Next step: Use the exact model's care instructions for cleaning the gasket or drawer and use only the detergent type and amount specified there. If the seal is damaged, the drawer continues to overflow, foam persists, or water appears from underneath, stop use and arrange qualified service.
Stop if: Do not pry the gasket off, remove cabinet panels, use sharp tools, mix cleaning chemicals, or run a cycle with a torn seal or water reaching electrical components.
Why this matters
Why: A damaged or obstructed door seal can let wash water escape at the front, while excess or unsuitable detergent can create foam that spills from the drawer. A clean front with water emerging below the cabinet points to the drain route, tub, or another concealed source rather than more drawer cleaning.
-
Check 4
If the leak begins during draining or spinning, inspect the exposed drain hose and its connection without opening the cabinet. Look for a hose that is kinked, crushed, disconnected, cracked, submerged, or not secured as the model instructions show. If the model provides a user-accessible drain filter, isolate power, close the taps, control residual water with the specified container or drain hose, and clean the filter only by the manufacturer's procedure.
Expected result: Record whether the drain path is clear and dry, whether water escapes at a hose joint, whether the filter is blocked or not fully seated, or whether the leak remains below the cabinet after the external path is checked.
Next step: Correct only a visible hose position or a filter installation that the model instructions explicitly cover, dry the area, and monitor for recurrence without a full-load cycle. If the filter is damaged, cannot be reseated, water cannot be controlled, or the lower leak returns, keep the washer out of service and request a technician.
Stop if: Do not loosen a filter with hot or uncontrolled water, reach into a pump, remove the pump or cabinet, run the washer with a missing filter, or improvise a drain-hose extension or seal.
Why this matters
Why: A blocked, badly positioned, or loose drain path can retain or release water during emptying, and Haier warns that a filter not installed in place can cause leakage. A dry external path with a continuing lower leak suggests a pump, tub, internal hose, or seal issue requiring service.
-
Check 5
After the taps remain closed and the washer is dry and isolated, review the load and detergent history rather than restarting immediately. Compare the reported leak phase with whether foam rose into the drawer or tub, the machine displayed a water-level warning, the water entered without a command, or the first wet point was below the tub.
Expected result: Classify the event as a one-time foam or overfill event, a repeated leak during fill, a repeated leak during drain or spin, water entering while idle, or an unknown source beneath the cabinet.
Next step: Follow the manual's detergent and rinse guidance only after the leak is fully controlled and no electrical hazard exists; otherwise provide the phase, location, error display, photos, model, and whether the taps were closed to qualified service. Do not resume normal washing until the source is confirmed and the area is safe.
Stop if: Stop immediately for continued filling, rising water or foam, water near the outlet or wiring, burning odor, smoke, sparks, abnormal heat, a breaker trip, or any need to open the cabinet or test live electrical parts.
Why this matters
Why: A one-time foam event may be related to detergent amount, detergent type, rinsing, or a restricted drain path. Repeated filling, water entering while idle, a critical-level indication, or a leak from the tub or cabinet suggests a valve, sensor, pump, tub, or internal hose fault that ordinary cleaning will not prove or repair.
Use your observations
Decision map
Find the observation that best matches what you see, then follow the next safe action.
-
PATH 01Safety boundary
What you see
Water begins at the faucet, inlet hose, or washer inlet connection during filling.
Do this next
Close the taps, inspect the visible connection and sealing cushion, and reseat only as the model instructions allow. Replace a damaged hose or fitting through qualified service.
Why this path and its safety boundary
Why it matters: The pressurized supply path or its seal is the leading branch.
Safety stop: Do not use a spraying, cracked, swollen, or repeatedly leaking inlet hose, and do not open the valve or cabinet.
-
PATH 02Safety boundary
What you see
Water or foam first appears at the front door, gasket, detergent drawer, or compartment while washing.
Do this next
Inspect and clean only reachable surfaces according to the model care instructions, correct detergent use, and stop for a torn gasket or recurring overflow.
Why this path and its safety boundary
Why it matters: A door-seal obstruction or damage, drawer residue, detergent amount or type, or foam event is more likely than a rear hose leak.
Safety stop: Do not pry the gasket, use sharp tools, mix cleaners, or run the washer when water reaches controls or electrical parts.
-
PATH 03Safety boundary
What you see
Water appears at the drain hose, lower filter, or pump area during draining or spinning.
Do this next
Keep power isolated and water controlled; correct only the exposed hose position or the filter procedure described for the exact model, then request service if the leak returns.
Why this path and its safety boundary
Why it matters: A kink, blockage, loose connection, submerged or poorly positioned drain hose, or incorrectly seated filter can prevent controlled drainage or allow leakage.
Safety stop: Do not loosen a filter with hot or uncontrolled water, run with a missing filter, or access a pump or cabinet without qualified support.
-
PATH 04Safety boundary
What you see
Foam rises or spills from the drawer or tub and the leak coincides with detergent use or spinning.
Do this next
Do not repeat a full cycle. After the area is safe and the water is controlled, follow the manual's detergent and rinse guidance; request service when foam persists, water level is abnormal, or the drain path is not clear.
Why this path and its safety boundary
Why it matters: Excess or unsuitable detergent, insufficient rinsing, poor drainage, or a water-level sensing fault can make foam overflow; a foam event does not prove a split hose.
Safety stop: Stop for rising water, continued filling, a critical-level error, electrical contact, or any need to open the cabinet or test a sensor.
-
PATH 05Safety boundary
What you see
The leak comes from below the cabinet, continues with the taps closed, or is accompanied by water near electrical parts, burning odor, smoke, sparks, heat, or a breaker trip.
Do this next
Keep the taps closed and the washer isolated, keep people away from the wet area, and arrange qualified appliance service. Preserve the error display and take photos only from a dry, safe position.
Why this path and its safety boundary
Why it matters: An internal hose, pump, tub, valve, sensor, wiring, or another fault is possible and cannot be safely identified by external cleaning.
Safety stop: Do not move the wet appliance, restore power, bypass a breaker, remove panels, or test live wiring.
Helpful context
Understand the symptom
First locate the leak without making the water hazard worse
A washer can release water from a pressurized inlet connection while filling, from the front door or detergent drawer while washing, or from the drain and pump route while emptying. Water left under the cabinet can travel away from the actual source, so note the cycle phase and the first wet point that can be seen from ordinary standing access. If water is near the plug, receptacle, control panel, or other electrical equipment, do not reach through it to disconnect power; isolate the circuit only when it can be done safely and keep people away until the area is dry and assessed.
Use the model instructions for filters and access panels
Haier's filter guidance uses a controlled drain into a container before the filter is loosened and warns that the filter must be installed correctly or it can leak. Models differ: some have a small drain hose and others do not. Do not remove a filter, hose, rear cover, pump, or cabinet panel while water is uncontrolled, the drum is hot, the washer is powered, or the model instructions do not describe that access.
Foam and overflow are a separate branch from a split hose
Excess detergent, an unsuitable high-foam product, poor rinsing, a blocked drain path, or a water-level sensing problem can push foam or water toward the drawer or over the tub. Haier recommends following the manual's detergent amount and compartment, checking the drain path and filter, and using an appropriate rinse or cleaning procedure. If foam or water keeps rising, the machine fills by itself, an error indicates a critical level, or the cause is not just detergent, stop and request service rather than repeating full cycles.
Safety boundary
Stop conditions
- Stop and isolate the washer when water reaches a plug, outlet, control panel, wiring, or other electrical equipment; do not touch wet electrical equipment.
- Close the water taps and request service for continued filling, rising water, an indicated critical level, or a leak that continues with the taps closed.
- Do not run another cycle to reproduce a leak, move the appliance through pooled water, or reach behind a wet appliance.
- Do not open the cabinet, pump, inlet valve, wiring, or live electrical parts; do not bypass a breaker or improvise a repair.
- Stop for burning odor, smoke, sparks, abnormal heat, a tripped breaker, a torn door seal, a cracked hose, or an uncontrolled filter drain.
Only after diagnosis
Potential parts
- water inlet hose or sealing cushion
Consider this category only if inspection confirms the leak starts at the inlet connection and the hose, connector, or sealing cushion is cracked, missing, displaced, or unable to stay dry after the model-approved reseating procedure.
Confirm the exact Haier model, connector arrangement, hose specification, and seal design before ordering; do not compensate for a mismatch by overtightening. - washing-machine door gasket
Consider this category only when a front-load washer has a confirmed torn, pierced, or permanently deformed door gasket and the leak begins at that gasket.
Confirm the exact model and gasket fit with Haier or a qualified technician; a drawer or drain leak should not be treated as a gasket failure. - drain hose or drain filter
Consider this category only when the external drain path or filter is confirmed damaged, missing, blocked beyond approved cleaning, or unable to seal after the correct procedure.
Confirm the model-specific hose routing, filter design, and installation method; the filter must be correctly seated and the drain path must remain secure and leak-free. - drain pump or internal leak assembly
Consider this category only after service diagnosis confirms a concealed leak during draining or a pump or internal hose fault after the visible hose and filter path are clear.
Do not order from symptoms alone; confirm the exact model, revision, electrical specification, and manufacturer's fit information through qualified service.
When checks do not resolve it
Need a professional?
Arrange qualified appliance service when the leak source is beneath the cabinet or inaccessible, an inlet or drain hose or seal is damaged, a filter cannot be safely drained or reseated, water continues to enter, a critical-level warning appears, foam repeatedly overflows, or the leak returns after an exact model-approved external check. Treat water near electrical parts, burning odor, smoke, sparks, abnormal heat, and a tripped breaker as stop-now conditions.
Safety scope: This article supports safe external observation, water shutoff, and only the filter or hose steps explicitly covered by the exact model instructions. Do not open panels, access a pump or valve, test live wiring, move a wet appliance, or continue using a washer with an unresolved leak.
Common questions
FAQ
Why is my Haier washer leaking from the back?
If water starts at the rear while the washer fills, close the taps and inspect the visible faucet-to-hose and hose-to-washer connections, including the sealing cushion, for looseness or damage. Do not overtighten or use a cracked hose. If the connection cannot be made dry with the model-approved procedure, keep the tap closed and request service.
Can too much detergent make a washing machine leak?
Excess or unsuitable detergent can create foam that spills from a drawer or tub and looks like a leak. Haier recommends the detergent type, compartment, and amount specified for the washer. If foam persists, water keeps rising, or the machine shows a critical-level indication, stop and request service rather than repeating cycles.
Is it safe to clean the drain filter when the washer is leaking?
Only follow the exact model's filter procedure after closing the taps, isolating power from a dry safe position, and controlling residual water with the specified hose or container. Do not loosen a filter with uncontrolled or hot water, and do not run the washer with a missing or poorly seated filter.
What if water is leaking from underneath the Haier washer?
A lower leak can come from the drain hose, filter, pump path, internal hose, tub, or seal. Check only exposed hose and filter areas as the model instructions allow. If the external path is dry or the leak returns, keep the washer and taps off and arrange qualified diagnosis; do not remove cabinet panels.
When should I stop using a leaking washer immediately?
Stop immediately for continued filling, rising water or foam, water near the plug or outlet, a burning odor, smoke, sparks, abnormal heat, a breaker trip, a cracked hose or torn seal, or any leak that requires moving or opening the appliance. Keep people away from the wet area and arrange qualified service.
Read the exact guide
Official sources
- Too much foam in the drum and spilled from the distribution drawerHaier India · Haier troubleshooting guidance for foam spilling from the distribution drawer; use the exact washer manual for detergent selection and amount.
- The plastic knob of the filter has fallen off and white part remains inside machine. How can I remove it safety?Haier India · Haier filter guidance for models with this filter arrangement; model differences may change the accessible drain path.
- How to clean the filter? - FL washing machineHaier India · Haier front-load filter procedure; only use it when the exact model has the described user-accessible filter arrangement.
- Much foam during the spin cycle of washing machineHaier India · Haier troubleshooting guidance for excessive foam; detergent and cycle instructions for the exact model take precedence.
- How to connect drain water-HW120-B1558Haier India · Haier installation guidance for the listed model; use the exact model manual for a different washer.
- Washing Machine - Troubleshooting Common Washing Machine IssuesHaier India · Haier general troubleshooting article; use the exact model manual and qualified service for component access or replacement.
- Common problem trouble shooting for top load washing machineHaier India · Haier top-load troubleshooting page; use it for the stated checks and consult the exact model manual for other washer designs.
- HWM85-0713S haier output -10-08-10.cdrHaier India · Haier manual for the identified model family; diagrams and settings may differ on other washers.
- The water inlet hose leakingHaier India · Haier India troubleshooting guidance for water inlet hose leaks; the exact model manual controls connector details.
Community feedback
Share a repair observation
Share a plain-text repair observation. Accepted observations are published automatically; this page may take a moment to update.