
On this page
Start here
Quick answer
A Hotpoint freezer that is leaking usually needs the water source separated first: moisture on the inner base commonly points to a blocked gutter outlet or food touching the rear wall, while water at the rear can involve the defrost collection point. Switch the appliance off and disconnect power only when it is safe before repair or part work. Wipe up water, keep it away from electrical connections, check that the door closes and its seal is not obstructed, and use the exact model manual for defrosting. If food is thawing, the leak returns after the accessible drainage check, an error code appears, or water reaches electrics, stop and arrange qualified service.
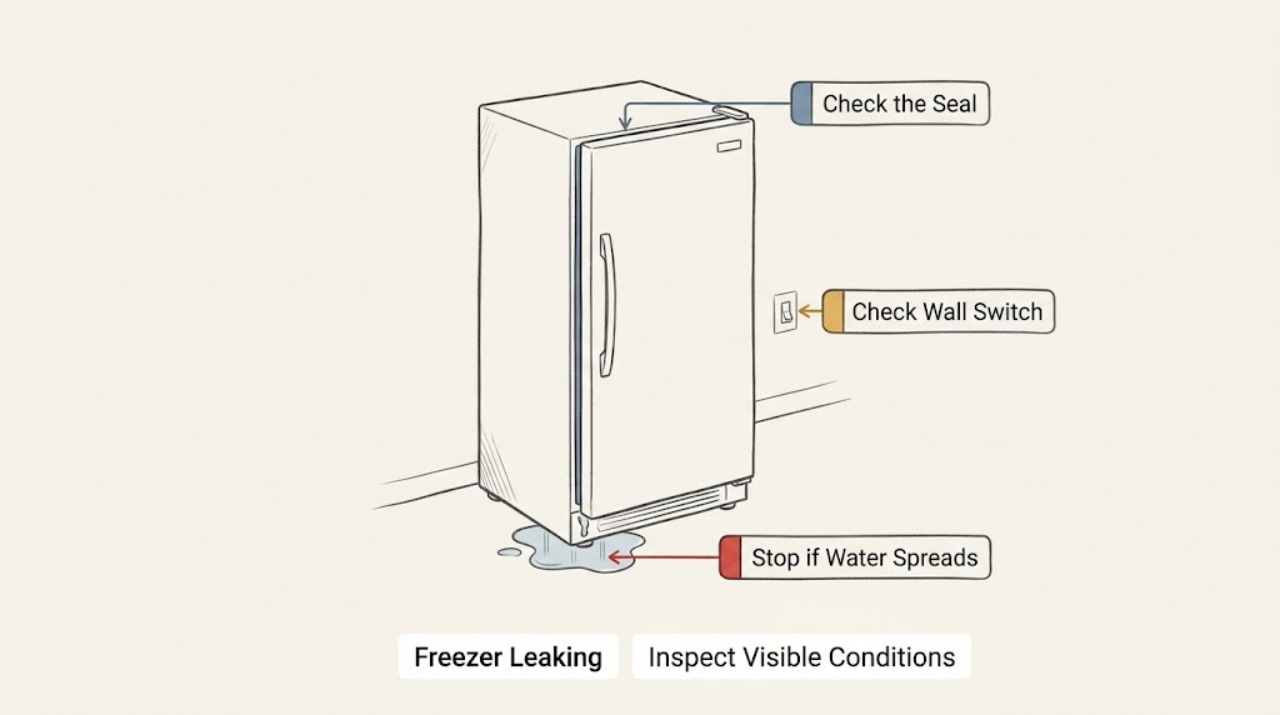
Work through in order
Diagnostic checks
Use only checks that match the exact appliance or system and its official guide.
-
Check 1
With the freezer door closed between checks, trace the leak without moving the appliance: inspect the inner rear wall and base, the door opening and seal, the front floor, and the visible rear floor. Note the highest wet point, whether water is pooling inside or outside, and whether the appliance is still cold.
Expected result: Water beginning at the inner rear wall or base supports a gutter or defrost-drain path; water around the door points toward door closure, seal, or moisture entry; water at the rear needs a safe collection-point or service assessment. Warm food or a rising temperature adds a food-safety branch.
Next step: Photograph the wet area and model label. If water is near electrics or food is warming, stop using the freezer and arrange service. Otherwise continue with the matching visible check below without moving a heavy appliance.
Why this matters
Why: The location and temperature change decide whether an accessible cleaning check is reasonable or whether the leak may be part of a cooling or defrost fault.
-
Check 2
Switch the appliance off and disconnect power only when safe, then inspect the rear inner wall for the gutter outlet. Remove only loose, accessible debris with a drinking straw or pipe cleaner as Hotpoint describes, and mop up the water from the base. Do not use a sharp tool, chip ice, pour boiling water, or remove a cabinet panel.
Expected result: If the outlet is visibly blocked and the base stays dry after the obstruction is removed, the leak was consistent with restricted drainage. If the outlet is clear, inaccessible, frozen solid, or water returns, the drainage or defrost system remains unresolved.
Next step: For a clear outlet and a dry base, monitor the appliance. For recurring water, heavy ice, or an inaccessible drain, keep the appliance off if food safety permits and arrange qualified freezer service using the model number.
Why this matters
Why: Hotpoint identifies a blocked gutter outlet as a common explanation for moisture on the inner base; a recurring leak after this limited check is not proof that a pump, heater, sensor, or sealed-system part is faulty.
-
Check 3
Inspect the closed door and gasket from the outside. Check for a package, ice, or shelf item preventing full closure, look for a visible split or detached section of seal, and confirm that containers or uncovered liquids are not adding avoidable moisture. Do not force the door or remove the gasket.
Expected result: A door left ajar, an obstruction, or damaged seal can admit moisture and create frost that later melts; a fully closing door with an intact visible seal makes that explanation less likely. Frost concentrated near basket fronts is also consistent with a door left ajar.
Next step: Remove only a safe external obstruction, close the door, and monitor for renewed frost or water. If the seal is damaged, the hinge or cabinet is misaligned, or the door cannot close evenly, arrange service and keep the freezer closed to protect food.
Why this matters
Why: Moisture entry can produce water without a blocked outlet, but a seal that is visibly damaged or a door that will not align requires model-specific service rather than an improvised repair.
-
Check 4
Look at the frost pattern and identify the freezer type from its model manual. If a non-frost-free model has a substantial ice layer, use the manual's defrost procedure and the Hotpoint guidance for defrosting when ice reaches roughly 3–5 mm; do not scrape or heat the cabinet. If it is frost-free, do not perform a manual defrost unless the model instructions specifically call for it.
Expected result: Ice that is thick, melting, or blocking the outlet can create temporary water; a frost-free model with heavy ice, continued leaking, or a return of ice after the correct procedure needs service diagnosis. A normal frost pattern with a clear outlet points back to the door or collection path.
Next step: Follow only the exact model manual for a permitted defrost. If the leak continues, the freezer will not reach its specified temperature, or the manual gives no safe user procedure, stop troubleshooting and contact qualified service.
Why this matters
Why: The correct defrost method depends on the Hotpoint model. Frost alone does not identify a failed component, and forcing ice removal can damage hidden refrigeration tubing.
-
Check 5
After the safe checks, read any displayed code or alarm and record it with the exact model number. Do not remove the rear cover to inspect the defrost collection point above the compressor or any sensor, wiring, heater, or sealed-system component.
Expected result: Hotpoint lists E3 as a defrost-sensor fault, E5 as a freezer-defrost-sensor fault, E6 as a control/display fault, and E9 as a freezer high-temperature alarm. No code, a clear outlet, and a continuing external leak still require the leak location and temperature history for diagnosis.
Next step: Keep the code, model, photos, water location, frost pattern, and temperature observations together for a qualified technician. Stop immediately for water near electrics, smoke, a burning smell, or a warming food compartment.
Why this matters
Why: A code changes the service path and should not be replaced by guessing a part. The rear collection point is part of the appliance's defrost-water route but is not a reason to open the cabinet as a home check.
Use your observations
Decision map
Find the observation that best matches what you see, then follow the next safe action.
-
PATH 01Next step
What you see
Water is confined to the inner base and the rear-wall gutter outlet is visibly blocked.
Do this next
With power disconnected only when safe, clear loose accessible debris with a drinking straw or pipe cleaner, mop the base, and monitor. Escalate if water returns.
-
PATH 02Next step
What you see
The door was ajar or an obstruction prevented a complete seal, and the gasket is visibly intact.
Do this next
Remove the safe obstruction, close the door, cover liquids, and monitor frost and water. Arrange service if the door still will not close evenly.
-
PATH 03Next step
What you see
Heavy ice is present, the appliance type is non-frost-free, and the model manual permits user defrosting.
Do this next
Follow the exact manual's defrost procedure and do not scrape or heat the cabinet. If the leak or ice returns, arrange service.
-
PATH 04Next step
What you see
Water returns after the accessible outlet check, comes from the rear or a hidden area, or the door seal is damaged.
Do this next
Do not remove panels or order a part from the symptom alone. Keep the freezer off if safe and arrange qualified appliance service with the model and photos.
-
PATH 05Next step
What you see
An E3, E5, E6, or E9 code appears, food is warming, or water is near electrical connections.
Do this next
Stop using the appliance, disconnect power only when safe, protect food, and arrange qualified service. Do not repeatedly restart it or open the cabinet.
Helpful context
Understand the symptom
Find where the water starts
Do not assume a puddle at the front began there. Look for the highest wet point: the inner rear wall and base, the door opening, the cabinet floor, or the rear of the appliance. Hotpoint specifically links inner-base moisture with the rear-wall gutter outlet or items touching that wall. Record whether the water is clear, whether frost is melting, and whether the freezer is still keeping food solid before cleaning anything.
Clear only the accessible drainage path
With the freezer safely switched off, remove loose food and wipe up standing water. If the inner gutter outlet is visibly obstructed, Hotpoint recommends clearing that obstruction with a drinking straw or pipe cleaner and mopping the base. Do not chip ice, force a sharp object into a drain, pour boiling water into the cabinet, or remove a sealed panel to reach hidden tubing.
Protect food and stop for electrical risk
Keep water away from the plug, cord, controls, and other electrical connections. If water is pooling near electrics, the cord is damaged, the cabinet is wet externally, there is smoke or a burning smell, or food is warming, stop using the appliance and obtain qualified help. Do not keep restarting a freezer that is leaking and no longer maintaining a safe temperature.
Only after diagnosis
Potential parts
- door gasket or door-closure component
Consider this class only if the exact model is confirmed and inspection shows a damaged seal or a door-closure problem that is allowing moisture entry.
Confirm the complete Hotpoint model and model-specific fit information before selecting any component. - defrost drain or defrost-sensing component
Consider this class only after qualified diagnosis links a recurring leak, heavy ice, or a matching error code to the defrost or drainage system.
Do not choose a component from the leak symptom or code alone; verify the exact model and service diagnosis.
When checks do not resolve it
Need a professional?
Provide the exact model and product code, photographs of the highest wet point and any frost, whether the water is inside or outside, the time and frequency of the leak, door and gasket observations, freezer temperature or high-temperature alarm, any displayed code, and what happened after the accessible gutter check. Do not remove panels or bring a loose part as proof of a fault.
Common questions
FAQ
Why is my Hotpoint freezer leaking water inside?
Hotpoint says moisture or droplets on the inner base are usually associated with a blocked gutter outlet on the rear inner wall or items touching the back wall. Clear only loose, accessible obstruction as directed, mop the base, and arrange service if the water returns.
Where does defrost water go in a Hotpoint freezer?
Hotpoint says automatic-defrost water runs to a collection point at the rear above the compressor, where it normally evaporates as the compressor warms. Do not open the cabinet to reach it; persistent water needs qualified diagnosis.
Can I defrost a leaking Hotpoint freezer myself?
It depends on the model. Follow the exact manual; Hotpoint gives model-dependent guidance and says frost-free appliances do not need routine manual defrosting. Never chip ice or use heat against the cabinet.
When should I stop using a leaking freezer?
Stop when water reaches electrical connections, food is warming, the cord is damaged, smoke or a burning smell appears, an error code persists, or the leak returns after the accessible check. Disconnect power only when safe and arrange qualified service.
Read the exact guide
Official sources
- Hotpoint Freezer Troubleshooting & Repair - HotpointHotpoint · Hotpoint freezer leaking and moisture diagnosis
- Hotpoint Service Freezer Repair - HotpointHotpoint · Hotpoint freezer leak that persists or involves an error code or hidden component
- Hotpoint Fridge Freezer Error Codes - HotpointHotpoint · Hotpoint freezer leak accompanied by a temperature, defrost, or control code
Community feedback
Share a repair observation
Share a plain-text repair observation. Accepted observations are published automatically; this page may take a moment to update.