
On this page
Start here
Quick answer
First identify what is leaking and where it starts. A small amount of clear moisture after steam cooking or a Hotpoint steam-clean programme may be condensation or water used by that function; food, grease, or a cleaning solution can also run from the cavity or door. A continuous drip from behind the controls, underneath the oven, around a gas connection, or near electrical parts is not a normal spill. Stop using the oven for any gas smell, smoke, fire, sparking, overheating, liquid near electrical connections, or leak that continues after the appliance is cool. Do not open the oven or try to repair a gas or electrical component; record the source and arrange qualified service.
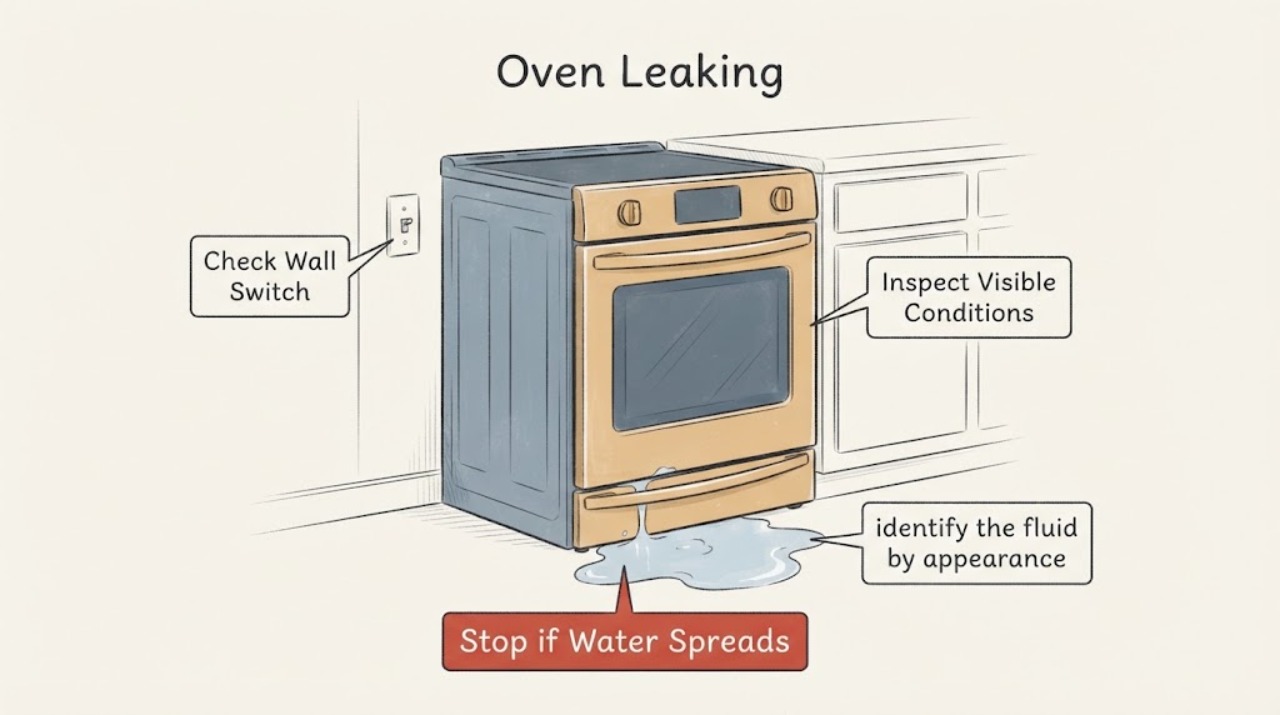
Work through in order
Diagnostic checks
Use only checks that match the exact appliance or system and its official guide.
-
Check 1
Stop immediately for a gas smell, smoke, flame, sparking, a burning or electrical odor, liquid touching electrical controls, a hot or discolored cabinet, or a leak that is actively spreading. Move away from the appliance and follow local emergency or gas-safety procedures; do not operate switches near a suspected gas leak.
Expected result: The fluid is near wiring or controls, a gas odor is present, smoke or flame is visible, or heat/electrical damage is apparent.
Next step: Keep the oven out of use and obtain appropriate emergency or qualified gas/electrical appliance help. Do not attempt to locate an internal leak.
Why this matters
Why: This is a gas, fire, shock, or heat hazard rather than a normal condensation or spill diagnosis.
-
Check 2
With the oven cool, identify the fluid by appearance and smell without touching an unknown liquid: clear water, greasy or food-colored liquid, detergent/cleaner residue, or an unusual fuel-like odor. Note whether it appeared after cooking, steam use, cleaning, or while the oven was idle.
Expected result: Clear moisture follows steam, food/grease follows a spill, cleaner follows maintenance, or an unexplained liquid appears while idle.
Next step: Continue only with the matching low-risk branch. Treat an unknown, oily, chemical, or fuel-like fluid as unsafe and arrange service.
Why this matters
Why: Timing and fluid type separate an expected steam/condensation or cavity spill from a possible internal or supply problem.
-
Check 3
Look at the cool oven door, gasket, sill, and cabinet immediately below the door. Check for droplets on the inner glass or frame, a displaced or damaged seal, residue in the contact area, and a trail that begins inside the cavity rather than behind the controls.
Expected result: Moisture is limited to the door/cavity after steam or cooking, or it runs from behind the door seal, lower trim, or an uneven gap.
Next step: Wipe accessible residue only after cooling and keep the oven unused if the seal is torn, detached, or repeatedly wet. Do not remove the seal or force the door.
Why this matters
Why: Door condensation or a cavity spill may be wipeable after cooling; a displaced seal, persistent trail, or uneven door fit can let moisture escape and needs model-specific attention.
-
Check 4
Inspect the cavity floor, racks, roasting tray, grill pan, and side rails for an overturned pan, excessive liquid, food debris, grease, or cleaner residue. Check that the spill is not coming from an accessory or from water intentionally added for a model-specific steam function.
Expected result: The liquid traces back to a pan, food, grease, cleaning product, or a steam-clean water area, and there is no continuing drip when the cavity is cool.
Next step: Remove the cool accessory and wipe the spill with the method allowed by the model manual. Do not use the oven again while cleaner remains, liquid pools, or the source is uncertain.
Why this matters
Why: The likely source is a user-level spill or condensation event, not an internal supply leak; residue can still smoke or damage surfaces if left in place.
-
Check 5
From outside the appliance, check the bottom edge, side panels, rear-visible area, nearby floor, and cabinet for a fresh trail or pooling. Do not pull out a built-in oven or reach behind it; do not touch a wet plug, outlet, gas line, or terminal.
Expected result: The trail begins underneath/behind the oven or reaches the floor, while the cavity and door are dry; or the exterior is dry after the suspected spill.
Next step: Leave the oven off and arrange qualified appliance service. If water is near electrical equipment, isolate power only from a safe, dry, accessible location and do not re-energize it for a test.
Why this matters
Why: An underside or rear-origin leak is not explained by ordinary cavity condensation and may involve internal plumbing, steam hardware, cooling condensate, or a connection.
-
Check 6
Record the Hotpoint model or commercial code, oven type, function selected, when the fluid appeared, where it was first seen, whether the door was opened, and any odor, smoke, code, heat, or breaker event. Compare the symptom with the exact model manual/support guidance.
Expected result: The leak repeats during a particular function, continues while idle, follows cleaning, or cannot be reproduced safely.
Next step: Give the complete record and photographs taken from a safe distance to Hotpoint or qualified service. Do not run another cycle merely to obtain a clearer result.
Why this matters
Why: A repeatable function-specific symptom can guide a technician, but a leak with an unknown source still requires inspection rather than repeated operation.
Use your observations
Decision map
Find the observation that best matches what you see, then follow the next safe action.
-
PATH 01Next step
What you see
Clear droplets appear on the door or cabinet after steam cooking or a steam-clean function and stop after cooling.
Do this next
Treat it as possible condensation, wipe only when cool, and follow the exact model instructions for the steam function. Persistent pooling, wet controls, or a rear/underbody trail needs service.
-
PATH 02Next step
What you see
Greasy, food-colored, or liquid residue traces to a tray, pan, food spill, or cavity cleaning.
Do this next
Let the oven cool, remove the source, and clean according to the model manual. Do not operate while liquid, cleaner, or heavy residue remains or if smoke/odor develops.
-
PATH 03Next step
What you see
Liquid begins at the door seal, lower trim, beneath the cavity, behind controls, or while the oven is idle.
Do this next
Stop use and arrange qualified appliance service. Do not remove the seal, open panels, or pull out a built-in appliance to find the source.
-
PATH 04Next step
What you see
A suspected cleaner or chemical residue remains, or the fluid cannot be identified by safe observation.
Do this next
Do not heat the oven or mix cleaning products. Keep it out of use, preserve the product information if known, and obtain model-specific cleaning or service guidance.
-
PATH 05Next step
What you see
There is a gas smell, smoke, flame, sparking, burning/electrical odor, overheating, or liquid near electrical parts.
Do this next
Stop immediately, keep away from the hazard, and use appropriate emergency or qualified gas/electrical assistance. Do not switch the oven back on.
Helpful context
Understand the symptom
“Leaking” does not identify the fluid or its path. Steam can condense on a cooler door or cabinet, while a pan, food, grease, or cleaning product can spill inside the cavity. The decision changes when liquid starts behind the fascia, under the appliance, at a gas connection, or close to wiring: those cases need the oven left unused and a qualified inspection.
Let the oven cool before wiping or inspecting it. Use only external, low-risk observations. Never pour more water into the cavity to test for a leak, run a cleaning cycle to reproduce the symptom, remove panels, or work on gas or electrical parts.
Safety boundary
Stop conditions
- Stop immediately for a gas smell, smoke, flame, sparking, burning or electrical odor, abnormal heat, liquid near controls or wiring, or an actively spreading leak.
- Do not run another cycle to reproduce the leak, pour water into the cavity as a test, open panels, remove a built-in oven, or work on gas, electrical, or steam components.
- Do not use the oven while cleaner, liquid, a damaged seal, or an unknown fluid remains inside or around the appliance.
Only after diagnosis
Potential parts
- oven door seal or gasket
Only relevant if a qualified inspection finds a torn, detached, hardened, or displaced seal is allowing moisture or residue to escape.
Seal profiles vary by model; confirm the exact Hotpoint model and approved installation method before any replacement. - steam or condensation component
Only relevant when a model equipped with a steam or condensation feature has a confirmed internal component or connection leak.
Do not infer a failed steam component from condensation alone; use the exact model documentation and qualified diagnosis. - door or cavity frame component
Only relevant if the door frame, hinge alignment, or cavity trim is confirmed to be the path for a persistent leak after spills are excluded.
Confirm the exact appliance identity and fitment with Hotpoint or qualified service; do not force or disassemble the door.
When checks do not resolve it
Need a professional?
Use urgent emergency or gas-safety help for an active fire, smoke event, suspected gas leak, or hazard that cannot be safely isolated., Use qualified appliance service for a rear, underside, control-area, or persistent leak, a damaged seal, or any leak that repeats without a clear spill source., Use the exact Hotpoint manual/support path for a steam-clean or self-clean function that leaves unexpected liquid, residue, or a locked/abnormal state.
Have this ready
- Hotpoint model or commercial code and oven type
- Fluid appearance or smell and the first location observed
- Function and timing when the leak appeared
- Whether the door, seal, cavity, floor, controls, or rear area was wet
- Any gas odor, smoke, sparking, overheating, code, or breaker event
Common questions
FAQ
Is water on a Hotpoint oven door always a leak?
Not necessarily. Steam cooking or a steam-clean programme can create condensation, while food or cleaning residue can run from the cavity. If moisture continues while cool, reaches controls, or starts underneath or behind the oven, stop use and arrange service.
What should I do if food or grease spilled in my Hotpoint oven?
Let the oven cool, remove the tray or accessory, and wipe the residue using the model's cleaning guidance. Do not run the oven while liquid, cleaner, or heavy residue remains or if smoke or unusual odor appears.
Can I use my Hotpoint oven if it is leaking underneath?
No. An underside or rear-origin leak is not safely explained by a cavity spill without inspection. Keep the oven out of use and arrange qualified appliance service, especially if liquid is near electrical parts.
When is a leaking oven an emergency?
Treat a gas smell, smoke, flame, sparking, burning or electrical odor, overheating, liquid near controls, or a spreading leak as an immediate stop condition. Keep away and use appropriate emergency or qualified gas/electrical help.
Read the exact guide
Official sources
- How To Steam Clean Your Oven with HotpointHotpoint · Hotpoint steam-clean oven condensation, water, food-spill, and residue behavior
- Hotpoint Service Oven Repair - HotpointHotpoint · Hotpoint gas and electric oven repair, safety guidance, and professional service escalation
- Hotpoint Oven Troubleshooting & RepairHotpoint · Hotpoint oven troubleshooting, maintenance, model support, and escalation
- Oven Buying Guide - Kitchen AppliancesHotpoint · Hotpoint oven steam and self-cleaning feature behavior, including water/heat and door-lock context
Community feedback
Share a repair observation
Share a plain-text repair observation. Accepted observations are published automatically; this page may take a moment to update.