
On this page
Start here
Quick answer
First identify whether the Hotpoint oven is electric or gas and whether it is completely inactive, warm but below temperature, or heating unevenly. Confirm the oven function and temperature are selected, the electronic clock or timer is set as required by the model, the door or self-clean latch is not holding the oven out of operation, and the household breaker or fuse is on. For an electric oven, inspect a visible bake element only after power is fully removed; for a gas oven, observe only from a safe position whether the igniter glows during Bake and do not adjust gas components. If a gas odor, delayed ignition or flare, smoke, sparks, arcing, burning smell, damaged wiring, or repeated breaker trip occurs, turn the controls off, keep clear, and arrange qualified service.
Before you begin
Safety first
- Do not open panels, probe live wiring, bypass the door latch, adjust gas valves or regulators, repeatedly reset protection, or operate the oven with gas odor, delayed ignition, smoke, sparks, arcing, burning smell, overheating, or damaged wiring.
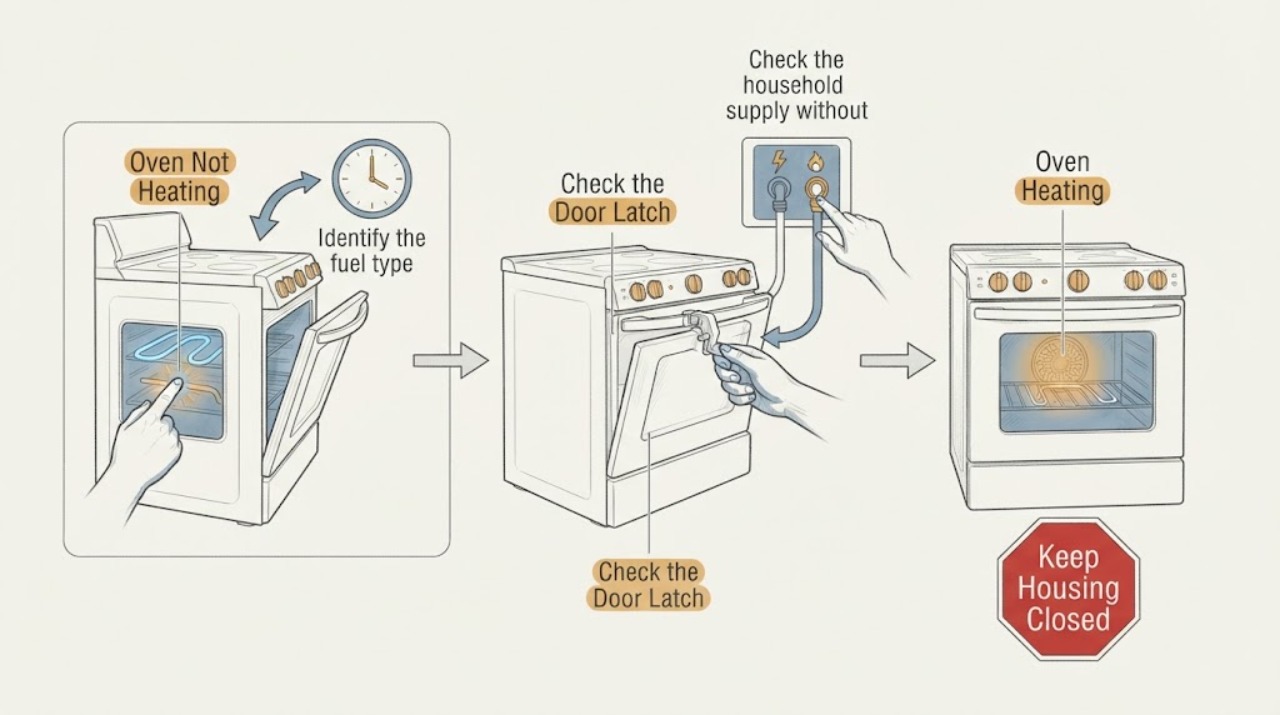
Work through in order
Diagnostic checks
Use only checks that match the exact appliance or system and its official guide.
-
Identify the fuel type and exact heating symptom
Using the model label and owner manual, identify whether the Hotpoint oven is electric, gas, or dual-fuel. With controls off, note whether the display or clock works, whether the cavity is completely cold, whether the oven becomes warm but does not reach the selected temperature, whether the surface burners work, and whether any error, smell, smoke, spark, or unusual flame appeared.
Expected result: The display is dead, the display works but the cavity stays cold, only one function fails, electric heating is partial, or a gas oven has no flame or an abnormal ignition event.
Next step: Follow the common controls and supply checks, then use only the electric or gas branch that matches the model. If any gas odor, delayed ignition, flare, smoke, spark, arc, or burning smell is present, skip testing and use the safety branch.
Stop if: Stop for gas odor, delayed ignition or flare, smoke, sparks, arcing, burning smell, overheating, exposed wiring, a damaged cord, or repeated breaker trip.
Why this matters
Why: A dead display or all-functions failure points first to supply or controls. A working display with a cold cavity moves to settings, latch, element, igniter, or control checks. On gas models, working surface burners do not prove that the oven burner or igniter is healthy.
-
Check function, temperature, clock, and door-latch state
Select Bake or the intended cooking function and temperature exactly as the model manual shows, then press Start if the controls require it. Confirm the clock is set after any power interruption, check that Sabbath or another special mode is not active when the model has one, and verify that a self-clean latch is fully unlocked. Close the door normally without forcing it.
Expected result: The oven function or temperature was not selected, Start was not pressed, the clock is flashing or incorrect, a special mode is active, the self-clean latch is locked, or all settings are correct but the cavity stays cold.
Next step: Use the exact manual to correct one setting or unlock the latch, then make one supervised preheat attempt. If the clock will not retain its setting, the latch will not release, or the oven remains cold with correct settings, continue to supply and fuel-specific checks or request service.
Stop if: Do not force the latch, open panels, continue with smoke or burning smell, or keep resetting a breaker that trips again.
Why this matters
Why: Electronic controls can refuse a heat command when a required selection, clock setting, or mode is incomplete. A self-clean latch left engaged can block normal operation on models with that mechanism. Correct settings do not prove that a heating element, igniter, supply, or control is functional.
-
Check the household supply without live electrical testing
Check the household fuse or breaker visually and confirm the range or wall oven's plug and receptacle show no visible damage, moisture, or heat marks. Do not slide a heavy appliance or remove a cover just to reach wiring. If a protection device is clearly off and the area is dry and safe, restore it once; do not repeatedly reset it.
Expected result: The breaker or fuse is off, the clock works but heating does not, the plug or receptacle looks damaged or hot, or the supply remains on but the oven is still cold.
Next step: If one safe restoration does not return normal operation, leave the oven off and arrange qualified electrical or appliance service. Do not test voltage at terminals or attempt an internal fuse, harness, or control repair.
Stop if: Stop for moisture, a hot or discolored receptacle, smoke, sparks, arcing, burning smell, exposed conductors, or a repeated trip.
Why this matters
Why: A supply interruption can stop the oven even when another indicator or clock still works. A damaged or hot connection, or a device that trips again, can indicate an electrical fault and is not a preheat problem. Power with no heat shifts the diagnosis to controls or the fuel-specific heating path.
-
For an electric oven, inspect the bake element only when de-energized
Turn the oven off, remove power using the model-approved plug or household disconnect, and wait until the cavity is cool. From inside the cavity, inspect only a visible lower bake element for a crack, blister, or break; do not remove the element or touch terminals. During a normal Bake preheat, a visible bake element may glow, while a broil element may cycle differently by design.
Expected result: The visible bake element is cracked or broken, the element appears intact but never heats, only broil heats, or the model uses a concealed bake element.
Next step: Restore power only after the oven is reassembled and safe, and make one supervised test if no hazard was found. If the element is damaged, concealed, or remains cold, request qualified appliance service and provide the model and observed pattern.
Stop if: Do not inspect or touch an element while energized, remove a hidden floor, continue after smoke or arcing, or use an oven with exposed or damaged heating wiring.
Why this matters
Why: An electric element with a visible break is evidence for service or a model-approved replacement, not permission to work on energized wiring. An intact or concealed element does not rule out a control, sensor, supply, or internal element fault. The broil element's glow is not a universal test during Bake.
-
For a gas oven, observe the igniter and flame without adjusting gas parts
With the room ventilated and no gas odor or abnormal ignition, select Bake as the manual describes and observe only from the open-door position specified by the model. Note whether the igniter develops the expected red glow and whether a stable burner flame follows. Check the visible gas shutoff position only if it is clearly accessible and the installation instructions identify it; do not remove covers or adjust a regulator or valve.
Expected result: The igniter does not glow, it glows but no flame follows, a flame lights and goes out, the surface burners work while the oven does not, or ignition is delayed, loud, smoky, or abnormal.
Next step: If the igniter or flame result is abnormal but there is no immediate hazard, leave the oven off and arrange qualified gas or appliance service. If gas odor, delayed ignition, flare, smoke, or an unusual flame occurs, stop immediately, avoid switches or flames, and follow local gas-emergency guidance.
Stop if: Stop for any gas odor, delayed ignition, flare, soot or smoke, unstable flame, sparks, or burning smell; do not relight or continue operating the oven.
Why this matters
Why: Official gas-oven guidance uses the igniter glow as a visual clue but says no glow can involve the igniter, controls, or other electrical parts. A working cooktop does not establish that the oven burner path is safe. Delayed, loud, smoky, or abnormal ignition is a hazard and cannot be corrected by repeated cycling.
-
Separate temperature perception from a genuine no-heat fault
Allow the oven to complete a normal preheat without repeatedly opening the door, then note whether food is undercooked, whether the cavity becomes warm, and whether an electric element cycles on and off. Keep pans centered on a shelf with space for air circulation and do not cover the entire shelf with foil. Treat a cooling fan that runs after shutdown as a separate cooling behavior, not proof of heating failure.
Expected result: The cavity becomes warm but cooking is uneven, the element cycles normally, the cavity stays cold, or the fan runs after the oven is switched off.
Next step: Correct only an obvious rack, pan, or airflow issue and make one supervised cooking test. If the cavity remains cold, the door does not seal, or the symptom returns after a normal cycle, request service rather than increasing settings or repeating long tests.
Stop if: Do not continue if the oven overheats, the door glass or seal is damaged, smoke or sparks appear, a burning smell is present, or the breaker trips.
Why this matters
Why: Heating elements cycle to maintain temperature and may not glow continuously. Hotpoint says a cooling fan can run after shutdown to protect controls. A warm but uneven oven may reflect rack, pan, door-seal, or airflow conditions; a cold cavity after correct preheat points back to the heating path.
-
Use one model-appropriate reset, then stop at service
If the oven is cool, dry, and free of safety symptoms, use at most the one control reset described in the owner manual. Re-enter the clock only as the manual requires, record the selected function, temperature, fuel type, element or igniter observation, and any code, then make one supervised test. Do not keep cycling power to mask a returning fault.
Expected result: The oven resumes heating once, the clock loses time again, the no-heat symptom returns, an error reappears, or the supply trips again.
Next step: Leave the oven off and arrange qualified appliance service; use qualified electrical or gas service when the supply or fuel path is implicated. Provide the exact model, fuel type, settings, clock state, observed heat or ignition result, and any code.
Stop if: Do not continue after gas odor, delayed ignition, smoke, sparks, arcing, burning smell, overheating, damaged wiring, or repeated breaker trip.
Why this matters
Why: A reset can clear a temporary electronic state but does not prove the heating element, igniter, gas valve, sensor, latch, control, or household supply is sound. A repeat failure is evidence for a model-specific service diagnosis.
Use your observations
Decision map
Find the observation that best matches what you see, then follow the next safe action.
-
PATH 01Next step
What you see
Gas odor, delayed ignition, flare, smoke, sparks, arcing, burning smell, overheating, exposed wiring, or repeated breaker trip
Do this next
Turn the oven controls off, keep clear, avoid flames or electrical switches when gas is suspected, and arrange qualified emergency or appliance service as appropriate.
-
PATH 02Next step
What you see
Function, temperature, Start, clock, special mode, or self-clean latch is not in the required state
Do this next
Use the exact owner manual to correct the setting or unlock the latch, then make one supervised preheat attempt.
-
PATH 03Next step
What you see
Breaker or fuse is off, plug is loose or damaged, or the oven loses power
Do this next
Restore a clearly off protection device once only when safe; a repeated trip, hot connection, or persistent no-power symptom needs qualified service.
-
PATH 04Next step
What you see
Electric oven remains cold or its visible bake element is cracked or broken
Do this next
Keep power isolated for any visual check and arrange qualified appliance service; do not test live terminals or dismantle a concealed element.
-
PATH 05Next step
What you see
Gas oven igniter does not glow, glows without a normal flame, or flame does not remain stable
Do this next
Leave the oven off and arrange qualified gas or appliance service; abnormal or delayed ignition is an immediate stop condition.
-
PATH 06Next step
What you see
Cavity warms but food remains uneven or the no-heat symptom returns after safe checks
Do this next
Check only rack, pan, door-seal, and airflow clues once; persistent cold or incorrect heating needs qualified service.
Helpful context
Understand the symptom
No heat is not the same as slow or uneven cooking
Record the exact model and fuel type before drawing conclusions. A completely cold cavity with a working display is different from an oven that reaches some heat, an electric element that has a visible break, or a gas oven whose igniter glows but never establishes a flame. A fan may continue after cooking to cool the controls; that sound alone does not prove that the oven is heating or failing.
Do not turn a visual check into live repair
Only inspect cool, visible, user-accessible parts. Hotpoint says the appliance must be unplugged before replacing a part, and gas or electrical work belongs with qualified service. Do not probe live wiring, remove a rear panel, bypass a door latch, relight a suspect gas system, or keep operating an oven that smells of gas or burning, smokes, sparks, arcs, overheats, or trips protection.
When checks do not resolve it
Need a professional?
Request qualified appliance service when safe external checks do not restore heat, a heating element or igniter is suspect, the clock or latch fault returns, or the oven heats incorrectly. Use qualified electrical service for supply or repeated breaker problems and qualified gas service for gas odor or ignition faults.
Safety scope: Do not open panels, probe live wiring, bypass the door latch, adjust gas valves or regulators, repeatedly reset protection, or operate the oven with gas odor, delayed ignition, smoke, sparks, arcing, burning smell, overheating, or damaged wiring.
Have this ready
- Provide the exact model, fuel type, function and temperature selected, clock or mode state, whether the display works, whether an electric element glowed or a gas igniter glowed and produced a flame, and any code or safety symptom.
Common questions
FAQ
Why does my Hotpoint oven have power but not heat?
Confirm the function, temperature, Start action, clock, special mode, and self-clean latch state first. Then use the correct electric or gas branch: an electric oven may have a damaged or concealed element, while a gas oven may have an igniter or burner-path fault. Do not open panels or test live wiring; persistent no heat needs service.
How can I tell whether an electric Hotpoint oven element has failed?
After power is fully removed and the oven is cool, inspect only a visible lower bake element for a crack or break. During Bake, the bake element can glow while a broil element may cycle differently. A concealed or intact element still needs qualified diagnosis if the oven stays cold.
What if my Hotpoint gas oven igniter glows but there is no heat?
A glow without a normal stable burner flame is a clue, not a repair instruction. Leave the oven off and arrange qualified gas or appliance service. Any gas odor, delayed ignition, flare, smoke, or abnormal flame is an immediate stop condition.
Read the exact guide
Official sources
- Electric Range - Oven Doesn't Heat But Burners Do HeatGE Appliances · Electric ranges whose surface burners work but oven does not heat; verify exact model
- Range & Wall Oven - Oven Temperature Is Not CorrectGE Appliances · Ranges and wall ovens with warm but incorrect or uneven results; verify exact model
- Electric Range & Wall Oven - Bake and Broil Element OperationGE Appliances · Electric ranges and wall ovens; verify model-specific element behavior
- Gas Range - Oven Does Not Heat, But The Burners HeatGE Appliances · Gas ranges with working surface burners and a non-heating oven; verify exact model
- Hotpoint Service Oven RepairHotpoint UK · Hotpoint ovens; confirm regional model instructions
- Range & Wall Oven - Oven Will Not Come OnGE Appliances · Hotpoint appliances supported in the GE Appliances region; verify the model manual
- Gas Range & Wall Oven - Oven Will Not Come OnGE Appliances · Gas range and wall-oven models in the GE Appliances support family; verify exact model
- Range & Wall Oven - Clock Not Keeping Correct TimeGE Appliances · Electronic ranges and wall ovens; use the exact owner manual
Community feedback
Share a repair observation
Share a plain-text repair observation. Accepted observations are published automatically; this page may take a moment to update.