
On this page
Start here
Quick answer
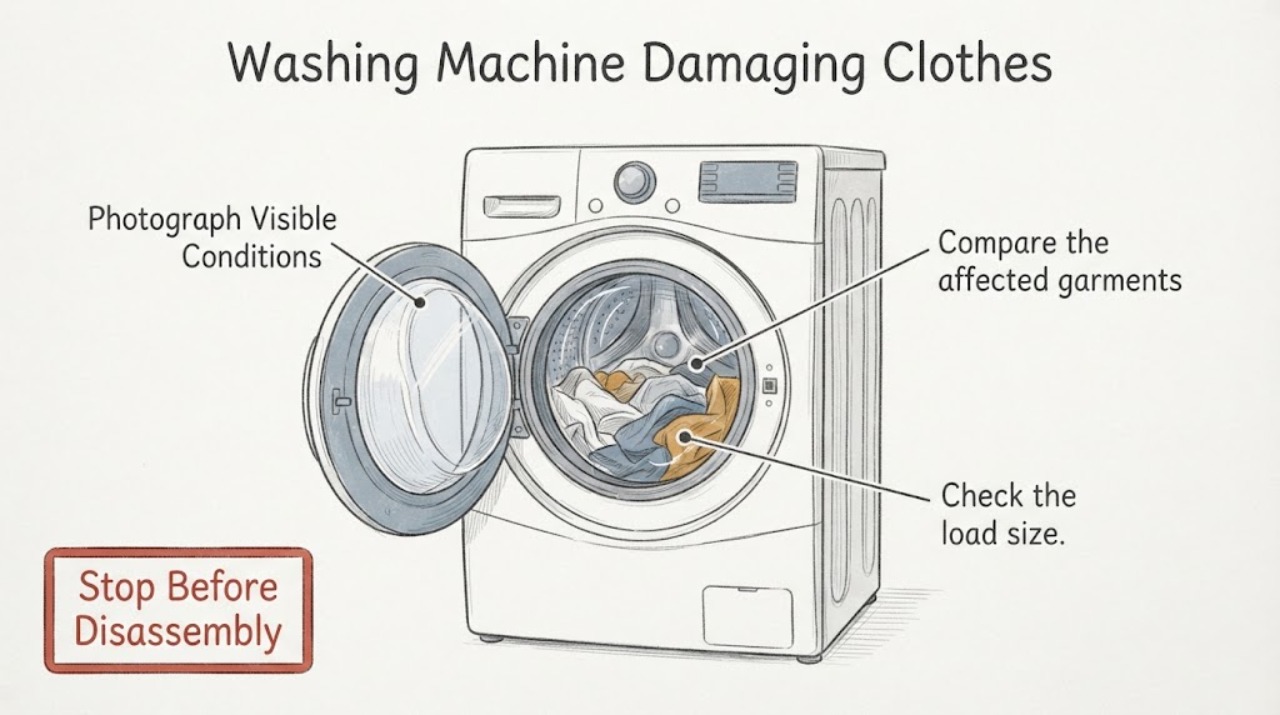
First classify the damage instead of assuming the Hotpoint washer has a failed part. Dye transfer, fading, detergent marks, stretching, and localized holes or snags point to different checks. Stop using the washer for the affected load, photograph the garment and the washer area, then compare the care label, fabric mix, load size, detergent amount, and selected cycle. Hotpoint recommends separating colours and fabric weights, using the care label and gentler cycles for delicates, leaving room in the drum, and avoiding overloads. If damage is localized, new after washing, or accompanied by scraping, grinding, a damaged seal, or violent movement, leave the machine off and arrange model-specific service rather than opening the cabinet.
Work through in order
Diagnostic checks
Use only checks that match the exact appliance or system and its official guide.
-
Check 1
Stop the affected load and photograph the garment before washing it again. Describe whether the result is colour transfer, fading, a detergent mark, stretched fabric, generalized abrasion, or a localized hole/snag, and note whether one garment or several items were affected.
Expected result: The damage is mainly colour or residue; it is broad wear or stretching; or it is a hole, snag, cut, or abrasion concentrated at one area.
Next step: Keep the damaged item and take photos of the drum opening, door seal, and any visible contact area. Choose the matching branch below before running another load.
Why this matters
Why: Colour/residue and fabric-selection problems follow a different path from a localized physical catch. A localized or repeatable mark is a reason to inspect the washer path and stop further loads, not proof of one particular internal part.
-
Check 2
Compare the affected garments with their care labels and the cycle used. Separate whites, lights, and darks; keep heavy towels or jeans away from light delicates; turn vulnerable garments inside out; and use a mesh bag and the gentle or wool cycle where the care label calls for it.
Expected result: The load mixed colours or fabric weights, a delicate item was put through a stronger cycle, or the cycle matched the labels and the items were still physically damaged.
Next step: For a confirmed care or sorting mismatch, correct the next load and do not use the damaged item as a test. If the cycle matched the labels or the same physical mark returns, stop using the washer until the drum path and seal are assessed.
Why this matters
Why: A mismatch between fabric care and cycle can account for fading, colour transfer, wear, or stretching. If the labels and load were followed yet one area is repeatedly damaged, handling alone is less likely and the washer needs a safe physical check.
-
Check 3
Check the load size and arrangement before any future low-risk wash: leave space at the top of the drum, do not pack the washer tightly, and distribute large and small items rather than washing one dense heavy item alone. Do not use a new load to test a washer that already snagged or tore fabric.
Expected result: The drum was overloaded, tightly packed, or dominated by one heavy item; the washer was loaded sensibly; or the cycle involved severe banging or unstable movement.
Next step: Correct only the loading pattern when no physical damage or dangerous symptom exists. If the washer bangs, walks, scrapes, or damages clothes again with a sensible load, stop use and arrange service rather than inspecting internal parts.
Why this matters
Why: Hotpoint says overloads restrict movement and mixed heavy/light loads help balance the spin. Severe or repeatable movement can add mechanical stress, but it does not establish that a shock absorber, bearing, belt, or other part has failed.
-
Check 4
With the washer unplugged and the drum stopped, inspect only the visible drum openings, door seal or rim, and loading path for a loose foreign object, torn seal, exposed sharp edge, or residue that could contact clothes. Do not remove panels, reach behind the drum, or run a hand over an unseen area.
Expected result: A loose object or visible residue is accessible; the seal or drum path looks damaged; the visible path is clear; or the suspected contact point cannot be inspected safely from the opening.
Next step: Remove only a loose object that is plainly accessible without tools. For a sharp edge, torn seal, repeated snag point, or anything behind the visible opening, leave the washer off and arrange a qualified inspection.
Why this matters
Why: Hotpoint identifies foreign objects as a possible source of unusual drum noise and tells owners to inspect the door seal for wear, tears, or debris. A visible catch or damaged seal warrants service; a clear opening does not rule out an internal fault.
-
Check 5
Check the detergent label and the washer manual for the selected programme. Measure the amount for the load, use the documented dispenser or dosing method, and avoid treating a residue mark as a drum fault. Do not add extra detergent or hotter cycles to test the machine when fabric is already being damaged.
Expected result: The dose or placement differed from the product/manual guidance; the residue is on the whole load; or dosing was correct but physical damage remains.
Next step: Correct the dose and programme for the next appropriate load only when no physical damage or hazard is present. If physical damage continues with correct dosing, stop using the washer and provide the garment photos and model details to service.
Why this matters
Why: Hotpoint says detergent amount should follow load size and its guidance, while incorrect cycle or detergent use can affect results. Correct dosing cannot explain a localized cut or snag, which needs a physical-path decision.
Use your observations
Decision map
Find the observation that best matches what you see, then follow the next safe action.
-
PATH 01Next step
What you see
The problem is colour transfer, fading, or residue and there is no localized tear, snag, sharp contact, leak, smoke, or violent movement.
Do this next
Separate colours and fabrics, follow the care label, use the appropriate gentle programme for delicates, and correct the detergent amount. Do not keep re-washing the damaged garment as a diagnostic test.
Why this path and its safety boundary
Why it matters: Laundry sorting, care-label selection, cycle intensity, or detergent handling is more plausible than a confirmed washer component fault.
-
PATH 02Next step
What you see
A hole, snag, cut, or abrasion appears in a repeatable location on one or more garments, or a visible drum opening, seal, rim, or loose object can catch fabric.
Do this next
Leave the washer unplugged, limit inspection to the visible opening, preserve the garment and photos, and arrange model-specific service if the contact point is damaged, inaccessible, or returns after a correctly sorted load.
Why this path and its safety boundary
Why it matters: The washer’s visible clothing path needs inspection; the symptom alone does not identify whether the cause is a seal, drum surface, object, alignment, or another part.
-
PATH 03Next step
What you see
The load was overloaded, mixed with heavy items, or visibly unstable, and there is no physical catch or dangerous symptom.
Do this next
Use a smaller, balanced load with the correct cycle only after the washer’s visible path is clear. Stop and seek service if it still bangs, walks, scrapes, or damages clothing.
Why this path and its safety boundary
Why it matters: The loading pattern may be contributing to excessive movement or wear, but it does not prove an internal failure.
-
PATH 04Next step
What you see
Damage is accompanied by a burning smell, smoke, sparking, electrical damage, a leak, a torn seal, severe grinding, or repeated severe movement.
Do this next
Stop the washer, isolate power only if safe, keep water away from electrical hazards, and arrange qualified Hotpoint or appliance service. Do not open the cabinet, bypass a safety device, or run another test load.
Why this path and its safety boundary
Why it matters: This is a safety or mechanical-service escalation, not a laundry-sorting experiment.
Helpful context
Understand the symptom
“Damaging clothes” describes several different outcomes. A colour transfer or detergent mark may come from sorting, care-label, or dosing choices; abrasion, stretching, or a tear that appears at one repeatable spot raises a different question about the load path. Hotpoint’s guidance says heavy items should be separated from light delicates, care labels should control the cycle, and delicate items may need a gentle programme. A single damaged garment does not by itself prove a failed drum, seal, motor, or control.
Use the washer only after the damage pattern is understood and the visible path is safe. Record the exact model before seeking a manual or service because Hotpoint says models vary and directs owners to model manuals. Do not keep running test loads when clothes are being snagged, the drum or seal has a sharp or damaged area, the washer bangs severely, or there is smoke, burning smell, leaking, or electrical damage.
When checks do not resolve it
Need a professional?
Arrange qualified Hotpoint or appliance service when the same physical damage returns after correctly sorting and loading clothes, a visible drum or seal defect is found, the catch point is inaccessible, or the washer bangs, scrapes, leaks, overheats, or shows an electrical symptom. Give the technician the complete model information, the garment photos, the cycle and load details, and the exact location of any repeatable mark.
Common questions
FAQ
Does damaged clothing prove that my Hotpoint washer needs a new drum or seal?
No. A care-label or sorting mismatch, overload, detergent issue, loose object, seal, drum surface, or another condition can produce different patterns. A repeated localized snag or visible damage should be assessed by service rather than used to name a part from the symptom alone.
What should I change first if clothes are faded or colours run?
Separate whites, lights, and darks, wash new coloured items separately the first time, turn vulnerable clothes inside out, and follow each garment’s care label and suitable cycle. This addresses colour transfer and visible wear without treating it as a washer component failure.
Can I run an empty cycle to see whether the washer damages clothes?
Do not run repeated tests when there is a sharp edge, torn seal, scraping, smoke, leak, electrical symptom, or recurring physical damage. Keep the garment and photos, inspect only the visible opening with power isolated, and arrange service when the path is not clearly safe.
Read the exact guide
Official sources
- What colours can go into a washing machine together?Hotpoint UK Appliances Limited · Hotpoint guidance on colour sorting, new-colour separation, turning clothes inside out, and care-label temperature/cycle symbols.
- Washing Machine Troubleshooting - Quick fixes & Tips - HotpointHotpoint UK Appliances Limited · Hotpoint washing-machine safety, visible external troubleshooting, foreign-object/noise and door-seal checks, unbalanced-load guidance, model-manual limits, and repair escalation.
- Official Hotpoint Appliance Service RepairHotpoint UK Appliances Limited · Hotpoint washing-machine repair selection, manuals/help routes, and qualified engineer service boundary.
- The Anatomy of a Washing Machine: Understanding Its Parts and FunctionsHotpoint UK Appliances Limited · Hotpoint washing-machine drum, agitator/impeller, foreign-object/noise and visible maintenance context.
- How to correctly load and use a washing machineHotpoint UK Appliances Limited · Hotpoint washing-machine loading, space in drum, balanced loads, detergent amount, and fabric-specific settings.
- What are the Best Strategies for Organising Laundry Loads in Your Washing Machine?Hotpoint UK Appliances Limited · Hotpoint washing-machine load sorting by colour and fabric, care-label use, separating heavy items from delicates, mesh bags, and balanced loading.
Community feedback
Share a repair observation
Share a plain-text repair observation. Accepted observations are published automatically; this page may take a moment to update.