
On this page
Start here
Quick answer
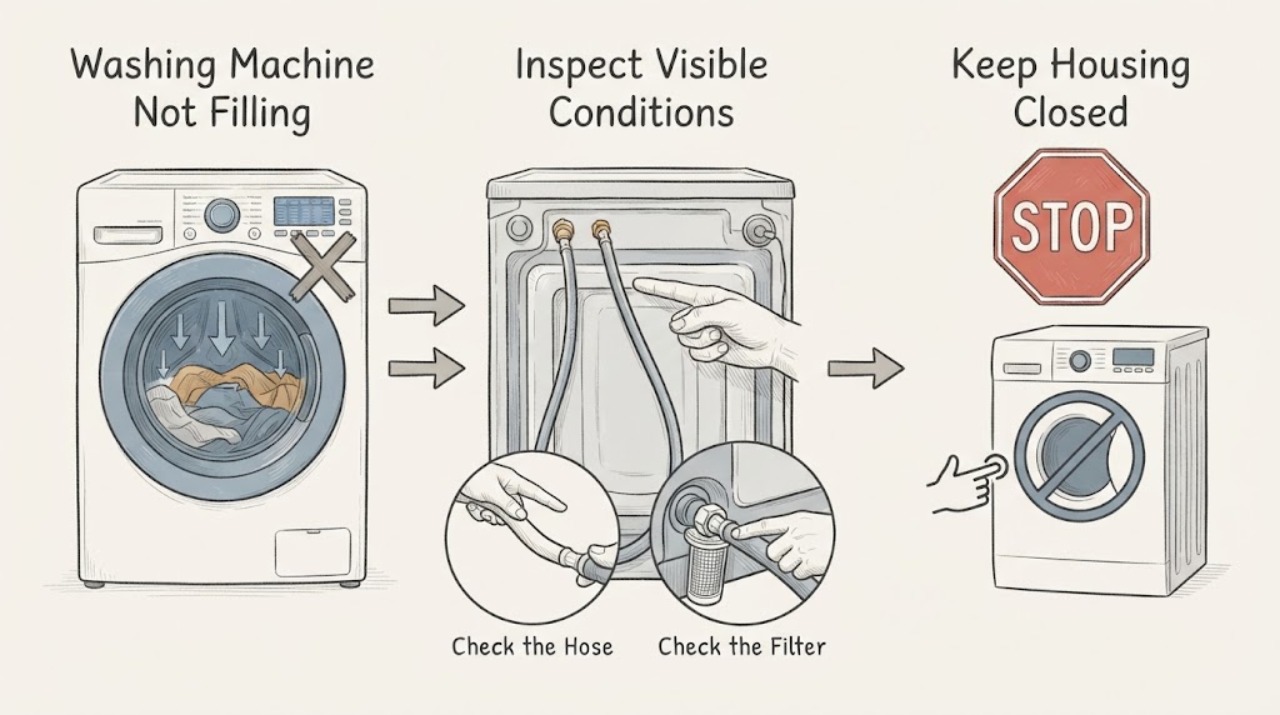
If a Hotpoint washing machine is not filling, first check whether the program actually starts and whether the door locks, then confirm the water taps are open and the inlet hoses are not kinked or leaking. If water enters and immediately disappears, inspect the drain hose routing against the exact model manual because an incorrectly positioned hose can cause a siphon-like symptom. A tap symbol or flashing light may indicate a water-supply issue, while a recurring error can point to a valve, filter, door-lock, water-level sensing, or control fault. Do not reach into standing water, open panels, bypass the door lock, or keep running a leaking machine; isolate it safely and arrange qualified service when the external checks do not restore a normal fill.
Before you begin
Safety first
- Owner checks stop at observing the start sequence, inspecting accessible taps and hoses, following a model-approved inlet-filter procedure, checking external drain routing, and observing the door and display. No panel, live electrical, pressure-system, or bypass work is included.
Work through in order
Diagnostic checks
Use only checks that match the exact appliance or system and its official guide.
-
Check 1
Select a normal wash program and press Start once with the door fully closed. Observe the display, door-lock indication, tap symbol or flashing lights, and the sequence before any water should enter.
Expected result: The program never starts, the door does not lock, a tap or fault indication appears, or the machine begins a cycle but remains dry.
Next step: Record the exact indication and model number. Do not bypass the door lock. Continue with the external supply check only if there is no leak, standing water, burning smell, or electrical damage.
Why this matters
Why: A no-start or door-lock symptom comes before the water path. A tap indication points toward supply or inlet checks. A cycle that starts with no water keeps the inlet, filter, valve, water-level, and control branches open.
-
Check 2
Inspect the accessible water taps and both ends of each inlet hose. Confirm the taps are open, the hoses are not kinked or crushed, and the connections show no active drip. Do not loosen a pressurized connection.
Expected result: A tap is closed, a hose is kinked, the connection leaks, or the supply and hose path look normal.
Next step: Correct only a plainly closed tap or external kink, dry the area, and run one supervised fill attempt. If water still does not enter or any connection leaks, stop and arrange service.
Why this matters
Why: A closed tap, restricted hose, or leak can prevent the required inlet flow. A normal external supply path shifts attention to an inlet screen or valve, the door state, or water-level control.
-
Check 3
With the machine stopped, unplugged, and the water supply closed, consult the exact manual for any user-accessible inlet screen or filter. Inspect only the specified access point; do not remove an internal valve or dismantle the hose end if the manual does not describe it.
Expected result: The manual identifies a blocked accessible screen, no blockage is visible, or the filter cannot be reached safely.
Next step: Clean only as the manual directs, restore connections without leaks, and make one supervised fill attempt. If the fault remains, do not substitute a valve or continue internal checks; request service.
Why this matters
Why: A blocked inlet filter can restrict water even when the tap and hose are fine. No visible blockage or an inaccessible filter leaves the inlet valve, wiring, and water-level system for qualified diagnosis.
-
Check 4
If water enters and then leaves immediately, inspect the drain hose from the outside and compare its routing and height with the exact model manual. Look for a hose pushed too far into a standpipe, a low route, a kink, or an open connection that could let water siphon away.
Expected result: The hose route differs from the manual, the hose is kinked or too deeply inserted, or the route appears correct but the drum still will not retain water.
Next step: Correct only an obvious external routing error according to the manual and run one supervised fill. If the machine still drains during fill, stop and arrange service; do not move internal hoses or open the cabinet.
Why this matters
Why: A drain hose that is incorrectly routed can make a fill appear to fail because incoming water leaves before the level is reached. A correct route with immediate draining points toward a drain or water-level fault rather than the inlet tap.
-
Check 5
Read any displayed code or flashing-light pattern exactly, including which lights are on and when the pattern begins. Compare it with the matching Hotpoint manual or official error-code guide for the full model, without assuming a code from another series applies.
Expected result: The indication maps to a water-supply or door condition in the model manual, maps to another system, or is not listed for that model.
Next step: Perform only the manual's documented user step once. If the code returns, the machine remains dry, or the manual provides no safe owner action, stop use and provide the code and model to a qualified technician.
Why this matters
Why: A model-specific indication can direct a safe user check, but an unknown or recurring code is evidence that the machine needs its own service path. An indicator that clears while no water enters does not prove the inlet valve is good.
-
Check 6
Check the door seal and latch area from the outside for a garment, debris, cracked seal, or misalignment that prevents firm closure. If there is standing water, keep the door closed and do not force the lock; note whether the machine was filling, draining, or stopped when the water remained.
Expected result: The door closes and locks normally, an obstruction or damaged seal is visible, or the door remains locked with water inside.
Next step: Remove only a loose external obstruction while unplugged. If the seal, latch, or door alignment is damaged, or water remains trapped, stop and arrange service rather than opening the door or panel.
Why this matters
Why: A door that cannot reach its safe locked state can prevent filling. A locked door with water inside may reflect a drain or control condition, and forcing it can release water or damage the lock.
Use your observations
Decision map
Find the observation that best matches what you see, then follow the next safe action.
-
PATH 01Next step
What you see
The program does not start or the door does not lock.
Do this next
Check for a loose garment or visible obstruction at the door edge, record any door indication, and use only the exact manual's user procedure. Do not bypass or force the lock; request service if it persists.
-
PATH 02Next step
What you see
The machine shows a tap symbol or a water-supply indication.
Do this next
Check the accessible taps, inlet hoses, and model-approved inlet filter path. If the supply is normal and the indication returns, arrange service for the inlet valve or control path.
-
PATH 03Next step
What you see
Water enters and immediately drains away.
Do this next
Compare the drain hose routing with the exact manual and correct only an obvious external routing problem. If the hose route is correct but water still leaves, stop and request service for the drain or water-level system.
-
PATH 04Next step
What you see
The inlet taps and hoses are normal but no water enters.
Do this next
Stop after the manual-approved filter check. A valve, wiring, pressure or water-level sensor, or control fault requires qualified diagnosis; do not open the cabinet.
-
PATH 05Next step
What you see
A code or flashing pattern returns after the documented user step.
Do this next
Stop using the machine and give the technician the exact code, model, cycle, and water behavior. Do not apply a reset or code meaning from another Hotpoint model.
-
PATH 06Next step
What you see
There is a leak, standing water near electrical parts, burning smell, smoke, spark, or repeated breaker trip.
Do this next
Stop immediately, keep people away, and isolate power only from a safe, dry position if that can be done without touching water. Arrange qualified electrical or appliance service.
Helpful context
Understand the symptom
First decide what “not filling” means
A washer can fail to fill because the program never starts, because water is blocked before the inlet valve, because the machine detects an unsafe door state, or because water enters and then drains away. Note the display, door behavior, sound of the inlet valve, and whether any water remains in the drum. This distinction prevents replacing a valve when the real issue is a closed tap, a door lock, or a drain hose that is siphoning.
Use the exact Hotpoint model guidance
Hotpoint publishes model-dependent manuals and troubleshooting pages. Record the full model number and any tap symbol, flashing light, or error message before clearing it. Hotpoint's own guidance says models vary, so do not assign one code meaning or one filter location to every washer.
Water and electrical safety are part of the diagnosis
Before a user-level inspection, stop the program and unplug from a dry, safe position. Never reach through standing water, force a locked door, or remove an appliance panel. A leak toward the outlet, a hot or burning smell, smoke, sparks, or a repeated breaker trip is a stop condition; leave the appliance isolated and obtain qualified help.
Safety boundary
Stop conditions
- Stop immediately for active leakage, standing water near the outlet or cord, smoke, burning smell, sparks, a hot connection, or a repeated breaker trip.
- Do not force a locked door, reach into trapped water, bypass a door lock, remove panels, or dismantle an inlet valve, pressure system, pump, or wiring.
- Stop if a hose connection will not seal, the machine keeps filling or draining unexpectedly, or an error returns after the exact model's documented user step.
- Do not keep cycling a machine that will not fill. Arrange qualified service when the accessible supply, hose, drain-routing, door, and manual-approved filter checks do not restore a normal fill.
Only after diagnosis
Potential parts
- washing machine water inlet valve
Consider this category only after the taps, hoses, accessible filter, door state, and exact model diagnosis confirm an inlet-valve fault.
Verify the complete model and revision before selecting a part; no-fill symptoms do not prove valve failure. - washing machine inlet filter screen
Consider this category only when the exact manual identifies a replaceable screen and inspection confirms damage or an authorized technician recommends it.
Do not remove an internal screen or assume a universal size; confirm the model-specific design. - washing machine door-lock assembly
Consider this category only when the door closes correctly but a qualified diagnosis confirms that the lock prevents the fill sequence.
Confirm the complete model and door design; never bypass the lock to test a fill. - washing machine water-level sensor
Consider this category only when water enters or immediately drains and a qualified diagnosis confirms a water-level sensing fault.
Pressure and sensing systems are model-specific internal repairs; use approved service information.
When checks do not resolve it
Need a professional?
Arrange qualified Hotpoint appliance service when the machine still will not fill after the external supply and door checks, when water immediately drains away despite correct hose routing, when an inlet or water-level fault is suspected, or when a code returns. Use electrical emergency help for smoke, sparks, burning, or dangerous water contact with electrics.
Safety scope: Owner checks stop at observing the start sequence, inspecting accessible taps and hoses, following a model-approved inlet-filter procedure, checking external drain routing, and observing the door and display. No panel, live electrical, pressure-system, or bypass work is included.
Common questions
FAQ
Why does my Hotpoint washing machine not fill with water?
The program may not be starting, the door may not be locking, or the water path may be restricted by a closed tap, kinked hose, inlet screen, valve, or control fault. Check the external supply and exact manual before requesting service.
What if water enters and immediately drains from my Hotpoint washer?
Check the drain hose routing and height against the exact model manual for a siphon-like drain-away symptom. Correct only an obvious external routing issue; persistent immediate draining requires service.
Can a Hotpoint door lock prevent filling?
Yes, a machine may not begin its fill sequence if the door cannot reach its safe locked state. Check only for a visible obstruction and do not force or bypass the lock; a recurring lock problem needs service.
Should I replace the water inlet valve first?
No. Confirm the taps, hoses, accessible filter path, door state, drain routing, and model-specific indication first. A valve should be selected only after qualified diagnosis confirms it and the exact model is known.
What should I do if the washer has water in it and will not fill or open?
Stop the program and do not force the door or reach into the water. Unplug only from a safe, dry position, follow the exact manual's safe drain guidance if applicable, and request service if water remains or a leak is present.
Read the exact guide
Official sources
- Washing Machine Troubleshooting - Quick fixes & Tips - Hotpoint - HotpointHotpoint · Hotpoint washing-machine troubleshooting for no-fill symptoms, water supply, inlet filters, door state, error indications, and unusual operation
- Hotpoint Service Help and Advice - HotpointHotpoint · Hotpoint owner help, user-manual access, service pathways, and washing-machine installation guidance
- Hotpoint Service Washing Machine Repair - HotpointHotpoint · Hotpoint washing-machine troubleshooting, drain-hose positioning, water supply, manuals, and repair escalation
Community feedback
Share a repair observation
Share a plain-text repair observation. Accepted observations are published automatically; this page may take a moment to update.