
On this page
Start here
Quick answer
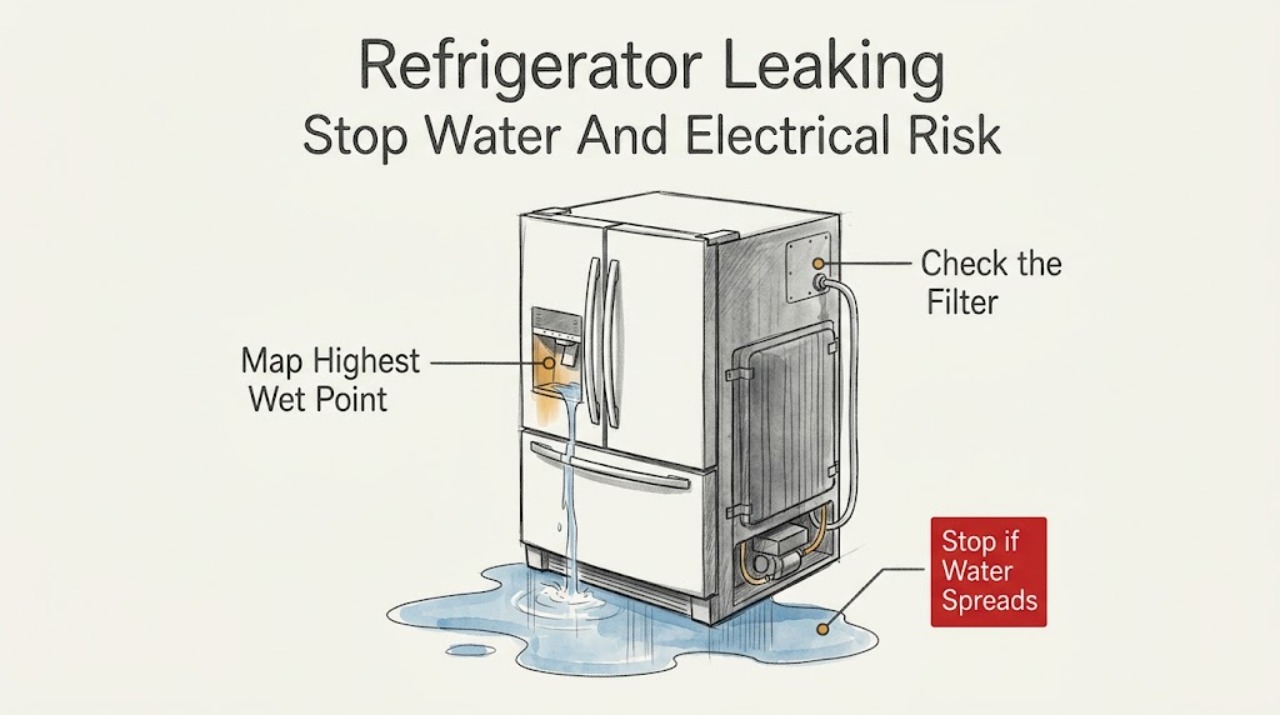
First protect the room and electrical area: stop dispensing or making ice, keep the refrigerator and nearby electrical hardware dry, and close the household water shutoff only if it is clearly accessible and safe. Then locate the highest wet point without pulling out a built-in unit: water inside the refrigerator or under a door can be condensation, a filter seal, or a dispenser line; a filter-area drip can follow an incorrectly seated, damaged, or incompatible filter; water at the hinge or rear can be a supply connection; and water beneath the cabinet can come from a concealed drain, valve, pan, or other component. JennAir's official support pages separate built-in, French-door/bottom-freezer, column, and general full-size paths, so do not assume every model has a water filter, dispenser, ice maker, or the same drain arrangement. Inspect only dry, visible filter and connection conditions according to the exact Use & Care Guide. If water is active or near electricity, the source is hidden, a hose/filter housing is cracked, the leak returns, or moving panels or the appliance would be required, leave water (and power if safe to isolate) off and arrange qualified appliance service; do not run the refrigerator to reproduce the leak, loosen pressurized fittings, open the rear cover, or select a part from the puddle location alone.
Before you begin
Safety first
- The owner may stop water use, contain water from a dry accessible position, isolate water/power only when safe, record the model and wet-point history, and inspect visible filter, gasket, and under-sink/rear connections permitted by the exact guide. Qualified personnel must handle built-in-unit movement, rear/bottom panels, hidden tubing, drains, valves, dispenser/ice-maker connections, wiring, and live or sealed-system work.
Work through in order
Diagnostic checks
Use only checks that match the exact appliance or system and its official guide.
-
Check 1
Stop dispensing water and making ice. From a dry, safe position, close the refrigerator's household water shutoff if it is clearly accessible; isolate power only if the plug or disconnect can be reached without touching water or damage. Keep towels or a shallow tray on the dry side of the leak and keep water away from outlets and wiring.
Expected result: Water is still flowing; water is near an outlet, cord, or electrical connection; the plug/cord is hot or damaged; the shutoff is inaccessible; or the leak has stopped and the area is dry.
Next step: Leave water and power off as safely possible and arrange qualified appliance service; use qualified electrical help if the electrical area is affected. Continue only with dry, non-contact documentation.
Stop if: Do not stand in water, touch wet electrical parts, pull out a built-in refrigerator, reset a tripped protective device, or reconnect the unit to reproduce the leak.
Why this matters
Why: An active leak or water near electrical hardware is a stop-use condition. An inaccessible valve or hard-to-reach built-in connection is not a reason to pull the appliance forward or open a panel.
-
Check 2
With the area safe and the water supply off, note the highest visible wet point without moving the refrigerator: inside the fresh-food or freezer compartment, beneath a door or hinge, around a filter/dispenser, at the rear supply connection, or under the base. Record whether water appears after dispensing, ice making, a filter change, door opening, defrosting, or an installation/move.
Expected result: Moisture is inside; under a door/hinge; at the filter or dispenser; behind the refrigerator; under the base; or the source cannot be seen.
Next step: Follow the matching branch and provide the wet-point map and timing to service. Do not run the appliance merely to see which area gets wet first.
Stop if: Stop if the source is hidden, water returns while isolated, the cabinet must be moved, or an internal panel would need to be removed.
Why this matters
Why: JennAir maps water inside toward filter sealing or condensation; water under a door or at a hinge toward dispenser tubing on applicable models; rear water toward supply connections; and hidden/bottom water toward a drain, valve, pan, or internal component.
-
Check 3
If the model has a water filter or dispenser and the filter area is dry enough to handle, use the exact model guide to inspect the filter cap, housing, sealing surfaces, O-rings, and visible dispenser area. Note a recent filter change, incomplete lock, cross-threading, crack, missing O-ring, or water under the door. Do not remove a filter from a pressurized or actively leaking system.
Expected result: The filter is newly installed, not fully seated, visibly cracked, missing a seal, or the filter area is dry; the model has no filter/dispenser; or water is coming from a hidden tube or housing.
Next step: Keep the water supply off. Reinstall or replace a filter only exactly as the model guide permits and only when the housing is safe and dry; otherwise arrange service with the model information.
Stop if: Do not force a filter, use an unverified substitute, open the filter head, disassemble the dispenser, or continue if the housing, tubing, or cabinet is cracked.
Why this matters
Why: JennAir identifies filter installation, damage, seal/O-ring condition, and compatibility as causes of filter-area drips. Water under a door can instead be a dispenser line, and a model without the feature needs a different branch.
-
Check 4
If the refrigerator's water connections are visible without moving the unit, inspect the household shutoff, tubing, and accessible fitting for cracks, moisture, or a loose insertion. On a model with a dispenser tube under a hinge cover, consult the exact manual rather than opening the cover by assumption; note whether doors were removed during delivery. Do not loosen a line or reach behind a built-in refrigerator.
Expected result: A visible supply line or shutoff is wet/damaged; a hinge-area tube may have been disturbed during delivery; all visible connections are dry; or the connection is hidden.
Next step: Leave the water supply off and give the visible observation and delivery history to a qualified appliance technician or plumber. Arrange service immediately for a cracked line or recurring leak.
Stop if: Do not pull the appliance forward, open the rear cover, loosen a pressurized fitting, cut tubing, or attempt a live leak test.
Why this matters
Why: JennAir's built-in and bottom-freezer guidance links rear, hinge, and under-door water to supply or dispenser tubing, but the exact connection location depends on the architecture. A hidden connection cannot be safely diagnosed from the floor alone.
-
Check 5
For moisture inside the cabinet or on an exterior surface, dry it and observe only from a safe position whether it returns without dispensing water or making ice. Check the door gasket visually for an obstruction and note room humidity, but do not remove door panels, disturb a gasket heater, or place hands near hidden drains or wiring.
Expected result: A small film does not return and humidity is high; water returns from a clear filter/line path; moisture follows dispensing/ice use; or water keeps appearing at the bottom or inside.
Next step: Keep the water feature off and monitor only if the moisture was minimal and does not return. For recurring water, use model-specific service rather than disassembling the drain or door.
Stop if: Stop for water near electrical hardware, a damaged gasket/door, ice buildup concealing a channel, or any need to remove an inner panel or test a drain/valve.
Why this matters
Why: JennAir states that minimal condensation can be normal in humid conditions, while repeated water associated with a filter, dispenser, ice maker, or bottom location indicates a leak path requiring the appropriate branch. A recurring hidden puddle is not normal condensation by default.
-
Check 6
Record the exact JennAir model and serial number, layout (built-in, column, French-door/bottom-freezer, side-by-side, or other), water features, wet-point map, timing, filter history, door/delivery history, and whether the leak stopped with water isolated. Use the model's literature to interpret any water or filter indication; do not use a generic code or parts list.
Expected result: The leak stops after a documented external correction; it returns; the source is hidden; a water/filter code appears; or the refrigerator remains wet or unsafe.
Next step: Keep the water feature and refrigerator out of service as appropriate and arrange JennAir or qualified appliance service. Use qualified electrical service when water reached power hardware, and provide the complete record.
Stop if: Do not order a gasket, filter housing, valve, tube, pan, or pump from the symptom alone; do not run the unit with covers removed or reconnect repeatedly to reproduce the fault.
Why this matters
Why: A stopped drip can reflect a filter or accessible connection condition, but recurrence or a hidden source can involve a valve, dispenser tube, drain, pan, filter housing, ice-maker path, or internal component. JennAir directs unresolved leaks to model-specific service.
Use your observations
Decision map
Find the observation that best matches what you see, then follow the next safe action.
-
PATH 01Safety boundary
What you see
Moisture is inside the refrigerator/freezer or appears beneath a door or hinge on a model with water dispensing or ice making.
Do this next
Keep water features off, check only the model-permitted visible filter/hinge area, and arrange service for recurring water or a hidden tube.
Why this path and its safety boundary
Why it matters: JennAir distinguishes condensation, filter sealing, and dispenser/ice-maker tubing. Under-door water is not automatically a drain fault, and an appliance without a water feature needs a different diagnosis.
Safety stop: Do not remove hinge covers or door panels, reach into a hidden tube, or continue operation near electrical moisture.
-
PATH 02Safety boundary
What you see
Water is concentrated at the filter head, housing, or nearby interior/under-door area, especially after a filter change.
Do this next
Close the water supply and follow the exact model guide for a safe filter inspection or replacement. If the housing is damaged or the drip persists, arrange service.
Why this path and its safety boundary
Why it matters: JennAir links filter installation, seal/O-ring condition, housing damage, and incompatible filters to drips. A no-filter model cannot be diagnosed with this branch.
Safety stop: Do not force or cross-thread the filter, use an unverified filter, open the head, or pressurize a cracked housing to test it.
-
PATH 03Safety boundary
What you see
Water appears behind the refrigerator, at a rear household connection, around a hinge, or beneath a door, and the model has a water line/dispenser/ice maker.
Do this next
Keep the household water supply off and have a qualified technician or plumber assess the visible connection or hidden line. Do not move a built-in refrigerator yourself.
Why this path and its safety boundary
Why it matters: JennAir identifies supply-line, shutoff, fitting, and dispenser-tube paths for these locations, but the exact routing is architecture and model dependent.
Safety stop: Stop for active flow, water near electrical hardware, a pressurized fitting, a hard-to-move unit, or any need to open the rear/hinge area.
-
PATH 04Safety boundary
What you see
Water collects underneath the refrigerator or returns from an unseen area after the floor and visible connections are dry.
Do this next
Keep the refrigerator and water supply off as appropriate and arrange model-specific appliance service. Use electrical service if water reached power hardware.
Why this path and its safety boundary
Why it matters: A bottom or hidden leak can involve a drain, defrost pan, valve, filter housing, tubing, or internal component. Location alone cannot identify a replaceable part, especially across JennAir architectures.
Safety stop: Do not pull out a built-in unit, remove rear/bottom covers, probe a drain, or run a cycle to expose the source.
-
PATH 05Safety boundary
What you see
Only a small amount of moisture appears inside or on the cabinet in a humid room, does not return after drying, and no water feature or connection is wet.
Do this next
Keep doors closed as practical and monitor without opening panels if the moisture does not return. Escalate recurring moisture, water on the floor, or any electrical risk.
Why this path and its safety boundary
Why it matters: JennAir says minimal condensation can be normal in humid conditions, but recurring water changes the problem to a leak investigation rather than a condensation observation.
Safety stop: Stop if water pools, a gasket is damaged, or moisture reaches a cord, outlet, control, or other electrical part.
Helpful context
Understand the symptom
A floor puddle may have traveled from somewhere else
Dry the visible floor and trace upward from the wettest point rather than guessing from the puddle's front edge. Water inside the cabinet, under a door, at the filter area, around a hinge, behind the refrigerator, or beneath the base leads to different checks. JennAir's support tree separates several refrigerator architectures; a column, built-in, French-door, or non-dispensing model may not have the same water path.
Filter and dispenser leaks are conditional
Only inspect a filter, dispenser tube, ice maker, or hinge connection if the refrigerator actually has that feature. A filter changed recently can be unseated, cross-threaded, missing an O-ring, or damaged; a line under a door or hinge can be disturbed after delivery or door removal. Use the exact model instructions and keep the water supply off during any permitted user-level inspection.
Water and electricity require a conservative stop point
Do not reach behind the refrigerator, stand in a wet area, or touch a wet plug, receptacle, cord, or appliance connection. Keep the unit and water feature out of service when the leak is active, recurring, hidden, or near electrical components. A qualified technician can determine whether the cause is a supply line, drain, filter housing, valve, dispenser tube, ice-maker path, defrost pan, or internal sealed-system area.
When checks do not resolve it
Need a professional?
Safety scope: The owner may stop water use, contain water from a dry accessible position, isolate water/power only when safe, record the model and wet-point history, and inspect visible filter, gasket, and under-sink/rear connections permitted by the exact guide. Qualified personnel must handle built-in-unit movement, rear/bottom panels, hidden tubing, drains, valves, dispenser/ice-maker connections, wiring, and live or sealed-system work.
Common questions
FAQ
What should I do first when my JennAir refrigerator is leaking?
Stop dispensing water and making ice, close the water shutoff if it is safely accessible, and keep water away from electrical hardware. Contain the leak from a dry position and do not move a built-in refrigerator or reconnect it to reproduce the leak.
Why is there water inside my JennAir refrigerator?
JennAir lists an incorrectly installed or damaged filter and minimal humidity-related condensation as possibilities for the applicable French-door/bottom-freezer path. Repeated water, a puddle, or moisture linked to dispensing or ice making needs a model-specific leak investigation.
Can a recently changed water filter cause a JennAir refrigerator leak?
Yes. JennAir identifies incomplete seating, cross-threading, damaged or missing O-rings, housing damage, and incompatible filters as possible filter-area leak causes. Keep the water supply off and follow the exact model guide; do not force the filter or pressurize a damaged housing.
Why is water under the door or near the hinge?
On JennAir models with a dispenser or ice maker, water under a door or at a hinge can involve dispenser tubing or a loose connection, especially after door removal during delivery. It is model-dependent; use the exact manual and do not remove the hinge cover or door panel by assumption.
What if the leak is behind or beneath the JennAir refrigerator?
Keep the water supply off and do not pull out an integrated unit. JennAir points to cracked supply tubing, fittings, shutoff valves, and other model-dependent connections behind the appliance; a hidden or bottom leak can also involve a drain, pan, valve, or internal component and needs qualified service.
When does a JennAir refrigerator leak require professional service?
Arrange service for an active or recurring leak, water near electrical hardware, a hidden source, a cracked filter housing or line, a built-in unit that would need moving, or any repair involving rear/bottom panels, valves, drains, tubing, or the sealed system. Provide the model, architecture, wet-point map, timing, and safe photos.
Read the exact guide
Official sources
- Water Inside RefrigeratorJennAir Product Help · Opened the official JennAir water-inside page; used conditionally for filter/O-ring and minimal-condensation distinctions, not as a universal architecture for all JennAir refrigerators.
- Leaking from Behind - Built-In RefrigeratorJennAir Product Help · Opened the official JennAir built-in rear-leak page; used conditionally for accessible supply-line and valve observations and the boundary against moving a built-in refrigerator.
- Leaking at the Top - Bottom Freezer RefrigeratorJennAir Product Help · Opened the official JennAir top-leak page; used only for models with a door dispenser and for the conditional hinge-tube/delivery-history branch.
- Leaking from the Filter Area - Bottom Freezer RefrigeratorJennAir Product Help · Opened the official JennAir bottom-freezer filter-area page; used conditionally for recently replaced filters, lock/seal, O-rings, and filter damage.
- What to Do if the Water Filter is Damaged or DrippingJennAir Product Help · Opened the official JennAir filter-leak page; used for conditional filter-area inspection and the boundary against assuming filter hardware exists or fits every model.
- What to Do if There is Water on the FloorJennAir Product Help · Opened the official JennAir floor-leak guide; used for separating drainage/door-seal/water-supply families, filter and rear-line observations, and model-specific support routing.
- LeakingJennAir Product Help · Opened the official JennAir leak index; used to establish that leak guidance is split by refrigerator architecture and model-specific manuals/service.
- Leaking from the Ice Maker - Bottom Freezer RefrigeratorJennAir Product Help · Opened the official JennAir ice-maker leak page; used only for models with the relevant water/ice architecture and for bottom-compartment, hinge, and rear-connection observations.
Community feedback
Share a repair observation
Share a plain-text repair observation. Accepted observations are published automatically; this page may take a moment to update.