
On this page
Start here
Quick answer
A Kenmore dryer that leaves clothes damp usually has a cycle or load problem, restricted airflow, or a heat or supply fault. First compare the result with a correctly sized load on a heat cycle, then clean and reseat the lint filter and check the complete exhaust route from the outside without opening the cabinet. Kenmore recommends cleaning the lint filter after every load and checking the dryer vent for blockage; use the exact model manual to account for whether the dryer is electric, gas, or a model-specific ventless design. Stop for smoke, a burning or gas odor, sparks, a hot cabinet, a damaged cord or vent, or a repeatedly tripping breaker, and arrange qualified appliance service before accessing internal heating or gas components.
Before you begin
Safety first
- This guide is limited to ordinary controls, a safe load comparison, filter care, and visible external checks. Do not open panels, disconnect the gas line, test live voltage, access the heater or burner, bypass a safety device, or continue after a smoke, gas, burning, sparking, or repeated-trip condition.
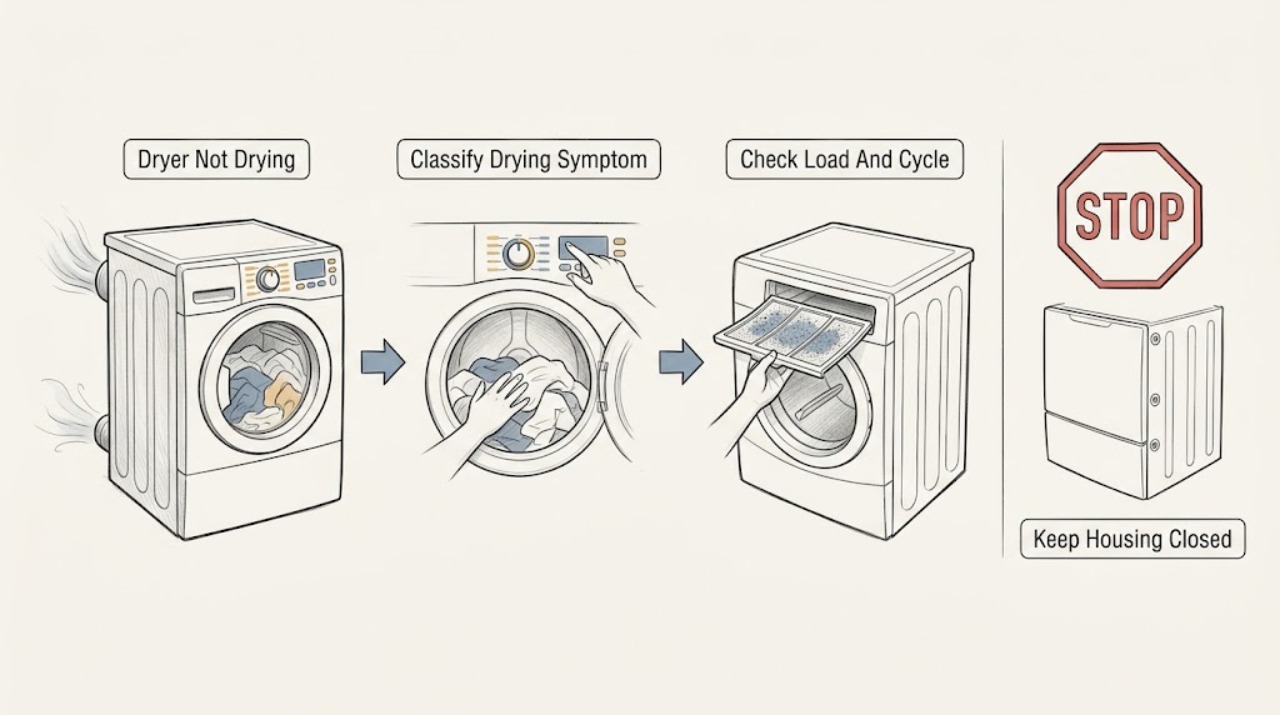
Work through in order
Diagnostic checks
Use only checks that match the exact appliance or system and its official guide.
-
Check 1
Run one small, similar-load test on the cycle and heat setting specified by the exact Kenmore manual, using ordinary controls and clean, properly spun laundry.
Expected result: Record whether the drum tumbles, whether the load feels warm during the cycle, whether the cycle ends early, and whether all items or only heavy seams and dense fabrics remain damp.
Next step: Continue to the load and filter checks when the drum runs; arrange service when the drum will not run, the dryer is unusually hot, the cycle stops with an abnormal sound, or there is no heat after the safe external checks.
Stop if: Stop immediately for smoke, a burning or gas odor, sparks, a hot cabinet, an abnormal electrical sound, or a breaker that trips again.
Why this matters
Why: Warm air with slow or uneven drying points first toward load selection, moisture-sensing behavior, airflow, or venting. No useful heat, no tumble, or an immediate stop points toward a supply, control, drive, or heating fault that needs a different branch.
-
Check 2
Compare the problem load with a balanced load that is not tightly packed, and verify the selected cycle, temperature, dryness level, and any timed-versus-sensor setting against the model manual.
Expected result: Note whether the dryer is overloaded, nearly empty, mixing heavy and light fabrics, set to air-only or low heat, or ending before the heavier items are dry.
Next step: Use the manual's recommended load and cycle; do not increase heat beyond the model's controls or repeat cycles indefinitely to compensate for damp clothing.
Stop if: Stop if the load or cabinet is excessively hot, fabric is scorching, the control behaves unpredictably, or the dryer gives a burning smell.
Why this matters
Why: A result that improves with a correctly sized, balanced load supports a cycle or load explanation rather than an immediate parts failure. A similar failure with a reasonable test load keeps airflow, supply, and heat-system checks active.
-
Check 3
Switch the dryer off, let hot surfaces cool, remove the lint filter using ordinary access, and clean lint from the screen and its accessible housing; reinstall the filter fully.
Expected result: Check whether the screen is coated, torn, warped, wet with residue, or not seating flat, and whether the housing contains a visible lint mat that can be removed without tools or deep probing.
Next step: Run the same controlled test after the filter is clean and correctly seated; keep the filter clean after every load and never operate the dryer without it.
Stop if: Stop if the filter will not release normally, the housing is damaged, lint is packed beyond safe ordinary access, or you would need to open a panel or insert an object into the duct.
Why this matters
Why: A dirty or poorly seated filter can restrict the intended air path and contribute to long drying. A damaged screen, inaccessible buildup, or a clean filter with no improvement shifts the check to the external vent and then qualified service.
-
Check 4
From safe access, inspect the visible exhaust hose and outside termination for crushing, sharp kinks, disconnected joints, lint, nesting, a closed flap, or weak airflow while the dryer operates normally.
Expected result: Record whether air exits steadily, whether the outside flap opens, whether airflow is weak or absent, and whether lint or moisture accumulates at the termination; do not dismantle hidden ductwork.
Next step: Turn the dryer off and arrange vent cleaning or appliance service when the route is blocked, unsafe to reach, concealed, damaged, or still weak after the visible obstruction is removed by an appropriately qualified person.
Stop if: Stop for lint blowing into the room, a loose or hot vent, a damaged wall or roof termination, a need to climb or move the appliance, or any smoke or burning odor.
Why this matters
Why: Weak or absent outside airflow supports a restricted, crushed, disconnected, or incorrectly routed exhaust path and can explain long drying. Strong airflow keeps load, moisture-sensing, power or gas supply, and internal heating checks in the service branch.
-
Check 5
Without opening the dryer or moving it, verify the accessible power connection and breaker or fuse position; on a gas model, observe only whether the external gas shutoff is in its normal operating position and whether other gas appliances have supply.
Expected result: Note whether the plug or cord is damaged, the breaker is open or trips again, the control display works but heat is absent, or other gas appliances also lack supply.
Next step: Reset a breaker only once if it is safe and no hazard is present; if it trips again, remains open, or the external gas supply is uncertain, leave the dryer off and call qualified electrical, gas, or appliance service as appropriate.
Stop if: Do not touch exposed conductors, test live voltage, relight or adjust gas components, disconnect the gas line, remove panels, or continue after a gas odor, sparking, cord damage, or repeated trip.
Why this matters
Why: An open or recurring breaker, damaged cord, or wider gas-supply problem is not a dryer setting issue. A powered control with no heat can still have an internal heater, thermal, ignition, or control fault and must not be diagnosed by opening the appliance.
-
Check 6
Find the full model number from the dryer's rating label and compare the observed symptom, cycle behavior, vent arrangement, and electric-or-gas configuration with the exact Kenmore manual.
Expected result: Record the model number, dryer type, selected cycle and heat setting, load size, filter and vent observations, outside airflow, breaker or gas-supply result, and any displayed code or unusual sound.
Next step: Provide the record to qualified appliance service and request diagnosis of the heat path, airflow, controls, and supply; do not order an internal part from a generic dryer description.
Stop if: Stop all further troubleshooting if the model manual calls for panel access, gas work, live testing, heater or burner inspection, or a procedure outside ordinary safe access.
Why this matters
Why: A complete model-specific record lets service distinguish a normal sensor-cycle result or ventless-specific maintenance step from an internal heat, control, drive, or supply fault. Missing model information makes part and procedure identification unsafe.
Use your observations
Decision map
Find the observation that best matches what you see, then follow the next safe action.
-
PATH 01Next step
What you see
The drum runs and the load is warm but drying is slow or uneven.
Do this next
Correct the load and cycle, clean and seat the filter, and inspect the visible exhaust route. If the outside airflow remains weak or drying remains slow, arrange vent or appliance service.
-
PATH 02Next step
What you see
The drum runs but the load never becomes usefully warm.
Do this next
Perform only the accessible supply check for the electric or gas configuration and consult the exact model manual. Do not open panels or test heater, ignition, wiring, or live-voltage components; arrange qualified service.
-
PATH 03Next step
What you see
The outside termination has little or no airflow, or lint and moisture collect there.
Do this next
Stop the dryer and arrange qualified vent inspection or cleaning; a hidden or damaged duct requires professional access, not repeated high-heat cycles.
-
PATH 04Next step
What you see
A smaller, balanced load on the correct cycle dries normally.
Do this next
Treat the original result as a load or cycle mismatch, follow the model manual's load guidance, and avoid overloading or using an unsuitable low-heat or air-only setting.
-
PATH 05Next step
What you see
The breaker trips again, the cord is damaged, other gas appliances also lose supply, or there is smoke, gas odor, sparking, or burning odor.
Do this next
Leave the dryer off, keep clear of the hazard, and contact the appropriate qualified electrical, gas, or appliance professional. Do not reset repeatedly or remove any cover.
-
PATH 06Next step
What you see
The dryer has a model-specific sensor, ventless, or other configuration that is not covered by the general checks.
Do this next
Use the exact Kenmore manual and provide the full model number to service; do not assume a conventional exhaust or substitute a generic procedure.
Helpful context
Understand the symptom
Separate a load or cycle issue from a dryer heat or airflow issue
Notice whether the dryer produces warm air but needs multiple cycles, ends early with damp clothes, leaves only thick items wet, or produces no useful heat at all. A mixed or tightly packed load can dry unevenly, while a restricted vent can make the whole load slow and may also cause the appliance to cycle on a high-temperature safety limit. Moisture-sensing behavior varies by model, so a sensor cycle should be compared with the exact instructions for the dryer rather than treated as universal.
Use the external vent and lint path as the first maintenance boundary
Lint at the filter or a crushed, blocked, or poorly exhausting vent can reduce airflow enough to prolong drying. Clean the filter after every load, confirm it is seated, and observe the outside termination during a normal cycle if it is safely accessible. Do not run the dryer without its filter, push a hand into a hidden duct, or dismantle the cabinet to reach a blockage. If the vent route cannot be inspected safely, have it assessed by a qualified professional.
Electric and gas models have different service boundaries
Kenmore sells both electric and gas dryers. An electric dryer may have a supply or breaker issue even when the controls light up, while a gas dryer also depends on an available gas supply and an operating ignition and heating system. Limit the homeowner check to the accessible plug, breaker or fuse, controls, and any external shutoff that can be observed without moving the appliance or opening panels. Internal heating, ignition, wiring, burner, and live-voltage tests belong to qualified service.
Only after diagnosis
Potential parts
- lint filter
Consider this category only if the exact model's filter is torn, warped, missing, or cannot seat correctly after cleaning and the model manual identifies it as replaceable.
Confirm the full model number and the manufacturer's fit information before ordering; do not run the dryer without the correct filter. - exhaust vent hose or termination component
Consider this category only if inspection confirms a crushed, disconnected, damaged, or otherwise unsuitable visible vent component and a qualified person determines replacement is appropriate.
Confirm the route, dimensions, material, building requirements, and exact model instructions; a replacement part does not substitute for a full concealed-duct assessment. - heating-system component
Consider this category only after qualified diagnosis confirms an internal electric heater, thermal component, ignition, burner, or related component has failed.
Use the full model number and qualified service diagnosis; do not select or install an internal electrical or gas component from the symptom alone.
When checks do not resolve it
Need a professional?
Arrange qualified appliance or vent service when cleaning and ordinary external checks do not restore drying, when the drum does not run, when there is no heat, when airflow is weak, when the vent is concealed or damaged, or when the model requires panel access. Leave the dryer off for smoke, gas or burning odor, sparks, a hot cabinet, damaged power cord, repeated breaker trips, or any sign of lint escaping into the room.
Safety scope: This guide is limited to ordinary controls, a safe load comparison, filter care, and visible external checks. Do not open panels, disconnect the gas line, test live voltage, access the heater or burner, bypass a safety device, or continue after a smoke, gas, burning, sparking, or repeated-trip condition.
Common questions
FAQ
Why is my Kenmore dryer running but leaving clothes damp?
Start with the load and cycle, then clean and reseat the lint filter and check the visible exhaust route. Warm but slow drying commonly keeps airflow and load checks active; no useful heat or weak outside airflow needs qualified service rather than repeated cycles.
How often should I clean the Kenmore dryer lint filter?
Kenmore's maintenance guidance says to clean the lint filter after every load. Do not run the dryer without its correctly seated filter, and stop if the filter is damaged or cannot seat normally.
Can I repair the Kenmore dryer heating element or gas burner myself?
Do not open the cabinet, test live voltage, disconnect the gas line, access the burner or heater, or bypass a safety device as an ordinary user check. Record the model number and symptoms and arrange qualified appliance service.
Does every Kenmore dryer use the same drying procedure?
No. Kenmore offers electric and gas dryers and model-specific features, including different sensing and vent arrangements. Use the exact model manual before applying a procedure or considering any part.
Read the exact guide
Official sources
- Dryers | Laundry | KenmoreKenmore · Supports distinguishing electric and gas dryers and model-specific support routing.
- Find Your Manual | Kenmore Appliance Manuals & GuidesKenmore · Supports using the exact model manual before applying controls or maintenance.
- Laundry List: Kenmore Dryer Buying GuideKenmore / Livemore · Supports electric/gas distinction, load sizing, moisture sensing, and airflow context.
- Appliance Maintenance Tips to Help Maximize Efficiency | Livemore™Kenmore / Livemore · Supports lint-filter cleaning after each load, vent blockage checks, and professional vent cleaning.
Community feedback
Share a repair observation
Share a plain-text repair observation. Accepted observations are published automatically; this page may take a moment to update.