
On this page
Start here
Quick answer
If a Kenmore washer-dryer is leaking, stop the cycle, keep people away from the wet floor, and turn off the water supply. Unplug the appliance only when the plug and surrounding area are dry and it is safe to do so. Note where water first appears and whether it happens while filling, washing, draining, spinning, or drying. Kenmore's maintenance guidance says to inspect the hoses behind a washer for wear, cracks, bulges, or dripping; check those accessible connections without opening the cabinet. Use the exact model manual for any user-accessible filter or drain procedure. Do not keep operating an appliance with a continuing leak, water near electrical parts, a damaged cord, flooding, or an unexplained leak from underneath: arrange qualified appliance service.
Before you begin
Safety first
- This article supports safe observation and ordinary accessible inspection only. Keep water off and power disconnected when safe for a continuing leak. Do not open the cabinet, force the door, bypass controls, tilt the appliance, or handle wet electrical parts.
Work through in order
Diagnostic checks
Use only checks that match the exact appliance or system and its official guide.
-
Check 1
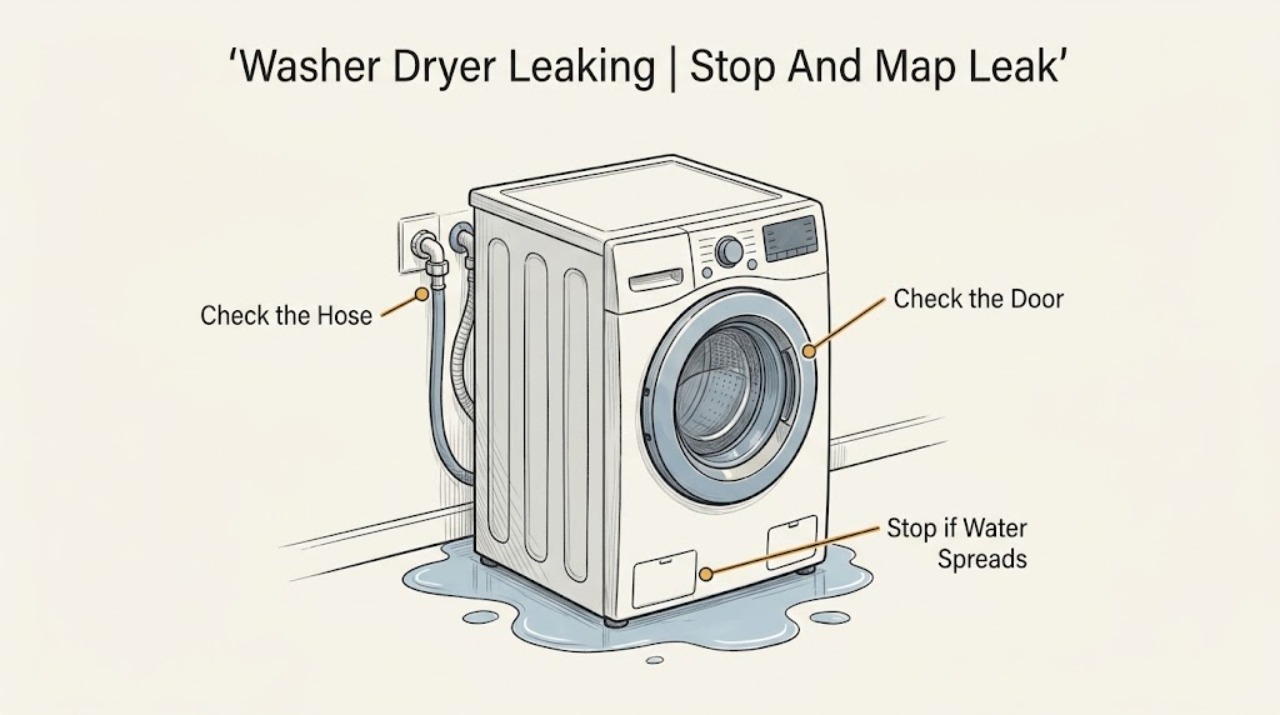
Stop the cycle, keep the floor clear, and observe from outside the wet area where the first fresh water appears: rear, front door, dispenser, drain connection, or underneath. Record whether it starts during filling, washing, draining, spinning, or drying; do not restart an active leak just to reproduce it.
Expected result: The location and timing may be rear supply water during fill, front water at the door or dispenser, water at the drain path, or water that appears from below the cabinet; the floor may also be wet without the source being visible.
Next step: If it is safe and dry to do so, turn off the water supply and disconnect power without touching wet electrical parts. Then continue only with the matching external check below; call service for an underside, continuous, or concealed leak.
Stop if: Stop immediately for flooding, water near the outlet or cord, a damaged cord, burning smell, shock, or any need to stand in water or open the appliance.
Why this matters
Why: A leak location and cycle-stage match narrows the next safe check, while an underside or continuously growing puddle leaves the cause unresolved and is not a reason to open the cabinet.
-
Check 2
With the water supply off, inspect the accessible rear fill hoses and their visible connections using a flashlight. Look for a crack, bulge, rubbed spot, kink, or fresh drip; do not loosen a pressurized connection or use a wrench as a guess.
Expected result: A wet threaded connection may be the source, while a hose that is cracked, swollen, or dripping along its body is damaged. Dry surfaces once and look for new moisture without placing hands behind a wet machine.
Next step: Leave the water off and do not run the washer. Use the Kenmore manual for the exact hose and connection procedure or arrange qualified service if the hose, connection, shutoff, or access is uncertain.
Stop if: Stop for a seized or damaged shutoff, a hose that cannot be isolated, water spraying under pressure, or water near electrical parts.
Why this matters
Why: A confirmed external hose leak can explain water during filling, but it does not establish that an internal inlet valve or cabinet component is safe to replace without the model instructions.
-
Check 3
With the appliance stopped, water off, and power safely disconnected, inspect only the visible door seal, door opening, detergent drawer, and surrounding surfaces. Remove an accessible piece of lint or residue without prying, pulling the seal, or forcing a locked door.
Expected result: Look for a torn or displaced seal, an item caught at the opening, detergent residue or overflow at the drawer, a door that is not closing evenly, or no visible source at the front.
Next step: Clean only ordinary accessible residue as the model manual permits and keep the appliance out of service if the seal is torn, the door is damaged, or water returns. Arrange service for seal replacement, dispenser faults, or any internal front-panel repair.
Stop if: Stop if the door is locked with water inside, glass or seal material is damaged, the door will not latch, or access would require removing a panel.
Why this matters
Why: A front leak during fill or wash can be related to the door sealing area or dispenser path, but visible residue alone does not prove a failed seal or valve.
-
Check 4
If water appeared during draining or spinning, inspect the visible drain hose, its outlet, and the household standpipe or sink connection. Check for a kink, displacement, split, or splash at the connection without dismantling household plumbing.
Expected result: A hose that has pulled out, is kinked, or is split can spill during drain flow; water that rises or splashes from the standpipe may be a household drain issue rather than an appliance part.
Next step: Keep the appliance off until the manual-approved hose routing or household plumbing correction is made. If the connection is sound but water still emerges from below, stop testing and call qualified service.
Stop if: Stop for sewage-contaminated water, a blocked or overflowing standpipe, a concealed split, or any need to disassemble plumbing or the appliance.
Why this matters
Why: A drain-stage leak at an external connection points to hose routing or household drainage, while water from beneath the cabinet or a persistent drain leak needs service diagnosis.
-
Check 5
If the manual for the exact Kenmore model identifies a user-accessible pump filter or emergency drain, follow that procedure only after water is off and power is safely disconnected. Place a shallow pan and towels before opening the specified access point; do not remove a filter merely because the appliance is leaking.
Expected result: The manual may identify a small amount of trapped water, lint, or debris at an accessible filter, or it may show that this model has no user-accessible filter. A large, hot, foul, or uncontrolled flow is not an ordinary filter check.
Next step: Follow the exact model instructions for resealing and cleanup only if the procedure is explicitly user-accessible. If water continues, the seal will not sit correctly, or the source is behind the access panel, leave water and power off and arrange service.
Stop if: Stop for hot water, a large flow, water near electrical components, missing fasteners, a damaged seal, or any instruction that requires cabinet disassembly.
Why this matters
Why: A model-approved accessible drain or filter path can explain a drain-stage leak, but an internal pump, tub, valve, or hose remains a service diagnosis when the manual does not authorize access or the leak continues.
-
Check 6
After an external hose or routing issue has been corrected according to the exact model instructions, the floor is dry, and no electrical or flooding hazard remains, run at most one short supervised test with a small or empty permitted load. Keep hands away from moving parts and stop at the first new drop.
Expected result: Note whether water remains absent, returns at the same location and cycle stage, or appears from a different location. Do not treat a dry first minute as proof that a hidden leak is repaired.
Next step: Stop the test and shut off water if any moisture returns. Record the location, stage, load, and correction for the technician; do not run additional cycles to chase an intermittent leak.
Stop if: Do not test if the appliance, cord, outlet, floor, or cabinet is wet, if the source is underneath, or if the model manual does not permit the proposed operation.
Why this matters
Why: A repeat leak after an external correction indicates that the correction did not address the source or that an internal component is involved; a dry test supports monitoring but does not justify ignoring a later leak.
-
Check 7
Record the full model number, the first wet location, the cycle stage, water temperature if known without touching it, hose and door-seal observations, and any correction already attempted. Use Kenmore's manual lookup to obtain the exact manual before requesting service.
Expected result: A complete record may show a repeatable fill, wash, drain, or spin pattern, or it may show that the source is concealed or intermittent. The model number determines which access and drain instructions apply.
Next step: Arrange qualified appliance service for any leak from underneath or inside the cabinet, a persistent or repeat leak, a damaged seal or hose that needs replacement, or uncertainty about safe access. Keep the water supply off until then.
Stop if: Stop all user troubleshooting if water reaches electrical parts, the appliance moves or vibrates abnormally, or the leak is large enough to cause damage.
Why this matters
Why: A technician can distinguish an external hose or drain-routing issue from a door, dispenser, pump, valve, tub, or other internal issue only when the observed stage and location are preserved.
Use your observations
Decision map
Find the observation that best matches what you see, then follow the next safe action.
-
PATH 01Safety boundary
What you see
Water appears at a rear supply hose or connection during filling.
Do this next
Keep the water supply off, do not run the appliance, and use the exact model manual or qualified service for the hose and connection repair.
Why this path and its safety boundary
Why it matters: An external hose or connection is a plausible source, but the inlet valve and internal plumbing are not established by an external inspection.
Safety stop: Stop for a damaged shutoff, pressurized spray, inaccessible connection, or water near electrical parts.
-
PATH 02Safety boundary
What you see
Water appears at the door seal or dispenser during fill or wash.
Do this next
Inspect only ordinary visible access as the model manual permits, then keep the appliance off and arrange service if the leak returns or any seal or door damage is present.
Why this path and its safety boundary
Why it matters: A visible obstruction, damaged seal, door problem, or dispenser overflow is possible; a torn seal or internal dispenser fault needs service.
Safety stop: Do not force a locked door, pull the seal, remove a panel, or continue operation with water reaching the cabinet or floor.
-
PATH 03Safety boundary
What you see
Water appears at the drain hose, standpipe, sink connection, or underneath during drain or spin.
Do this next
Check only visible routing and the exact model manual's user-accessible drain instructions; call service when the external path is sound or the source is underneath.
Why this path and its safety boundary
Why it matters: External hose routing or household drainage may be involved, while an underside leak may involve an internal hose, pump, filter seal, tub, or other component.
Safety stop: Stop for an overflowing standpipe, contaminated water, concealed plumbing, uncontrolled flow, or cabinet access.
-
PATH 04Safety boundary
What you see
Water appears from underneath, continues while the appliance is idle, or the source cannot be located safely.
Do this next
Turn off the water supply and disconnect power only when safe without contact with water. Protect the area from further damage and arrange qualified appliance service.
Why this path and its safety boundary
Why it matters: The leak may be internal or connected to a concealed supply or drain path; ordinary external inspection cannot establish the failed component.
Safety stop: Do not run another cycle, tilt the appliance, or open the cabinet to investigate.
-
PATH 05Safety boundary
What you see
The floor is dry, the external correction follows the model manual, and one supervised permitted test produces no new moisture.
Do this next
Monitor the next permitted use and keep the leak location and cycle stage recorded; stop immediately if moisture returns.
Why this path and its safety boundary
Why it matters: The original external condition may have been corrected, but an intermittent leak is not ruled out.
Safety stop: Do not continue testing if the floor, plug, cord, or cabinet becomes wet or if any water appears from below.
Helpful context
Understand the symptom
Find where the water starts before guessing at a part
A leak that begins while the machine fills points toward the supply hoses, inlet area, dispenser, or an overfill condition. Water that appears only while draining points toward the drain hose, standpipe connection, an accessible filter path, or an internal pump area. A front leak can involve the door seal or dispenser, while water appearing from underneath is not safely diagnosed by looking through the front panel. Dry the floor enough to see the first new wet spot, observe only from a safe distance, and record the stage rather than repeatedly running a leaking appliance.
Use water and electrical precautions first
Turn off the washer's water supply before handling a supply hose. If the floor, plug, outlet, or cord is wet, do not reach into the area or unplug it by hand; use a safe disconnect only if it can be done without contact with water, otherwise get qualified help. Kenmore's moving guidance uses a bucket for residual water and directs the user to drain the main hose, but it also points to the owner's manual for model-specific instructions. Do not remove a cabinet panel, bypass a switch, or continue a cycle to reproduce an active leak.
Safety boundary
Stop conditions
- Stop for flooding, water near an outlet, plug, cord, or other electrical part, a damaged cord, burning smell, shock, or an appliance that cannot be safely isolated.
- Stop for a leak from underneath or inside the cabinet, a continuous leak while idle, a large or uncontrolled flow, or water damage that is worsening.
- Do not remove cabinet panels, force a locked door, tilt the appliance, bypass a switch, or repeatedly run cycles to reproduce a leak.
- If the external source is not clear after safe observation, keep water and power off when safe and arrange qualified appliance service.
When checks do not resolve it
Need a professional?
Arrange qualified appliance service when a leak comes from underneath or inside the cabinet, returns after an external hose or drain correction, involves a torn door seal or damaged hose, continues while the machine is idle, cannot be isolated safely, or occurs near electrical parts. Also call when the exact model manual does not authorize the access or drain procedure needed.
Safety scope: This article supports safe observation and ordinary accessible inspection only. Keep water off and power disconnected when safe for a continuing leak. Do not open the cabinet, force the door, bypass controls, tilt the appliance, or handle wet electrical parts.
Common questions
FAQ
Why is my Kenmore washer-dryer leaking from the back?
A rear leak during filling can come from a supply hose or visible connection, but the inlet valve and internal plumbing are not proven by looking at the hose. Turn off the water, inspect only from a dry safe position, and use the exact model manual or qualified service for the repair.
What should I do if the leak is coming from underneath the washer-dryer?
Stop the cycle and do not tilt or open the appliance. Turn off the water supply and disconnect power only when safe without touching wet electrical parts. Keep the appliance out of service and arrange qualified appliance service because the source may be an internal pump, hose, valve, tub, or seal.
Can a clogged drain hose make a Kenmore washer leak?
A kinked, displaced, split, or poorly routed drain hose can spill during draining, and a household standpipe can also overflow. Inspect visible routing without dismantling plumbing, follow the exact model manual, and call service if the external path is sound or water appears from underneath.
Can I keep using a Kenmore washer-dryer if the leak is small?
Do not keep running an appliance with a continuing or unexplained leak, especially near an outlet, plug, cord, or cabinet electrical parts. After an external correction that follows the model manual, one short supervised permitted test may be appropriate only when the area is dry and safe; stop at the first new drop.
When should I call for Kenmore washer-dryer leak repair?
Arrange qualified service for a leak from underneath or inside the cabinet, a leak that returns after an external hose or drain correction, a torn door seal, a continuous leak while idle, a large flow, or any situation requiring cabinet access or handling wet electrical parts.
Read the exact guide
Official sources
- How to Move AppliancesKenmore Livemore · Official Kenmore moving guidance used only for safe water shutoff, power isolation when safe, bucket use, and hose-draining precautions; it is not a repair procedure.
- Appliance Maintenance Tips to Help Maximize EfficiencyKenmore Livemore · Official Kenmore maintenance article used for accessible hose inspection, load and balance context, and the recommendation to seek professional help for leaks or performance problems.
- Kenmore ManualsKenmore · Official Kenmore model-manual lookup used to identify the exact access, hose, drain, and user-serviceable procedures for a particular appliance.
Community feedback
Share a repair observation
Share a plain-text repair observation. Accepted observations are published automatically; this page may take a moment to update.