
On this page
Start here
Quick answer
Start by deciding whether the clothes enter drying already waterlogged, whether the dryer tumbles without heat, or whether heat is present but moisture cannot leave. Use a correctly sized load and the intended heated or sensor cycle; Air Dry and other no-heat settings will not dry normally. Clean the lint filter, then inspect the vented exhaust path and outside hood if your model vents outdoors. A ventless or heat-pump model needs its model-specific filters and condensate path maintained instead, so do not add an external vent. If the washer-dryer repeatedly overheats, trips power, smells of burning, shows smoke or gas odor, or still cannot dry after these user-level checks, stop and arrange qualified service. [Source: kenmore-dryer-guide; cpsc-dryer-safety; energy-star-heat-pump]
Work through in order
Diagnostic checks
Use only checks that match the exact appliance or system and its official guide.
-
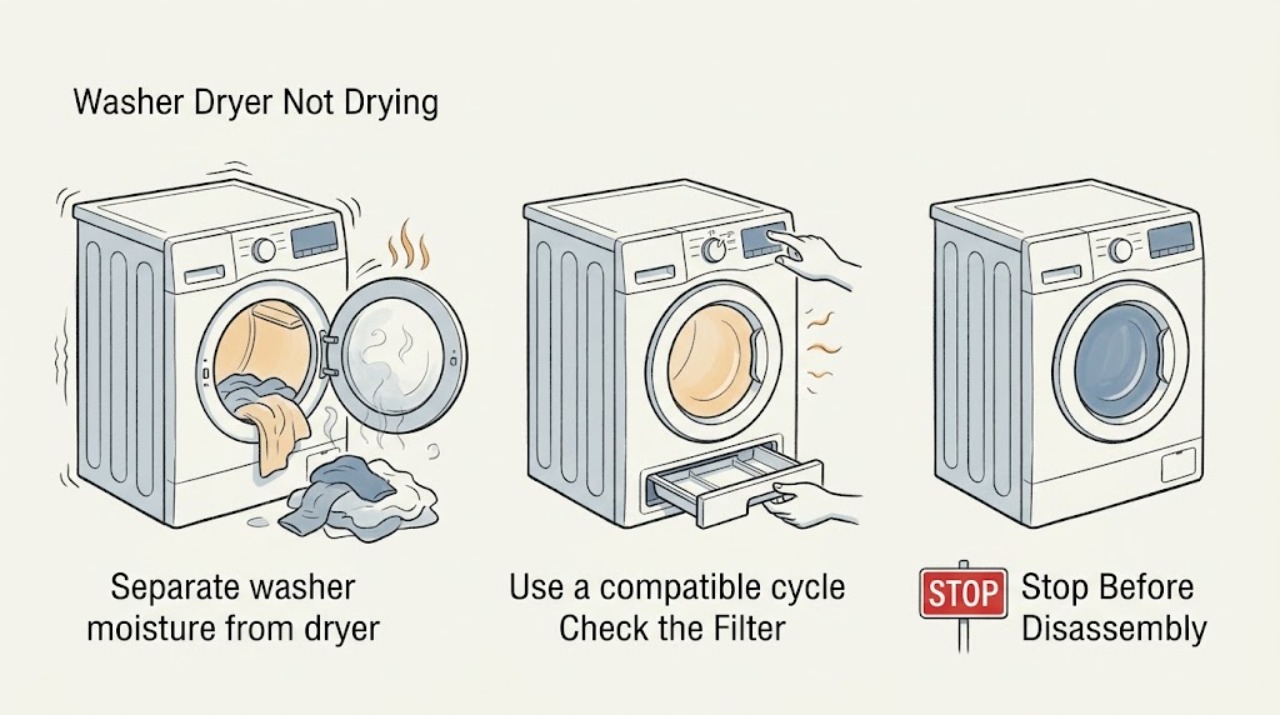
Separate washer moisture from dryer performance
Run a familiar small load through the washer portion and note whether the final spin leaves water pooling or clothes merely damp. In the drying portion, record whether the drum tumbles, whether the selected cycle is advancing, whether warm air is present, and whether the load is damp at the end or the cycle stops early.
Expected result: A soaked load before drying points to washer drain or spin performance; a tumbling cold load points to a cycle, supply, or heating issue; warm air with very slow drying points to airflow, condensate, load, or sensor conditions.
Next step: Follow the washer-side check if the load is waterlogged. Otherwise confirm the dry-cycle and heat settings, then identify whether the unit is vented or ventless before checking its moisture path.
Why this matters
Why: These are different fault paths. Replacing a dryer heater cannot correct water left by an incomplete washer spin, and cleaning a vent cannot correct a no-heat setting.
-
Use a compatible cycle and manageable load
Select the normal or model-recommended heated/sensor dry program for the fabric, not Air Dry or another deliberately no-heat option. Use a load with enough room to tumble, separate heavy items from light items, and avoid testing with a single oversized blanket or an almost empty drum.
Expected result: Heat and time behavior improves after the cycle is corrected or the load is reduced and balanced; or the drum still tumbles without heat and the load remains damp.
Next step: Retest once with a normal load. If the drum is still cold on a heated cycle, move to the accessible electrical or gas-supply check and stop before internal testing.
Why this matters
Why: Kenmore describes sensor strips and temperature monitoring as features that regulate drying and end a cycle when clothes are dry; load size and cycle selection change what the sensors can detect. A no-heat setting is not evidence of a failed heater.
-
Clean the lint filter and vented exhaust path
If the unit has an outdoor exhaust, turn it off and let it cool. Clean the lint filter before the next load, inspect the accessible duct for crushing or blockage, and observe whether the outside flap opens and warm air escapes during a supervised test. Keep the area behind and around the appliance clear. Reconnect any duct that was disconnected before operating.
Expected result: Lint is present, the duct is kinked or blocked, or little air reaches the outside hood; after correction, airflow and drying time improve. If the unit has no outdoor duct, this check does not apply.
Next step: For a vented model, arrange qualified duct cleaning if the blockage is inside an inaccessible run or airflow remains weak. For a ventless model, continue with its filters and condensate route instead of adding a vent.
Why this matters
Why: Lint and exhaust restrictions reduce airflow, raise heat, and are a recognized reason for damp clothes and longer-than-normal drying. CPSC also treats the vent and lint path as a fire-safety maintenance area.
-
Check the ventless filters and condensate route
If the model is ventless or heat-pump based, follow its exact owner guide to clean the accessible lint and heat-exchanger filters, empty the water container if fitted, and confirm the drain hose is not kinked or displaced. Do not access sealed panels or the sealed heat-pump system.
Expected result: A full water container, blocked accessible filter, or kinked drain path is found; after maintenance the dryer removes moisture and the cycle completes. If the appliance is a conventional vented type, these heat-pump checks may not apply.
Next step: Run one model-approved test cycle. If the condensate path is clear but drying remains poor, stop before opening the refrigeration or heat-pump system and request service.
Why this matters
Why: ENERGY STAR explains that heat-pump dryers remove moisture in a closed loop and must route the resulting water to a tank or drain. A ventless unit can therefore dry poorly even without an outdoor exhaust blockage.
-
Verify heat and accessible supply conditions
During a heated cycle, observe whether the drum tumbles and whether the exhaust or drum area becomes warm according to the owner guide. For an electric model, look for a tripped household breaker only and reset it once if safe; for a gas model, verify only that the external supply valve is in its normal open position. Never remove panels or perform electrical or gas-system measurements yourself.
Expected result: The dryer tumbles but remains cold, a breaker trips again, a gas supply is unavailable, or heat returns after the accessible setting/supply correction.
Next step: Stop and use a qualified electrician or gas professional for supply concerns, or authorized appliance service for an internal heater, motor, thermal, or control diagnosis.
Why this matters
Why: A cold tumbling drum separates a heating or supply problem from an airflow problem. A repeat trip or gas-supply concern is an installation or service issue, not a reason to keep restarting the machine.
-
Run one controlled sensor-cycle retest
After the applicable filter, airflow, or condensate correction, wipe only the accessible moisture-sensor area as directed by the exact owner guide and run one normal, similar-weight load. Record whether the timer changes, whether items contact the sensors, and whether the cycle ends with clothes evenly dry.
Expected result: The normal load completes after the sensor area and load are corrected, or the cycle still stalls, ends damp, or repeatedly shuts down.
Next step: Preserve the exact cycle, load, elapsed time, and symptom for service. Do not replace a sensor, control, heater, or pump solely because the load was damp once.
Why this matters
Why: Moisture sensors can alter cycle duration, but a successful user-level retest does not prove a sensor replacement is needed. Persistent failure after a controlled test points toward a model-specific mechanical, thermal, control, or condensate diagnosis.
Use your observations
Decision map
Find the observation that best matches what you see, then follow the next safe action.
-
PATH 01Safety boundary
What you see
Clothes are still very wet when the wash portion ends.
Do this next
Investigate washer drain and final-spin behavior using the exact model guide; reduce the load and redistribute it for one test. If water remains or the washer cannot complete spin, service the washer side before diagnosing the dryer.
Why this path and its safety boundary
Safety stop: Continue with dry-cycle, heat, and airflow classification.
-
PATH 02Safety boundary
What you see
The drum tumbles but the load remains cold.
Do this next
Confirm a heated cycle, then check only the accessible electric breaker or external gas supply. Stop for recurring trips or any gas concern and call a qualified professional.
Why this path and its safety boundary
Safety stop: Continue with airflow, condensate, load, and sensor checks.
-
PATH 03Safety boundary
What you see
The unit vents outdoors and the outside flap has little or no airflow.
Do this next
Stop the test, clean the lint filter, inspect accessible ducting for crushing or blockage, and arrange qualified duct cleaning if the restriction is not safely accessible.
Why this path and its safety boundary
Safety stop: Do not add a vent or duct to a ventless model; follow the ventless filter and condensate branch.
-
PATH 04Safety boundary
What you see
The unit is ventless or heat-pump based.
Do this next
Use the model guide for its accessible filters, water container, and drain hose; do not open the sealed heat-pump or refrigeration system.
Why this path and its safety boundary
Safety stop: Use the conventional exhaust-path check instead.
-
PATH 05Safety boundary
What you see
There is smoke, a burning smell, exposed wiring, unusual heat, a gas odor, or a breaker that trips again.
Do this next
Stop immediately, keep people away, and use the appropriate emergency, gas, electrical, or appliance-service channel. Do not restart for more observations.
Why this path and its safety boundary
Safety stop: Perform only one controlled retest after the applicable user-level correction; persistent dampness needs service.
Helpful context
Understand the symptom
A washer-dryer can appear to have a dryer fault when the washer leaves too much water in the load. It can also tumble normally while producing no heat, or produce heat that cannot carry moisture away. Record which of these occurs before choosing a part.
Identify the installation from the exact owner guide or the visible ducting: a conventional vented dryer exhausts humid air outdoors, while a ventless heat-pump design uses a closed loop and a condensate route. Do not apply vented-dryer checks to a ventless model.
The checks below are limited to controls, load preparation, accessible filters, the exhaust outlet or condensate container, and external supply observations. Do not open the cabinet, defeat a door or thermal safety, or work on live electrical or gas parts.
Safety boundary
Stop conditions
- Stop for smoke, a burning odor, exposed or hot wiring, arcing, unusual cabinet heat, a gas odor, or a breaker that trips again.
- Do not bypass a door switch, thermal safety, fuse, sensor, or other protective device.
- Do not remove the cabinet, test live electrical or gas parts, or open a heat-pump/refrigerant system.
- Do not operate a conventional dryer with its exhaust disconnected, and do not add an outdoor vent to a ventless model.
When checks do not resolve it
Need a professional?
Request authorized appliance service when the washer-dryer remains damp after one correctly loaded, correctly selected test with the applicable filter and moisture path clear; when a motor, heater, pump, sensor, or control diagnosis is needed; or when the unit repeatedly stops. Use a qualified electrician for recurring breaker, outlet, or supply concerns and a qualified gas professional for gas-supply concerns.
Have this ready
- Exact Kenmore model and serial from the appliance label
- Whether the appliance is a vented dryer, ventless condenser, or heat-pump design
- Washer final-spin result, selected dry cycle, load size/fabric mix, and whether the drum tumbles
- Whether heat is present, outside airflow is strong when applicable, or a condensate tank/drain is involved
- Elapsed time, point at which the cycle stops or stalls, and any displayed code
- Any repeated breaker trip, odor, smoke, gas concern, unusual noise, or prior filter/duct cleaning
Common questions
FAQ
Why are my Kenmore washer-dryer clothes still wet after drying?
Check whether the washer left too much water, then confirm the dry cycle produces heat and that the appropriate lint, exhaust, or condensate path is clear. Use one correctly sized test load before requesting service.
Does a ventless Kenmore washer-dryer need an outside vent?
A heat-pump design uses a closed loop rather than the outdoor exhaust used by a conventional dryer. Follow the exact model guide for filters and water drainage, and do not add a vent to a ventless installation.
What if the Kenmore dryer tumbles but does not heat?
Confirm that a heated cycle is selected, then check only the accessible supply condition. Repeated breaker trips, gas concerns, or an internal heating fault require a qualified professional.
Read the exact guide
Official sources
- Heat Pump DryerENERGY STAR · Heat-pump and ventless dryer operating principles, moisture sensing, filters, and water drainage
- Laundry List: Kenmore Dryer Buying GuideKenmore / Transform SR Brands LLC · Kenmore dryer technology and installation guidance, including electric/gas types, load capacity, moisture sensing, and vent alerts
- Overheated Clothes Dryers Can Cause FiresU.S. Consumer Product Safety Commission · Household clothes dryers; lint, exhaust, airflow, and fire-prevention guidance
- 7.4 cu. ft. ENERGY STAR Auto-Dry Electric Dryer - WhiteKenmore · Kenmore electric dryer product example; sensor drying, lint-filter reminder, and Check Vent Sensor features
Community feedback
Share a repair observation
Share a plain-text repair observation. Accepted observations are published automatically; this page may take a moment to update.