
On this page
Start here
Quick answer
If a Kenmore washer will not fill, first verify that the required household water valves are fully open, the inlet hoses are connected and not kinked, and the accessible inlet screens are not blocked. Then confirm the selected cycle and lid or door state from the exact model manual. If there is still no water after those low-risk checks, stop before opening the cabinet: the inlet valve, lock or lid switch, pressure-sensing system, or control may need model-specific service.
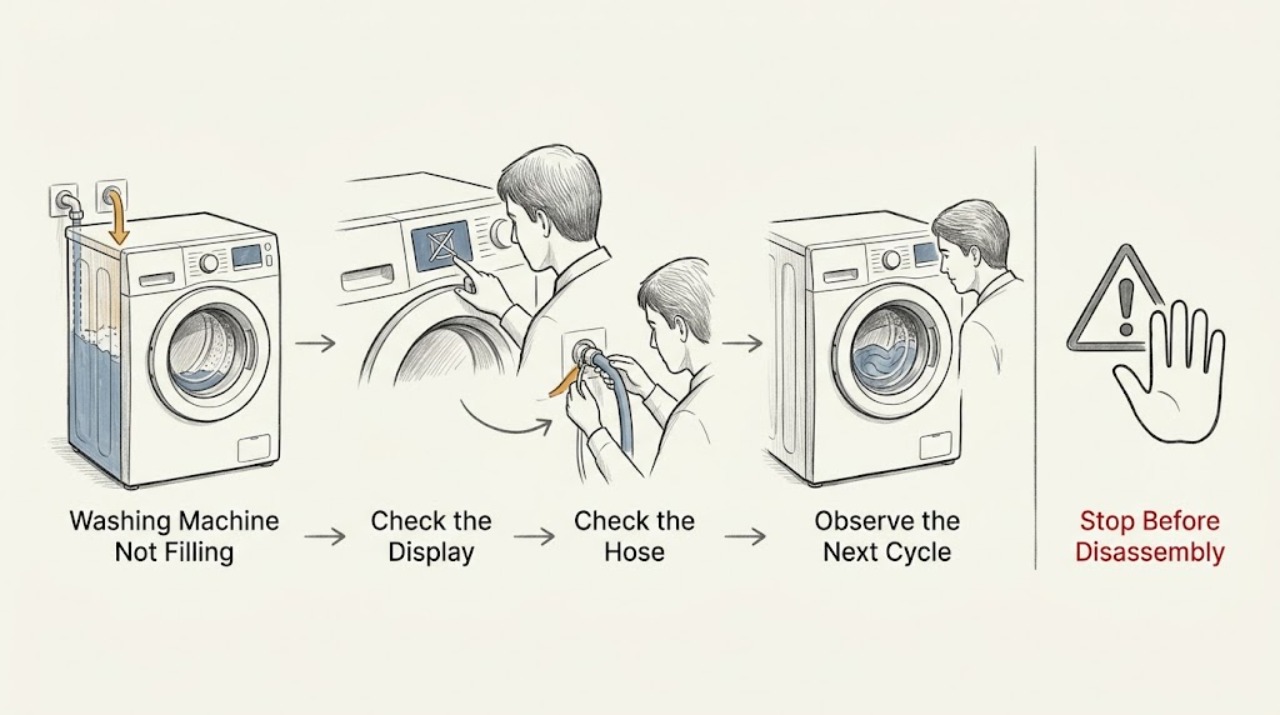
Work through in order
Diagnostic checks
Use only checks that match the exact appliance or system and its official guide.
-
Check 1
Read the complete Kenmore model number and note whether the washer is front-load or top-load, which cycle was selected, and any displayed code or flashing light.
Expected result: The model and control behavior are identifiable, or the display is blank, a fill or low-flow message is present, or the lid or door indicator remains unresolved.
Next step: Use the Kenmore manual for that exact model and continue with the external water checks below. If the display is blank, stop the fill diagnosis and check power only from a dry, safe location.
Stop if: Do not remove panels or test wiring to identify a model-related fault.
Why this matters
Why: Kenmore manuals are model-specific; a generic code explanation can send you down the wrong branch, while a blank display may be a power or control issue rather than a water-supply issue.
-
Check 2
With the washer stopped, check the household hot and cold supply valves and confirm each connected inlet hose is attached to the intended washer connection and is not sharply bent behind the cabinet.
Expected result: A valve is partly closed, a hose is kinked or crushed, a connection is visibly loose, or both supplies are open and the hoses lie freely.
Next step: Correct only an obvious, dry, hand-accessible valve or hose-position issue, then run the model-approved fill check. If a connection drips or the hose is damaged, keep the valve closed and arrange replacement or service.
Stop if: If water sprays, the hose or valve is damaged, or the floor becomes wet, close the supply from a safe dry position and do not restart the washer.
Why this matters
Why: A closed supply or restricted hose can produce no fill or a slow fill. Some models require both connected supplies even when the chosen cycle feels cold.
-
Check 3
If the model manual permits it, close the water valves, place the hose ends in a container, and inspect the small inlet screens at the washer connection without removing or prying out the screens.
Expected result: The screen area has visible sediment, or the screens look clear and the hose itself is not restricted.
Next step: For accessible screens, use only the manual-approved gentle cleaning method and refit the hoses without cross-threading. If a screen is damaged, missing, or cannot be reached without disassembly, leave it alone and arrange service.
Stop if: Do not open the cabinet, remove an inlet screen, apply compressed air, or work with water still connected.
Why this matters
Why: Sediment can reduce or stop flow before it reaches the inlet valve. A clear screen makes a supply-side blockage less likely but does not prove that the valve or control is healthy.
-
Check 4
Select a normal model-supported cycle, confirm the water-level or temperature setting is not a special manual-fill or delayed option, close the lid or door completely, and press Start according to the manual.
Expected result: The washer begins sensing and then admits water, pauses with a fill or sensing indicator, or refuses to start because the lid or door is not recognized as closed.
Next step: Allow the model's normal sensing period to finish once. If closing the lid or door changes nothing, record the indicator or code and move to service rather than bypassing the interlock.
Stop if: Never hold, tape, bypass, or defeat a lid or door switch to make the washer fill.
Why this matters
Why: Sensing, low-water designs, a delayed start, or an open/unrecognized lid can look like a fill failure. A persistent lock indication points to an interlock or control decision rather than the household valve alone.
-
Check 5
Inspect the visible drain hose routing while the washer is off: it should be secured in the standpipe or laundry tub in the model-specified position, without a kink, blockage, or a sealed connection.
Expected result: The drain hose is lying too low, pushed too far into the standpipe, sealed tightly, kinked, or the household drain backs up; otherwise its routing matches the manual.
Next step: Correct only the clearly visible routing issue using the exact model manual, then observe whether the water level remains in the tub. If the household drain backs up, stop and have the drain cleared.
Stop if: Do not reach into a backed-up drain or continue cycling with water escaping onto the floor.
Why this matters
Why: Improper drain routing can let incoming water siphon away or make the washer report a fill or long-fill condition even though water enters.
-
Check 6
If a code or light remains, record its exact characters, the washer type, and whether any water enters on hot, cold, or neither selection; do not substitute a code from another Kenmore platform.
Expected result: The code or light maps in the exact manual to low flow, a dispenser or door condition, a drain condition, or another fault, or it is not identified.
Next step: Follow one model-approved cancel or reset only if the manual calls for it, then repeat the external check once. If the code returns, preserve the code and arrange qualified diagnosis.
Stop if: Do not repeatedly reset the washer, run it with a leaking connection, or probe live terminals.
Why this matters
Why: Low-flow and fill-related codes can result from open-supply, kinked-hose, anti-flood-device, or control conditions, while an unknown code requires the model's own table.
-
Check 7
After the external checks, compare the result: no water and no valve sound, a hum with no incoming water, water on only one temperature path, or normal water that stops and returns a fill fault.
Expected result: The symptom persists despite open supplies, free hoses, accessible clear screens, a closed lid or door, correct cycle selection, and correct drain routing.
Next step: Stop using the washer, record the model, code, cycle, water-path result, and any leak, and request qualified appliance service. The technician can test the correct part and platform without guessing.
Stop if: If there is a burning smell, smoke, arcing, repeated breaker trip, uncontrolled filling, hot water release, or standing water near electricity, isolate the appliance only if safe and leave it out of service.
Why this matters
Why: The remaining possibilities include a model-specific inlet valve, pressure-sensing path, lid or door interlock, wiring, or control fault; distinguishing them may require protected electrical and mechanical tests.
Use your observations
Decision map
Find the observation that best matches what you see, then follow the next safe action.
-
PATH 01Next step
What you see
A hot or cold supply valve is closed, or an inlet hose is kinked.
Do this next
Restore the obvious external supply condition with the washer stopped; if the hose or connection is damaged, keep the water off and arrange service.
Why this path and its safety boundary
Why it matters: Water flow is restricted before the washer's inlet valve.
-
PATH 02Next step
What you see
An accessible inlet screen is visibly blocked with sediment.
Do this next
Use only the model-approved screen-cleaning method after shutting off water. A damaged or inaccessible screen needs service.
Why this path and its safety boundary
Why it matters: The washer may receive too little water to satisfy its fill check.
-
PATH 03Next step
What you see
The lid or door is not recognized as closed, or the washer remains in sensing or delayed start.
Do this next
Close the lid or door normally and allow one normal sensing period. Do not bypass the interlock; arrange service if the indication remains.
Why this path and its safety boundary
Why it matters: The control may intentionally withhold or pause filling.
-
PATH 04Next step
What you see
Water enters but immediately leaves, or the fill or long-fill message returns with low water.
Do this next
Compare the visible drain routing with the Kenmore manual and stop if the drain backs up or water reaches the floor.
Why this path and its safety boundary
Why it matters: Drain-hose routing, siphoning, a blocked household drain, or a restricted drain path may be involved.
-
PATH 05Next step
What you see
Only one temperature path supplies water, or a low-flow code returns after the external checks.
Do this next
Keep the exact code and temperature result; do not assume a cross-platform Kenmore code meaning. Use the model manual and request qualified service if it repeats.
Why this path and its safety boundary
Why it matters: A hose, supply, inlet valve, anti-flood device, or model-specific control condition remains possible.
-
PATH 06Next step
What you see
No external cause is found, and the washer still will not fill or repeatedly stops at fill.
Do this next
Leave the washer out of service and have a qualified technician test the model-specific inlet, sensing, interlock, and control circuits.
Why this path and its safety boundary
Why it matters: A component or protected circuit fault is more likely than a simple hose setting.
Helpful context
Understand the symptom
What not filling can mean
A washer that appears not to fill may have no incoming water, restricted flow, a lid or door interlock that has not allowed the cycle to proceed, or a normal sensing pause. Front-load and top-load Kenmore models are not all built on the same platform, so use the model number on the Kenmore manual page before interpreting a code or trying a component test. Do not judge the water level by whether it covers the clothes: many high-efficiency cycles deliberately use less water.
Use a dry-safe order
Keep the washer stopped while you inspect the controls and the supply path. For any hose connection or inlet-screen inspection, close the household water valve first and catch residual water in a container. If water is on the floor near the cord, outlet, or other electrical equipment, do not step into it or reach through it; isolate power only from a dry, safe location and arrange help if that cannot be done safely.
The decision point
If water flow returns after a valve, hose, screen, cycle, or lid check, run only the model-appropriate confirmation cycle while watching the first fill. If the washer hums without admitting water, shows a fill code repeatedly, fills and immediately loses water, or behaves differently on hot and cold selections after the external checks, record the model and symptom and use qualified appliance service rather than opening the cabinet or making live electrical measurements.
Only after diagnosis
Potential parts
- washer water inlet valve
Consider this only when both supplies, hoses, accessible screens, and the model's start and lid or door conditions are confirmed, and service testing points to the valve.
Kenmore washers use different platforms; confirm the complete model number and the manufacturer's fit information before ordering. - washer inlet hose
Consider this only if an inlet hose is kinked, damaged, leaking, or internally restricted and cannot be safely restored by repositioning.
Match the hose connection and model requirements; do not assume a generic hose is suitable for every installation. - washer lid or door interlock
Consider this only when the lid or door closes normally but the washer still does not recognize it and the exact manual or service test supports an interlock fault.
Confirm the complete model number and the correct front-load or top-load component before ordering; never bypass the safety switch.
When checks do not resolve it
Need a professional?
Request qualified appliance service when the exact model manual does not resolve a repeated fill code, the external water path is clear but no water enters, a lid or door interlock is not recognized, or component and wiring tests would be required. Provide the complete model number, code or light pattern, selected cycle, hot or cold flow result, and whether the washer leaks or drains while filling.
Common questions
FAQ
Why does my Kenmore washer make a sound but no water enters?
Check both supply valves, the inlet hoses, and the accessible screens with the water turned off. If those are clear and the washer still hums without water, the inlet valve, interlock, sensing system, or control may need model-specific service; do not open the cabinet or test live wiring.
Do both hot and cold hoses need to be connected?
Many washers expect both connected supplies, but the exact requirement depends on the model and installation. Check the Kenmore manual for your complete model number rather than assuming a cold-selected cycle can use only one hose.
Could a low water level be normal?
Yes. Sensing and high-efficiency cycles can use less water or pause while determining the load. A fill indicator with no or very little incoming water is different and points back to the supply-path checks.
Can the lid or door stop a Kenmore washer from filling?
Yes. The control may pause or withhold filling when the lid or door is not recognized as closed. Close it normally and allow one model-appropriate sensing period; never bypass the safety switch.
When should I stop troubleshooting?
Stop for a leak, uncontrolled filling, hot-water exposure, standing water near electricity, burning smell, smoke, arcing, repeated breaker trips, or a damaged cord. If the external checks pass but the fill problem persists, leave the washer off and request qualified service.
Read the exact guide
Official sources
- Not Filling or Long Fill - Washer - Product HelpWhirlpool · General washer not-filling, drain-hose, water-level, and long-fill guidance
- Find Your Manual | Kenmore Appliance Manuals & GuidesKenmore · Kenmore washing-machine owners manuals and troubleshooting resources
- Error Codes in Front Load Washers - Product HelpWhirlpool · General front-load washer low-flow, fill, drain, door, and reset guidance
- Checking the Fill Hoses if the Washer is not FillingWhirlpool · General washer water-supply, inlet-hose, and inlet-screen checks
- Fill or Sensing Light On - Product HelpWhirlpool · General top-load washer sensing, fill indicator, and lid-pause behavior
Community feedback
Share a repair observation
Share a plain-text repair observation. Accepted observations are published automatically; this page may take a moment to update.