
On this page
Start here
Quick answer
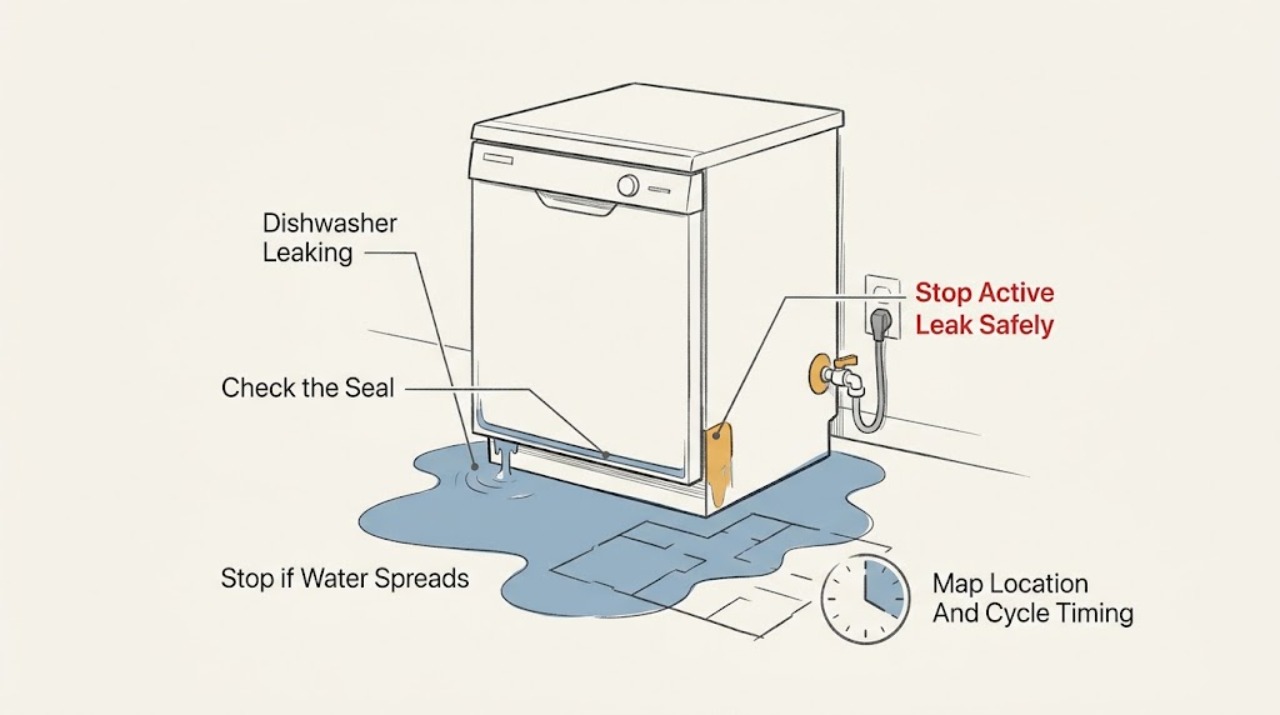
If a KitchenAid dishwasher is actively leaking, stop the cycle, keep people away from the water, switch off power at the breaker if it is safe to do so, and close the dishwasher's water supply. Do not run another cycle to reproduce the leak. First record whether water appears at the front or door, underneath or behind the unit, from the vent, or as suds or rinse aid inside the tub. KitchenAid's official guidance associates front leaks with the gasket, latch, loading, leveling, spray-arm direction, or over-sudsing; bottom or rear leaks can involve the water supply, drain hose, inlet valve, sump, pump, or seals. Use only model-specific instructions for visible user checks. Treat a recurring leak, water under the cabinet, a cracked tub, persistent overfill, pump/valve/seal suspicion, or any leak near electrical parts as a professional-service condition.
Work through in order
Diagnostic checks
Use only checks that match the exact appliance or system and its official guide.
-
Check 1
If water is still moving or the cycle is running, cancel the cycle if the controls respond. Keep hands and feet out of standing water; from a dry, safe position, switch off the dishwasher circuit at the breaker and close the dishwasher water-supply valve before cleaning up.
Expected result: The leak stops when the cycle and water supply are stopped, or water continues, the valve cannot be reached safely, or water is near electrical parts.
Next step: Leave the dishwasher off and use the location/timing checks only from safe, accessible areas. Arrange professional service for continued flow, electrical exposure, or an unreachable shutoff.
Stop if: Do not pull a wet plug, reach behind a wet unit, remove panels, or restart the dishwasher to reproduce the leak.
Why this matters
Why: Stopping the supply limits additional water, but it does not identify the failed component. Continued flow or an unsafe electrical area is an escalation, not a reason to keep testing.
-
Check 2
After the area is safe and dry, document where the first water mark appears: along the door or sides, at the bottom/front center, beneath or behind the cabinet, around the vent, or only inside the tub. Note whether it occurs while filling, washing, draining, or after the cycle ends.
Expected result: The pattern is front/door, bottom/front-center, behind/underneath, vent-related, or limited to standing liquid inside the tub.
Next step: Follow the matching branch below and use the exact model manual for any component location. If the source cannot be seen without moving or opening the dishwasher, stop and schedule service.
Stop if: Do not run an open-door or removed-panel cycle to watch for a leak.
Why this matters
Why: KitchenAid uses these locations to separate gasket/latch/loading and suds issues from supply, drain, inlet, pump, sump, or seal issues. A location alone is not a component diagnosis.
-
Check 3
For a front, door, or side leak, inspect the visible gasket for tears, missing sections, soil, or distortion; check that dishes and utensils are not protruding into the seal; confirm the door latch holds the door closed; and check whether the dishwasher is visibly or demonstrably out of level. Do these checks with power off and without removing the door or access panels.
Expected result: The gasket is dirty or damaged, the latch is loose or bent, loading blocks closure, the dishwasher is unlevel, or none of these is visible.
Next step: Remove only the visible loading obstruction and clean the gasket using the owner's instructions. Do not order a gasket or latch until the model is confirmed; arrange service for damaged hardware, persistent leakage, or an internal cause.
Stop if: Do not force the door, tighten hidden hardware, replace a latch, or adjust leveling feet unless the exact owner's manual authorizes that procedure for the model.
Why this matters
Why: KitchenAid identifies gasket, latch, loading, and leveling as front-leak contributors. If those visible conditions are absent, a spray-arm, overfill, internal seal, or other model-specific cause remains possible.
-
Check 4
Look inside the tub only after the dishwasher is stopped and safe. Check whether the liquid is foamy, colored or slick like rinse aid, or clear standing water. Note whether the filter area contains only the small amount described by the model guidance, whether a drain/air-gap connection is visibly obstructed, and whether a garbage-disposer connection was recently changed.
Expected result: There are suds, unusually frequent rinse-aid refills or liquid at the dispenser, excessive standing water, a visible drain/air-gap obstruction, or none of these.
Next step: Stop using hand dish soap, correct only the documented detergent or rinse-aid filling issue, and clear only a plainly accessible obstruction according to the model instructions. Persistent standing water, repeated suds, or leakage from below needs service.
Stop if: Do not pour drain chemicals into the dishwasher, dismantle the dispenser, or reach into the sump or pump area with power connected.
Why this matters
Why: KitchenAid says hand dish soap or excess detergent can create suds that push water out; it also documents overfilled or leaking rinse aid and drain-path/garbage-disposer issues as distinct checks. A small amount of water in the filter area may be normal for the covered guidance.
-
Check 5
For water under or behind the dishwasher, inspect only exposed, dry portions of the household supply and drain connections for a visible crack, loose connection, or fresh water mark. Record the model and serial number from the tub frame and do not open the access area to inspect the inlet valve, float, pump, sump, diverter, motor seal, or tub.
Expected result: A visible external connection is damaged or wet, or water appears from the center/rear with no safe external source.
Next step: Keep the dishwasher off, close the water supply, and arrange qualified service. Provide the leak location, cycle timing, model/serial information, and photographs taken from a dry, safe position.
Stop if: Do not remove panels, loosen water fittings, run a live leak test, or replace a pump, valve, hose, seal, or tub part without model-specific professional instructions.
Why this matters
Why: KitchenAid lists supply lines, drain tubes, inlet valves, floats, pumps, diverters, sump areas, and motor-shaft seals among possible causes, but the deeper components are not safely identified by a front-facing observation.
Use your observations
Decision map
Find the observation that best matches what you see, then follow the next safe action.
-
PATH 01Next step
What you see
Water appears along the door edge, corners, or sides during the wash cycle.
Do this next
Stop using the machine until the visible correction is made with the model instructions. Persistent leakage or any internal cause requires authorized service.
Why this path and its safety boundary
Why it matters: A sealing, loading, latch, or leveling issue is more likely; if those checks are clean, spray-arm direction, over-sudsing, overfill, or an internal seal remains possible.
-
PATH 02Next step
What you see
Water collects under the center/front or beneath/behind the dishwasher rather than at the door edge.
Do this next
Keep power and water off, do not open the access area, and schedule qualified service. Do not assume a hose or pump part fits from the leak location alone.
Why this path and its safety boundary
Why it matters: A hose/connection issue is possible, while an inlet valve, float, sump, pump, diverter, or seal issue requires model-specific service diagnosis.
-
PATH 03Next step
What you see
The leak is accompanied by foam, bubbles, or liquid that appears to be rinse aid inside the tub.
Do this next
Let suds dissipate, use only automatic-dishwasher detergent, correct the documented fill level, and arrange service if the dispenser remains damaged or the machine still leaks.
Why this path and its safety boundary
Why it matters: Over-sudsing or a rinse-aid fill/dispenser issue is more likely than a failed water hose, but continued external leakage still needs the location branch.
-
PATH 04Next step
What you see
Water or steam appears around the vent, the drain path is obstructed, the leak continues while idle, or water reaches electrical areas.
Do this next
Keep the circuit and water supply off and arrange professional service. Do not run a cycle or use drain chemicals to test the theory.
Why this path and its safety boundary
Why it matters: A drain-line, overfill, supply, or internal leak is possible; an active or inaccessible leak is beyond a safe user-level check.
Helpful context
Understand the symptom
Location is the first diagnostic decision
A puddle at the door is a different starting point from water under the center or behind the dishwasher. KitchenAid's opened leak guide separates front/door, bottom/front-center, and behind/under-cabinet patterns, then points to different possible causes. The location narrows the inspection; it does not prove that a particular gasket, valve, hose, pump, or seal has failed.
Do not confuse water with detergent or rinse aid
KitchenAid also documents two look-alikes: ordinary dish soap can create foam that pushes water out, and an overfilled or leaking rinse-aid dispenser can leave liquid inside the tub. Identify the liquid and the timing before ordering a part or opening the machine.
When checks do not resolve it
Need a professional?
Arrange qualified service for water under or behind the unit, a recurring leak after visible gasket/loading/leveling checks, a suspected inlet valve, float, pump, diverter, sump, seal, tub, or internal hose issue, persistent overfill, a cracked connection, or any water near electrical parts. Provide the model and serial number from the tub frame.
Common questions
FAQ
What should I do first if my KitchenAid dishwasher is actively leaking?
Stop the cycle, keep clear of standing water, switch off power at the breaker if safe, and close the dishwasher water supply. Do not restart the dishwasher to reproduce the leak.
Why is my KitchenAid dishwasher leaking from the bottom of the door?
KitchenAid directs you to check the visible gasket, door latch, loading obstructions, leveling, suds, and spray-arm direction. If those checks do not explain the leak, stop using the machine and arrange model-specific service rather than assuming a gasket is the only cause.
Can regular dish soap cause a dishwasher leak?
Yes. KitchenAid says hand dish soap creates suds, and suds can push water out of the dishwasher. Stop the cycle, let the suds dissipate, and use only detergent intended for automatic dishwashers; persistent leakage still needs diagnosis.
Is a little water in the filter area always a leak?
Not necessarily. KitchenAid's draining guidance says a small amount of standing water in the filter area can be normal for the covered guidance. Water on the floor, recurring water under the unit, or water that does not drain as expected is a different symptom and needs the leak-routing checks.
Should I replace the pump, valve, hose, or gasket myself?
Do not choose a part from the leak location alone. KitchenAid lists several possible components and says model and installation details vary. Confirm the full model number and use the owner's guide; pump, valve, sump, diverter, tub, internal seal, and inaccessible hose work should be handled by qualified service.
Read the exact guide
Official sources
- Rinse Aid Leaking from Dispenser - Dishwasher - Product Help | KitchenAidKitchenAid Product Help · KitchenAid dishwasher rinse-aid dispenser leak and overfill guidance
- How to Find & Fix Dishwasher Leaks | KitchenAidKitchenAid · KitchenAid dishwasher leak symptom, door, bottom, vent, drain-hose, detergent, and professional-service guidance
- Dishwasher Leaking Troubleshooting Guide - Product Help | KitchenAidKitchenAid Product Help · KitchenAid dishwasher leak location, common causes, safe shutdown, and service boundary guidance
- Leaking - Product Help | KitchenAidKitchenAid Product Help · KitchenAid dishwasher leaking category and model-specific front/door versus underneath/behind routing
- Not Draining - Water Remain at End of Cycle - Dishwasher - Product Help | KitchenAidKitchenAid Product Help · KitchenAid dishwasher standing-water, drain-path, garbage-disposer, air-gap, and over-sudsing guidance
Community feedback
Share a repair observation
Share a plain-text repair observation. Accepted observations are published automatically; this page may take a moment to update.