
On this page
Start here
Quick answer
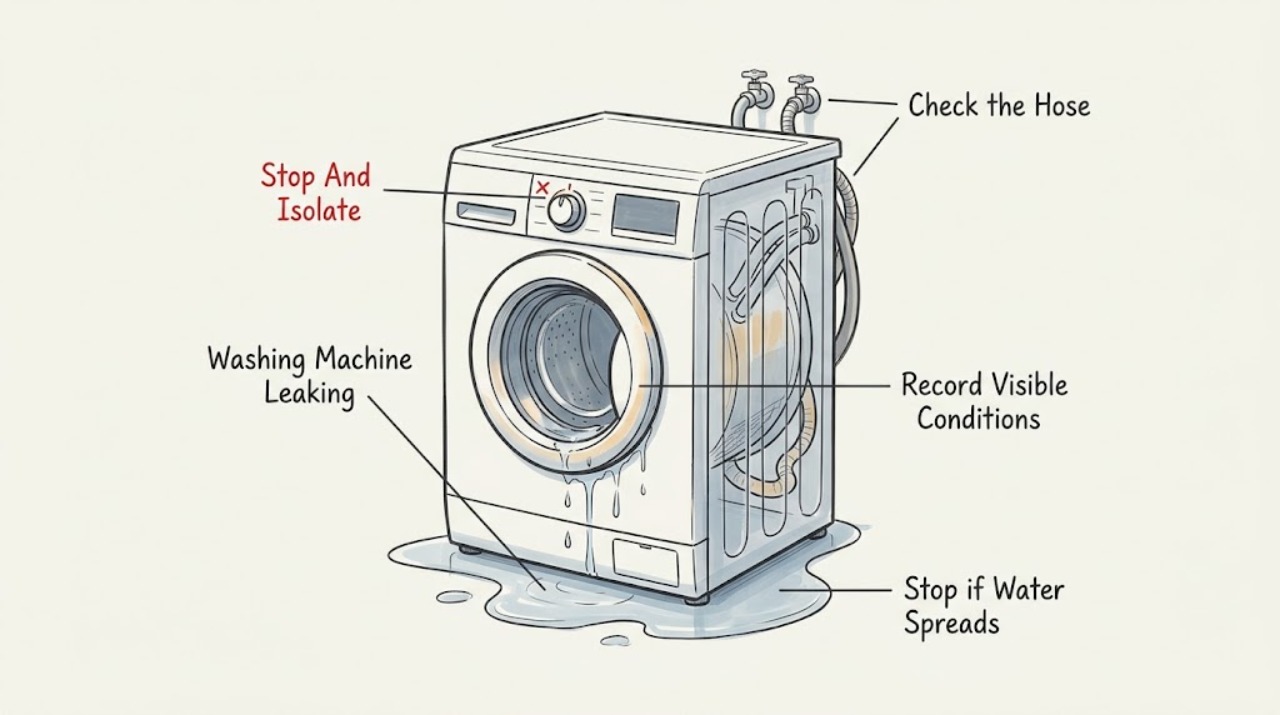
First stop the LG washer safely and note whether the leak starts while filling, during wash or spin, while draining, or after the machine stops. Close the water valves and isolate power from a dry safe position when water is near the cord, plug, outlet, or control. Then trace the highest wet point: hot/cold inlet hoses and taps, detergent dispenser, front door gasket or lid, drain hose and standpipe, pump-filter access on applicable front-load models, or the underside. LG identifies loose or cracked inlet/drain hoses, a blocked dispenser, too much detergent or suds, hair or debris at a door gasket, an improperly seated pump-filter cap, an unsecured drain hose, and a clogged household drain as distinct leak paths. Do not run a leak test when the floor is wet near electricity, water is hot, the washer is shaking violently, or there is a burning smell, smoke, spark, or tripped breaker. A torn gasket, internal leak, recurring overflow, or leak that remains after a safe external correction needs qualified service.
Before you begin
Safety first
- This article supports dry, ordinary-access observations and exact-model external procedures only. Do not operate after an electrical, fire, flood, heat, or severe mechanical warning; do not handle wet or hot power parts, open the cabinet, force a lock/filter, or bypass safety devices.
Work through in order
Diagnostic checks
Use only checks that match the exact appliance or system and its official guide.
-
Check 1
Stop the cycle using the normal control if it responds, keep people away from the wet floor, close accessible water valves, and identify whether water is near the cord, plug, outlet, control, or other electrical connection.
Expected result: Classify the leak as a dry-area drip, a wet electrical area, a hot-water leak, a large uncontrolled flow, or a leak accompanied by smoke, burning odor, sparks, severe vibration, or a breaker trip.
Next step: From a dry safe position isolate power at the breaker or unplug only by an intact plug, shut water valves if reachable without crossing danger, and obtain qualified appliance/electrical/plumbing help. Continue only with dry, non-invasive observations when no safety warning exists.
Stop if: Do not touch a wet plug or outlet, unplug through standing water, pull a damaged cord, keep running with a flood, or reset power after smoke, sparks, burning odor, a hot connection, severe movement, or a breaker trip.
Why this matters
Why: Water near electricity, hot water, an uncontrolled flow, or fire/electrical symptoms is a safety event before it is a washer troubleshooting problem.
-
Check 2
After the washer is stopped and the area is safe, note the cycle stage and trace the highest wet point without moving the machine: inlet/tap, dispenser, door/lid, rear drain hose, standpipe, pump-filter cover, or underside.
Expected result: Record whether the first water appears during fill, wash agitation, spin, draining, immediately after stopping, or only as residual moisture; note whether the water is clear, soapy, or hot without touching it.
Next step: Photograph the safe exterior and use the stage-specific checks below. Keep the machine isolated when the source cannot be identified from ordinary access.
Stop if: Do not pull a full washer, tilt it, reach under it, or remove panels to chase a hidden leak.
Why this matters
Why: Fill-stage water favors inlet, dispenser, door/lid, splash, or oversuds causes; drain-stage water favors the drain hose, standpipe, pump filter, or backflow; an underside or persistent leak can indicate an internal fault.
-
Check 3
With water valves closed and power isolated, inspect the hot and cold inlet hoses, faucet connections, washers, and the rear of the washer for cracks, splits, kinks, loose threads, or water tracking down from a tap.
Expected result: Record a dry intact connection, a leak at the tap, a leak at the washer inlet, a cracked/bulging hose, a loose connection, or a wet rear area whose source is not visible.
Next step: Correct only a clearly identified external connection according to the manual with valves closed and the area dry; replace a damaged hose through model-appropriate service and check for leaks before use. Have a plumber assess a leaking household tap.
Stop if: Do not loosen a pressurized or hot hose, overtighten plastic fittings, work around wet power, or run the washer to confirm a suspected hose leak.
Why this matters
Why: A hose or household tap can send water down the rear cabinet and make the washer appear to leak from underneath. A cracked hose or persistent connection leak can quickly become a flood and should not be tested by running another cycle.
-
Check 4
With the washer off and dry, inspect the detergent drawer, cup, housing, and surrounding front panel for residue, clumped powder, an overfilled compartment, a mis-seated insert, or water marks that begin during fill.
Expected result: Record a clean and correctly seated drawer, detergent residue or blockage, use above the maximum line, wrong detergent compartment, or a drawer overflow despite correct cleaning and dosage.
Next step: Remove and clean only the drawer components the exact model allows using lukewarm water and a soft brush or cloth; let them dry and reseat fully. Use the specified detergent and amount, then request service if overflow returns.
Stop if: Do not open the drawer while water is filling, use sharp tools to clear it, mix cleaning chemicals, exceed the maximum line, or test a dispenser leak while electrical parts are wet.
Why this matters
Why: LG says residue or excess detergent can impede water flow, overflow the drawer, and create suds that resemble a leak. A clean drawer with continued overflow points to a model-specific inlet or dispenser fault.
-
Check 5
For a front-load washer, with power isolated and the drum empty, inspect the door glass and rubber gasket for hair, lint, detergent residue, trapped clothing, tears, or deformation; for a top-load washer, inspect the lid closure and ordinary-access rim for damage or a load that can splash over.
Expected result: Record a clean intact gasket/lid, removable debris, a torn or deformed gasket, a damaged lid/closure, or a leak that persists from the door or lid after cleaning.
Next step: Remove only loose visible debris and wipe the gasket/door with a soft cloth when cool and dry. Use the model's correct cycle and load guidance; arrange service for a torn gasket, damaged lid, door misalignment, or recurring leak.
Stop if: Do not cut, stretch, glue, or remove the gasket, bypass a lid/door lock, operate with a damaged door/lid, or reach into a moving or hot drum.
Why this matters
Why: LG identifies hair or debris at an intact front-load gasket as a possible door leak and says a torn or damaged gasket requires service. A top-load bulky or floating item or excessive water level can splash during wash, but persistent leakage is not normal.
-
Check 6
With power isolated, inspect the rear drain hose and its connection to the standpipe, laundry tub, or household drain for a split, kink, crushing, loose attachment, submersion, or a hose that slips out when the pump discharges.
Expected result: Record a secure intact hose and free drain, a hose out of the drain, a cracked or extended connection, water backing up at the standpipe, or a concealed blockage.
Next step: Re-secure only an obviously displaced hose according to the exact manual and keep its documented routing; stop use and request plumbing service for backup or appliance service for a cracked hose or hidden connection.
Stop if: Do not disconnect a full or hot hose without a prepared safe drain path, seal the drain with tape, use chemical drain cleaner in the appliance path, or run with water leaking toward power.
Why this matters
Why: A loose hose can put all drain water on the floor, while a clogged household drain can backflow and look like a washer leak. A damaged hose or recurring overflow needs service or plumbing rather than a cycle change.
-
Check 7
Only if the exact LG model documents an accessible drain-pump filter or residual-water hose, switch off and unplug the washer, cool hot water, place a shallow container and cloth, and follow that model's filter and residual-water procedure.
Expected result: Record a loose residual-hose cap, filter not fully seated, lint or an object in the filter, a clean correctly seated filter, water still leaking after reassembly, or no filter access in the manual.
Next step: Remove only accessible debris as the manual directs, fully close the cap and reseat the filter, dry the area, and request service if it leaks again or the pump/filter cannot be safely accessed.
Stop if: Do not open a filter with hot or pressurized water, force a cap, reach into a wet pump, run with a loose filter/stopper, or use a front-load procedure on a different washer design.
Why this matters
Why: LG says a loose residual-hose cap or improperly seated pump filter can leak after cleaning. A stuck filter, concealed obstruction, persistent leak, or model without documented access needs service.
-
Check 8
Review the last load, water level, cycle, detergent type and amount, and whether the drum or basket was tightly packed, badly unbalanced, bulky, or prone to float; inspect for excess bubbles without adding water or detergent.
Expected result: Record a normal load and dosage, visible oversuds, detergent above the recommended amount, a bulky/floating item, a high water level, or severe movement during spin.
Next step: Only when the area is dry and there is no safety warning, follow the model's load, water-level, and detergent guidance for a future cycle. If the leak repeats with a normal load or severe vibration remains, arrange service.
Stop if: Do not keep running a foaming or violently shaking washer, add water manually, use an unsuitable high-load cycle, or dismiss a leak with odor, smoke, electrical heat, or a breaker trip as splash.
Why this matters
Why: LG notes that excess suds can overflow and resemble a leak, while bulky or floating items and high water can splash during wash. Severe imbalance can damage hoses and make a leak worse; it is not a safe explanation for water near electrical parts.
-
Check 9
Only when the floor and electrical area are dry, all visible connections are intact, water is cool, and there was no odor, heat, smoke, spark, or severe vibration, use the exact LG guidance for one empty rinse or other low-risk observation; watch from outside without touching the washer.
Expected result: Record no leak, a leak at fill/dispenser/door, a leak during drain, backflow at the household drain, a leak from underneath, or a new electrical/mechanical warning.
Next step: Stop at the first leak and isolate the washer. Give service the stage and wet point; do not repeat tests to increase confidence.
Stop if: Do not run any test with water near electricity, hot water, a damaged cord or hose, a full tub, severe vibration, smoke, burning odor, sparks, or a tripping breaker.
Why this matters
Why: A leak in an empty controlled cycle supports a washer or connection fault; no leak with the load removed shifts attention to load splash, suds, or garment distribution but does not rule out an intermittent fault. A new warning ends testing.
-
Check 10
Prepare the full LG model number, front/top-load design, cycle and stage, water temperature, leak timing, highest wet point, hose and tap condition, dispenser/gasket/filter observations, load and detergent details, drain behavior, vibration, and safe photographs for service.
Expected result: Confirm whether the evidence points to inlet, dispenser, door/lid, drain hose/standpipe, filter, load/suds/splash, or an internal leak or safety fault.
Next step: Use LG's model-specific support and repair resources or a qualified appliance/plumbing/electrical technician. Keep the washer isolated until the source is corrected and the area is dry.
Stop if: Do not return the washer to use while a leak source is unexplained, a gasket/filter/hose is damaged, water reaches power, or there has been smoke, odor, heat, sparks, severe vibration, or a breaker trip.
Why this matters
Why: A stage-and-source record lets a technician distinguish a household drain overflow from a failed hose, pump/filter, gasket, inlet, dispenser, or internal tub seal without unsafe owner disassembly.
Use your observations
Decision map
Find the observation that best matches what you see, then follow the next safe action.
-
PATH 01Safety boundary
What you see
Water starts during fill and is highest at an inlet hose/tap, detergent drawer, or upper front panel.
Do this next
Close water valves, isolate power if needed, clean and reseat only the documented drawer parts, and correct a clearly identified external hose connection; service a damaged hose, valve, dispenser, or persistent overflow.
Why this path and its safety boundary
Why it matters: A loose/cracked inlet connection, blocked or overfilled dispenser, wrong detergent placement, or excess suds is more likely than a drain failure.
Safety stop: Do not open the dispenser while filling, loosen a pressurized hose, use sharp tools, run with wet power, or continue after smoke, odor, heat, sparks, or a trip.
-
PATH 02Safety boundary
What you see
Water appears at the front door/lid or top edge during wash or spin, especially with debris at the gasket, a damaged seal, a bulky/floating load, or high water level.
Do this next
Remove only loose debris from a cool, dry gasket and follow the model's load/cycle guidance; request service for a tear, deformation, door/lid damage, misalignment, or recurrence.
Why this path and its safety boundary
Why it matters: A door gasket/lid or load/splash path is plausible; a torn gasket, damaged lid, or recurring leak is not a normal load issue.
Safety stop: Do not cut, glue, stretch, or remove the gasket, bypass the lid/door lock, or operate with a damaged closure or severe vibration.
-
PATH 03Safety boundary
What you see
A large amount of water reaches the floor during drain, the drain hose is loose or cracked, or the standpipe/laundry drain backs up.
Do this next
Keep the washer off, secure only an obviously displaced hose according to the manual, and arrange plumbing or appliance service for backup, cracked hose, concealed connection, or recurring overflow.
Why this path and its safety boundary
Why it matters: The drain hose connection or household plumbing can be the leak source, and backflow may be mistaken for a washer cabinet leak.
Safety stop: Do not disconnect a full/hot hose, use chemical drain cleaner in the washer path, seal the drain opening, or run while water can reach electricity.
-
PATH 04Safety boundary
What you see
A front-load model leaks from the lower access cover or residual-water hose, particularly after filter cleaning, or the applicable filter will not seat or turn.
Do this next
Isolate power, cool residual water, and follow only the exact model's filter procedure; have service handle a stuck filter, persistent leak, pump obstruction, or inaccessible access.
Why this path and its safety boundary
Why it matters: A loose cap, incorrectly seated filter, blocked pump, or concealed object is possible.
Safety stop: Do not force the filter, open it with hot/pressurized water, reach into a wet pump, run with a loose cap, or apply the step to a model without documented filter access.
-
PATH 05Safety boundary
What you see
The leak occurs only with an overfilled, bulky, floating, unbalanced, or foaming load and no connection, gasket, or hose damage is found.
Do this next
Use the specified detergent amount and an appropriate cycle/load, and correct ordinary-access balance or water-level settings. Arrange service if the leak repeats with a normal load or the washer shakes severely.
Why this path and its safety boundary
Why it matters: Load splash, high water, or excess suds may be sending water outside the washer, but the explanation is safe only if the washer remains electrically and mechanically normal.
Safety stop: Do not keep testing a foaming or violently shaking washer, add water manually, or ignore any wet electrical area, odor, smoke, spark, heat, or breaker trip.
-
PATH 06Safety boundary
What you see
The leak comes from underneath or inside the cabinet, occurs with an empty controlled cycle, persists after safe external corrections, or has no traceable ordinary-access source.
Do this next
Keep water and power isolated and request qualified appliance service; provide the model, stage, water type, wet point, and photographs.
Why this path and its safety boundary
Why it matters: An internal hose, tub, pump, valve, seal, or structural fault is possible and cannot be safely diagnosed by owner disassembly.
Safety stop: Do not tilt, lift, open panels, probe the cabinet, or run repeated cycles to locate an internal leak.
Helpful context
Understand the symptom
Leak timing tells you where to look first
Water at the front during fill can come from the dispenser, door gasket, splash, or an inlet connection. A large release only during draining often comes from a loose drain hose or a backed-up household drain. Water that appears after cleaning a pump filter can be the filter cap or residual-water hose, while a puddle that begins under the cabinet and cannot be traced from above needs service. Dry the area only when it is safe and record the first wet point rather than guessing from the puddle's final location.
Front-load and top-load checks are not identical
A front-load washer has a door gasket and, on some models, an accessible pump filter and residual-water hose. A top-load washer may splash when a bulky item floats or when the water level is too high, and its drain-hose routing can make the washer stop or overflow. LG states that its general images and steps may differ by model, so use the full model number and the matching manual before moving a hose, opening an access cover, or changing a cycle.
A detergent leak is not always a failed water seal
Excess or unsuitable detergent can create suds that overflow or make a leak appear at the rear or dispenser. Residue can block dispenser flow, and liquid or powder placed in the wrong compartment can clog or overflow. Use only the detergent type and amount specified for the exact model, clean a removable drawer with a soft brush when the washer is off and dry, and stop if water has reached electrical parts or the overflow continues.
Safety boundary
Stop conditions
- Stop immediately for water near the cord, plug, outlet, control, or wet floor; isolate power only from a dry safe position and do not touch wet electrical parts.
- Stop for hot water, uncontrolled flow, smoke, burning or melting odor, sparks, a hot/discolored connection, damaged cord, severe vibration, or a repeated breaker trip.
- Do not open panels, tilt or pull a full washer, force a door/lid/filter, bypass a lock, or reach into a moving, hot, or wet mechanism.
- Do not loosen hot or pressurized hoses, use chemical drain cleaner in the washer path, seal a drain opening, or run with a filter/stopper/gasket not fully restored.
- Do not keep cycling a washer after a leak, and do not assume a load, suds, or splash issue explains a recurring leak, leak from underneath, or internal water path.
Only after diagnosis
Potential parts
- washer inlet hose assembly
Consider this category only when the exact model's hose is cracked, split, bulging, or leaking after a safe external inspection confirms it as the source.
Confirm the full model, hose ends, washers, temperature routing, and manufacturer fit information; isolate water and power before replacement. - washer drain hose assembly
Consider this category only when the exact model's drain hose is damaged, displaced beyond restoration, or leaking at a diagnosed hose connection rather than the household drain.
Confirm model-specific length, routing, attachment, and standpipe requirements; do not use tape or an improvised extension as a permanent repair. - door gasket or lid seal
Consider this category only after inspection confirms a torn or deformed seal and the exact model's diagnosis identifies it as the source.
Confirm the exact model and service procedure; do not glue, stretch, cut, or bypass a gasket or lid/door lock. - drain pump filter or pump assembly
Consider this category only for models that document the component and after diagnosis confirms a damaged, blocked, or failed filter/pump or a leaking filter seal.
Confirm exact model and component design; residual water and electrical isolation are required, and stuck or internal pump work should be handled by service.
When checks do not resolve it
Need a professional?
Arrange LG or qualified appliance, plumbing, or electrical service when the leak is under the cabinet, persists in an empty controlled cycle, returns after a safe external correction, involves a cracked hose, torn gasket, stuck or leaking pump filter, blocked household drain, persistent dispenser overflow, door/lid damage, severe vibration, water near power, smoke, odor, sparks, heat, or a breaker trip.
Safety scope: This article supports dry, ordinary-access observations and exact-model external procedures only. Do not operate after an electrical, fire, flood, heat, or severe mechanical warning; do not handle wet or hot power parts, open the cabinet, force a lock/filter, or bypass safety devices.
Common questions
FAQ
Where should I look first when my LG washer leaks?
Note whether the leak starts during fill, wash, spin, drain, or after stopping, then trace the highest wet point. Check inlet hoses/taps, dispenser, front door gasket or top-load lid area, drain hose/standpipe, and the pump-filter cover only if the model documents that access.
Why does my LG washer leak only during draining?
A loose or cracked drain hose, a hose that has slipped out, or a clogged household drain that backs up can release water only when the pump discharges. Keep the washer off, secure only an obvious external hose issue according to the manual, and arrange plumbing or appliance service for backup or recurrence.
Can too much detergent make an LG washer leak?
Yes. Excess or unsuitable detergent can create suds that overflow, and residue can block the dispenser. Use the HE detergent type and amount specified for the exact model, do not exceed the maximum line, and clean the removable drawer only when the machine is off and dry.
What if my LG front-load washer leaks from the door?
Inspect the cool, power-isolated gasket and door for hair, lint, detergent residue, trapped fabric, tears, or deformation. Remove only loose debris with a soft cloth. A torn gasket, damaged door, or leak that persists after cleaning requires service; do not cut, glue, or bypass the lock.
Does every LG washer have a drain-pump filter?
No. Some models document an accessible filter and residual-water hose, while access differs by design. Confirm the full model and follow only its instructions. Never force a cap, open it with hot or pressurized water, or open the cabinet because another model has a filter.
Can a top-load LG washer splash water onto the floor?
LG notes that bulky or floating items, high water levels, excess bubbles, and loose drain connections can send water to the floor. Use the correct cycle and load guidance only when the machine is otherwise safe; recurring leaks, severe vibration, or water near electricity need service.
When is an LG washer leak an emergency?
Treat water near the cord, plug, outlet, or control, a hot or damaged connection, smoke, burning or melting odor, sparks, severe vibration, an uncontrolled flow, or repeated breaker trips as an immediate stop condition. Keep clear, isolate power only from a dry safe position, and obtain qualified help.
Read the exact guide
Official sources
- [LG Washing Machine] Water Overflowing from Detergent DrawerLG USA Support · LG USA support for washers and washer-dryer combinations; drawer design varies by model.
- Appliance and Electrical Fire SafetyU.S. Fire Administration · Government fire-safety guidance for major appliances including washers; it does not diagnose an LG washer.
- [LG top load washing machine water leak] Water leaks to the floor during washingLG USA Support · LG USA support for top-load washers; exact controls and hose fittings vary by model.
- [LG Front Load Washing Machine] Troubleshooting LeaksLG USA Support · LG USA support for front-load washers; images and steps may vary by model.
- LG Washer - Detergent and Additive UsageLG USA Support · LG support guidance for front- and top-load washers; dispenser arrangement varies by model.
- [LG front load washer leak] Water leaks from the drain outlet and drain hose during drainageLG USA Support · LG USA support article for front-load washers; exact hose routing varies by model.
Community feedback
Share a repair observation
Share a plain-text repair observation. Accepted observations are published automatically; this page may take a moment to update.