
On this page
Start here
Quick answer
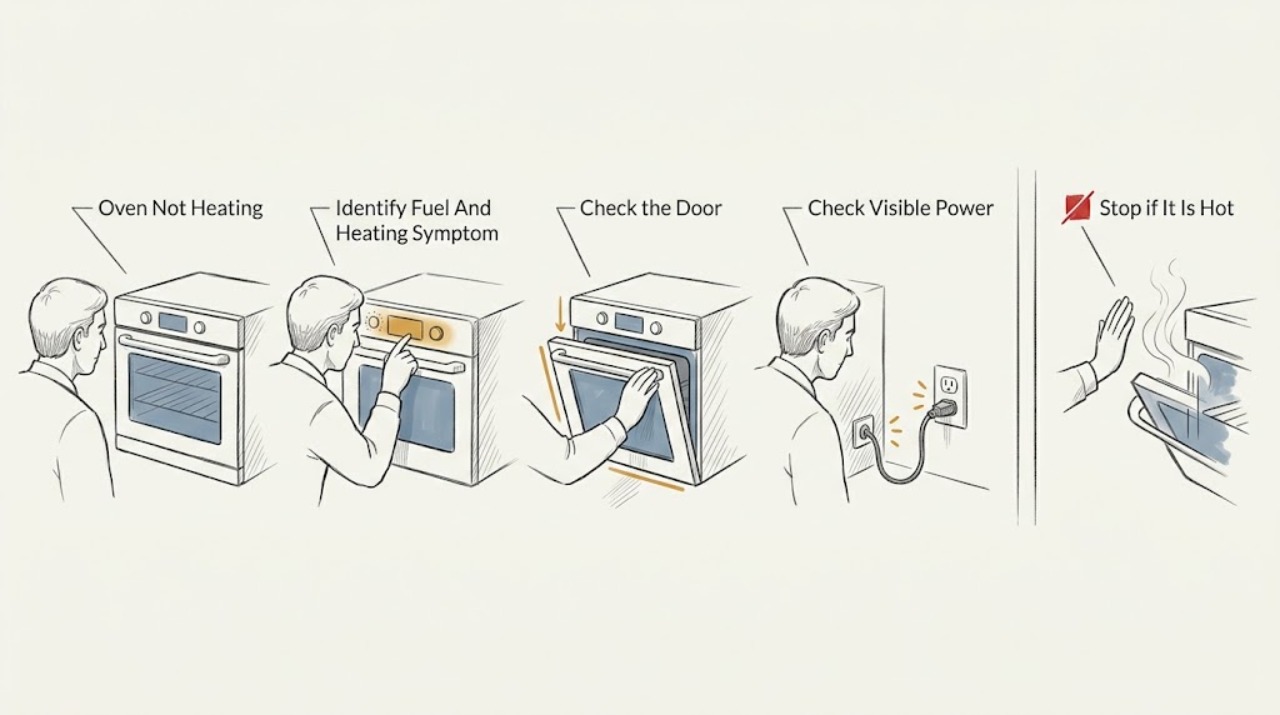
First identify whether the oven is electric, gas, dual-fuel, or unknown, then distinguish no heat at all from slow or uneven heating. Check the selected cooking mode, temperature, clock or delayed-start state, control lock, door closure, and visible power condition using the model manual. An electric oven may have a failed heating element or supply issue; a gas oven may have an ignition, gas-supply, burner, or control issue. Do not remove panels, test live circuits, loosen gas fittings, manually ignite an unknown model, or keep cycling a failed ignition. If you smell gas, hear hissing, see a delayed flare, abnormal flame, smoke, arcing, a hot or damaged outlet, or a carbon-monoxide alarm, stop and leave for safe-location gas or emergency assistance. If the oven still does not heat after low-risk model-specific checks, use qualified appliance service, with an electrician for a recurring supply or breaker fault.
Before you begin
Safety first
- The user should limit work to normal controls, model-documented mode or clock checks, dry-distance power observations, and visible cool-door or sensor observations. Professionals handle internal elements, igniters, burners, valves, regulators, controls, wiring, and combustion testing.
Work through in order
Diagnostic checks
Use only checks that match the exact appliance or system and its official guide.
-
Check 1
Record the oven fuel type, model if visible, whether the display and light work, whether the cooktop works, and whether the cavity produces no heat, some heat, or heat only in one mode. Do not move the appliance or remove a cover to identify these facts.
Expected result: The oven is electric, gas, dual-fuel, or unknown; controls are blank or lit; and the complaint is no heat, slow heat, or one-mode failure.
Next step: Use the matching electric or gas branch and keep the oven unused if any odor, smoke, abnormal flame, heat damage, or electrical warning is present.
Why this matters
Why: Fuel type determines whether the heating path uses elements or burner ignition. A blank display suggests supply or control power, while a lit display with no heat points toward settings, interlocks, element or ignition, sensor, or control. One-mode failure narrows the service clue but does not identify a part.
-
Check 2
Using the normal controls, select the model's Bake or appropriate cooking mode, set a temperature, confirm the clock is set if required, cancel delayed start or timer states, clear Control Lock or Demo only as the manual describes, and close the door fully. Do not force a latch or bypass an interlock.
Expected result: The wrong mode, delayed start, control lock, Demo or Sabbath state, unset clock, open door, or self-clean latch is visible; or settings are correct but heat does not begin.
Next step: Make one normal start attempt after correcting only a documented setting. If there is no heat or any hazard sign, stop rather than repeating the cycle or opening the oven to inspect internal parts.
Why this matters
Why: Controls and door interlocks can prevent heating without a failed element or burner. A correct model-specific setting with no heat moves the diagnosis toward supply, heating hardware, ignition, sensor, or control service.
-
Check 3
From a dry, safe position, look for a tripped breaker, blown fuse indicator, damaged or discolored outlet, or a loose accessible plug. Do not open the panel, pull a built-in oven, touch a wet connection, use an adapter or extension lead, or perform an energized meter check.
Expected result: The breaker is tripped, the outlet or cord is damaged, the oven has no display, or visible power appears normal while heating remains absent.
Next step: If the installation is dry and there is no odor, smoke, heat, or damage, one normal reset may be attempted only as the manual allows. If the breaker trips again, the outlet is damaged, or the oven stays dead, leave it isolated and arrange electrical or appliance service.
Why this matters
Why: Ovens need the correct electrical supply for controls and, depending on design, ignition or heating elements. A damaged connection or recurring breaker trip is an electrical fault boundary. Normal visible power does not clear an internal control or heating circuit.
-
Check 4
For a confirmed electric oven with no gas risk, observe the visible bake or broil element from outside during one normal, manual-approved start. Do not touch the element, remove the rear cover, scrape residue, or continue if smoke, arcing, a burnt odor, or a hot outlet appears.
Expected result: The selected element glows or cycles and the cavity warms; the element stays visibly cold while controls call for heat; or the element is cracked, blistered, displaced, or arcing.
Next step: Turn the oven off and arrange qualified appliance service for a cold, damaged, or arcing element. Never replace an element or access wiring while energized; use emergency help for smoke or active fire.
Why this matters
Why: A cold or visibly damaged element is a service clue, not proof that the element alone is defective; supply, relay, sensor, and control faults can produce the same symptom. A glow does not rule out a sensor, door-seal, or mode problem if heat is inadequate.
-
Check 5
For a confirmed gas or dual-fuel oven, check only the accessible, labeled gas shutoff position described in the installation manual without moving the appliance or loosening a fitting. Note whether surface burners work, but do not use a match, open an internal panel, or repeatedly cycle a failed ignition.
Expected result: The documented shutoff is closed, both cooktop and oven lack gas, the cooktop works while the oven does not, or the valve position is unknown or stiff.
Next step: If the valve identity and normal position are unambiguous and there is no gas odor, restore only the documented position without force. If the oven remains cold, the valve is uncertain, or odor is present, stop and obtain qualified gas-appliance service.
Why this matters
Why: A closed or interrupted supply can affect all gas functions. Working cooktop burners do not clear an oven-specific igniter, valve, burner, regulator, control, or ignition-timing fault. An unknown valve or any gas odor requires professional handling.
-
Check 6
Only when the exact manual permits normal operation, the room has no gas odor, the door is closed, and no warning sign is present, make one ordinary gas-oven start attempt and observe from outside without opening the door. Stop immediately for persistent clicking, a delay, bang, flare, abnormal flame, smoke, or odor.
Expected result: There is no click or glow; a click or glow occurs but no stable heat follows; ignition is delayed; or a flame, smoke, or odor is abnormal.
Next step: Stop for any delayed ignition, flare, abnormal flame, smoke, or gas odor, leave as appropriate, and use gas or emergency assistance from a safe location. For a quiet failed start, keep the oven off and arrange a qualified technician; do not open panels.
Why this matters
Why: No ignition sign can point to control, power, interlock, or igniter service. A click or glow without stable heat can involve gas delivery or ignition timing. Delayed ignition can allow unburned gas to accumulate and create a hazardous flare.
-
Check 7
With the oven cool, inspect the door's visible closure and gasket placement, and verify that a visible temperature sensor is not obviously displaced or touching an element. Do not bend a sensor, move a gasket, block vents, line the floor with foil, or remove an internal part.
Expected result: The door does not close or seal, the gasket is displaced, a sensor is visibly out of position, foil or a liner blocks airflow, or these visible conditions are normal.
Next step: Correct only a loose, removable item described by the manual and make no further heating test if odor or smoke occurs. Arrange appliance service for a door, gasket, sensor, vent, or calibration concern that is not clearly covered by the manual.
Why this matters
Why: Heat loss or an airflow restriction can make an oven seem not to heat or can produce inaccurate temperature behavior. A sensor or element that looks normal still may have an electrical or control fault that requires service.
-
Check 8
Record any exact display code, the model and fuel type, selected mode, time to failure, visible element or ignition response, breaker behavior, door state, and whether the oven was recently installed, moved, cleaned, or repaired. Do not repeat a hazardous start to collect more evidence.
Expected result: A documented model procedure explains a single reset or mode-clear; the code returns; no code is shown; or the failure is accompanied by smell, smoke, heat, arcing, or abnormal flame.
Next step: Use only the exact manual's one safe reset when no hazard is present. Otherwise keep the oven off and provide the record to a qualified appliance technician, electrician, or gas professional as appropriate.
Why this matters
Why: A model-specific procedure may clear a temporary control state, but a returning code or unexplained no-heat condition needs diagnosis. Safety signs override all reset or heating advice.
Use your observations
Decision map
Find the observation that best matches what you see, then follow the next safe action.
-
PATH 01Next step
What you see
A gas odor, hissing, delayed ignition, bang, flare, abnormal flame, smoke, or suspected combustion problem occurs.
Do this next
Stop using the oven, avoid flames and switches, leave for a safe location, and use gas or emergency assistance. Do not relight, open the door to investigate, or return to use until professionals confirm safety.
-
PATH 02Next step
What you see
The oven display and controls are blank, a breaker trips, or a cord or outlet is damaged or discolored.
Do this next
Do not open the panel or keep resetting. Leave the appliance isolated and arrange qualified electrical or appliance service; use emergency assistance for smoke, fire, arcing, or shock danger.
-
PATH 03Next step
What you see
The display is lit but mode, clock, delay, lock, Demo, Sabbath, door, or self-clean state is preventing the cycle.
Do this next
Clear only the state documented for the exact model, close the door normally, and make one safe start attempt. If heating still does not begin, request service.
-
PATH 04Next step
What you see
A confirmed electric oven has correct settings and power but a selected element remains cold or visibly damaged.
Do this next
Keep the oven off and arrange qualified appliance service. Do not touch, remove, or replace the element or access wiring as a consumer check.
-
PATH 05Next step
What you see
A confirmed gas oven has correct settings and power, the supply is safely confirmed, but ignition or heat does not establish.
Do this next
Do not manually ignite, open panels, or repeat the cycle. Arrange qualified gas-appliance diagnosis for the igniter, burner, valve, regulator, control, and combustion path.
-
PATH 06Next step
What you see
The oven warms but does not hold temperature and the door, gasket, sensor, airflow, or foil condition is visibly abnormal.
Do this next
Correct only a simple manual-approved setting or loose item; otherwise keep the oven out of service and request model-specific appliance service.
-
PATH 07Next step
What you see
The model, fuel type, control behavior, or internal heating design cannot be confirmed, or the oven remains cold after low-risk checks.
Do this next
Stop troubleshooting and provide the recorded identity and symptoms to a qualified appliance technician. Do not guess a part or cross-apply a gas or electric procedure.
Helpful context
Understand the symptom
Identify gas, electric, or dual-fuel first
A gas oven uses a burner and ignition sequence, while an electric oven uses heating elements and an electrical supply. A dual-fuel range can combine both. A clock or cooktop that works does not prove that the oven heating circuit or ignition system is healthy. Read the rating label or owner manual without moving a built-in appliance or opening a cover, and keep the exact model available for any code or procedure.
Separate no heat from poor baking
If the cavity stays near room temperature, start with mode, power, door, gas, or element and igniter clues. If it warms but food cooks unevenly or slowly, sensor position, door sealing, airflow, rack position, calibration, or normal element cycling may be involved. Do not use a vague temperature complaint to justify changing a part or adjusting gas pressure.
Safety overrides a heating test
A faint click or glow can be part of a normal ignition sequence on some gas models, but persistent gas odor, delayed ignition, a bang, flare, abnormal flame, smoke, or CO concern is not a diagnosis branch. An electrical burning smell, arc, hot outlet, damaged cord, or repeated breaker trip also requires the oven to remain off. Do not open the door to investigate a suspected delayed ignition or use a match to prove gas flow.
Safety boundary
Stop conditions
- Stop immediately for gas odor, hissing, delayed ignition, bang, flare, abnormal flame, smoke, or suspected combustion trouble; leave and use gas or emergency assistance from a safe location.
- Treat a carbon-monoxide alarm or possible headache, dizziness, nausea, shortness of breath, confusion, or unusual fatigue as an emergency; leave and do not use the oven again until assessed.
- Stop for electrical burning odor, arcing, buzzing, a hot or discolored outlet or control, damaged cord, repeated breaker trip, or smoke or fire.
- Do not open panels, remove elements or burners, loosen gas fittings, adjust a regulator, manually ignite an unknown model, or perform energized electrical tests.
- Do not force a door or latch, block vents, line the oven floor with foil, or repeatedly cycle the oven to make heat appear.
Only after diagnosis
Potential parts
- Electric heating element
Relevant only when a qualified technician confirms a confirmed electric oven's selected element or supply path has failed after settings and power are verified.
Match the exact model, element position, electrical rating, and installation method; do not replace an element while energized or by appearance alone. - Gas oven igniter or burner assembly
Relevant only when a qualified technician confirms the gas model's controls call for heat but safe ignition or burner operation does not establish.
Gas ignition components vary by model and fuel configuration and require qualified installation and combustion verification. - Oven control, sensor, or door interlock
Consider only after the technician finds normal supply and settings but a control, sensor, latch, or interlock prevents heating or correct regulation.
Confirm exact model, control design, fuel type, and manufacturer-approved component before any replacement.
When checks do not resolve it
Need a professional?
Arrange qualified appliance service when the oven remains cold after the exact model's low-risk setting, door, supply, and single reset checks; when a gas igniter or burner or an electric element or control is suspected; or when the model and procedure are unclear. Use qualified electrical service for recurring breaker, outlet, cord, or wiring concerns. Use gas or emergency assistance for odor, hissing, delayed ignition, flare, smoke, fire, a CO alarm, or possible exposure.
Safety scope: The user should limit work to normal controls, model-documented mode or clock checks, dry-distance power observations, and visible cool-door or sensor observations. Professionals handle internal elements, igniters, burners, valves, regulators, controls, wiring, and combustion testing.
Common questions
FAQ
Why is my oven on but not heating?
A lit display does not prove that the mode, clock, lock, door, supply, heating element, gas igniter, sensor, or control is working. Check only the model-documented low-risk settings and visible conditions, then arrange service if heat does not begin.
How do I know whether my oven is gas or electric?
Use the rating label, installation documents, or owner manual without moving a built-in appliance or opening a cover. A cooktop with flames suggests a gas or dual-fuel appliance, but the exact oven design still needs model confirmation.
Can I replace the heating element or igniter myself?
Do not replace an element or igniter based only on appearance. Manufacturer guidance recommends professional help for electrical or heating replacement, and gas ignition work can create a delayed-ignition or combustion hazard.
What should I do if my gas oven smells while it is not heating?
Stop using it. A persistent gas-like odor, hissing, delayed ignition, bang, or flare requires leaving for a safe location and using gas or emergency assistance. Do not look for the leak or repeatedly relight the oven.
Should I reset the breaker if the oven will not heat?
Only one normal reset is reasonable when the installation is dry, there is no odor, smoke, heat, arcing, or active fault, and the model manual allows it. If it trips again or the oven remains cold, leave it off and arrange qualified service.
Read the exact guide
Official sources
- Protect Your Family from Carbon Monoxide PoisoningU.S. Consumer Product Safety Commission · Carbon-monoxide sources, gas ranges and ovens, alarms, and exposure symptoms
- Oven Not Pre-Heating - Wall OvenWhirlpool Product Help · Representative manufacturer guidance for electric oven installation, supply, breaker, and professional service boundary
- Why is my oven not heating up?Whirlpool · Representative manufacturer guidance distinguishing gas igniter and electric element causes, door seal, sensor, and professional replacement
- Oven Not Heating - Powering On - ElectricWhirlpool Product Help · Representative manufacturer guidance for electric oven door, control lock, Demo, delayed start, and model-specific operation
- Gas Range Delayed Ignitions - Tests and Examinations of RangesU.S. Consumer Product Safety Commission · Gas-oven delayed ignition, unburned-gas accumulation, flare-up, igniter, and airflow hazards
- Oven Not Working - Cooktop Working - Not Clicking - Product HelpWhirlpool Product Help · Representative manufacturer guidance for gas oven door, gas shutoff, grounded supply, and model-specific service checks
Community feedback
Share a repair observation
Share a plain-text repair observation. Accepted observations are published automatically; this page may take a moment to update.