
On this page
Start here
Quick answer
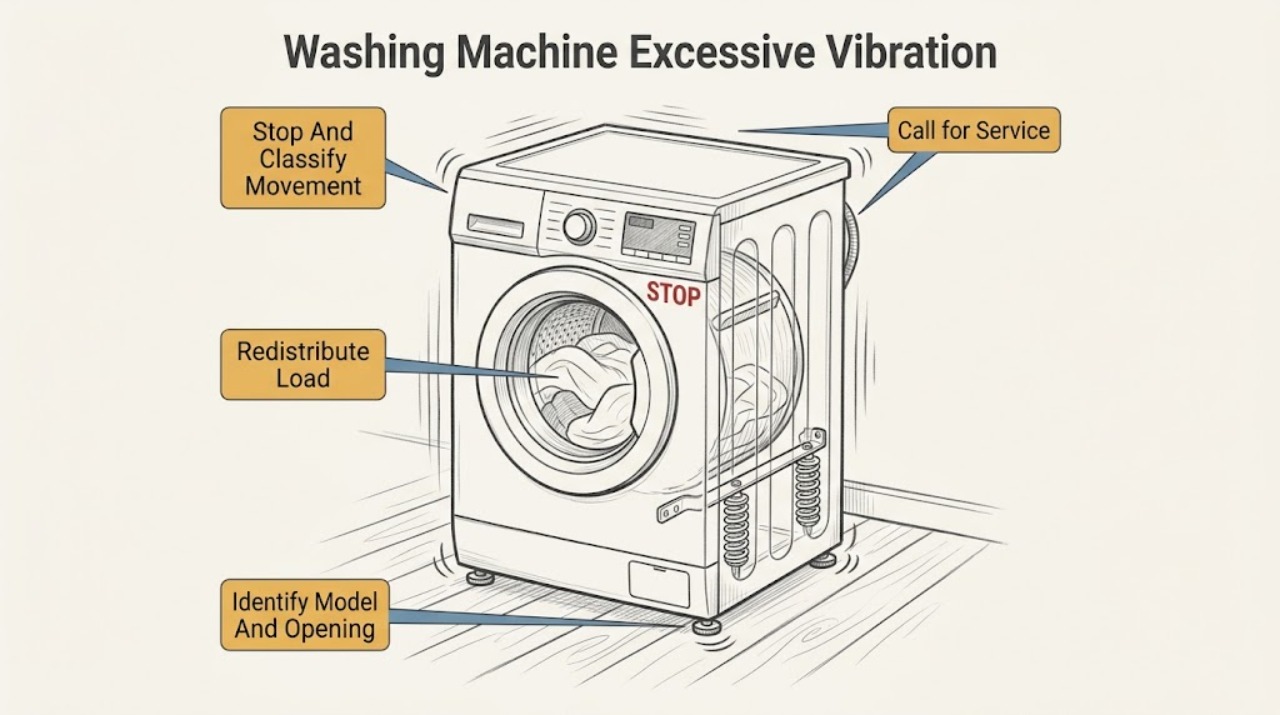
Roper washer vibration is most often tied to a load that is too large or uneven, a washer that rocks on its feet or floor, or installation hardware that was not handled according to the exact model instructions. Start by stopping the cycle safely, noting whether the movement occurs during spin or throughout the cycle, and checking for water, impact, or unusual noise. Redistribute a loose load, confirm all feet contact a firm floor, and use the Roper manual to determine whether the model is top-load or front-load and whether transport hardware should have been removed. If the washer walks, bangs violently, leaks, rubs metal, smells hot, trips protection, or still vibrates with an empty load after installation checks, stop using it and arrange qualified service. Do not open the cabinet or diagnose suspension, bearings, motor, or electrical parts by running repeated tests.
Before you begin
Safety first
- This article supports ordinary-access observation, load redistribution, and exact-model installation checks only. Internal suspension, bearing, drive, motor, wiring, cabinet, and electrical work belongs to qualified service.
Work through in order
Diagnostic checks
Use only checks that match the exact appliance or system and its official guide.
-
Check 1
Stop the cycle with the normal control, keep clear of the moving basket or drum, and record when the vibration starts, whether it is during spin or other phases, and whether the cabinet walks, bangs, leaks, or makes a new sound.
Expected result: Record brief movement during load sensing, vibration only at spin, movement throughout the cycle, a loud impact or metal rub, visible water, smoke or hot odor, a tripped protective device, or a washer that moves across the floor.
Next step: Use the matching branch below and preserve the exact phase, sound, and movement details for service; do not restrain the cabinet during another spin.
Stop if: Stop immediately for walking, violent impact, leakage, metal-on-metal rubbing, smoke, hot odor, electrical damage, or repeated protective shutdown.
Why this matters
Why: Spin-only movement supports a load, level, floor, or suspension path. Movement throughout the cycle suggests installation or mechanical trouble. Water, hot odor, smoke, electrical shutdown, violent impact, or walking changes this to a stop-and-service condition.
-
Check 2
Read the Roper model information from a safe, dry position and identify top-load or front-load operation before reviewing the installation and use-and-care instructions.
Expected result: Record the full model, opening style, basket or drum arrangement, recent installation or move, and any model-specific transport, leveling, pedestal, or floor instructions.
Next step: Use only the exact Roper instructions for transport hardware, feet, floor, and load limits, and do not remove or install hardware based on another model.
Stop if: Stop if the model cannot be identified, installation hardware is damaged or missing, or access requires moving a heavy appliance without safe help.
Why this matters
Why: A front-load model may use transport bolts, while a top-load model may use different packing materials and leveling steps. The model determines which installation hardware and suspension arrangement apply; a generic instruction can create damage.
-
Check 3
With the washer stopped and the lid or door safely released, remove a single heavy item or excess clothing and arrange the remaining wet items loosely and evenly according to the Roper cycle guide.
Expected result: Record whether the load was tightly packed, a single absorbent item, a group of heavy items, unevenly collected on one side, or already loose and balanced; note whether clothes were left unusually wet.
Next step: Run only the model-recommended cycle for that load when no stop condition exists; if vibration returns with ordinary balanced loads, continue to the installation and empty-load branches.
Stop if: Do not reach into a moving basket, add water to correct imbalance, overload the washer, or continue with a load that causes violent movement or leakage.
Why this matters
Why: A single heavy or uneven load can produce spin vibration, reduced spin speed, and wet clothes even when the washer itself is sound. A loose, balanced load with the same symptom shifts attention to installation, floor, or mechanical condition.
-
Check 4
With the washer empty and stopped, check that the cabinet does not rock diagonally and that every foot is firmly on a solid floor; adjust feet only as the exact Roper installation instructions allow, then secure any required lock hardware.
Expected result: Record a stable cabinet with firm foot contact, a rocking corner, a foot that will not lock, floor flex or sag, a drain pan or platform affecting contact, or an appliance that cannot be leveled without lifting.
Next step: Correct only the permitted leveling adjustment, recheck stability by hand, and arrange installation or service when the floor, foot, platform, or lock hardware is abnormal.
Stop if: Do not place hands under a loaded washer, use an improvised support, force a foot, or continue if the cabinet can fall or the floor is damaged.
Why this matters
Why: A rocking cabinet or loose foot can amplify normal spin forces and cause walking. A flexible floor, unsupported platform, damaged foot, or leveling that requires unsafe lifting is an installation or building condition rather than a load problem.
-
Check 5
If the problem began after delivery, installation, or moving, compare the visible rear or packing-area hardware with the exact Roper installation instructions from a safe position; do not loosen bolts, remove panels, or reach behind a connected appliance.
Expected result: Record whether the manual calls for transport hardware to be removed or installed, whether the hardware is still present, whether spacers or packing material are missing, and whether the washer was recently relocated.
Next step: Have installation or qualified service correct transport hardware according to the exact manual; do not run a front-load washer when the required transport state is unknown.
Stop if: Do not operate with suspected transport hardware still installed, remove hardware from an energized or unstable washer, or improvise replacement bolts or spacers.
Why this matters
Why: Transport hardware left in a front-load model can prevent the tub from moving as designed and cause severe vibration. A missing or incorrect component after moving can also create a setup problem. The exact model manual, not a general washer picture, decides what belongs there.
-
Check 6
From ordinary safe access, inspect the floor around the washer, hoses, door or lid seal, visible cabinet edges, and basket or drum opening for water, displaced items, or an obstruction; do not remove panels or reach between the basket and tub.
Expected result: Record a dry stable area, water from a hose or door area, an object caught at the opening, a cracked visible part, a cabinet panel rubbing, or a sound that occurs even with no load.
Next step: Shut off water and power only when safe if there is leakage, remove only an obvious loose item from ordinary access, and arrange service for anything trapped, damaged, or internal.
Stop if: Stop for water near electrical equipment, sharp or loose parts, a trapped object, a moving panel, smoke, hot odor, or any need to reach inside the cabinet.
Why this matters
Why: Water can make the floor slippery and affect stability, while an object or damaged visible part can cause noise and movement. An internal obstruction, rubbing cabinet, or no-load mechanical noise needs service rather than a deeper reach-in check.
-
Check 7
Only when the washer is level, dry, correctly installed, and free of hazards, use the exact model's permitted short or empty check while watching from a safe distance; do not hold the machine or extend the spin to reproduce a fault.
Expected result: Record stable operation, a repeatable spin-only shake with no clothing, basket or drum wobble, scraping or banging, an error, a leak, or cabinet travel.
Next step: Stop the check at the first abnormal movement, document the phase and sound, and arrange qualified service for a no-load recurrence.
Stop if: Do not run an empty or loaded check for smoke, hot odor, leakage, violent movement, metal rubbing, electrical symptoms, or repeated protective shutdown.
Why this matters
Why: A stable empty check followed by vibration only with certain loads supports load balance or cycle selection. Vibration with no load points toward floor, installation, suspension, bearing, drive, or cabinet service.
-
Check 8
Prepare a service record without opening the washer: model, top-load or front-load style, cycle and phase, load type, installation or move history, floor condition, transport-hardware status, level check, and a short description of any sound or leak.
Expected result: Record whether the symptom is repeatable with a balanced load or empty check, whether clothing remains wet, whether the basket or drum looks centered, and whether any warning or protective shutdown occurred.
Next step: Keep the washer out of service when the symptom is severe or repeats without a load, and provide the record and photos to qualified Roper or appliance service.
Stop if: Do not diagnose internal suspension, bearing, motor, belt, wiring, or cabinet parts by removing covers or running repeated high-speed tests.
Why this matters
Why: A precise record lets a technician separate load imbalance and setup from suspension, bearing, drive, cabinet, water, or electrical issues without repeated risky operation.
Use your observations
Decision map
Find the observation that best matches what you see, then follow the next safe action.
-
PATH 01Safety boundary
What you see
Vibration occurs mainly during spin with a single heavy item, tightly packed load, or clothing gathered to one side.
Do this next
Redistribute clothing loosely, avoid a single absorbent item, select the cycle recommended for the load, and monitor one normal cycle from a safe distance.
Why this path and its safety boundary
Why it matters: The load is a plausible cause of off-balance movement and reduced spin performance.
Safety stop: Stop for walking, violent impact, leakage, or vibration that returns with a balanced load.
-
PATH 02Safety boundary
What you see
The cabinet rocks, a foot is not firmly on the floor, the floor flexes, or a platform or drain pan changes contact.
Do this next
Follow the exact Roper leveling procedure and arrange installation or building service if the floor, platform, foot, or lock hardware cannot be made stable.
Why this path and its safety boundary
Why it matters: Installation stability can amplify normal spin forces and cause excessive movement.
Safety stop: Do not lift a loaded appliance, use improvised supports, or operate while it rocks or can move.
-
PATH 03Safety boundary
What you see
The symptom began on a new front-load washer or immediately after delivery or moving, and transport hardware status is unknown.
Do this next
Use the exact Roper manual and have installation or qualified service verify the transport hardware before operating.
Why this path and its safety boundary
Why it matters: Incorrect transport setup can restrict tub movement or leave the machine vulnerable during operation.
Safety stop: Do not run with suspected bolts installed, missing spacers, or an unknown setup, and do not improvise hardware.
-
PATH 04Safety boundary
What you see
A correctly loaded and level washer vibrates, bangs, or walks even when the basket or drum is empty.
Do this next
Stop repeated tests and arrange qualified appliance service with the phase, sound, and model information.
Why this path and its safety boundary
Why it matters: The problem is less likely to be clothing balance and more likely to involve installation, suspension, bearing, drive, cabinet, or floor condition.
Safety stop: Do not remove panels, reach into the tub, spin internal parts, or operate through a severe vibration.
-
PATH 05Safety boundary
What you see
There is scraping, metal rubbing, a trapped item, cabinet contact, or a new repetitive sound.
Do this next
Stop using the washer, remove only an obvious loose item from ordinary access, and arrange service for anything trapped or internal.
Why this path and its safety boundary
Why it matters: An obstruction or mechanical contact may damage the washer or clothing and cannot be safely identified from a running cycle.
Safety stop: Do not reach between the basket and tub, remove covers, or run another cycle to locate the rubbing.
-
PATH 06Safety boundary
What you see
Water is present around the washer, the floor is slippery or soft, or a hose, door, lid, or cabinet leak is visible.
Do this next
Stop the cycle, keep clear, shut off water and power only from a dry safe position when possible, and arrange qualified appliance or plumbing service.
Why this path and its safety boundary
Why it matters: Water can create a stability and electrical hazard and may be a separate cause of movement or damage.
Safety stop: Do not operate on a wet floor, touch wet electrical equipment, or restart after a leak without finding and correcting the source.
-
PATH 07Safety boundary
What you see
Smoke, burning odor, hot plug or outlet, arcing, repeated protective shutdown, or damaged wiring is present.
Do this next
Keep clear, isolate power only from a dry safe position when possible, and contact emergency or qualified electrical/appliance service.
Why this path and its safety boundary
Why it matters: This is an electrical or fire-safety issue, not a vibration adjustment.
Safety stop: Do not reset protection repeatedly, touch wet equipment, remove panels, or run another cycle.
-
PATH 08Safety boundary
What you see
The washer is stable and quiet with ordinary balanced loads after exact-model installation checks, but one unusual load causes movement.
Do this next
Use the cycle guide, avoid single absorbent items and tight packing, and stop using that load pattern if it causes walking or impact.
Why this path and its safety boundary
Why it matters: The load type or cycle may be outside the machine's stable operating range rather than evidence of a failed part.
Safety stop: Arrange service if the same movement appears with ordinary loads, an empty check, or any safety symptom.
Helpful context
Understand the symptom
First decide whether the load or the machine is moving
A washer can move briefly while it senses or redistributes a load, especially during the high-speed portion of a cycle. Excessive vibration means more than normal basket movement: the cabinet walks, bangs, rocks, leaks, or leaves clothes unusually wet. Roper's guide separates off-balance loading from installation, and says a level washer with all feet firmly on the floor is required for proper operation. Stop the cycle normally before reaching near the basket or drum, and do not hold the cabinet down while it spins.
Top-load and front-load checks are not interchangeable
Find the model number and identify the opening style before changing anything. A top-load Roper model may use a basket, agitator, or washplate and may have a packing tray or other installation material. A front-load model may use transport bolts that secure the drum during shipping. Whirlpool's official installation guidance says transport hardware is model-specific and must be addressed through the installation instructions; do not remove or reinstall anything based on a generic picture.
Correct the low-risk causes in order
With the washer stopped, redistribute wet clothing evenly and remove a single heavy item or an overloaded group. Then check whether the cabinet rocks diagonally and whether all feet remain firmly on the floor. Roper advises loose loading, smaller loads when needed, and a level washer; a soft or sagging floor can still transmit movement after the feet are adjusted. Change one condition at a time so the result is meaningful.
When an empty-load result points to service
If a correctly loaded, level washer still bangs, walks, or vibrates with no clothing in it, the problem is less likely to be load balance. Visible movement of the basket or drum, scraping, repeated thumping from one area, leaking, or a machine that rapidly returns out of level can indicate suspension, bearing, drive, cabinet, or installation trouble. Those parts are behind covers or depend on the exact model, so document the symptom and stop rather than improvising an internal inspection.
Use a narrow final check, not repeated high-speed trials
After a permitted load redistribution or leveling correction, use the exact manual's recommended short or empty check only if there is no leak, damage, smell, electrical warning, or violent movement. Watch from a safe distance for stable feet, normal spin ramp, and no cabinet travel. A quiet result under one load does not prove that a damaged suspension or floor is safe; recurrence returns the washer to the service path.
Safety boundary
Stop conditions
- Stop immediately for walking, violent banging, metal rubbing, leakage, smoke, burning odor, a hot plug or outlet, arcing, or repeated protective shutdown.
- Do not hold the washer down, run repeated high-speed tests, or reach into a moving basket or drum to correct imbalance.
- Do not remove cabinet panels, reach between the basket and tub, diagnose suspension or bearing parts, or improvise transport hardware.
- Do not lift a loaded washer, use an improvised support, or operate on a wet, soft, sagging, or unstable floor.
- Do not touch wet electrical equipment or reset a protective device repeatedly; isolate power only from a dry safe position when possible.
- Stop and arrange qualified service when vibration returns with a balanced or empty load, the model-specific installation state is unknown, or the washer cannot be leveled safely.
Only after diagnosis
Potential parts
- Roper washer leveling foot or lock nut
Consider this category only when the exact model has a damaged or missing leveling part and the floor is otherwise stable.
Match the full model, foot style, thread, and lock hardware; do not use a part to compensate for a sagging floor or unstable platform. - Roper washer suspension or shock component
Consider this category only when qualified diagnosis links no-load vibration, repeated impact, or basket movement to the model's suspension system.
Confirm exact model, top-load or front-load design, suspension layout, and service procedure; do not open the cabinet as a home diagnostic. - Roper washer transport hardware set
Consider this category only when the exact model's installation instructions require transport hardware for relocation or identify missing or damaged pieces.
Use only the exact model hardware and installation instructions; transport parts are not a generic vibration fix and must not be improvised. - Roper washer tub or drum bearing component
Consider this category only after qualified diagnosis identifies bearing play, grinding, or no-load movement consistent with the exact model.
Confirm model, tub design, repair scope, and compatible assembly through qualified service; do not order from vibration alone.
When checks do not resolve it
Need a professional?
Arrange qualified Roper or appliance service when vibration returns with a balanced or empty load, the washer walks or bangs, the basket or drum rubs, the cabinet or floor cannot be stabilized, transport hardware is unknown after installation or moving, or suspension, bearing, drive, cabinet, or internal electrical work may be involved. Use appliance or plumbing service for leaks, and emergency or qualified electrical service for smoke, burning odor, arcing, hot electrical equipment, water near electricity, or repeated protective shutdown.
Safety scope: This article supports ordinary-access observation, load redistribution, and exact-model installation checks only. Internal suspension, bearing, drive, motor, wiring, cabinet, and electrical work belongs to qualified service.
Common questions
FAQ
Why is my Roper washer shaking during spin?
Start with a loose, balanced load, then check firm foot contact, level installation, and floor stability. If it still walks, bangs, or vibrates empty, stop repeated spin tests and arrange qualified service.
Can one heavy item make a Roper washer vibrate?
Yes. A single absorbent or heavy item can collect to one side during spin. Stop normally, redistribute the load according to the exact Roper cycle guide, and do not add water or tightly pack more clothing to counterbalance it.
How do I know whether the washer is level?
With the washer empty and stopped, check that the cabinet does not rock and every foot is firmly on a solid floor. Follow the exact Roper installation instructions for foot adjustment and lock hardware; do not lift a loaded machine or use improvised supports.
Could shipping bolts cause excessive vibration?
On some front-load designs, transport bolts restrain the drum during shipping and must be handled according to the exact installation guide. Confirm the Roper model and its instructions before removing or installing anything; do not use a generic bolt pattern.
What if the Roper washer vibrates with no clothes inside?
No-load vibration makes a simple clothing imbalance less likely and points toward leveling, floor, installation, suspension, bearing, drive, or cabinet service. Keep the washer out of service if it bangs, walks, rubs, leaks, or returns to an unstable state.
When is washer vibration unsafe?
Stop for walking, violent impact, metal rubbing, leakage, smoke, burning odor, a hot plug or outlet, arcing, repeated protective shutdown, a wet electrical area, or a floor that cannot support the appliance. Do not restrain the washer or repeatedly reset protection.
Read the exact guide
Official sources
- Use and Care Guide – RTW4516FWRoper Appliances · Official Roper use-and-care guide for model RTW4516FW; use the exact guide for another Roper model when its design or controls differ.
- Front Load Washer Installation ChecklistWhirlpool Product Help · Official Whirlpool front-load installation checklist; use it as general context only and follow the exact Roper installation guide.
- Removing Shipping Bolts for Front Load WasherWhirlpool Product Help · Official Whirlpool front-load guidance; Roper model-specific installation instructions determine the assigned washer's transport hardware.
- Installation Instructions – RTW4516FWRoper Appliances · Official Roper installation instructions for model RTW4516FW; installation details vary by model and opening style.
- Vibration or Out of Balance loads - Product HelpWhirlpool Product Help · Official Whirlpool top-load guidance used for general top-load behavior; the Roper cycle guide and exact model manual control.
- Washer is Vibrating, Walking or MovingWhirlpool Product Help · Official Whirlpool guidance used for general washer mechanics; Roper model instructions control the assigned appliance.
Community feedback
Share a repair observation
Share a plain-text repair observation. Accepted observations are published automatically; this page may take a moment to update.