
On this page
Start here
Quick answer
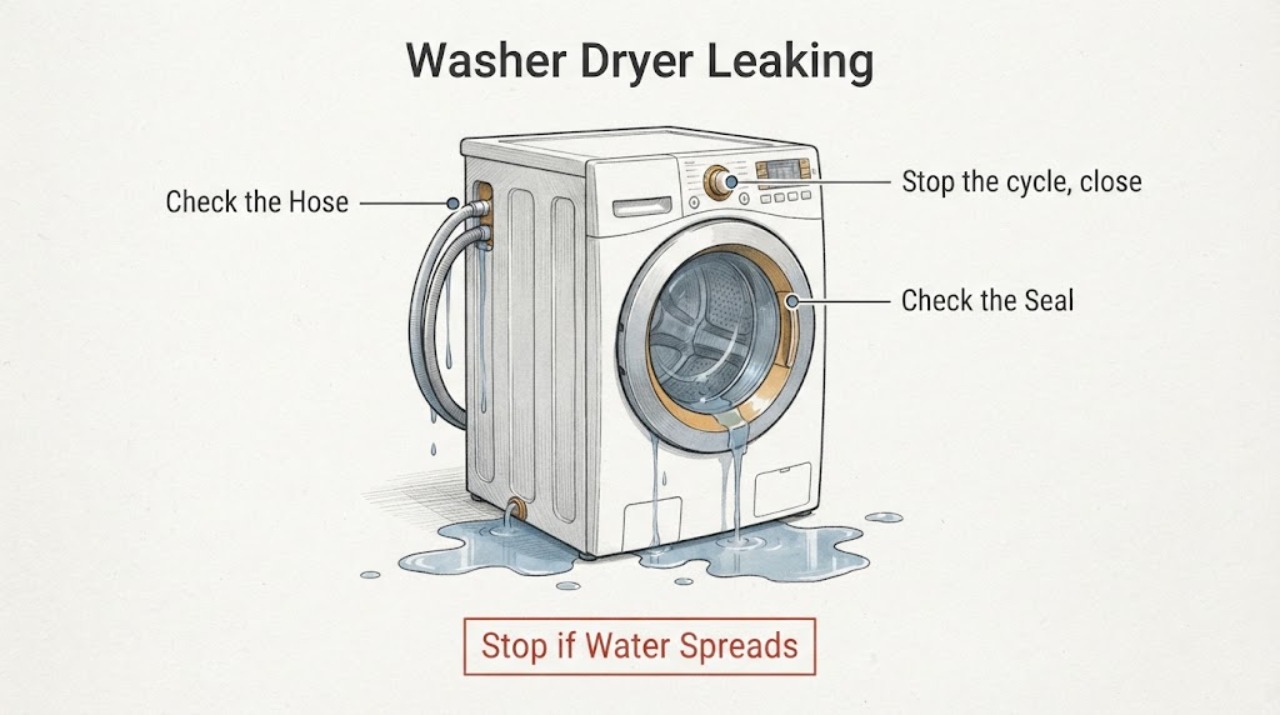
Stop the Samsung washer-dryer, turn off its water supplies, and disconnect power only if you can do so without standing in water or touching damaged electrical parts. Wipe up enough water to locate where it first returns, then check the supply-hose connections, front-door gasket, drain hose and holder, pump-filter area, detergent drawer, load size, and level. Do not remove a pump filter while water is trapped in the drum unless the model manual provides a safe drain procedure. After correcting an accessible hose, gasket obstruction, detergent, or leveling issue, run only the model-approved short test; if water returns, the leak is underneath, or the appliance is wet near electrical controls, stop and arrange service.
Work through in order
Diagnostic checks
Use only checks that match the exact appliance or system and its official guide.
-
Check 1
Stop the cycle, close the hot and cold water valves, and inspect the floor and nearby electrical area from a dry position. Disconnect power only if the plug, socket, cord, and floor are dry and reachable without entering the spill.
Expected result: The leak stops when the water valves are closed, or water continues to appear from below, the drain, or an already wet electrical area.
Next step: If the electrical area is wet, the source is underneath, or water continues to spread, keep the appliance off and arrange service. Otherwise dry the accessible area before locating the first return point.
Why this matters
Why: Stopping the water supply limits flooding. A leak that continues may be residual water or a drain-side or internal leak; water near electrical parts makes further consumer testing unsafe.
-
Check 2
With the machine off and the water valves closed, inspect both ends and the full length of each supply hose, the drain hose, its holder, and the visible rear connections. Look for moisture, splits, loose fittings, kinks, or a hose that has slipped out of the household drain.
Expected result: Moisture begins at a supply connection, a damaged or kinked hose, or a drain hose that is too loose, too deep, or sealed tightly into the standpipe; or all visible hoses are dry and correctly supported.
Next step: Correct only an accessible positioning issue using the Samsung manual and its hose guide. Do not remove the rear retaining screw or improvise a connector; replace a damaged hose or request service. Then continue only if the area is dry and secure.
Why this matters
Why: A damaged or incorrectly positioned hose can leak during filling or draining, and an airtight or incorrectly inserted drain hose can siphon or spill. A dry rear path shifts attention to the door, drawer, filter, or an internal leak.
-
Check 3
On a front-load model, inspect the door glass and rubber gasket with the door open. Carefully fold back the seal to remove visible hair, thread, or other trapped material, and confirm laundry is not caught between the gasket and glass. Separately inspect the detergent drawer, its cover or insert, and the surrounding channel for residue or overflow.
Expected result: The leak starts at the closed door, the gasket has damage, an object is trapped in the seal, or water and suds emerge from the drawer. The gasket and drawer are clean, intact, and dry.
Next step: Remove only loose debris and clean the accessible drawer as the manual directs. Do not use the appliance with a damaged gasket or drawer, and do not dismantle the door; request service if the leak remains or the seal is torn.
Why this matters
Why: A small object or damaged seal can allow wash water past the door. Excess or non-HE detergent can create suds, while a dirty or incompletely assembled drawer can overflow. Water dripping only after opening the door may be residual and is not the same as a leak with the door closed.
-
Check 4
If the model has a user-accessible pump or debris filter, read the exact manual first. Only when the drum is safely drained by the model's procedure, place a towel and suitable container, clean the filter, refit its cap and drain hose securely, and check that the washer-dryer stands level and stable.
Expected result: The filter contains lint or debris, the filter cap or small drain hose was not seated, the appliance rocks, or the filter and level are already correct.
Next step: Correct only the manual-approved filter, cap, hose, or leveling issue. Keep the appliance off if water cannot be drained safely or if any housing, pump, or hose is damaged; arrange service instead of opening the cabinet.
Why this matters
Why: A neglected filter can restrict draining and contribute to leaks; an unsecured cap or hose can leak after service. An unstable machine can worsen splashing or seal contact. If the filter area is inaccessible, full of water, cracked, or still leaks after correct refitting, it is not a safe trial-and-error repair.
-
Check 5
After an accessible cause has been corrected and the appliance is completely dry, run the model-approved short test with a small load or no additives as appropriate. Watch from outside the spill area during filling, tumbling, draining, and any drying transition; stop immediately if water returns.
Expected result: No water returns, or the leak reappears at a particular stage or from underneath despite the corrected hose, gasket, drawer, filter, or leveling condition.
Next step: If the leak returns, stop the cycle, close the water valves, and arrange service. Do not repeat tests to collect more evidence, and do not open the rear or lower panels.
Why this matters
Why: A clean test identifies whether the correction addressed the leak. A stage-specific or underside leak points to an internal hose, pump, tub, valve, seal, or control-related issue that requires model-specific diagnosis.
Use your observations
Decision map
Find the observation that best matches what you see, then follow the next safe action.
-
PATH 01Next step
What you see
Water is near the plug, socket, cord, control panel, or a person would need to stand in pooled water to reach the appliance.
Do this next
Do not touch the wet electrical area or reach behind the machine. Close the water valves if safely accessible, leave power isolation to a qualified person if needed, and arrange service.
Why this path and its safety boundary
Why it matters: Further testing is an electrical and flooding hazard.
-
PATH 02Next step
What you see
The first wet point is a supply connection, drain hose, door gasket obstruction, detergent drawer, filter cap, or leveling issue that can be corrected exactly as the model manual describes.
Do this next
Correct only that identified issue, dry the area, and run one model-approved short test while watching for recurrence. Stop and request service if water returns.
Why this path and its safety boundary
Why it matters: An accessible installation or maintenance cause may be responsible.
-
PATH 03Next step
What you see
The visible hoses, door seal, drawer, filter, and level are correct, but water still appears or comes from underneath.
Do this next
Keep the washer-dryer off and the water valves closed. Do not remove panels or continue test cycles; arrange qualified appliance service.
Why this path and its safety boundary
Why it matters: An internal leak or damaged component is more likely.
-
PATH 04Next step
What you see
A Samsung leak or water-level code remains after the visible leak source and excess suds have been addressed.
Do this next
Record the exact code and model, keep the appliance off if water is present, and request service through Samsung or a qualified appliance technician.
Why this path and its safety boundary
Why it matters: The sensor, pump, hose, or another internal condition may still be present.
Helpful context
Understand the symptom
Locate the first wet point
Water on the floor is not necessarily where the leak starts. Dry the accessible floor and watch from a safe position without running the machine if water is still spreading. A leak at the rear usually points to a supply or drain connection; water at the front may come from the door seal or detergent drawer; water from underneath needs service unless the model manual gives a specific user-accessible filter procedure.
Washer-dryer models need model-specific limits
Samsung washer-dryers differ in door design, drain routing, pump-filter access, and detergent or drying systems. Use the exact manual for your model before adjusting a drain hose, opening a filter door, or running a test. A guide for a conventional washer can identify likely leak paths, but it does not authorize a repair on a different model.
Keep water and electricity separated
Do not reach behind a wet appliance, stand in pooled water, or touch a plug, socket, cord, or control panel that is wet or damaged. Shut the water valves first when practical. If power cannot be disconnected safely, leave the area and arrange service or qualified electrical help.
Safety boundary
Stop conditions
- Close the water valves and stop the cycle immediately if water is actively spreading, the leak comes from underneath, or a leak returns during the test.
- Do not stand in pooled water, reach behind a wet appliance, or touch a wet plug, socket, cord, or control panel.
- Do not remove a pump filter with trapped water unless the exact model manual provides a safe drain procedure and the area can remain dry.
- Do not remove the rear drain-hose retaining screw, open panels, bypass a door lock, or continue using a machine with a damaged gasket, hose, or housing.
Only after diagnosis
Potential parts
- water supply or drain hose
Only consider this category when inspection identifies a damaged, kinked, incorrectly seated, or leaking hose and the exact model manual or technician confirms the replacement.
Confirm the full model identifier, connection type, routing, and manufacturer fit information before ordering. - door gasket
Only consider this category if water escapes from the closed door and the gasket is visibly damaged after loose debris and laundry obstruction have been ruled out.
Door seals vary by model and installation; have a qualified technician confirm fitment if the seal or retaining ring must be removed. - pump filter or drain pump
Only consider this category if the model-approved filter procedure does not restore draining and a technician confirms a damaged filter housing or pump fault.
Confirm model fit and safe installation instructions; do not select a pump from a leak symptom alone.
When checks do not resolve it
Need a professional?
Arrange qualified appliance service when the leak returns after one safe correction and test, water comes from underneath or an inaccessible area, a hose, door gasket, pump, tub, valve, or housing is damaged, a leak code remains, or the appliance is wet near electrical controls. Stop immediately if there is flooding, a damaged cord or socket, sparking, or any situation requiring you to stand in water or reach behind a wet machine.
Common questions
FAQ
Where should I look first when my Samsung washer-dryer leaks?
Stop the cycle and locate the first wet point from a dry position. Check the supply and drain connections at the rear, the front door gasket, and the detergent drawer before considering an internal or underside leak.
Can too much detergent cause a Samsung washer-dryer to leak?
Yes. Excess or non-HE detergent can create suds that contribute to leaks or leak errors, and residue or an incompletely assembled drawer can cause overflow. Use the exact detergent and amount specified for your model.
Should I open the pump filter when the washer-dryer is leaking?
Only if the exact model manual provides a safe drain procedure and the area can stay dry. Never remove a filter with trapped water while standing in a spill or when water is near electrical parts; request service instead.
When should I stop troubleshooting a Samsung washer-dryer leak?
Stop when the leak returns, comes from underneath or an inaccessible area, reaches electrical parts, or leaves a leak code after visible causes are corrected. Close the water valves, keep the appliance off, and arrange qualified service.
Read the exact guide
Official sources
- What to do if your washing machine leaks?Samsung · Samsung washer leak causes involving door gasket, detergent drawer, drain hose, leveling and detergent
- Samsung washing machine is leakingSamsung · Samsung washer leak source, hose, door gasket, drain hose, pump filter, detergent, leveling and test-cycle guidance
- Samsung washing machine information and error codesSamsung · Samsung washer leakage, hose, drain-hose-holder, suds and service guidance
Community feedback
Share a repair observation
Share a plain-text repair observation. Accepted observations are published automatically; this page may take a moment to update.