
On this page
Start here
Quick answer
Stop the Samsung washer, keep water away from the plug and outlet, and close both household water valves if the leak is active. Find the first wet point rather than assuming the puddle's location is the source: check the supply hose and inlet connections, dispenser and suds, front-load door gasket, drain hose and pump-filter area, then the underside only from a safe standing position. Do not tilt the washer, remove panels, open a hot or pressurized filter, or reconnect power while the floor or electrical connection is wet. A missing hose holder, damaged hose, torn gasket, leak from the cabinet base, continuous filling, hot water, burning smell, smoke, or repeated breaker trip requires qualified service.
Before you begin
Safety first
- This article covers safe external observation and model-documented controls or drain access only. A qualified professional must handle internal water, pump, valve, tub, seal, wiring, cabinet, and electrical work.
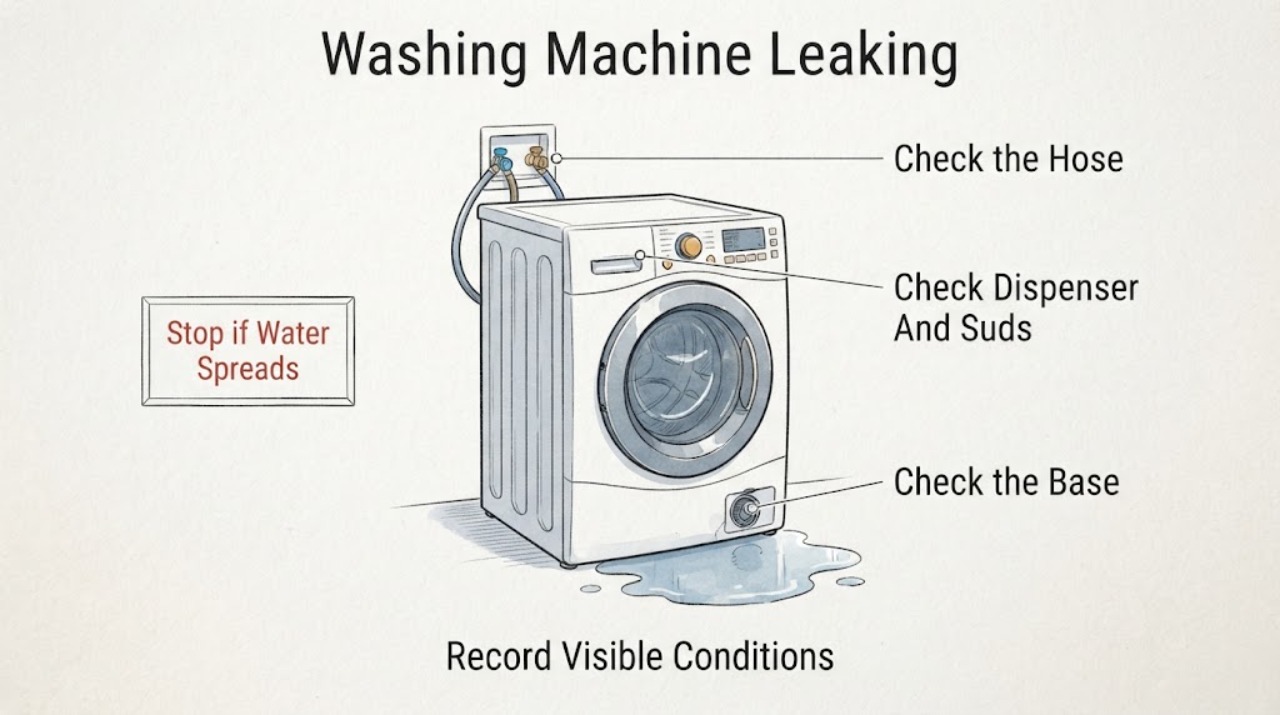
Work through in order
Diagnostic checks
Use only checks that match the exact appliance or system and its official guide.
-
Check 1
Stop the washer using its normal control if it responds, keep the floor and electrical connection dry, close both household water valves for an active leak, and note the cycle stage when water first appeared; do not pull the washer forward through water.
Expected result: The leak stops when the washer stops, continues while the washer is off, appears during filling, appears during draining, or appears only during spin or movement.
Next step: Keep the appliance unused and use the first-wet-point checks below without moving it through standing water.
Stop if: Stop for water near the plug or outlet, a wet floor that cannot be made safe, smoke, burning smell, sparks, a hot connection, or uncontrolled water flow.
Why this matters
Why: A leak that continues while off points toward a pressurized supply connection or valve. Filling timing points toward supply hoses, valves, or dispenser routing; draining timing points toward the drain hose, pump filter, or pump area; spin-only water can be displaced by a door, tub, or movement issue.
-
Check 2
From the front or another dry, safe position, inspect the visible hot and cold supply hoses, valve connections, and washer inlet area for a first wet point, kink, damaged washer, loose-looking connection, or spray; do not loosen a pressurized fitting.
Expected result: Water starts at a supply connection, runs down a hose, appears at the washer inlet, or is absent from the supply side while the leak occurs during another stage.
Next step: Leave the valves closed and arrange qualified service for a damaged hose, inlet, or connection; if the supply side is dry, continue to the dispenser, door, and drain observations.
Stop if: Do not tighten, remove, or reconnect a hose while water is uncontrolled, do not use a damaged hose, and stop for a burst hose or water approaching electrical parts.
Why this matters
Why: A supply-side first wet point can leak independently of the tub or drain system. A damaged hose or connection should not be treated as a control or pump fault; the exact hose and connection need safe repair or service.
-
Check 3
With the washer off and dry, inspect the detergent drawer, dispenser opening, and front panel for residue, overflow marks, a drawer that is not seated, or excessive suds; use only the detergent and drawer-care instructions for the exact model.
Expected result: Water or foam begins at the dispenser, the drawer is obstructed or not closed, the washer is over-sudsing, or the dispenser area is dry.
Next step: Clean and reseat the drawer only as the model manual permits, use the correct detergent guidance, and run no further cycle if overflow continues; a dry dispenser sends the diagnosis to the door or drain path.
Stop if: Do not mix cleaning chemicals, force the drawer, pour chemicals into a running washer, or continue when water reaches the panel or electrical connection.
Why this matters
Why: A dispenser first wet point can result from residue, drawer seating, detergent quantity or type, or a restricted water path rather than a failed drain pump. Foam that travels out of the drawer can resemble a hose leak and can also affect cycle behavior.
-
Check 4
On a front-load model, inspect the visible door glass, gasket lip, and contact area with the washer off for trapped laundry, debris, a fold, tear, puncture, or distortion; do not pull the gasket out or force the door.
Expected result: The first wet point is at the door, an item is trapped in the seal, the gasket is visibly damaged, or the door area is dry while water appears elsewhere.
Next step: Remove only a loose visible item without tools, keep the washer unused if the seal is damaged, and request service for a torn gasket, door, hinge, or frame.
Stop if: Do not pry the gasket, remove the door, run with broken glass or a torn seal, or touch the area if hot water or electricity is present.
Why this matters
Why: Laundry or debris can prevent a seal from contacting correctly, while a torn or distorted gasket is a service or exact-model replacement question. A dry door area shifts attention to the supply, dispenser, drain, or cabinet base.
-
Check 5
From a safe position, inspect the visible drain hose, standpipe or sink entry, rear holder, and floor below for a kink, split, displaced hose, loose drain connection, or water that first appears during draining; do not remove the rear retaining screw or create an airtight drain connection.
Expected result: The drain hose leaks, slips, is kinked or damaged, the rear holder is missing, the standpipe overflows, or the drain path is dry while water first appears elsewhere.
Next step: Keep the washer off and arrange service for a damaged hose or missing holder; if the hose is intact but water remains inside, use the safe front-load drain branch only when the exact model supports it.
Stop if: Do not pull the hose out of the standpipe, remove the retaining screw, extend or seal the drain connection, or handle sewage-like water near electricity.
Why this matters
Why: Samsung identifies hose installation and a missing holder as causes of leaks or drain problems. A drain-hose first wet point is separate from a door-gasket or supply leak; a standpipe overflow can be a household drain problem rather than a washer cabinet leak.
-
Check 6
If a front-load model has a documented pump-filter access and water remains inside, let recently hot water cool, turn the washer off, place a stable container and absorbent material, and follow the exact Samsung emergency-drain and filter instructions; do not open a hot or pressurized filter.
Expected result: Water drains through the emergency hose, the filter area leaks, the filter is blocked, no water drains, or the model has no accessible emergency hose or filter.
Next step: Stop after the model-approved external procedure, dry the area, and request service if draining fails, the filter or cap is damaged, or the leak returns.
Stop if: Do not remove a filter with hot water or pressure behind it, use sharp tools, tilt the washer, remove panels, or spill water near the plug or outlet.
Why this matters
Why: A blocked filter or pump area can cause retained water and leakage during draining, but older or different models may not have the same access. A filter cap or hose that leaks after the documented procedure needs service.
-
Check 7
Only after the first wet point is corrected, the floor and electrical connection are dry, and no hazard is present, use the exact model manual to perform one short, supervised rinse or drain observation; do not run a full load to see whether a leak returns.
Expected result: No water appears, the same first wet point returns, water appears at the cabinet base, the washer moves violently, or a code or electrical symptom appears.
Next step: Stop testing, close the water valves, leave the washer unused, and provide the timing, first wet point, photos, model, and code to qualified service.
Stop if: Do not test with a wet floor, active leak, damaged hose or seal, hot water, smoke, burning smell, sparks, or a repeated breaker trip.
Why this matters
Why: A dry short check supports the corrected external cause but does not prove internal components are sound. A returning or cabinet-base leak, movement-related leak, code, or electrical symptom needs qualified diagnosis.
Use your observations
Decision map
Find the observation that best matches what you see, then follow the next safe action.
-
PATH 01Safety boundary
What you see
Water continues while the washer is off and the supply valves are open.
Do this next
Close both water valves, keep the washer unused, and arrange qualified service for the supply-side first wet point.
Why this path and its safety boundary
Why it matters: A pressurized supply hose, valve connection, or inlet-side fault is more likely than a drain-only issue.
Safety stop: Stop for a burst hose, uncontrolled spray, water near electricity, or an unsafe floor.
-
PATH 02Safety boundary
What you see
Water or foam first appears at the detergent drawer or dispenser opening during filling.
Do this next
Use the model care guidance to clean and reseat the drawer, then stop if overflow returns or reaches the controls.
Why this path and its safety boundary
Why it matters: Drawer seating, residue, detergent use, or a restricted dispenser path is plausible.
Safety stop: Do not mix chemicals, force the drawer, or continue with water near the control panel.
-
PATH 03Safety boundary
What you see
The first wet point is at a front-load door seal, and laundry or debris is trapped or the gasket is visibly folded or damaged.
Do this next
Remove only a loose visible item, do not run the washer with a damaged seal, and arrange qualified service for damage or a returning leak.
Why this path and its safety boundary
Why it matters: The seal may not be contacting correctly, or the gasket, door, hinge, or frame may need exact-model service.
Safety stop: Do not pry or remove the gasket, force the door, or run with broken glass or a torn seal.
-
PATH 04Safety boundary
What you see
Water first appears at the drain hose, its holder or connection, or the household standpipe during draining.
Do this next
Keep the washer off and request service or household plumbing assessment; preserve the hose holder and do not create an airtight connection.
Why this path and its safety boundary
Why it matters: A drain-hose installation, damaged hose, holder, or household drain overflow is more likely than a supply leak.
Safety stop: Do not remove the rear holder screw, pull the hose from a flooded standpipe, or handle contaminated water near electricity.
-
PATH 05Safety boundary
What you see
A supported front-load washer retains water and the leak or overflow occurs at the pump-filter area.
Do this next
Allow hot water to cool, use only the exact model's emergency-drain procedure, and request service if the path is blocked, damaged, or still leaks.
Why this path and its safety boundary
Why it matters: A blocked filter, pump path, cap, or drain procedure may be involved, but access differs by model.
Safety stop: Do not open a hot or pressurized filter, tilt the washer, remove panels, or spill water near electricity.
-
PATH 06Safety boundary
What you see
The visible hoses, dispenser, door area, and drain path are dry, but water appears under the cabinet or returns during operation.
Do this next
Close the water valves, leave the washer unused, and arrange qualified Samsung appliance service; do not tilt or open the cabinet.
Why this path and its safety boundary
Why it matters: An internal hose, tub, pump, valve, or structural leak cannot be identified safely from outside.
Safety stop: Stop for water near the outlet, unstable flooring, electrical symptoms, smoke, burning smell, or repeated breaker trips.
-
PATH 07Safety boundary
What you see
There is hot water, steam, uncontrolled water, a wet plug or outlet, smoke, burning smell, sparks, a hot cord, or a breaker trip.
Do this next
Keep clear, close water valves only if it can be done safely without entering water, and use the appropriate emergency or qualified service path from a safe position.
Why this path and its safety boundary
Why it matters: The incident is no longer a routine leak check; water, burn, fire, and electrical risk take priority.
Safety stop: Do not touch wet electrical parts, reset a breaker, reconnect power, move the washer, or resume a cycle.
Helpful context
Understand the symptom
The puddle is not always the source
A Samsung washer can leak at the supply connection, detergent drawer, door seal, drain hose, pump-filter area, or an internal component, while water travels across the floor before it is noticed. Note whether water appears during filling, tumbling, draining, or spinning, and photograph the first wet point if it can be seen without moving the washer.
Make the area safe before looking closer
Stop the cycle and keep hands, feet, the plug, and the outlet dry. Close the supply valves for an active leak. If the recent cycle used hot water, wait for it to cool before any drain or filter work. A washer that is leaking from the cabinet, continuously filling, or showing electrical symptoms should remain unused until qualified service assesses it.
Safety boundary
Stop conditions
- Stop the washer and keep water away from the plug, outlet, controls, and feet; do not reconnect power while the floor or electrical connection is wet.
- Close the household water valves for an active leak only from a dry, safe position; do not move or tilt the washer through standing water.
- Allow recently hot water to cool before any documented drain or filter procedure; do not open a hot or pressurized filter.
- Do not remove the rear drain-hose holder screw, create an airtight drain connection, remove panels, or handle internal hoses, pumps, valves, wiring, or the cabinet base.
- Stop immediately for smoke, burning smell, sparks, a hot or damaged cord or outlet, repeated breaker trips, uncontrolled flow, unstable flooring, or a torn door seal, broken glass, or damaged frame.
Only after diagnosis
Potential parts
- washing-machine supply hose
Consider this category only when the first wet point is a visibly damaged supply hose or a qualified diagnosis confirms the hose is the source.
Confirm the exact model, hose specification, connector, and installation requirements; do not reconnect a damaged hose or use a substitute without fit and safety confirmation. - front-load door gasket
Consider this category only when the first wet point is the door seal and qualified diagnosis confirms a torn, distorted, or model-specific gasket failure after visible debris is excluded.
Confirm exact model and door configuration with Samsung or a qualified technician; do not stretch, glue, or substitute a seal to make it fit. - drain hose or pump-filter component
Consider this category only if the first wet point and qualified diagnosis identify a damaged drain hose, cap, filter, or pump path after safe external checks.
Confirm exact model, filter arrangement, hose routing, and water-safety procedure; do not open or replace a drain component while hot or pressurized.
When checks do not resolve it
Need a professional?
Request qualified Samsung appliance service for a cabinet-base leak, damaged supply or drain hose, missing drain-hose holder, torn door gasket, damaged door or frame, pump-filter leak, continuous filling, a leak that returns after one safe external correction, or any code or electrical symptom. Use appropriate household plumbing service for a standpipe or building-drain overflow. Treat smoke, sparks, hot electrical parts, and water near electricity as urgent safety conditions.
Safety scope: This article covers safe external observation and model-documented controls or drain access only. A qualified professional must handle internal water, pump, valve, tub, seal, wiring, cabinet, and electrical work.
Common questions
FAQ
How do I find where my Samsung washing machine is leaking?
Stop the washer, keep water away from electricity, and note whether the first wet point is at a supply hose, dispenser, front door gasket, drain hose, pump-filter area, standpipe, or cabinet base. Do not move the washer through standing water; photograph the visible first wet point from a safe position.
What should I do if my Samsung washer leaks from the supply hose?
Close the household water valves from a dry position and leave the washer unused. Inspect only the visible hose and connection for damage or a first wet point; do not loosen a pressurized fitting. Arrange qualified service for a damaged hose, inlet, or connection.
Why is water or foam coming from the Samsung washer detergent drawer?
A drawer that is not seated, residue, detergent use, or a restricted dispenser path can cause overflow. With the washer off, clean and reseat the drawer only as the exact model guide permits. Stop if overflow returns or reaches the controls, and do not mix cleaning chemicals.
Can a Samsung washer door gasket cause a leak?
Yes, on front-load models a trapped garment, debris, fold, tear, or distortion can keep the gasket from sealing. Remove only a loose visible item without tools. Do not run with a torn seal or broken glass; request service for gasket, door, hinge, or frame damage.
What if my Samsung washer leaks during draining?
Inspect the visible drain hose, holder, connection, and household standpipe from a safe position. Samsung warns not to remove the rear retaining screw or create an airtight drain connection. If water remains inside, allow hot water to cool and use only the exact model's documented pump-filter or emergency-drain procedure.
When is a Samsung washer leak an urgent safety problem?
Stop immediately for uncontrolled water, hot water or steam, water near a plug or outlet, smoke, burning smell, sparks, a hot or damaged cord, exposed wiring, or a repeated breaker trip. Do not reconnect power, move the washer, or run another cycle; use the appropriate emergency or qualified service path from a safe position.
Read the exact guide
Official sources
- Samsung washing machine is leakingSamsung Support US · Samsung washing-machine leak troubleshooting; exact model and installation instructions control.
- Samsung washing machine information and error codesSamsung Support US · Samsung washer error-code and icon guide; code meanings vary by model.
- Water fill issues with Samsung washing machinesSamsung Support US · Samsung top-load and front-load water-fill guidance; model-specific hose and valve arrangements control.
- Samsung washing machine will not drainSamsung Support US · Samsung washer drain guide for front-load and top-load models; filter access differs by model.
Community feedback
Share a repair observation
Share a plain-text repair observation. Accepted observations are published automatically; this page may take a moment to update.