
On this page
Start here
Quick answer
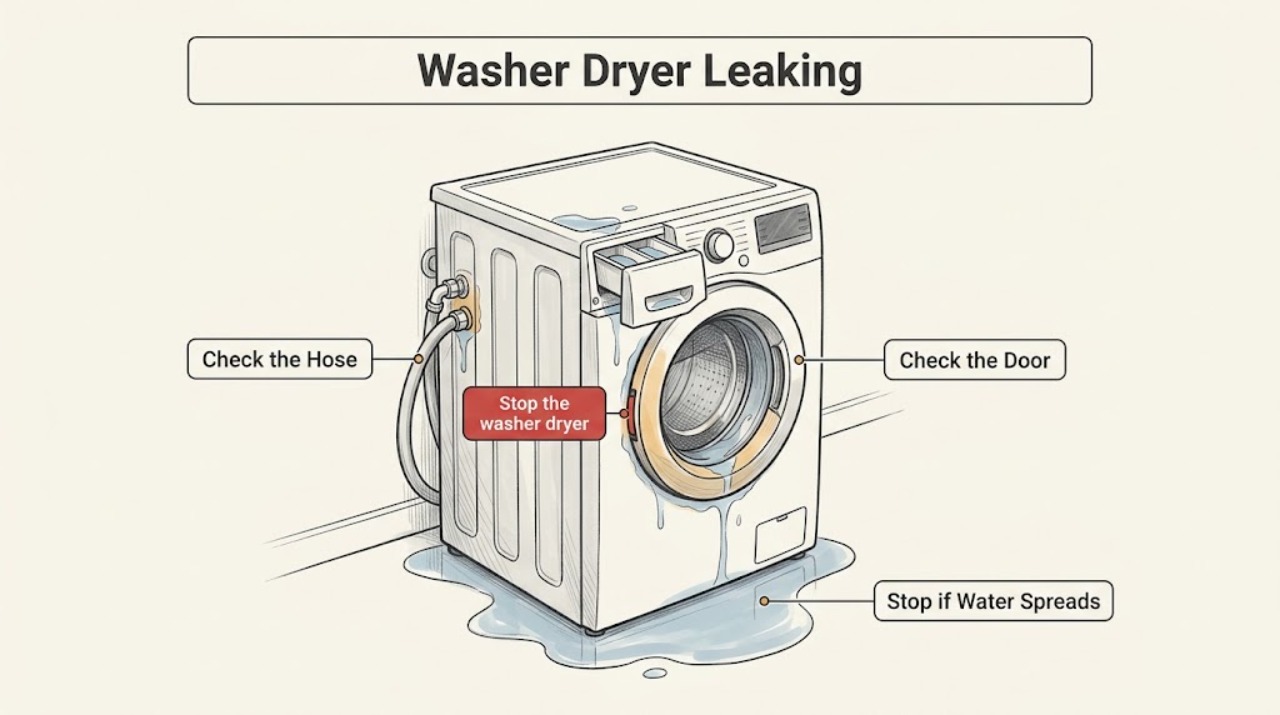
Stop the cycle as soon as a washer dryer leaks. If water is still entering, use the controls or circuit breaker from a dry position and then close the household water valves; never unplug while standing in water. Note whether the leak appears during filling, washing, draining, or drying and whether it comes from the front, rear, bottom, dispenser, door, or a visible hose. Inlet and drain connections, a door seal, a blocked dispenser, excess suds, an unlevel load, or a damaged hose are common washer-side causes. A leak that appears only during drying, comes from inside the cabinet, involves a heater or condensation path, or continues after external checks needs model-specific qualified service.
Work through in order
Diagnostic checks
Use only checks that match the exact appliance or system and its official guide.
-
Check 1
Stop the washer dryer from a dry position, keep clear of standing water, and if water is still entering close the household water valves after the appliance is off; do not unplug it while standing in water.
Expected result: The flow stops, slows, or continues despite the controls and valves being off.
Next step: If water is near an outlet, cord or control, do not approach it; keep the area clear and call qualified help. Once safe, note the cycle phase and leak location.
Why this matters
Why: Stopping the incoming water and isolating the appliance safely limits flooding. Continued flow with the valves closed may indicate retained water or a plumbing problem rather than a setting.
-
Check 2
With the appliance off and the floor safe, identify the first wet location and when it appeared: filling, washing or rinsing, draining, or drying; check the front, rear, dispenser, door, bottom and nearby household plumbing without moving the heavy appliance.
Expected result: The leak is tied to a wash phase, a drain phase, a visible external connection, or the dry phase only.
Next step: Follow the corresponding phase-specific check below. If the source is hidden inside the cabinet or cannot be located safely, stop and arrange service.
Why this matters
Why: Timing narrows the path: fill and wash implicate water delivery and sealing, drain implicates the outlet path, and dry-only leakage needs the model's drying or condensation guidance.
-
Check 3
For a leak during filling, visually inspect the hot and cold inlet hoses, their rubber washers and the household valve connections for kinks, cracks, wet threads or a loose connection; do not over-tighten or continue using a damaged hose.
Expected result: The wetness begins at a hose end, along a hose, at a valve, or not at the inlet path.
Next step: Close the water valves and use the model manual for a safe hose or washer replacement if a visible defect is found; use a plumber for a leaking household valve.
Why this matters
Why: A missing washer, damaged hose or loose connection can leak as pressure arrives. A dry inlet path shifts attention to the dispenser, door or internal system.
-
Check 4
For a leak during draining, inspect the visible drain hose and its standpipe, sink or floor-drain connection for a split, kink, loose end or signs of backup; do not push the hose farther into the standpipe than the installation instructions allow.
Expected result: Water rises at the household drain, the hose has moved or is damaged, or the outlet accepts water without backing up.
Next step: Stop using the unit and call a plumber for a household backup. Re-secure a visibly displaced hose only when the floor is dry and the manual permits; replace or service a damaged hose.
Why this matters
Why: A loose or damaged drain hose can discharge onto the floor, while a slow or blocked household drain can send water back toward the appliance.
-
Check 5
For a front leak during washing, with the drum empty and the appliance off, inspect the door glass, rubber seal and dispenser drawer for clothing, lint, residue, tears or a drawer left ajar; clean only accessible surfaces as the manual describes.
Expected result: Debris or a garment crosses the seal, the dispenser is clogged or open, the seal is torn, or these areas appear sound.
Next step: Remove only loose, accessible debris and close the drawer fully. Do not force a door or use a damaged seal; arrange service for a tear or persistent leak.
Why this matters
Why: An object across the door seal can prevent sealing, and buildup in a dispenser can cause fill water to back up and overflow. A torn seal or sound external area needs service rather than force.
-
Check 6
Check the detergent label and recent dose, load size and suds level; use only the detergent type and amount specified by the model manual, and do not add more items to an already high water level.
Expected result: There are heavy suds, detergent residue, an overloaded load, or no evidence of oversudsing or overload.
Next step: Stop the test if suds are escaping. After the unit is safe and clean, follow the manual's detergent guidance; persistent suds or leakage needs service.
Why this matters
Why: Excess detergent or a non-compatible formulation can create suds that escape through vents or seals. Overloading can disturb sealing and water level; absence of suds shifts attention to a physical leak path.
-
Check 7
Check that the unit is stable and level from the outside, with all feet contacting the floor; do not tip or drag a wet, heavy combination appliance to inspect underneath.
Expected result: The cabinet rocks, a foot is off the floor, the floor is damaged, or the appliance is stable.
Next step: Use the model installation instructions for a small, safe leveling correction only after the area is dry. If the unit must be moved, use qualified help.
Why this matters
Why: An unstable installation can increase movement and allow water to reach the front or another apparent location. A stable unit with a repeat leak points to the water path rather than leveling.
-
Check 8
If the leak occurs only on a dry cycle, stop the dry cycle and inspect only visible external areas for pooled water, a condensation container or hose, lint blockage, or a disconnected visible ventilation connection described in the model manual.
Expected result: The dry-only leak is at a visible external condensation or ventilation path, or it comes from the cabinet, heater area or an unknown location.
Next step: Do not remove panels or run another dry cycle when the source is internal, water reaches electrical parts, airflow is restricted, or there is unusual heat or odor. Arrange qualified service with the cycle phase and location recorded.
Why this matters
Why: Dry-only water can follow a model-specific condensation or drying-air path; an internal leak or heater-related path is not a safe consumer repair diagnosis.
-
Check 9
Only after the visible cause is corrected, power is dry and there is no damage or hazard, run a short rinse or small-load wash test while staying nearby; do not use a dry cycle to test a wet or electrically suspect appliance.
Expected result: No leak appears, the same location wets again, or water appears at a new location.
Next step: Stop the test immediately for any leak and arrange service; do not repeatedly cycle the appliance or attempt an internal repair.
Why this matters
Why: A controlled washer-side retest can confirm whether a hose, seal, dispenser, drain or leveling correction worked. A repeat or new leak means the root cause remains unresolved.
Use your observations
Decision map
Find the observation that best matches what you see, then follow the next safe action.
-
PATH 01Safety boundary
What you see
Water is actively entering or the floor is flooding.
Do this next
Stop the cycle or power from a dry position, close the household water valves after power is off, and keep away from water near electrical parts.
Why this path and its safety boundary
Safety stop: Record the cycle phase and first wet location before choosing a low-risk inspection.
-
PATH 02Safety boundary
What you see
The leak starts while the unit fills.
Do this next
Inspect visible inlet hoses, washers and household valve connections; stop for a split hose or leaking valve.
Why this path and its safety boundary
Safety stop: Follow the wash, drain or dry branch.
-
PATH 03Safety boundary
What you see
The leak starts while draining.
Do this next
Inspect the visible drain hose and outlet for displacement, damage or backup; use a plumber for a blocked household drain.
Why this path and its safety boundary
Safety stop: Continue to door, dispenser, suds and load checks.
-
PATH 04Safety boundary
What you see
Water appears at the front during washing.
Do this next
Check the door seal, door glass, clothing position and dispenser for accessible debris or residue.
Why this path and its safety boundary
Safety stop: Continue to rear, bottom or dry-only checks.
-
PATH 05Safety boundary
What you see
Heavy suds or detergent residue are present.
Do this next
Stop the test and follow the model's detergent type and dosage guidance; persistent suds or leakage needs service.
Why this path and its safety boundary
Safety stop: Treat a repeat leak as a physical path or internal fault rather than adding more detergent.
-
PATH 06Safety boundary
What you see
The appliance rocks or is not level.
Do this next
After the area is dry, use the installation instructions for a safe external leveling correction; do not tip or drag it.
Why this path and its safety boundary
Safety stop: Continue to inspect the specific leak path or arrange service.
-
PATH 07Safety boundary
What you see
The leak occurs only during drying.
Do this next
Stop drying and check only visible model-documented condensation or ventilation areas; internal or unknown leaks require qualified service.
Why this path and its safety boundary
Safety stop: Use the washer-side timing branches.
-
PATH 08Safety boundary
What you see
A short safe washer-side test leaks again or a hazard appears.
Do this next
Stop immediately and arrange qualified service; do not run more cycles or remove panels.
Why this path and its safety boundary
Safety stop: Resume use only if the manual permits and the corrected issue remains dry.
Helpful context
Understand the symptom
Start with water and electrical safety
Do not continue a cycle to see whether a leak gets worse. If water is moving, stop the cycle or switch the appliance off from a dry position. If the floor is wet, do not reach for a plug or outlet; use the circuit breaker only when you can do so safely, then close the household water valves. Keep children and pets away, and treat water near the appliance, a damaged cord, smoke, burning smell or a tripping breaker as a reason to stop and obtain help.
Separate the wash side from the dry side
Record the cycle phase and the first place that becomes wet. A leak while filling points toward an inlet connection or dispenser. A leak while tumbling or rinsing points toward the door seal, oversudsing, load or cabinet hoses. A leak while draining points toward the drain hose, standpipe, pump-filter area or household plumbing. If water appears only during drying, do not assume a washer hose is the cause: a model may have a drying-air, condensation or heater-related path that needs its own manual and service diagnosis.
Use only a controlled retest
After a visible, low-risk issue is corrected and the floor is dry, a short empty or small-load rinse test can help locate a remaining washer-side leak. Stay nearby and stop immediately if water returns. Do not run a dry cycle as a diagnostic when a wet electrical area, internal leak, unusual heat, smoke, burning smell or damaged hose is present.
Only after diagnosis
Potential parts
- inlet hose or hose washer
Only consider this class when water is visibly escaping at a damaged hose or connection after the water is shut off safely.
Confirm the appliance model, hose type and installation instructions before ordering or fitting a replacement. - drain hose
Only consider this class when the drain hose is visibly split or cannot be secured correctly, not when the household drain is backing up.
Confirm model-specific routing and fit; a plumbing blockage may require a plumber instead. - door seal or dispenser component
Only consider this class when a torn seal or damaged dispenser is identified as the source of a wash-side leak.
Confirm the complete model identifier and manufacturer fit information; do not force the door or use a damaged seal.
When checks do not resolve it
Need a professional?
Call qualified appliance service when the leak continues after safe external checks, comes from underneath or inside the cabinet, appears only during drying, involves a heater or condensation path, or follows a damaged seal, hose, pump-filter area or dispenser that cannot be safely resolved from the model manual. Call a plumber for a leaking household valve or drain backup. Stop immediately for flooding, water near an outlet or electrical control, a damaged cord, smoke, burning smell, unusual heat, a tripping breaker, a hose that may burst, or any need to tip, move, open panels or work on energized parts. Do not run another cycle just to locate a dangerous leak.
Common questions
FAQ
What should I do first if my washer dryer is leaking?
Stop the cycle from a dry position and close the household water valves after the appliance is off. Do not unplug while standing in water or approach an outlet in standing water.
How can I tell whether the washer or dryer side is leaking?
Note whether water first appears during filling, washing, rinsing, draining or drying. A dry-only leak needs the model's drying or condensation guidance rather than assuming a washer hose is at fault.
Why is water leaking from the back?
Check visible inlet and drain connections, hose damage, and household drain backup when the floor is safe. Stop using the unit for a damaged hose, leaking valve or persistent leak.
Can too much detergent cause a leak?
Yes. Excess or unsuitable detergent can create suds that escape through vents or seals. Follow the model manual and detergent label, and stop if suds continue to overflow.
What if the leak is from the door?
With the unit off, inspect the accessible door glass and seal for clothing, residue or a tear. Remove loose debris only; do not use the appliance with a torn seal or a persistent leak.
Should I run another cycle to find the leak?
Only a short, controlled washer-side test is reasonable after a visible low-risk issue is corrected, the floor is dry and no hazard exists. Stay nearby and stop as soon as water returns.
When does a washer dryer leak need service?
Use qualified service for an internal, bottom, dry-only or repeated leak, a heater or condensation-path concern, damaged electrical parts, or any situation requiring panels to be removed or the heavy unit moved.
Read the exact guide
Official sources
- Front Load Washer - Leaking WaterGE Appliances · Front-load washer leak location, flooding response, hoses, drain installation, dispenser and suds checks
- Leaking from Back - All-In-One Washer DryerWhirlpool Corporation · All-in-one washer dryer external inlet, drain and detergent checks
- Samsung washing machine is leakingSamsung Electronics America, Inc. · Washer leveling, safe test-cycle decision and service boundary after a leak
- LG Washer – Why is My Front Load Washing Machine Leaking?LG Electronics USA · Front-load washer door seal, inlet hose, drain hose, detergent residue and controlled leak checks
- Tech Sheet - W11300744 - Rev AWhirlpool Corporation · A Whirlpool washer dryer technical reference listing possible leak locations including hoses, door bellows, dispensers and ventilation tube
- Washers & DryersGE Appliances · Washer and dryer model-specific support, troubleshooting and qualified service
Community feedback
Share a repair observation
Share a plain-text repair observation. Accepted observations are published automatically; this page may take a moment to update.