
On this page
Start here
Quick answer
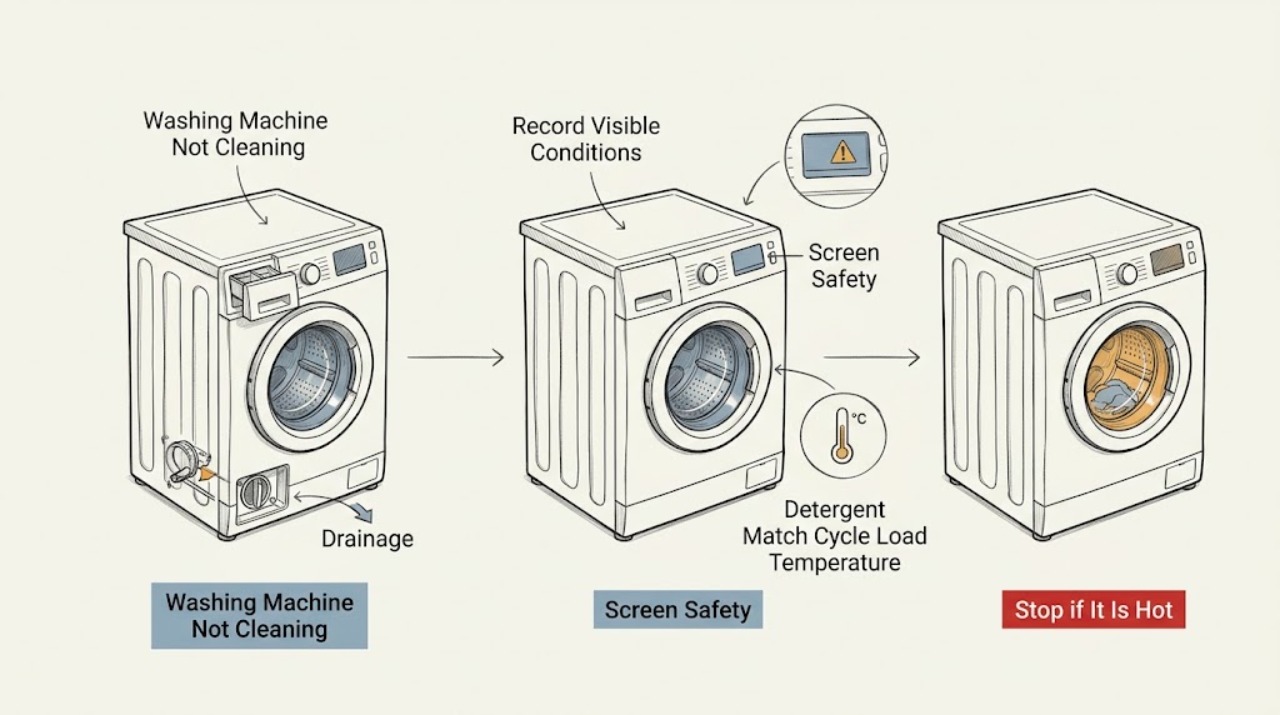
When a washing machine leaves clothes dirty, first separate a cycle or load problem from a water, detergent, dispenser, drainage, or mechanical fault. Use the exact model manual to choose a cycle and a temperature safe for the fabric, load items loosely rather than packing the drum, and use the detergent type and amount specified for that machine and water conditions. More detergent can create suds and residue instead of better cleaning. Check the dispenser and any user-accessible filter only as the manual permits, then run one suitable comparison load. Stop for a leak, smoke, burning odor, sparking, repeated electrical trip, scalding water, or abnormal drum movement; keep the machine off and arrange qualified service.
Work through in order
Diagnostic checks
Use only checks that match the exact appliance or system and its official guide.
-
Check 1
Inspect a representative load after the cycle and record whether the problem is visible soil, stains, detergent residue, lint, odor, or clothes that remain dry. Also record the cycle, temperature, load size, detergent type, and whether the machine filled, tumbled, drained, and spun.
Expected result: The machine completes normally but leaves soil or odor, leaves powder or liquid residue, or stops at filling, washing, draining, or spinning.
Next step: Follow the matching branch below and keep the exact model manual available. Do not assume a failed pump, motor, or heater from the cleaning symptom alone.
Stop if: Stop immediately for smoke, burning odor, sparks, a leak near electrical parts, scalding water, violent movement, or a repeated circuit trip.
Why this matters
Why: A completed but weak wash points first to cycle, load, water, or detergent choices; a failed fill, drain, or spin can prevent cleaning regardless of detergent.
-
Check 2
Before another cycle, inspect from a dry, safe position for standing water, a damaged cord or plug, burning odor, smoke, sparking, an unusually hot connection, repeated breaker trips, or a drum that moves violently.
Expected result: A safety warning exists, or the washer is dry and electrically normal with no unusual movement.
Next step: For a warning, stop and keep clear; isolate power only from a safe dry position if that can be done without touching water or damaged equipment, then arrange appliance, electrical, or plumbing service as appropriate. If no warning exists, continue to the settings check.
Stop if: Do not remove covers, reach into a moving drum, reset a repeatedly tripping circuit, or continue testing an active hazard.
Why this matters
Why: Fire, shock, water, and mechanical hazards take priority over cleaning performance. A normal display does not make a wet or overheating machine safe.
-
Check 3
Compare the load with the exact manual: select a cycle intended for the soil level, choose the warmest temperature permitted by the fabric-care label and washer, and load items loosely so water and movement can reach them. Reserve a quick cycle for a small, lightly soiled load.
Expected result: A quick or low-soil cycle was used for a heavy load, the drum was packed, the temperature was unsuitable for the soil or fabric, or a suitable cycle was already used.
Next step: Run one small, correctly sorted comparison load with a manual-supported cycle and fabric-safe temperature. If the same clean items remain dirty, check detergent and water next.
Stop if: Do not exceed the washer's load guidance, wash items against their care labels, or use a hot setting that could scald or damage the fabric.
Why this matters
Why: Whirlpool guidance links cycle, soil level, temperature, load size, and extra rinsing to the cleaning task. Changing several settings at once can hide the cause, so change only the documented setting needed for the comparison.
-
Check 4
Identify whether the washer requires high-efficiency detergent, then compare the detergent label and exact manual with the load size, soil, water hardness, and selected cycle. Use the stated amount for those conditions rather than adding extra detergent to compensate for poor results.
Expected result: The detergent is not marked for the machine, the amount was guessed, heavy suds remain, or the amount and product match the manual and label.
Next step: Correct the product or amount only according to the label and manual, then run one comparison load. If suds persist or detergent remains, inspect the dispenser and drainage path without opening sealed components.
Stop if: Do not mix detergents or cleaners, pour an unapproved chemical into the washer, or use a guessed fixed dose across machines.
Why this matters
Why: Too much or unsuitable detergent can create suds and residue that interfere with washing and rinsing; a correct dose with poor cleaning shifts attention to water flow, dispenser, drainage, or mechanical performance.
-
Check 5
With the machine off, check the dispenser for hardened detergent, a blocked opening, a misplaced pod, or a siphon insert that is not seated. Remove and rinse only the drawer or insert the exact manual identifies as user-removable; wipe a fixed dispenser box rather than trying to pull it out.
Expected result: Residue blocks a drawer, the siphon cap is loose, a pod was placed in a drawer not designed for it, or the dispenser is clean and releases product normally.
Next step: Clean and reseat only the documented removable pieces, then run a suitable comparison load. If the fixed box, valve, or delivery remains abnormal, arrange service.
Stop if: Do not force a fixed dispenser box, reach into internal water valves, or use mixed chemicals to dissolve residue.
Why this matters
Why: A blocked or misassembled dispenser can deliver too little detergent or release it at the wrong time. GE specifically distinguishes a removable drawer from a dispenser box that should not be removed by the user.
-
Check 6
If the machine seems to fill slowly or with little water, compare the exact manual with the accessible supply: both required faucets open, hoses not kinked, and inlet screens checked or cleaned only as the manual permits. Note whether the issue affects every cycle or only a hot or cold selection.
Expected result: One supply is closed, a hose is kinked, an inlet screen is visibly restricted, the household supply is weak, or the fill appears normal.
Next step: Correct an accessible faucet or hose condition and run one comparison cycle. If fill remains slow, a screen is damaged, or the household supply is uncertain, stop and call appliance or plumbing service.
Stop if: Do not disconnect a pressurized hose, open valves inside the washer, handle hot supply water, or continue if a connection leaks.
Why this matters
Why: Low or missing water can leave detergent undissolved and reduce cleaning. Some models use load sensing or low-water designs, so a low visible level alone does not prove a fault.
-
Check 7
Observe the end of a safe cycle: confirm that the washer drains fully, the tub does not retain dirty water, suds are not excessive, and no sewer odor or residue returns. Check only an external drain hose position and any pump filter explicitly identified as user-accessible in the exact manual, with the machine cool and isolated from power.
Expected result: Water remains, drainage is slow, the drain hose backs up, heavy suds persist, or the tub drains and rinses normally.
Next step: Use the manual-approved external hose or filter check only. Clean up water safely; if drainage remains poor, a pump filter is inaccessible, or sewage backs up, arrange appliance or plumbing service.
Stop if: Do not open a hot filter, reach into standing water near electrical parts, use caustic drain chemicals in the washer, or continue with a leak.
Why this matters
Why: Poor drainage or excessive suds can carry soil and detergent back onto fabric and may cause a cycle to extend or stop. A sealed pump or drain fault is a service issue, not proof that more detergent is needed.
-
Check 8
When no hazard exists, run only the drum-clean or maintenance cycle named by the exact manual, with the specified product if any; after use, leave a front-load door open only when safe and permitted so moisture can evaporate. Then run one correctly loaded comparison cycle and record the result.
Expected result: The washer has odor or visible residue, the manual provides a maintenance cycle, cleaning improves after maintenance, or the same soil remains after the comparison load.
Next step: Keep the improved settings and maintenance interval from the manual. If cleaning remains poor, the cycle cannot complete, or a fault returns, give the service technician the recorded cycle, load, detergent, water, drainage, and odor history.
Stop if: Do not combine cleaners, use an unapproved descaler, leave an open door accessible to children or pets, or continue if smoke, burning odor, sparking, leaks, or abnormal movement appears.
Why this matters
Why: Residue and trapped moisture can contribute to odor and poor results, but maintenance cannot correct failed water entry, drainage, drive, heating, sensing, or control hardware.
Use your observations
Decision map
Find the observation that best matches what you see, then follow the next safe action.
-
PATH 01Next step
What you see
There is smoke, a burning odor, sparking, a hot plug or connection, water near electrical parts, violent movement, scalding water, or a repeated circuit trip.
Do this next
Stop the washer, keep clear, and isolate power or water only from a safe dry position. Use qualified appliance, electrical, or plumbing service; use emergency help for smoke or fire. Do not reset and retest.
-
PATH 02Next step
What you see
The washer completes, but a quick or low-soil cycle, overfilled drum, poor sorting, or unsuitable temperature was used.
Do this next
Run one small, correctly sorted load with the manual-supported cycle and a fabric-safe temperature. Reassess before changing detergent or suspecting a part.
-
PATH 03Next step
What you see
The product is not appropriate for the washer, the amount was guessed, detergent residue remains, or heavy suds appear.
Do this next
Use the detergent type and amount specified by the exact manual and label for the load, soil, temperature, and water conditions. Never add extra or mix products.
-
PATH 04Next step
What you see
A removable drawer or siphon insert is blocked or misseated, or a pod was put in an incompatible location.
Do this next
Clean and reseat only the removable parts named by the manual. Wipe a fixed dispenser box and arrange service if delivery remains abnormal.
-
PATH 05Next step
What you see
Filling is slow, a required faucet is closed, a hose is kinked, an inlet screen is restricted, or only one temperature selection lacks water.
Do this next
Correct an accessible faucet or hose condition only when dry and safe, then compare one cycle. Use appliance or plumbing service for persistent low flow, damaged screens, or leaks.
-
PATH 06Next step
What you see
Dirty water remains, drainage is slow, suds persist, a drain backs up, or sewer odor returns.
Do this next
Use only the manual-approved external hose or user-accessible filter check. Stop for a leak or water near electrical parts; arrange appliance or plumbing service for recurrence.
-
PATH 07Next step
What you see
The manual supports a drum-clean or maintenance cycle and the washer has residue or odor without a safety warning.
Do this next
Run that cycle with only the specified product, do not mix cleaners, and leave a front-load door open after use only when permitted and safe. Compare one normal load.
-
PATH 08Next step
What you see
Correct cycle, load, detergent, dispenser, water, drainage, and manual-approved maintenance do not restore cleaning, or a cycle repeatedly stops.
Do this next
Keep notes and arrange qualified appliance service. Provide the model, cycle stage, load, detergent, water-temperature selection, fill and drain behavior, error message, and safety observations; do not open the cabinet.
Helpful context
Understand the symptom
Start with the symptom, not a guessed part
Record what remains dirty: body soil, stains, detergent marks, lint, odor, or items that are still dry. Note the cycle, temperature, load size, detergent type, and whether the drum filled, tumbled, drained, and spun. A machine that completes a cycle but cleans poorly follows a different path from one that cannot fill, drain, or turn. The exact owner manual controls model-specific settings and maintenance steps.
Detergent and water are a balance
Use a detergent intended for the machine and follow its label plus the washer manual. High-efficiency machines can develop excessive suds when conventional or over-dosed detergent is used; that can interfere with washing and rinsing. Water hardness, soil level, load size, and temperature affect the correct amount, so this guide does not give one cross-brand dose.
Keep cleaning safe
Do not mix cleaners or add an unapproved chemical because clothes look dull. In particular, never mix chlorine products with ammonia or another cleaner. Do not handle hot water, a hot filter, or a moving drum. If water reaches electrical parts, the machine smokes, smells burnt, sparks, trips the circuit, or moves violently, stop using it and use qualified service.
Only after diagnosis
Potential parts
- detergent dispenser drawer or siphon insert
Consider only after the exact manual and qualified diagnosis show that the dispenser cannot deliver product correctly after safe cleaning and reseating.
Match the exact model and drawer layout; a residue mark does not prove a replacement is needed. - water inlet valve or inlet screen
Consider only when a persistent, model-specific fill problem remains after accessible faucet, hose, and supply checks.
Confirm the exact model and temperature-valve arrangement through qualified service; do not open the water or electrical cabinet. - drain pump or pump filter assembly
Consider only when qualified diagnosis confirms poor drainage after the manual-approved external checks.
Drain design and user access vary. Match the exact model and keep electrical and standing-water hazards out of user-level work.
When checks do not resolve it
Need a professional?
Arrange qualified appliance service when cleaning remains poor after a correctly loaded comparison cycle and manual-approved checks, when the washer will not fill, drain, tumble, or spin normally, when a fault returns, or when the dispenser, inlet, pump, drive, sensor, heater, or control may be involved. Use plumbing service for household supply or drain-back problems and electrical or emergency service for electrical or fire signs.
Have this ready
- Provide the exact model and serial information, load type and size, cycle and temperature, detergent product and label-directed amount, water and hose observations, dispenser condition, fill and drain behavior, error text, odor, leak, movement, smoke, and electrical history.
Read the exact guide
Official sources
- Household Cleaning Product Safety HandoutU.S. Environmental Protection Agency · General cleaning-product safety; product labels and the washer manual remain controlling.
- WaterSense at Work: Best Management PracticesU.S. Environmental Protection Agency · Use for the general relationship between HE machines, detergent type, suds, and incomplete washing or rinsing; exact machine instructions control.
- Washer Detergent Usage and OversudsingGE Appliances · Use as manufacturer guidance about the factors affecting detergent use; do not transfer a fixed amount or model setting.
- What You Can Do at HomeU.S. Environmental Protection Agency · General household guidance; the washer and detergent labels remain controlling for a particular machine and product.
- Home MaintenanceU.S. Environmental Protection Agency WaterSense · General maintenance guidance; follow the exact washer manual for cleaning cycles, door position, and accessible filters.
- Washer Detergent Drawer ResidueGE Appliances · Use only for the documented GE front-load drawer behavior; apply the removable-versus-fixed distinction to an unbranded washer only when its manual confirms it.
- Selecting the Correct Cycle for the Clothes Being WashedWhirlpool Corporation · Use as general manufacturer guidance for the stated factors; the exact washer manual controls model-specific settings.
Community feedback
Share a repair observation
Share a plain-text repair observation. Accepted observations are published automatically; this page may take a moment to update.