
On this page
Start here
Quick answer
A washing machine that does not fill is usually waiting for a valid start, a closed and locked door or lid, open water valves, an unrestricted inlet hose, or enough household water flow. First record any display code and confirm whether the machine is completely dry, filling slowly, or filling and then losing water. Check the cycle and door or lid, then inspect the accessible supply valves and hoses. Inlet screens, low household flow, a drain hose that siphons, or a model-specific water valve can also stop a fill. If water keeps entering after the cycle is stopped, turn off the washer valves and arrange service; do not open the cabinet or test live wiring.
Before you begin
Safety first
- A technician can determine whether the remaining fault is an inlet valve, screen, pressure-sensing path, door or lid interlock, control, or installation issue without the user bypassing safety controls.
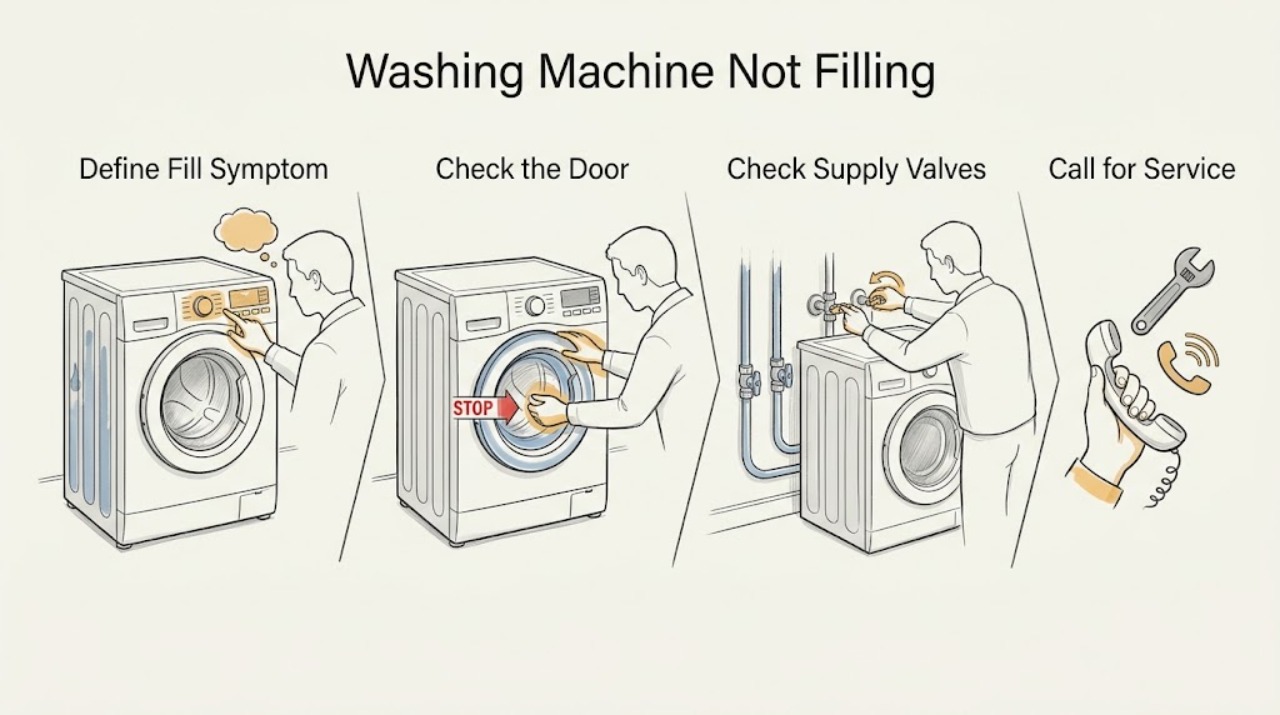
Work through in order
Diagnostic checks
Use only checks that match the exact appliance or system and its official guide.
-
Check 1
With the area dry and the washer attended, select the normal start control only once and observe the first stage without opening a panel. Record whether the display is lit, whether the door or lid latches, whether the tub is already holding water, whether any water enters, and the exact code or blinking pattern.
Expected result: The machine may pause for sensing, show a code, remain unlocked, show a completely dry tub, show a slow trickle, or begin filling and then lose water.
Next step: If there is smoke, a hot plug, arcing, a strong electrical smell, uncontrolled filling, or water near electricity, stop immediately and use the safety branch. Otherwise continue to the external supply check.
Why this matters
Why: A sensing pause or low visible water can be normal for some models. An unlocked door or lid points to the start interlock. A code must be interpreted in the exact model manual; a dry tub with no code moves the check toward supply and hose conditions.
-
Check 2
Confirm that the chosen cycle is not paused, delayed, waiting for a required option, or in a normal sensing stage. Close the door or lid normally and check only for visible clothing, detergent buildup, or an object preventing the latch from seating; do not force the lock.
Expected result: The washer may start its fill after a normal latch and cycle selection, or it may remain unlocked, show a lock-related indication, or stay inactive with the controls lit.
Next step: If the door or lid cannot close or latch normally, stop using the washer and arrange service. If it latches but no water arrives, inspect the supply valves and hose routing next.
Why this matters
Why: A machine that starts after a correct cycle and latch check has a control-state or loading issue rather than proof of a failed inlet valve. A repeatable lock indication needs model-specific service guidance.
-
Check 3
From a dry, stable position, look at the washer's hot and cold supply valves and the hose path. Verify that the valves are open as required by the model, that hot and cold connections are not reversed, and that each hose is free of a sharp kink, pinch, crushed section, visible bulge, or external leak. Do not loosen a connection while the line is pressurized.
Expected result: One valve may be closed, a hose may be bent behind the cabinet, connections may be reversed, a flood-control hose may be fitted, or both valves and hoses may appear normal.
Next step: Correct only an obvious valve position or hose routing that can be changed without moving the washer. If a hose is damaged, leaking, frozen, or fitted with a device not covered by the manual, keep the valve closed and arrange service or an approved replacement.
Why this matters
Why: A closed valve or restricted hose can give a no-fill or low-flow symptom. Hose and temperature requirements differ by model and region; an apparently cold-only setup may still be unsuitable for a cycle that calls for hot water.
-
Check 4
Compare the affected laundry valves with another nearby cold or hot fixture, without disconnecting the washer hoses. Note whether the household fixture has normal flow, weak flow, no flow, or flow that changes when another fixture runs.
Expected result: The nearby fixture may have normal flow while the washer does not, or several fixtures may have weak or absent flow.
Next step: If several fixtures are affected, contact the responsible water or plumbing service. If only the washer path is affected, continue with the model-authorized screen check or appliance service; do not disassemble the valve.
Why this matters
Why: Normal household flow makes a washer hose, inlet screen, or machine-side valve more plausible. Weak flow at several fixtures suggests a closed building valve, supply restriction, frozen line, or water-service problem rather than a washer-only fault.
-
Check 5
Only if the model instructions permit it and the floor is dry, close the water supply valves and isolate power before any hose or screen cleaning. Catch residual water, inspect the accessible inlet screens without removing them, and use only the gentle cleaning method specified by the manual. Never probe a live machine or scrape a screen into the valve.
Expected result: The screen or hose may show mineral film or debris, or it may look clear. A hose may also have restricted flow or a damaged coupling.
Next step: Reassemble only as the manual directs, open the valves slowly, and check for leaks without running a full load. If the screen cannot be accessed safely, the machine leaks, or the no-fill fault returns, use service.
Why this matters
Why: Debris can reduce or stop flow at the valve inlet. A clear screen does not prove that the internal valve, pressure sensing, wiring, or control is good, so it is not a reason to bypass a safety device.
-
Check 6
Look at the visible drain hose where it enters the standpipe or laundry tub. Compare its height, insertion depth, air gap, support, and kinks with the washer manual; do not tape or seal the hose into the drain and do not pull the washer out to reach hidden routing.
Expected result: The hose may be too low, pushed too far into the pipe, sealed airtight, kinked, or loose; or it may match the model's installation guidance.
Next step: If the visible routing is clearly wrong and can be corrected without moving the appliance, restore the manual-specified air gap and support. If the drain is blocked, backs up, or the hose is damaged or inaccessible, stop and arrange appliance or plumbing service.
Why this matters
Why: Poor routing can let water siphon away by gravity as it enters, making the washer look as though it will not fill. Correct dimensions vary by design, so generic measurements must not replace the manual.
-
Check 7
After the external checks are complete and no water or electrical hazard is present, perform at most one model-authorized cancel or power reset exactly as the user manual describes. Do not repeatedly cycle power or run repeated fill tests.
Expected result: The code may clear and the washer may begin its normal sequence, or the same no-fill condition may return immediately.
Next step: If the fault returns, leave the washer out of service and provide the recorded observations to a qualified appliance technician. If the machine fills normally, monitor one attended empty or small cycle for leaks and stop if the symptom returns.
Why this matters
Why: A one-time reset can clear a transient control state, but a recurring code or unchanged no-fill condition points to a persistent supply, interlock, valve, pressure-sensing, drain-routing, or control fault.
Use your observations
Decision map
Find the observation that best matches what you see, then follow the next safe action.
-
PATH 01Next step
What you see
The panel shows a sensing or delay state, the door or lid is latched, and no warning or leak is present.
Do this next
Allow the model's normal sensing period described in its manual. A low visible water level can be normal on high-efficiency designs.
-
PATH 02Next step
What you see
The door or lid does not latch, or the controls show pause, delay, lock, or a cycle-state indication.
Do this next
Remove only visible obstructions and reselect the cycle as the manual permits; do not force or bypass the latch.
-
PATH 03Next step
What you see
A supply valve is closed, a hose is kinked, the hot/cold connection is wrong, or several household fixtures have weak flow.
Do this next
Restore only an obvious valve position or safe hose path; do not force a seized valve or modify plumbing.
-
PATH 04Next step
What you see
The supply is available but the accessible hose or inlet screen is visibly restricted, while no electrical or water hazard is present.
Do this next
Follow the exact model instructions for safe isolation and gentle screen cleaning; never remove the screen or probe the valve.
-
PATH 05Next step
What you see
Water enters briefly but disappears, or the drain hose is too low, too deep, kinked, or sealed into the standpipe.
Do this next
Correct visible routing only to the dimensions and air gap stated in the model manual.
-
PATH 06Next step
What you see
Water keeps entering after stop or cancel, or the inlet valve does not shut off.
Do this next
Close the washer's water valves if safely reachable, keep the washer out of use, and do not repeatedly restore power.
-
PATH 07Next step
What you see
There is water near electricity, hot water, uncontrolled flow, smoke, a burning smell, arcing, a damaged cord, or the external checks and one authorized reset do not restore filling.
Do this next
Stop using the washer. From a dry safe location, isolate water or power only when this can be done without contact with water or damaged equipment.
Helpful context
Understand the symptom
Start by defining what not filling means
Watch the washer without reaching behind it or removing a panel. A completely dry tub, a very slow trickle, a normal low-water cycle, and water that enters but disappears are different faults. Note whether the panel is lit, whether the machine tries to lock, whether you hear a valve hum, and whether a code or blinking indicator appears. Many high-efficiency machines use less visible water than older designs, and some spend time sensing the load before they add water. The exact model manual controls cycle behavior and code meanings.
Use safe boundaries
Keep the floor dry and stop if water reaches a plug, cord, outlet, or appliance base. Do not pull a loaded washer forward, defeat a door or lid lock, remove cabinet panels, probe a live valve, or bridge a safety device. If the machine is filling without stopping, close both washer supply valves if they are safely reachable and leave the machine out of use until service.
Why a fill can fail before the valve is the problem
The control normally checks the chosen cycle and door or lid state before it opens an inlet valve. Water must then pass through the household valve, hose, inlet screen, and machine valve. A low-flow or error state can be caused by either side of that path. Water can also enter and immediately leave if the drain hose is too low, sealed into the standpipe, or otherwise routed against the model instructions.
What a useful service handoff includes
Give the technician the full model number, top-load or front-load design, exact display text, cycle and temperature setting, whether the fault is slow or total, and what you observed at the valves and hoses. Tell them if the washer was recently installed or moved, if a flood-control hose is fitted, if water is entering continuously, or if there has been a leak or electrical smell.
Safety boundary
Stop conditions
- Stop immediately for smoke, a burning or melting smell, visible arcing, a hot plug or cord, repeated breaker trips, or a damaged outlet. Do not reset the breaker repeatedly or open the washer.
- Stop immediately if water is uncontrolled, hot, contaminated, rising around the appliance, or reaching a cord, outlet, or other electrical equipment. Keep people away and isolate water or power only from a dry safe location.
- Do not force a door or lid, defeat its lock, pull a full washer forward, remove cabinet panels, probe live wiring, or test an inlet valve while energized.
- Do not loosen pressurized hoses, use excessive force on a supply valve, remove inlet screens, or use a flood-control device or replacement hose contrary to the model manual.
- If a chemical product has been poured into the washer or drain, do not disconnect hoses or handle the residue; tell the technician exactly what product was used.
- Stop after one model-authorized reset if the no-fill fault returns, if filling is uncontrolled, or if the source is not safely identifiable.
Only after diagnosis
Potential parts
- washer inlet hose
Consider only if an external hose is visibly damaged, leaking, restricted, or not approved for the model installation.
Match the model manual, connection type, length, temperature requirement, and local plumbing rules before ordering. - water inlet valve
Consider only after supply, hose, screen, door or lid, drain routing, and model-specific code checks are normal and service confirms a valve fault.
The valve is model-specific; confirm the exact model and technician diagnosis before selecting a part. - door or lid lock assembly
Consider only when the door or lid cannot latch normally and the model-specific service diagnosis identifies the interlock.
Do not bypass the lock; confirm the exact model and approved fitment.
When checks do not resolve it
Need a professional?
Arrange qualified appliance service when safe external checks and one authorized reset do not restore filling, or sooner for a recurring code, lock fault, damaged hose, leak, or continuous fill.
Safety scope: A technician can determine whether the remaining fault is an inlet valve, screen, pressure-sensing path, door or lid interlock, control, or installation issue without the user bypassing safety controls.
Have this ready
- Provide the full model number, front-load or top-load type, exact display code or lights, selected cycle and temperature, whether the tub is dry or loses water, valve and hose observations, recent installation or movement, and any leak or electrical symptom.
Common questions
FAQ
Why does my washing machine make a sound but not fill?
The control may be sensing, waiting for a door or lid latch, or opening a valve against restricted supply flow. Record the exact display state, confirm the valves and hoses externally, and use the model manual before considering an inlet valve fault.
Can a kinked drain hose make a washer look like it is not filling?
Yes. Poor drain-hose routing can either restrict draining or allow water to siphon away while the washer fills. Compare the visible routing with the exact model installation instructions and do not seal the hose into the standpipe.
Should both hot and cold washer valves be open?
Follow the model and cycle requirements. Many washers expect both connections, while some regional models use only cold water. Reversed, closed, kinked, or restricted hoses can produce a no-fill or water-supply error.
What should I do if the washer keeps filling?
Close the washer water valves if they are safely reachable, stop using the machine, and request appliance service. Do not keep restoring power or assume a reset repaired a valve or control fault.
When does a no-fill problem need a plumber instead of an appliance technician?
Use plumbing or building water service when several fixtures have weak flow, a supply valve is seized or leaking, or the standpipe backs up. Use appliance service when the household supply is normal but the washer still will not fill or shows a recurring lock, valve, sensing, or control symptom.
Read the exact guide
Official sources
- Water fill issues with Samsung washing machinesSamsung Support · Samsung washer fill behavior, supply hoses, error states, drain routing, one-minute power cycle, and continuous-fill safety guidance
- Laundry Water Supply GuideElectrolux Support · Electrolux front-load and top-load washer water supply, hose, filter, pressure, and installation guidance
- Front Load Washer - No FillGE Appliances Support · GE front-load washer no-fill electrical, water supply, flow, and paused-cycle checks
- Not Filling or Filling Slowly - Front Load WasherWhirlpool Product Help · Whirlpool front-load washer water supply, inlet screens, hoses, and drain-hose installation guidance
- Owner's ManualWhirlpool Corporation · Whirlpool washer installation, inlet hose, drain hose, no-fill troubleshooting, and uncontrolled-fill guidance
- Door Will Not Lock or Unlock - Front Load WasherWhirlpool Product Help · Whirlpool front-load washer door obstruction, latch, cycle, and service guidance
Community feedback
Share a repair observation
Share a plain-text repair observation. Accepted observations are published automatically; this page may take a moment to update.