
On this page
Start here
Quick answer
Stop the washer immediately and cancel the program. If the hot and cold supply valves are dry and safely reachable, close them; isolate power only from a safe, dry location and never enter standing water to reach a switch or panel. Do not run another test. The next distinction is whether water is still entering while the washer is stopped, whether the drain or standpipe is backing up during discharge, whether excess suds are spilling, or whether a hose, door, lid, or tub is leaking. Record the model, cycle, error message, water level, first wet point, and whether the water is clean or dirty. A persistent fill, a blocked drain, a damaged hose or seal, or an internal valve, pressure-sensing, or pump fault can require service. Keep the washer off for uncontrolled filling, hot water, sewage, water near electrics, smoke, burning odor, repeated breaker trips, or structural damage, and arrange appliance or plumbing service.
Before you begin
Safety first
- Keep the washer off for uncontrolled filling, active leaks, sewage, hot water, water near electrics, smoke, burning or electrical odor, arcing, damaged connections, repeated breaker trips, or structural damage. Do not perform internal electrical or plumbing work.
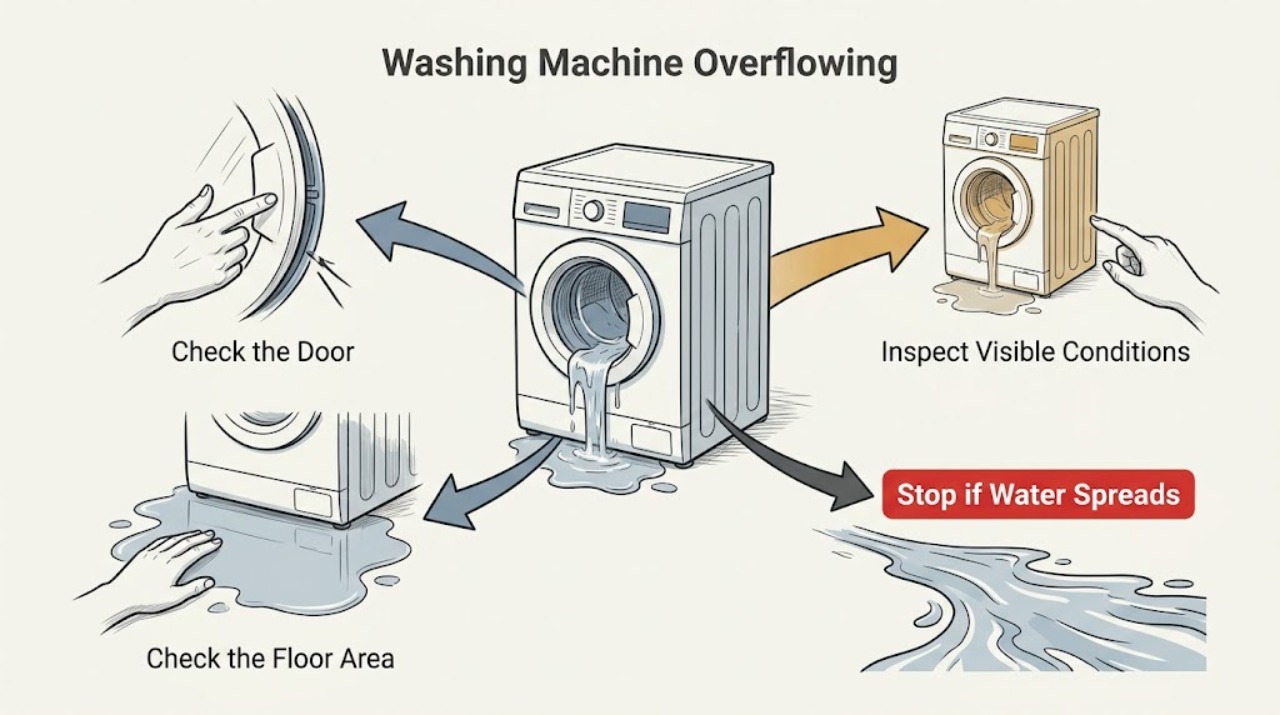
Work through in order
Diagnostic checks
Use only checks that match the exact appliance or system and its official guide.
-
Check 1
Press Cancel or Stop, keep the lid or door closed until the basket is fully stationary, and do not start another fill, drain, or spin. If the hot and cold supply valves are dry and safely reachable, close them. Isolate power only from a safe dry location, never by entering standing water or touching wet electrical equipment.
Expected result: Water continues entering after the program is stopped, water stops when the supply valves are closed, the basket keeps moving, or water is near an outlet, cord, appliance, or electrical panel.
Next step: Keep the washer off. If water cannot be isolated safely, or standing water blocks power access, leave the area and contact appliance or plumbing help; have an electrician assess wet electrical equipment before reuse.
Stop if: Stop immediately for uncontrolled filling, hot water, a moving basket that does not stop, rising or standing water, sewage, water near electrics, smoke, burning odor, or a hot plug or outlet.
Why this matters
Why: Continued filling suggests a supply or inlet-control problem; water that stops at the valves is different from a drain backup. Moving equipment and wet electrics create injury and shock hazards.
-
Check 2
From a safe, dry position, record the exact model, washer style, cycle and water-level setting, error text or light pattern, whether the lid or door was latched, and the first place water appeared. Photograph the hose, standpipe, floor, baseboard, and any ceiling or wall staining without moving the washer through water.
Expected result: The display is blank or shows an error, water began at the top or tub, the rear hose or standpipe is wet, the door or lid area is wet, or the cabinet underside is the first wet point.
Next step: Use the matching branch below and keep the complete display and model information for service. Do not clear a repeatable code by repeatedly operating the washer.
Stop if: Stop if the floor, wall, ceiling, or cabinet is swollen, sagging, soft, contaminated, or unsafe to approach.
Why this matters
Why: The first wet point and the timing relative to fill, agitation, or drain are more useful than the largest puddle. A model-specific code may distinguish a fill, drain, lid or door, or sensing condition.
-
Check 3
If water was still entering while the washer was stopped, observe whether closing the safely reachable supply valves stops the flow. Do not remove an inlet hose, open the cabinet, or handle a valve or wiring; only record whether the flow is continuous, intermittent, or stops at the external valves.
Expected result: Flow stops when both supply valves are closed, flow continues with the valves closed, or the valves cannot be reached safely.
Next step: Leave the valves closed and the washer off. Arrange appliance service for continued filling or an inlet-control diagnosis, and plumbing service if the external supply or drain connection continues to leak.
Stop if: Stop for pressurized spray, hot water, a damaged valve or hose, water near electrics, or any need to reach through standing water.
Why this matters
Why: Flow that stops at the supply valves points toward the washer inlet path or supply connection. Flow that continues points toward trapped water, a drain or hose leak, or another plumbing source; inaccessible valves require professional help.
-
Check 4
With the washer off and the drain hose visible, inspect only its external routing, the standpipe or laundry tub opening, and the nearby floor for a kink, pulled-out hose, loose connection, water marks, or drain backup. Do not force the hose deeper, seal the opening, pour chemicals into the drain, or remove a concealed pipe.
Expected result: Water rises at the standpipe or tub during discharge, the hose has come loose or is damaged, the drain is slow or backed up, or the visible drain path is dry while overflow occurred.
Next step: Keep the washer off and have a plumber evaluate the household drain and standpipe. Have appliance service assess the washer's pump or model-specific filter when the external drain is clear but water remains or overflow recurs.
Stop if: Stop for sewage backup, unknown chemicals, active pressurized water, a cracked fitting, or any need to disassemble plumbing or enter contaminated water.
Why this matters
Why: A drain or standpipe that cannot carry discharge can send water back onto the floor; a loose hose can release water before it reaches the drain. A dry visible path does not clear a concealed branch or pump problem.
-
Check 5
If the basket was not visibly overfilled but foam or suds escaped, record the detergent type and amount, selected cycle, load size, and whether the water level changed normally. Do not add more detergent or run a rinse to test it while the area is wet or the source is uncertain.
Expected result: Heavy suds are present, the washer was overloaded or set to a deep-fill or bulky cycle, or there are no unusual suds and water rose rapidly.
Next step: Keep the washer off until the source is confirmed. Use only the detergent type and quantity specified by the model and load instructions after service or a safe manual-guided recovery; request appliance service for recurring oversudsing or uncontrolled level.
Stop if: Stop for chemical exposure, a strong odor, water near electrics, uncontrolled filling, or any need to handle a foamy or contaminated spill without appropriate protection.
Why this matters
Why: Excess detergent can create suds that interfere with pumping and can contribute to leakage; cycle and load settings can legitimately change water use. Rapid water rise without suds points back to filling control or a drain restriction.
-
Check 6
After the washer is isolated and the area is dry and safe to approach, inspect the visible inlet and drain hose connections, door gasket or lid edge, detergent dispenser, and cabinet base for cracks, tears, loose fittings, or a clear first wet point. Do not tip the washer, remove panels, or reach into a pump or tub.
Expected result: A hose, gasket, dispenser, lid or door area, or cabinet base is visibly damaged or wet, or all visible areas are dry while the washer had overflowed.
Next step: Keep the washer off and arrange appliance service for a damaged seal, hose, dispenser, pump area, or unexplained cabinet leak. Use the exact model manual for any user-accessible cleaning only.
Stop if: Stop for sharp edges, electrical odor, smoke, a hot cabinet, a damaged door or lid lock, active leakage, or any need to reach inside the cabinet.
Why this matters
Why: A visible defect can explain a local leak, while a dry exterior with overflow can indicate an internal pump, tub, level-sensing, or concealed drain fault that cannot be safely identified from outside.
-
Check 7
Assess the affected room from a safe, dry location: note standing water, dirty or sewage-like water, a soaked wall or ceiling, bubbling or sagging drywall, musty odor, and whether the leak has stopped. Photograph the damage and arrange drying only after the water is known to be clean and the electrical area is safe.
Expected result: The area is dry and intact, damp but stable, contaminated, near electrical equipment, or structurally swollen or sagging.
Next step: Keep people away from unsafe or contaminated areas. Have a plumber stop the source, an electrician inspect wet electrical equipment before reuse, and a water-damage professional address substantial or hidden moisture.
Stop if: Stop for standing water that blocks access, sewage or unknown chemicals, a sagging or cracked wall or ceiling, visible mold, smoke, arcing, or any need to use powered equipment in a wet area.
Why this matters
Why: An overflow can continue damaging hidden materials after the washer stops. EPA advises prompt moisture control, while water contaminated by sewage or extensive hidden damage needs experienced professionals.
Use your observations
Decision map
Find the observation that best matches what you see, then follow the next safe action.
-
PATH 01Next step
What you see
Water continues entering while the washer is stopped and stops when the safely reachable supply valves are closed.
Do this next
Leave the valves closed and the washer off. Arrange appliance service for the washer and plumbing service for a leaking external supply connection.
Why this path and its safety boundary
Why it matters: An inlet hose, supply connection, or washer inlet-control path is implicated.
-
PATH 02Next step
What you see
Water rises from the standpipe or laundry tub during discharge, or the drain is visibly slow or backed up.
Do this next
Keep the washer off and have a plumber evaluate the drain, standpipe, trap, and hose connection. Do not use chemical drain cleaners or repeat the cycle.
Why this path and its safety boundary
Why it matters: The household drain or standpipe cannot carry the washer's discharge, or the exposed drain hose is loose or misrouted.
-
PATH 03Next step
What you see
Heavy suds are present without a rapidly rising water level.
Do this next
Keep the washer off, clean only after the area and electrical conditions are safe, and follow the model manual for detergent and recovery guidance. Request service if sudsing recurs.
Why this path and its safety boundary
Why it matters: Detergent amount or type, cycle, or load conditions may be interfering with pumping and containment.
-
PATH 04Next step
What you see
The first wet point is a hose, gasket, dispenser, lid or door area, or the cabinet base.
Do this next
Keep the washer off and arrange appliance service. Do not remove panels, tip the unit, or bypass a door or lid lock.
Why this path and its safety boundary
Why it matters: A visible washer leak may be separate from a drain overflow and may involve a hose, seal, pump area, tub, or door or lid condition.
-
PATH 05Next step
What you see
Water remains unexplained, several fixtures are involved, or water continues after washer supplies are isolated.
Do this next
Keep the washer and affected fixtures off and request plumbing inspection. Do not open walls or run another appliance to reproduce the leak.
Why this path and its safety boundary
Why it matters: A concealed branch, shared plumbing, or another source may be involved; washer-only assumptions are unsafe.
-
PATH 06Next step
What you see
Overflow water is near electricity, contaminated, rising, or damaging a wall, ceiling, floor, or cabinet.
Do this next
Keep people away, isolate utilities only from a safe dry location, and contact the appropriate appliance technician, plumber, electrician, restoration professional, or emergency service.
Why this path and its safety boundary
Why it matters: This is a combined water, contamination, electrical, or structural safety event.
Helpful context
Understand the symptom
Overflow is a water-control emergency first
A washer can overflow because it keeps filling, because it cannot carry discharge away, or because water escapes from a hose, door or lid, seal, pump area, or tub. These look alike once water reaches the floor. Stop the source before trying to identify a part. Do not assume the water is clean: drain water, detergent, and floor or wall water may be contaminated.
Use the model manual for access
Fill valves, pressure sensing, pump filters, drain tubes, and lid or door interlocks differ by washer design. Whirlpool notes that some models have no accessible filter and that model-specific instructions control how a full washer is emptied. External observations are useful; cabinet removal, bypassing a lock, and internal electrical or water-valve work belong to a qualified technician.
Safety boundary
Stop conditions
- Stop the washer immediately for uncontrolled filling, water that does not stop after the program is canceled, rising water, or any overflow that has not been located. Close the supply valves only when dry and safely reachable; do not run another test.
- Do not enter standing water or touch wet electrical equipment, cords, outlets, fixtures, or panels. Isolate power only from a safe dry location and have an electrician inspect affected equipment before reuse.
- Stop for sewage, unknown chemicals, hot water, a damaged or pressurized hose, smoke, burning odor, arcing, a hot plug or outlet, repeated breaker trips, or a moving basket that does not stop.
- Do not remove panels, reach into the tub or pump, bypass a lid or door lock, tip the washer, use chemical drain cleaners, open a wall, or use powered drying equipment in an unsafe wet area.
Only after diagnosis
Potential parts
- washer inlet hose or inlet valve
Only consider this class if the external supply check or a qualified diagnosis identifies a leaking hose, connection, or inlet-control fault on the exact washer.
Confirm the complete model and connection arrangement; do not choose a valve or hose from an overflow symptom alone. - washer drain hose or drain pump
Only consider this class if the standpipe and household drain are clear and a qualified diagnosis identifies a washer-side discharge fault.
Drain-pump access and filter design vary widely; confirm the model manual and fit information before any service. - washer door or lid seal
Only consider this class when the first wet point is a visibly damaged or poorly sealing door or lid area and the model supports that component.
Confirm the exact washer model and seal design; do not bypass the lock or force a damaged door or lid.
When checks do not resolve it
Need a professional?
Request service after any uncontrolled fill, overflow that reaches the floor or building materials, repeat drain backup, visible hose or seal leak, persistent error, or unexplained water source. Treat water near electrics, sewage, and structural damage as urgent.
Safety scope: Keep the washer off for uncontrolled filling, active leaks, sewage, hot water, water near electrics, smoke, burning or electrical odor, arcing, damaged connections, repeated breaker trips, or structural damage. Do not perform internal electrical or plumbing work.
Common questions
FAQ
What should I do first if a washing machine is overflowing?
Stop and cancel the program, close the water valves only if they are dry and safely reachable, and isolate power only from a safe dry location. Do not run another cycle or enter standing water.
Why does a washer overflow during drain?
A loose or misrouted hose, a slow or blocked standpipe or household drain, or a washer-side pump or filter problem can prevent discharge from leaving safely. Check only visible external routing and have a plumber or appliance technician evaluate the matching path.
Can too much detergent make a washer overflow?
Excess suds can interfere with pumping and contribute to leakage. Record the detergent and cycle, keep the washer off while the source is uncertain, and follow the model manual for detergent quantity and recovery.
What if the washer keeps filling after I press Stop?
If the supply valves are dry and safely reachable, close them and leave the washer off. Continued or repeated filling needs appliance service; do not remove panels, handle internal valves, or keep resetting the washer.
When is a washer overflow an emergency?
Treat rising or standing water, hot water, sewage or unknown chemicals, water near electricity, smoke, burning odor, arcing, a hot outlet, repeated breaker trips, a moving basket that does not stop, or swollen or sagging building materials as urgent. Keep clear and contact the appropriate professional.
Read the exact guide
Official sources
- Washer Not Draining or Spinning? Troubleshooting GuideWhirlpool Product Help · Whirlpool washer troubleshooting; filter access and drain requirements vary by model.
- Continuously Fills / Fills and Drains - WasherWhirlpool Product Help · Whirlpool washer installation guidance; confirm exact model and local plumbing requirements.
- Reasons why your washing machine is leakingWhirlpool · Whirlpool washer guidance; exact washer design and safe access vary by model.
- A Brief Guide to Mold, Moisture and Your HomeU.S. Environmental Protection Agency · General residential moisture and mold guidance; substantial or contaminated damage may require experienced professionals.
- Not Filling or Long Fill - WasherWhirlpool Product Help · Whirlpool top-load washer guidance; fill behavior and controls vary by model.
- Leaking Water Underneath - WasherWhirlpool Product Help · Whirlpool top-load washer guidance; exact washer design and installation vary by model.
- Safety Guidelines: Reentering Your Flooded HomeCenters for Disease Control and Prevention · Water-intrusion safety guidance applicable to indoor washer overflow; local emergency instructions take priority.
Community feedback
Share a repair observation
Share a plain-text repair observation. Accepted observations are published automatically; this page may take a moment to update.