
On this page
Start here
Quick answer
For a leaking water heater, first identify whether water is from a connection, drain valve, temperature-and-pressure relief outlet, condensation, or the tank body or base. A visible fitting leak and a tank leak have different consequences, and a relief outlet must never be capped. If water is hot or forceful, reaches controls, continues from the tank, or the source is uncertain, keep clear, isolate supplies only when safe under the model instructions, and arrange qualified service.
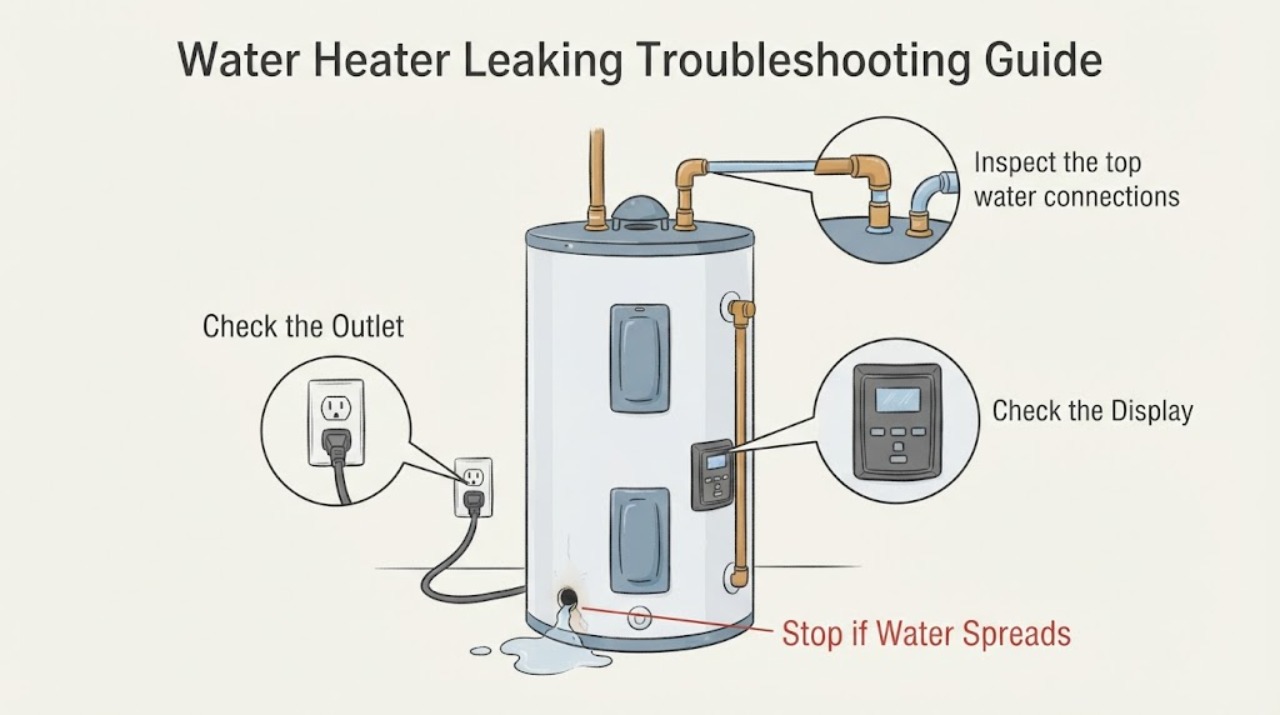
Work through in order
Diagnostic checks
Use only checks that match the exact appliance or system and its official guide.
-
Check 1
Treat the leak as active water damage first. Keep people away from hot water, dry the visible area only if safe, and identify whether water is coming from a pipe connection, drain valve, temperature-and-pressure relief outlet, top seam, or the tank base. Do not touch hot discharge water.
Expected result: The source is a visible fitting or valve, condensation on the outside, the relief outlet, or the tank body or base.
Next step: Do not cap or plug a relief outlet. If the source is unclear, hot, forceful, or at the tank body, keep clear and arrange qualified service.
Why this matters
Why: The source changes the next step: a loose accessible connection differs from relief-valve discharge or a tank leak, which can signal a safety or corrosion problem.
-
Check 2
With the area dry and the appliance accessible, inspect the top water connections and drain valve from outside for fresh beads, mineral trails, or a loose-looking fitting. Do not tighten a hot connection or remove a valve.
Expected result: Water begins at a connection or drain valve, or the fittings are dry while water appears lower on the tank.
Next step: If safe, have a qualified person follow the model instructions to isolate the water and energy supplies before repair. Do not use sealant or force a valve.
Why this matters
Why: A connection or drain valve can be the leak source, but a dry top does not rule out a tank, relief, or hidden piping leak. The observation does not justify a universal tightening amount.
-
Check 3
Check whether water appears only after a heating cycle or on a cold, humid surface, while keeping the cabinet and electrical or gas controls untouched. Compare the amount and location over one safe observation period rather than repeatedly operating a leaking heater.
Expected result: A light film forms on a cold surface and dries, or water collects and continues from a fitting, valve, or tank base.
Next step: If moisture persists, increases, or reaches controls, isolate the appliance safely and arrange service.
Why this matters
Why: Condensation can mimic a small leak, while continuing water at the base or a valve needs diagnosis. Condensation does not explain a steady stream or pooling water.
-
Check 4
Look only at the visible discharge path from the temperature-and-pressure relief valve. If it is releasing water, note whether the discharge is intermittent or continuous and keep clear of the outlet; do not block, cap, or test the valve yourself.
Expected result: The relief outlet is dry, intermittently wet, or continuously discharging hot water.
Next step: Keep the heater out of service and have a qualified professional assess the relief path and the heater controls.
Why this matters
Why: Relief discharge is a safety-related symptom and can involve temperature, pressure, or the valve itself. Continuous discharge is not a normal leak to suppress.
Use your observations
Decision map
Find the observation that best matches what you see, then follow the next safe action.
-
PATH 01Next step
What you see
Moisture is a small film on a cold surface, stops as conditions change, and no valve, fitting, or tank seam continues to wet.
Do this next
Improve the surrounding conditions only as the installation guidance allows and arrange service if water returns as a stream or pool.
Why this path and its safety boundary
Why it matters: Condensation is more likely than a confirmed tank leak, though recurrence should still be monitored.
-
PATH 02Next step
What you see
Water continues from the tank body or base, or the leak is too hot, forceful, or close to controls to identify safely.
Do this next
Keep clear, isolate water and energy supplies only when safe and according to the model instructions, and arrange qualified water-heater service.
Why this path and its safety boundary
Why it matters: Corrosion or a pressurized hot-water fault is possible and cannot be safely repaired from symptom-level checks.
-
PATH 03Next step
What you see
The temperature-and-pressure relief outlet is discharging, especially continuously.
Do this next
Do not cap the outlet. Stop using the heater and have a qualified professional inspect it.
Why this path and its safety boundary
Why it matters: A safety control or pressure or temperature condition may be involved; blocking the outlet could remove protection.
Helpful context
Understand the symptom
A water heater leak is a source-identification problem before it is a parts problem. Dry visible water only when safe, observe where fresh water begins, and keep the relief outlet and controls untouched. A.O. Smith treats tank or base leaks and relief-valve discharge as professional-service conditions rather than a universal tightening or replacement task.
When checks do not resolve it
Need a professional?
Stop and arrange qualified water-heater service for hot or forceful water, continuous relief-valve discharge, water near electrical or gas controls, a tank or base leak, corrosion, an uncertain source, or any internal valve, burner, element, or pressure work.
Common questions
FAQ
Can I cap a leaking relief valve?
No. A temperature-and-pressure relief outlet is a safety path. Keep clear and have a qualified professional inspect the heater.
Is every wet base a tank leak?
No. Condensation, a fitting, a drain valve, or a relief path can wet the area. Trace the first fresh water point only when safe; continuing water at the tank body or base needs service.
Should I tighten a connection while the heater is hot?
No. Do not work on hot or pressurized fittings. Follow the model instructions or use a qualified water-heater technician.
Read the exact guide
Official sources
- Why Is My Water Heater Leaking?A.O. Smith · water heater leak source identification, supply isolation, valves, condensation, tank corrosion, and service
Community feedback
Share a repair observation
Share a plain-text repair observation. Accepted observations are published automatically; this page may take a moment to update.