
On this page
Start here
Quick answer
First decide whether the vibration follows a twisted load, a loose object, the dryer cabinet, or the drum. Whirlpool links thumping and shaking with balled or bulky items, shoes, loose hardware, missing or misadjusted legs, objects leaning on the cabinet, pedestal contents, and items in the lint chute. Check the load and pockets, remove outside contact, and inspect level and firm foot contact from a safe, stopped position. On a newly installed unit, compare the exact installation guide for all transport materials and leveling requirements; do not remove an unseen part or move a connected dryer alone. A repeating scrape, violent movement, metal impact, hot cabinet, smoke, burning smell, gas odor, damaged cord, or breaker trip is a stop-use event. Persistent vibration with an empty drum, sound from the blower or drum support, or movement that returns after leveling needs qualified Whirlpool service.
Before you begin
Safety first
- This article covers listening and ordinary-access inspection only. Do not open the cabinet, reach into moving or internal parts, move a connected dryer alone, alter gas or electrical connections, remove unseen transport hardware, or perform live electrical work.
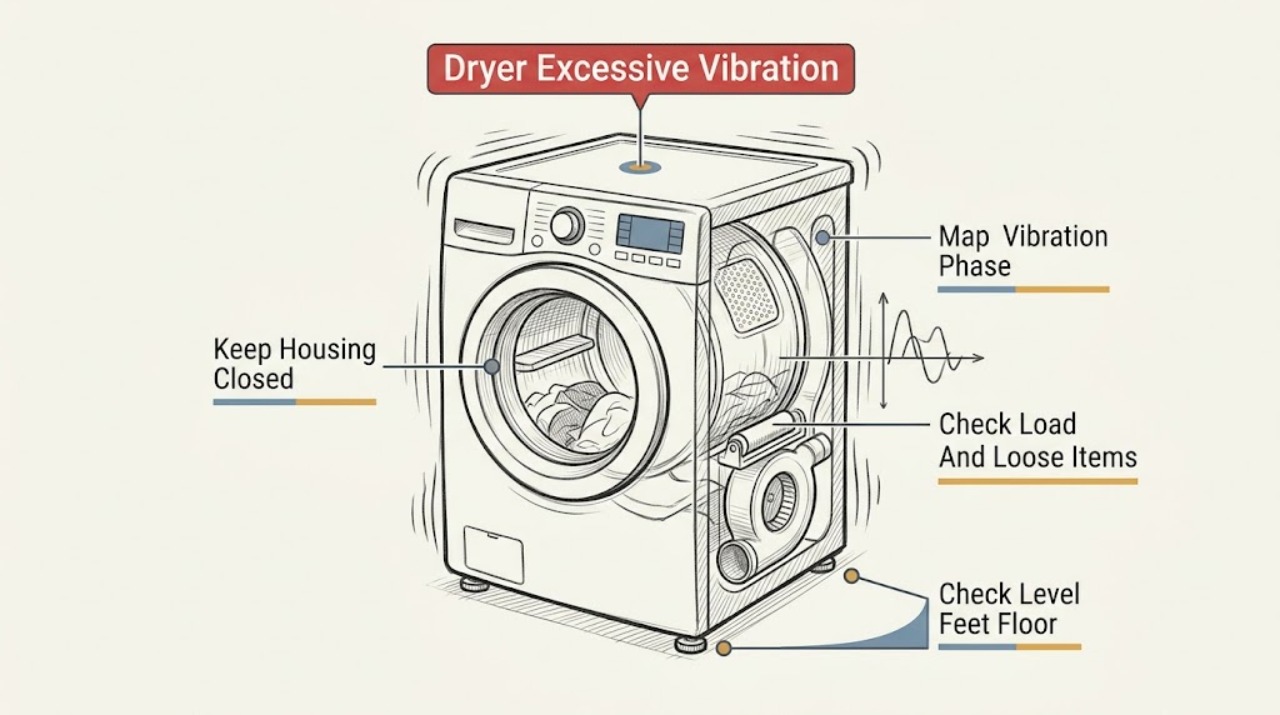
Work through in order
Diagnostic checks
Use only checks that match the exact appliance or system and its official guide.
-
Check 1
From a stable position with the dryer stopped, note whether vibration occurs at startup, during tumbling or heating, only with one load, during shutdown, or whenever the drum turns; locate the strongest movement at the floor, cabinet, drum edge, lint chute, blower area, pedestal, or nearby surface.
Expected result: The symptom is a soft or rhythmic thump, a cabinet rock, a rattle that changes with the load, a scrape synchronized with drum rotation, a blower-area knock, or violent movement; heat, smoke, odor, or a trip may also be present.
Next step: Use the matching branch below. Stop immediately for violent movement, metal scraping, smoke, burning smell, gas odor, sparks, a hot cord or outlet, a hot cabinet, damaged clothing, or a breaker trip.
Stop if: Do not run another cycle to reproduce a hazardous vibration, reach into a moving drum, or touch a hot, wet, scorched, or sparking connection.
Why this matters
Why: Timing and location separate load or outside-contact vibration from leveling, lint-chute, drum-support, blower, or electrical and thermal hazards.
-
Check 2
With the drum stopped and cool, remove the load, check pockets and garment hardware, untangle sheets or other large items, and keep shoes or other items out unless the exact Whirlpool guide supports that use; inspect only the visible drum edge for a plainly accessible object.
Expected result: The load was twisted or balled, a bulky item or shoe was present, a zipper or buckle is loose, a coin or similar object is visible, or the empty drum still vibrates.
Next step: Remove only a plainly accessible item, redistribute a suitable load loosely, and make one controlled observation only if no hazard exists. If vibration remains empty or an object is trapped, stop and request service.
Stop if: Do not pry an object from a seam, reach behind the drum, run damaged clothing, or continue with metal impact, scrape, smoke, odor, or unusual heat.
Why this matters
Why: Whirlpool connects balled fabric, shoes, zippers, buckles, buttons, rivets, and loose objects with thumping, shaking, knocking, or rattling. Persistence with an empty drum points away from the load.
-
Check 3
Inspect the dryer from outside for a missing foot, rocking or teetering, a soft or uneven floor, and firm contact at all four feet; use the exact Whirlpool installation guide for any accessible leveling adjustment and do not tip or move the appliance alone.
Expected result: The cabinet rocks when gently checked from the top, a foot is missing or not seated, the floor flexes, or the dryer is stable and level while vibration continues.
Next step: If the model guide permits a safe adjustment and the dryer can remain supported, correct the feet with appropriate help. Otherwise arrange qualified installation or appliance service; do not drag the connected dryer.
Stop if: Stop for an unstable floor, a damaged foot mount, strained cord or gas line, a vent that may kink, water exposure, or any need to lift or tip the dryer without qualified help.
Why this matters
Why: Whirlpool says missing legs and an unlevel dryer can cause rocking, noise, and vibration. A level, stable installation makes a load, contact, blower, drum support, or other internal issue more likely.
-
Check 4
Inspect the top, sides, rear clearance, pedestal drawer, wall, nearby washer, shelves, and stored objects without moving the dryer; remove only loose external items and leave the clearances specified by the exact installation guide.
Expected result: An object leans on the cabinet, the dryer touches a wall or nearby appliance, the washer transmits movement, the pedestal drawer contains loose items, or all outside surfaces are clear.
Next step: Remove loose external objects and restore model-specified clearance. If the dryer is stacked, mounted, or hard against a surface, use the installation guide or qualified service rather than forcing it into place.
Stop if: Do not climb on the appliance, pull a stacked unit, move a connected gas dryer, or continue if the cabinet, vent, cord, or gas connection is strained.
Why this matters
Why: Whirlpool identifies outside contact, pedestal contents, and a nearby washer as sources that can make a dryer cabinet vibrate or rattle. A clear installation shifts attention to the drum or blower path.
-
Check 5
If excessive movement began immediately after installation or relocation, compare the exact Whirlpool installation instructions with the work record for required leveling, shipping or transport materials, stacking or pedestal hardware, vent routing, and final clearances; inspect only visible, safe items.
Expected result: A required installation or transport item may still be present, a pedestal or stack kit is not seated as documented, the vent is crushed or kinked, or installation matches the model guide.
Next step: Keep the dryer off if a transport part, loose mount, crushed vent, or unstable installation is suspected. Have the installer or qualified Whirlpool technician verify and correct it using the exact guide.
Stop if: Do not remove unseen transport hardware, tip the dryer, disconnect gas or electrical connections, or alter a stack or pedestal installation as a test.
Why this matters
Why: Installation errors can create movement, noise, unsafe clearance, or stress on the vent and supply. Transport parts and installation hardware are model-specific and cannot be inferred from a generic dryer appearance.
-
Check 6
After the load, outside-contact, leveling, and installation checks, document whether vibration remains with an empty drum and whether it is a repeating drum-turn scrape, grinding or thump, blower or lint-chute knock, or a cabinet movement with no external cause; do not open the cabinet.
Expected result: The vibration is gone after a load or installation correction, or it remains with an empty drum, repeats at one drum position, comes from the blower path, or grows louder with heat or speed.
Next step: Keep the dryer out of use for persistent internal vibration and arrange qualified Whirlpool service. Provide the model, phase, load state, sound location, installation history, and any heat, odor, or electrical symptom.
Stop if: Do not remove panels, lubricate internal parts, reach into the blower or drum path, bridge a safety device, or restart after smoke, burning smell, gas odor, sparks, or a trip.
Why this matters
Why: A resolved external cause supports load, object, foot, floor, pedestal, or clearance. Persistent empty-drum vibration may involve drum rollers, a support, blower wheel, motor, drive, or another internal assembly and requires model-specific diagnosis.
Use your observations
Decision map
Find the observation that best matches what you see, then follow the next safe action.
-
PATH 01Next step
What you see
Thumping or shaking changes with sheets, bulky items, shoes, or garment hardware and improves when the cool drum is emptied or the load is untangled.
Do this next
Load suitable items loosely and clear pockets. Stop if the drum is damaged, an object is trapped, or vibration remains empty.
Why this path and its safety boundary
Why it matters: A twisted load, a bulky item, footwear, or loose hardware is more likely than a failed internal support.
-
PATH 02Next step
What you see
The cabinet rocks or teeters, one foot is missing or not seated, the floor flexes, or vibration changes after leveling.
Do this next
Follow the exact Whirlpool installation guide or use qualified installation help to restore firm four-foot contact. Do not tip or move the dryer alone.
Why this path and its safety boundary
Why it matters: The installation base or leveling feet can be transmitting movement through the cabinet.
-
PATH 03Next step
What you see
The dryer touches a wall, washer, shelf, or pipe, an object leans on it, or a pedestal drawer contains loose items.
Do this next
Remove only loose objects and restore the model-specified clearance. Use qualified help for stacked, mounted, or connected-appliance movement.
Why this path and its safety boundary
Why it matters: External contact can transmit or amplify cabinet vibration without an internal failure.
-
PATH 04Next step
What you see
The symptom began after delivery, relocation, stacking, or pedestal installation, and a required transport item, mount, vent route, or installation step is uncertain.
Do this next
Keep the dryer off and have the installer or qualified Whirlpool technician compare it with the exact installation guide. Do not remove unseen materials or disconnect supplies as a test.
Why this path and its safety boundary
Why it matters: A model-specific installation or transport condition can cause movement or stress; generic part guesses are not reliable.
-
PATH 05Next step
What you see
Vibration or scraping remains with an empty drum and stable installation, or it is synchronized with drum rotation or comes from the blower or lint-chute area.
Do this next
Stop using the dryer and arrange qualified Whirlpool service with the symptom record. Do not open the cabinet or reach into the drum or blower path.
Why this path and its safety boundary
Why it matters: A drum roller, support, blower wheel, motor, drive, or trapped internal object may need qualified diagnosis.
-
PATH 06Safety boundary
What you see
Vibration occurs with violent movement, metal scraping, smoke, burning smell, gas odor, sparks, a hot cabinet, damaged clothing, a hot cord or outlet, or a breaker trip.
Do this next
Turn the dryer off from a safe position, leave the area when needed, and seek appropriate emergency, gas-safety, electrical, or appliance help. Do not restart it.
Why this path and its safety boundary
Why it matters: This is a fire, gas, electrical, or mechanical safety event rather than a routine leveling problem.
Safety stop: Do not repeatedly reset protection, operate controls in a gas-filled area, or touch hot, wet, scorched, or sparking connections.
Helpful context
Understand the symptom
Vibration source matters more than volume
A thump that follows a balled sheet, shoe, or loose buckle is different from a cabinet that rocks on one missing foot, and both differ from a scrape that repeats with every drum turn. Note the phase, rhythm, and location: startup, tumbling, heat, shutdown, the drum edge, blower or lint-chute area, floor, pedestal, wall, or adjacent washer. Do not put hands inside a moving drum or try to hold a walking dryer in place.
Leveling and clearance are installation checks
Whirlpool's dryer guidance connects missing or poorly adjusted legs with rocking and noise, and its installation instructions say all feet should contact the floor and that proper leveling reduces excess noise and vibration. Objects leaning against the cabinet, a pedestal drawer, a nearby washer, or a wall can transmit vibration. Inspect these conditions from outside, and use the exact model installation instructions or qualified help when the appliance must be moved.
A hot or hazardous dryer ends the vibration test
Vibration combined with a scrape, smoke, burning smell, a hot cabinet, damaged clothing, gas odor, sparks, a hot cord or outlet, or a breaker trip is not an ordinary balance problem. Turn the dryer off from a safe position and arrange qualified appliance, electrical, vent, or gas-safety help. A restricted or damaged vent can also make a dryer hot; do not keep cycling it to see whether the vibration changes.
Safety boundary
Stop conditions
- Stop use for violent movement, metal scraping, smoke, burning smell, gas odor, sparks, damaged clothing, a hot cabinet, a hot or damaged cord or outlet, or a breaker trip.
- For unburned gas or suspected carbon monoxide on a gas model, do not operate controls or run another cycle; leave the area and follow local emergency and gas-safety procedures from a safe location.
- Do not operate without a secure lint screen, and stop if the vent is crushed, damaged, blocked, or associated with excess heat or burning scent.
- Do not reach into a moving drum or blower path, open the cabinet, disconnect gas or electrical supplies, alter a stack or pedestal, or remove unseen transport hardware as a test.
- Use ordinary-access and exact model-guide checks only; persistent empty-drum vibration or a returning fault needs qualified service.
Only after diagnosis
Potential parts
- dryer leveling foot
Consider this category only when an exact-model inspection confirms a missing, damaged, or non-seating foot after the floor and installation are assessed.
Confirm the exact Whirlpool model and foot design; do not tip or move an unstable dryer as an owner test. - dryer drum support roller or support
Consider this category only when qualified diagnosis traces persistent empty-drum, rotation-synchronous thumping or vibration to the drum support path.
Confirm exact model fit and service diagnosis; do not open the cabinet or lubricate internal supports as a test. - dryer blower wheel or motor drive
Consider this category only when a qualified technician traces a repeating blower-area knock, grinding, or movement to the internal blower or drive after the lint path is clear.
Confirm the exact Whirlpool model and diagnosis; keep hands and tools out of the lint chute and blower path.
When checks do not resolve it
Need a professional?
Arrange qualified Whirlpool dryer service when vibration remains with an empty drum, after the load and outside-contact checks, or after the exact installation and leveling guidance is confirmed; when the source seems to be the drum, blower, motor, drive, support, or pedestal; or when the vent or installation is concealed or damaged. Stop immediately and seek appropriate emergency, gas-safety, appliance, or electrical help for smoke, sparks, burning smell, gas odor, suspected carbon monoxide, a hot cabinet or cord, damaged clothing, violent movement, or a breaker trip.
Safety scope: This article covers listening and ordinary-access inspection only. Do not open the cabinet, reach into moving or internal parts, move a connected dryer alone, alter gas or electrical connections, remove unseen transport hardware, or perform live electrical work.
Common questions
FAQ
Why is my Whirlpool dryer shaking during a cycle?
Start with the load, pockets, bulky or balled items, shoes, cabinet contact, pedestal contents, and leveling feet. Whirlpool links these conditions with thumping, knocking, rattling, and vibration. If it shakes with an empty drum or moves violently, stop using it and arrange qualified service.
Can a dryer being out of level cause excessive vibration?
Yes. Whirlpool says a missing or poorly seated foot and an unlevel floor can make a dryer rock or teeter. Check firm contact at all four feet from outside and follow the exact installation guide. Do not tip or move a connected dryer alone.
Can a wall or washer make a Whirlpool dryer vibrate?
Yes. Whirlpool identifies objects leaning on the cabinet, contact with a nearby washer or wall, and loose items in a pedestal drawer as sources of transmitted vibration or rattling. Remove loose outside objects and restore model-specified clearance without pulling a connected or stacked unit.
What if the vibration started after installation or moving?
Compare the exact Whirlpool installation guide with the installation record for leveling, transport materials, stacking or pedestal hardware, vent routing, and clearance. Do not remove unseen transport parts or disconnect gas or electrical supplies as a test; have the installer or qualified technician verify the setup.
When is dryer vibration an emergency?
Stop immediately for violent movement, metal scraping, smoke, burning smell, sparks, a hot cabinet, damaged clothing, a hot or damaged cord or outlet, gas odor, suspected carbon monoxide, or a breaker trip. Leave the area when needed and follow local emergency or gas-safety procedures from a safe location.
What does vibration with an empty drum mean?
If load, clearance, leveling, and installation checks are correct but vibration remains empty, the drum support, rollers, blower, motor, drive, or an internal object may need model-specific diagnosis. Keep the dryer off and provide a qualified technician with the phase, location, and sound record.
Read the exact guide
Official sources
- Installation InstructionsWhirlpool · Official Whirlpool installation instructions for the identified dryer family; exact model, kit, vent, and gas or electric requirements must be confirmed.
- Knocking or Rattling Sound - Dryer - Product Help | WhirlpoolWhirlpool · Official Whirlpool Product Help guidance for Whirlpool dryers; model-specific access and service boundaries apply.
- Clothes Dryer Fire SafetyU.S. Fire Administration · Federal fire-safety guidance for household gas and electric clothes dryers.
- Sounds or Noises in a Dryer - Product Help | WhirlpoolWhirlpool · Official Whirlpool Product Help guidance for Whirlpool dryers; exact sound behavior and accessible checks vary by model.
Community feedback
Share a repair observation
Share a plain-text repair observation. Accepted observations are published automatically; this page may take a moment to update.