
On this page
Start here
Quick answer
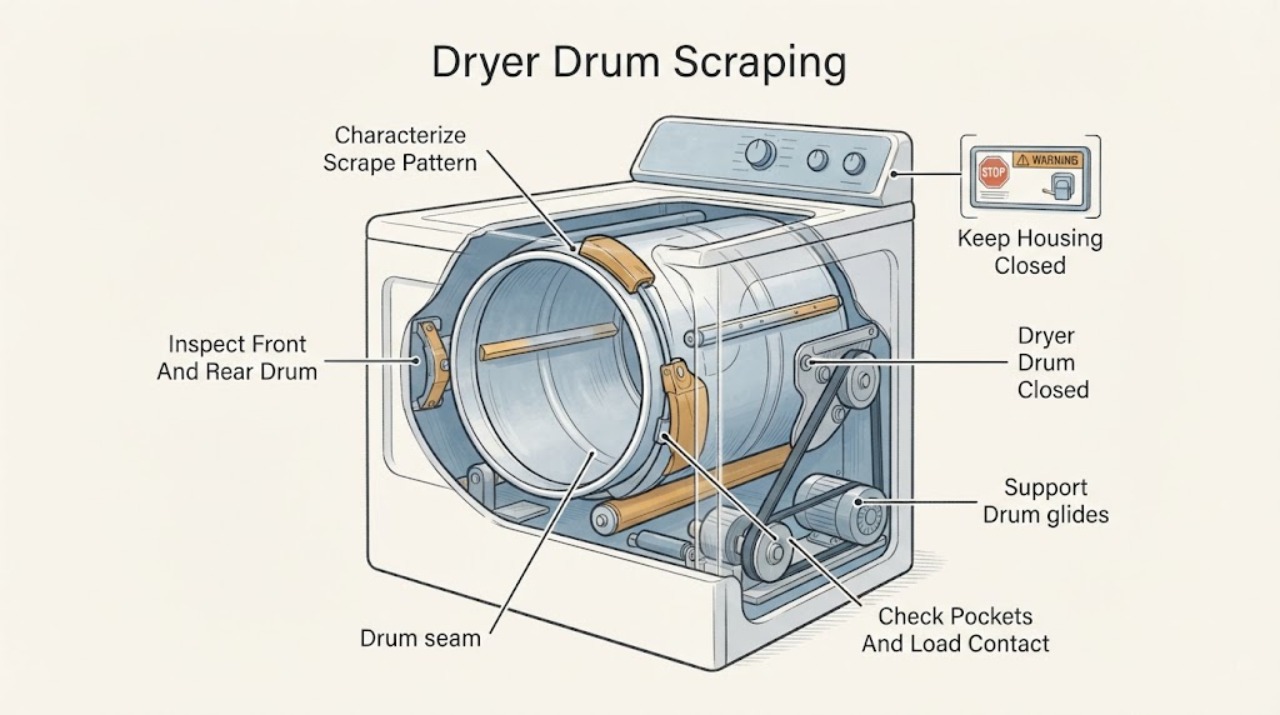
Turn the Whirlpool dryer off before investigating a scraping sound. From the open doorway, inspect the visible front and rear edges where the drum meets the cabinet for a coin, paper clip, safety pin, screw, nail, or other small item caught in the seam; remove only a loose object that is plainly reachable without tools or force. Empty pockets and remove items leaning against the dryer, then note whether the sound is scraping, thumping, rattling, or grinding and whether it occurs only with a particular load. A persistent scrape, a drum that binds or sits off-center, a loud rumble, or any smoke, burning odor, sparks, or damaged cabinet needs qualified service. Do not open panels, reach into the drum gap, lubricate an unknown part, or keep running the dryer to see whether a suspected roller, glide, belt, motor, or drum support will settle.
Before you begin
Safety first
- This article supports turning the dryer off, ordinary-access visual inspection, and removal of a loose visible object only. It does not authorize cabinet or drum-seal access, mechanical disassembly, lubrication, drive-part replacement, live electrical testing, or operation after a hazard appears.
Work through in order
Diagnostic checks
Use only checks that match the exact appliance or system and its official guide.
-
Check 1
Stop the dryer and record when the sound occurs: at startup, while the drum turns, only as the drum slows, with every load, or only with a particular load. From outside the appliance, note whether the drum appears to turn smoothly or stops, binds, or sits unevenly.
Expected result: The sound is a sharp intermittent scrape, a load-related rattle or thump, a continuous grind, or a scrape accompanied by binding, slowing, or an off-center drum.
Next step: Turn the dryer fully off before inspecting the seam; leave it off and arrange service immediately when the drum binds, the sound is severe, or the drum appears misaligned.
Stop if: Do not continue a running test to map a scrape, touch the drum while moving, or use the dryer after smoke, sparks, burning odor, or a hot cabinet appears.
Why this matters
Why: An intermittent sharp scrape focuses the next check on the drum seams and small objects. A load-related thump or rattle may come from clothing or external items. A continuous grind, binding, or off-center drum raises the likelihood of an internal support or drive fault.
-
Check 2
With the dryer off and cool, open the door and use a flashlight only from the doorway to inspect the visible front and rear edges where the drum meets the cabinet. Look for a coin, paper clip, safety pin, screw, nail, or other small hardware; do not reach into a narrow gap or pry the drum seal.
Expected result: A loose object is plainly visible at a seam, an object is wedged or sharp, the seams look clear, or the rear edge cannot be viewed without moving the appliance or removing a panel.
Next step: Remove only a loose, cool object that is safely reachable, keep all pieces, and make one later supervised check only if the drum and cabinet remain normal; otherwise arrange service.
Stop if: Do not use pliers, knives, screwdrivers, magnets, lubricant, or force in the drum seam, and do not remove panels to reach an object.
Why this matters
Why: A loose object at the seam can directly explain a sharp scrape and may be removed only without force. A wedged or inaccessible object, or a clear seam with persistent scraping, needs professional access and diagnosis.
-
Check 3
With the dryer off, remove the load and inspect pockets, zippers, buckles, buttons, and other hardware. Check whether sheets or bulky items were knotted or balled up and whether anything is touching the dryer top, sides, pedestal, or neighboring washer.
Expected result: A pocket item or garment hardware is found, the load was tightly bunched, an external object was touching the cabinet, or the drum scrapes with the drum empty and surroundings clear.
Next step: Clear only loose laundry or external objects and document what was found; if the empty drum still scrapes, leave the dryer off and request service.
Stop if: Do not reach behind the drum, insert a tool through the seal, or restart the dryer with a sharp object or loose hardware inside.
Why this matters
Why: Pocket items, garment hardware, bunching, and external contact can make rattling or thumping sounds that may be mistaken for a drum scrape. A clean empty drum with continued scraping makes an internal contact or support issue more likely.
-
Check 4
From outside the appliance, check whether the dryer rocks, a leg is missing, or the cabinet is visibly unstable. Note whether the scrape changes when the load is redistributed, but do not tip, slide, or disassemble a connected dryer.
Expected result: All feet appear supported and the cabinet is stable, the dryer rocks or is missing a foot, or the noise is accompanied by vibration or a pounding sound rather than a sharp scrape.
Next step: Have an unstable installation leveled safely according to the model instructions; if the cabinet is stable but scraping persists, arrange internal diagnosis.
Stop if: Do not tip or move the dryer while connected, wedge objects under the feet, or continue using a cabinet that rocks or has structural damage.
Why this matters
Why: Whirlpool links missing or unsupported feet and an unlevel installation with rocking, vibration, and noise. Stability can explain a pounding or vibration pattern but does not explain a persistent sharp scrape from a clear drum seam.
-
Check 5
Record whether the sound appeared on the first cycles after installation or after a long period of non-use, and whether it is a light temporary roller thump or a continuing scrape. Do not treat an unrelated thump as permission to ignore scraping, grinding, or a drum that binds.
Expected result: The sound is a light thump that fades after an idle period, a new-installation roller sound that diminishes, or a scrape that remains unchanged or worsens.
Next step: If the sound is only the documented light temporary thump and the dryer otherwise operates normally, monitor without opening it; for actual scraping or any abnormal mechanical symptom, stop use and arrange service.
Stop if: Do not run repeated cycles to wear in a scrape, and stop immediately for grinding, binding, smoke, burning odor, or visible damage.
Why this matters
Why: Whirlpool says some roller sounds can decrease after initial use or after rollers regain shape following non-use, but this does not account for a persistent scraping contact. Unchanged or worsening scraping requires service.
-
Check 6
Only when a loose seam object or external load item was removed and the drum turns freely by normal use, make one brief model-approved start while remaining nearby. Stop at once if the scrape returns; do not perform this check after a wedged object, binding, grinding, electrical symptom, or cabinet damage.
Expected result: The sound is gone, the same scrape returns, a new rumble or grinding sound appears, or the drum stops or binds.
Next step: Stop the cycle at the first recurrence and arrange qualified appliance service with the object, location, sound timing, and drum behavior documented.
Stop if: Do not repeat starts to force a result, operate with an object still in the seam, or continue after smoke, sparks, burning odor, or binding.
Why this matters
Why: A quiet cycle after removing a loose object supports that object as the cause but does not validate an internal repair. Recurrence or a new mechanical sound means the object was not the whole problem or a support or drive part needs diagnosis.
Use your observations
Decision map
Find the observation that best matches what you see, then follow the next safe action.
-
PATH 01Safety boundary
What you see
The dryer is off and a coin, paper clip, safety pin, screw, nail, or similar loose object is plainly visible at the front or rear drum seam.
Do this next
Remove it only if it is cool, loose, and reachable without force, keep it for the service record, and stop for service if it is wedged or the scrape remains.
Why this path and its safety boundary
Why it matters: The object is a plausible direct source of a sharp scraping sound.
Safety stop: Do not pry, cut, lubricate, or reach into the seam with a tool.
-
PATH 02Safety boundary
What you see
The sound occurs only with a particular load and a pocket item, garment hardware, knotted sheet, or object touching the cabinet is found.
Do this next
Clear the item, separate the load, and keep the cabinet surroundings clear. If the empty drum still scrapes, request service.
Why this path and its safety boundary
Why it matters: The observed pattern is more consistent with load or external contact than a persistent drum-support fault.
Safety stop: Do not restart with loose hardware, a sharp item, or a load that causes the drum to bind.
-
PATH 03Safety boundary
What you see
The sound is a light thump after long non-use or early after installation, fades as the dryer operates, and there is no scraping, binding, or unsafe symptom.
Do this next
Monitor the sound without opening the dryer and consult the model manual if it does not diminish or changes into scraping or grinding.
Why this path and its safety boundary
Why it matters: Whirlpool describes temporary roller sounds in these conditions; this pattern is not the same as a continuing scrape.
Safety stop: Do not use a temporary-thump explanation to justify repeated operation when the drum binds or the sound is a sharp scrape.
-
PATH 04Safety boundary
What you see
The dryer rocks, a foot is missing or unsupported, and the noise is vibration or pounding rather than a sharp scrape at the drum seam.
Do this next
Have the dryer stabilized and leveled according to its installation instructions. If scraping remains with a stable cabinet, request service.
Why this path and its safety boundary
Why it matters: An installation or leveling condition may be contributing to the noise, but it does not establish a drum-part failure.
Safety stop: Do not tip, slide, or wedge the connected dryer into position yourself.
-
PATH 05Safety boundary
What you see
The front and rear seams are clear, the load and cabinet surroundings are clear, but the drum continues to scrape or the sound occurs with an empty drum.
Do this next
Leave the dryer off and arrange qualified appliance service with the sound timing, drum behavior, model, and photos of the visible seams.
Why this path and its safety boundary
Why it matters: An internal drum support, roller, glide, belt, motor, or another drive or alignment issue is more likely than a loose pocket item.
Safety stop: Do not open panels, hand-force a binding drum, lubricate the drive, or order a part solely from the sound.
-
PATH 06Safety boundary
What you see
The scrape is accompanied by grinding, binding, an off-center drum, smoke, sparks, burning odor, a hot cabinet or cord, or repeated electrical trips.
Do this next
Stop using the dryer, keep clear, and isolate power only from a dry safe position if that can be done without touching damaged equipment; arrange urgent qualified service.
Why this path and its safety boundary
Why it matters: The immediate concern is a mechanical, thermal, or electrical hazard rather than a removable seam object.
Safety stop: Do not restart the dryer, open panels, touch hot or damaged parts, or attempt a roller, belt, motor, or wiring repair.
Helpful context
Understand the symptom
Classify the sound before chasing a part
A sharp scrape that begins with drum movement is different from a thump after a long idle period or a rattle that follows a pocket item. Note whether the sound occurs at the front or rear edge, with every load or one load, and whether the drum still turns smoothly. Stop the dryer before looking inside. Whirlpool's direct scraping check is limited to the visible seam between the drum and its front or rear.
Look for a loose object at the drum seam
Coins, paper clips, safety pins, screws, nails, and similar small hardware can become caught where the drum meets the front or rear. Open the door only after the dryer is off and inspect from a safe position. Remove an object only when it is loose and plainly reachable without tools or force. If it is wedged, sharp, hot, or beyond ordinary access, leave it in place and request service.
Rule out the load and cabinet surroundings
Zippers, buckles, buttons, and forgotten pocket items can create other contact sounds, while knotted sheets or bulky loads can thump or vibrate. Items touching the top or side of the dryer, a pedestal drawer, or a neighboring washer can also make noise. Reposition only loose laundry or external items with the dryer off. A scraping sound that continues with an empty drum is less likely to be a load-only issue.
Persistent scraping belongs to service
If the seam is clear but the drum scrapes, binds, shifts, or makes a rumble, the cause may involve a roller, glide, drum support, belt, motor, or another internal assembly. A visual sound description cannot identify the failed part. Whirlpool directs owners to professional diagnosis for persistent no-spin or internal component symptoms. Keep the dryer off and give the technician the sound pattern and when it occurs.
Safety boundary
Stop conditions
- Stop immediately for smoke, sparks, burning odor, grinding, binding, an off-center drum, a hot or damaged cord, a hot cabinet, or repeated breaker trips.
- Do not open the cabinet or console, remove the drum, reach into the front or rear seam, or perform live electrical testing.
- Do not pry, cut, lubricate, or use tools to remove a wedged object, drum seal, roller, belt, glide, or support.
- Do not tip, slide, or operate an unstable dryer or bypass a door or other safety switch.
- Stop normal-use troubleshooting and arrange qualified appliance service when a clear seam and load do not eliminate the scraping sound.
Only after diagnosis
Potential parts
- dryer drum roller or support assembly
Consider this category only when professional diagnosis links persistent scraping, rumbling, binding, or an off-center drum to a worn roller or support assembly after the visible seam is clear.
Confirm the exact Whirlpool model and support arrangement; do not force or hand-test a binding drum or assume a roller is the cause from sound alone. - dryer drum glide or seal assembly
Consider this category only when a technician identifies contact at the drum edge or a worn glide or seal as the source after loose objects and load contact are ruled out.
Verify exact model, location, and assembly design with Whirlpool or the technician; cabinet and seal work should be qualified service. - dryer drive belt or idler assembly
Consider this category only when qualified diagnosis finds a belt or idler problem associated with persistent scraping, slipping, or abnormal drum movement rather than a seam object.
Confirm the complete Whirlpool model and exact drive design before ordering; do not open the cabinet or replace moving parts as a sound-only experiment.
When checks do not resolve it
Need a professional?
Arrange qualified appliance service when the drum continues to scrape after a loose visible object and load issue are ruled out, when the drum binds or sits off-center, or when a roller, glide, belt, motor, drum support, alignment, or control fault is suspected. Seek urgent service for smoke, sparks, burning odor, grinding, a hot or damaged cord or cabinet, or repeated breaker trips. Provide the exact model, sound timing, seam and load observations, whether the drum was empty, and any object found.
Safety scope: This article supports turning the dryer off, ordinary-access visual inspection, and removal of a loose visible object only. It does not authorize cabinet or drum-seal access, mechanical disassembly, lubrication, drive-part replacement, live electrical testing, or operation after a hazard appears.
Common questions
FAQ
What should I check first when my Whirlpool dryer drum scrapes?
Turn the dryer off and inspect the visible front and rear drum seams for a loose coin, paper clip, safety pin, screw, nail, or similar small item. Then clear pockets, the load, and objects touching the cabinet. Do not use tools or force; persistent scraping needs service.
Can a coin or paper clip cause a dryer drum to scrape?
Yes. Whirlpool identifies small hardware caught where the drum meets the front or rear as a scraping source. Remove it only when it is cool, loose, and plainly reachable without tools; request service for anything wedged or inaccessible.
How can I tell scraping from a normal dryer thump?
A sharp contact scrape at the drum edge is different from a light temporary thump after long non-use or a load-related thump from bunched fabric. Whirlpool says roller sounds after non-use can diminish, but a continuing scrape, grind, or binding drum is not a condition to run through.
Could an unlevel Whirlpool dryer make a scraping sound?
An unlevel or unsupported dryer can rock, vibrate, and make noise, especially a pounding pattern. Check stability from outside without moving a connected appliance. If a stable dryer still scrapes with an empty drum, service is needed.
Should I lubricate the drum or replace the rollers when it scrapes?
No. A roller, glide, support, belt, motor, alignment, or another part can sound similar, and lubricant or a guessed replacement may create another problem. A qualified technician should identify the cause and confirm the exact model part.
When should I stop using a dryer that is scraping?
Stop for grinding, binding, an off-center drum, smoke, sparks, burning odor, a hot cord or cabinet, damaged parts, or repeated breaker trips. Also stop when the seams and load are clear but scraping continues; leave the dryer off and arrange qualified service.
Read the exact guide
Official sources
- 10 Reasons Your Dryer Won't Spin & How to Fix ItWhirlpool · Official Whirlpool manufacturer article for general dryer no-spin troubleshooting; it is not a model-specific diagnosis of a scraping sound.
- Sounds or Noises in a DryerWhirlpool Product Help · Official Whirlpool Product Help article for household dryer sounds; it distinguishes noise patterns but does not identify a specific failed part.
- Door Not Closing - DryerWhirlpool Product Help · Official Whirlpool Product Help article for dryer door-closing and related installation stability; exact model installation instructions control adjustments.
- Scraping Sound - DryerWhirlpool Product Help · Official Whirlpool Product Help article for household dryer scraping sounds; exact model instructions control access and service decisions.
Community feedback
Share a repair observation
Share a plain-text repair observation. Accepted observations are published automatically; this page may take a moment to update.