
On this page
Start here
Quick answer
If a Whirlpool washer leaves soil or residue behind, first reduce and sort the load, choose the cycle and warmest fabric-safe temperature that match the soil, and use the measured amount of HE detergent. Confirm both water supplies are open where the model uses hot and cold inlets, and clean the dispenser only as the model manual allows. If the washer itself has residue or odor, run its model-approved Clean Washer cycle empty with the specified cleaner. A recurring poor fill, error, leak, unusual mechanical sound, or electrical or burning symptom needs service rather than internal repair.
Before you begin
Safety first
- For smoke, burning odor, sparks, a hot electrical connection, repeated breaker operation, or water near electrical parts, stop using the washer and disconnect power only if it can be done without contact with water; use local emergency assistance for fire or immediate electrical danger. Do not run another test.
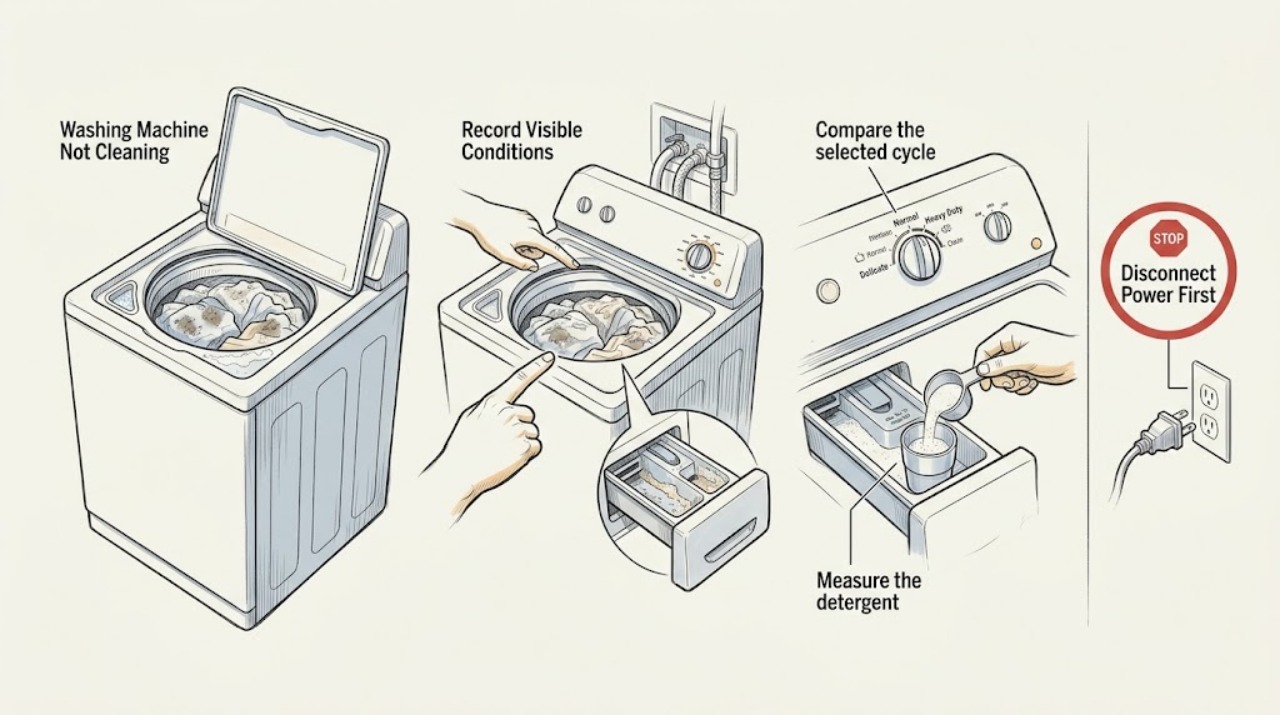
Work through in order
Diagnostic checks
Use only checks that match the exact appliance or system and its official guide.
-
Check 1
Run one controlled comparison: note the washer model and whether it is top-load or front-load, then sort a small load by color and fabric and record the cycle, soil setting, temperature, and the exact result (remaining soil, discoloration, residue, or odor).
Expected result: If the small sorted load cleans but a tightly packed or mixed load does not, the original load or cycle is the leading cause. If the same residue or odor appears with no clothing, treat it as a washer-interior or dispenser issue.
Next step: For a load-related result, continue with the cycle and loading check. For an empty-washer odor or residue, continue with the maintenance check; do not use the washer if a safety stop condition is present.
Why this matters
Why: Clothes must move freely, and Whirlpool says the cycle combines agitation or tumbling, spin speed, and temperature for the fabric and soil level. Dye transfer is a different result from soil left behind.
-
Check 2
Compare the selected cycle and settings with the garment care labels and the model's Cycle Guide. For heavily soiled, durable items, use the model's longer or soil-boosting option when available; for a light load, avoid a short cycle intended for only a few items.
Expected result: If a longer soil setting or model-supported extra cleaning option improves the controlled load, the previous cycle did not provide the needed wash time or agitation. If the fabric label requires cold water, do not raise the temperature just to chase a stain.
Next step: Keep the corrected cycle as the repeatable test. If cleaning remains poor with an appropriate cycle and a freely moving load, check detergent and dispenser delivery next.
Why this matters
Why: Soil level changes wash time, while temperature and motion are model- and fabric-dependent. The warmest water safe for the garment can help, but a setting that is too warm can discolor or damage fabric.
-
Check 3
Measure the detergent for the load and use only HE detergent if the washer is marked high-efficiency. Inspect the dispenser for visible buildup; wipe a fixed dispenser in place, or remove and wash a drawer only when the model manual permits it.
Expected result: Excess suds, a slippery residue, detergent left in the dispenser, or poor rinsing points to dose, detergent type, dispenser, or level issues. A clean dispenser and correct dose with the same load removes that variable from the next test.
Next step: Repeat the controlled load with the measured product and no unapproved additive. If residue remains or the dispenser does not deliver product, follow the model manual or request service; do not remove internal parts.
Why this matters
Why: Whirlpool warns that non-HE detergent or too much detergent can create excess suds, reduce cleaning, lower spin speed, and leave wet loads or an error. Some dispensers and trim are not removable, so forcing them can cause damage.
-
Check 4
With the washer idle and the floor dry, check the external hot and cold inlet connections and confirm both household faucets are fully open when the model uses both supplies. Do not loosen a hose or probe an inlet while the washer is powered or pressurized.
Expected result: A reversed hose, closed faucet, kink, visible drip, weak fill, or water-related error changes the diagnosis from a detergent or stain problem to a supply or inlet problem. Normal filling with correctly connected supplies makes a supply fault less likely.
Next step: Correct only an obvious external hose routing or faucet position when safe and allowed by the installation instructions. For a leak, weak flow, recurring fill error, or suspected inlet-valve fault, shut off water and arrange service.
Why this matters
Why: Whirlpool states that inlet hoses should match hot and cold supplies and both faucets should be open for proper fill. A washer that cannot fill correctly cannot deliver the programmed wash action.
-
Check 5
If the washer itself has odor, film, or recurring residue, remove all clothing and follow the exact model manual for its Clean Washer cycle. Use the specified washer-cleaner tablet or other single approved method, add no detergent or second chemical, and let the empty cycle finish; leave the lid or door open afterward for ventilation.
Expected result: Improvement after an empty maintenance cycle supports buildup or residue as the cause. Persistent residue, a cycle that will not fill or finish, or a new error means maintenance did not resolve the underlying problem.
Next step: After the approved cycle, run the manual-specified rinse if required and repeat the controlled laundry test once. If the issue persists, move to service rather than repeating chemicals or opening the washer.
Why this matters
Why: Whirlpool describes Clean Washer as an empty maintenance cycle that uses a higher water level and may include agitation and spinning. The supplied manual says not to interrupt it and not to combine the cleaner with detergent or another chemical.
-
Check 6
After the external checks, run one normal test load with the corrected load size, cycle, water setting, and detergent dose while staying nearby. Note filling, tumbling, draining, spin behavior, displayed codes, leaks, and the final clothing result.
Expected result: A clean result confirms a setup or maintenance correction. A repeated code, poor fill, standing water, leak, failure to agitate or spin, or the same soil pattern after a controlled test points to a model-specific mechanical, water, or control fault.
Next step: Stop using the washer for active leaks, smoke, burning odor, sparks, hot or damaged electrical parts, repeated breaker operation, or unsafe water conditions. Otherwise provide the model, cycle, code, load, detergent, and observations to a qualified Whirlpool service provider.
Why this matters
Why: Repeated failure after the user-accessible settings and cleaning checks is evidence for service diagnosis rather than a reason to guess at a pump, valve, motor, sensor, or control part.
Use your observations
Decision map
Find the observation that best matches what you see, then follow the next safe action.
-
PATH 01Next step
What you see
The clothing is stained or still dirty, but the empty washer is clean and odor-free.
Do this next
Use a smaller freely moving load, a fabric-safe cycle matched to the soil, and measured HE detergent; run one controlled comparison.
Why this path and its safety boundary
Why it matters: Treat the issue as load, sorting, cycle, temperature, or detergent selection first.
-
PATH 02Next step
What you see
The load has residue, excess suds, poor rinsing, or detergent remains in the dispenser.
Do this next
Use the correct HE dose, avoid unapproved combinations, and clean only a removable drawer or fixed surface as the model manual allows.
Why this path and its safety boundary
Why it matters: Dose, detergent type, additive use, dispenser buildup, or washer leveling is more likely than a stain-specific failure.
-
PATH 03Next step
What you see
The problem appears during filling, with a water error, weak flow, or an external leak.
Do this next
Stop for an active leak, close the affected faucet if safe, and arrange service for weak flow, errors, or an internal inlet fault.
Why this path and its safety boundary
Why it matters: Water supply, hose routing, inlet restriction, or an inlet component may be preventing the programmed wash action.
-
PATH 04Next step
What you see
An empty Clean Washer cycle improves odor or film, but the next correctly loaded cycle still cleans poorly.
Do this next
Repeat the controlled comparison once and then provide the recorded model and observations to service if the result is unchanged.
Why this path and its safety boundary
Why it matters: The remaining issue is likely setup, supply, cycle, detergent delivery, or a model-specific washer fault rather than interior buildup alone.
-
PATH 05Next step
What you see
Cleaning remains poor after the controlled test, or the washer has a code, standing water, unusual movement, or failure to complete.
Do this next
Stop immediately for smoke, burning odor, sparks, hot electrical parts, repeated breaker operation, active leakage, or unsafe water. Otherwise schedule qualified service with the model and test notes.
Why this path and its safety boundary
Why it matters: A service diagnosis is appropriate; do not guess at a replacement component or bypass a lock or safety control.
Helpful context
Understand the symptom
Start by separating a clothing result from a washer problem
Not cleaning can mean visible soil remains, dye transfer, detergent residue, poor rinsing, or a stale washer interior. The best first check is a small, sorted load with a known cycle and measured HE detergent. Record whether the symptom follows the clothing or appears even during an empty maintenance cycle; that distinction changes the next check. Exact cycles, controls, and maintenance instructions vary by Whirlpool model, so use the model manual when a control or cleaner is not clearly identified.
Safety boundary
Keep ordinary checks external and dry. Do not mix cleaners or add detergent to a Clean Washer procedure. Stop if water is reaching electrical parts, a hose is actively leaking, the plug or outlet is hot or damaged, there is smoke, a burning smell, sparking, repeated breaker operation, or a strong chemical exposure. Do not bypass a lid or door lock, open the control cabinet, or work on an energized washer.
Safety boundary
Stop conditions
- Stop and keep the washer off if water reaches the plug, outlet, controls, or other electrical parts; do not handle a wet electrical connection.
- Stop for smoke, burning odor, sparks, a hot or damaged plug or outlet, repeated breaker operation, or a cord that is hot or visibly damaged.
- Stop for an active hose or cabinet leak that cannot be contained safely; close the water supply when safe and arrange service.
- Do not mix bleach, washer cleaner, detergent, or other chemicals, and do not add a second cleaner to a Clean Washer procedure.
- Do not bypass a door or lid lock, open the control cabinet, probe wiring, or perform an internal repair without the model-specific service procedure and appropriate qualification.
Only after diagnosis
Potential parts
- detergent dispenser or drawer
Consider this category only when the model-approved cleaning leaves the dispenser unable to release measured detergent and service confirms the dispenser is the fault.
Confirm the complete washer model and the exact manual or service diagnosis before selecting any part. - water inlet valve or inlet screen
Consider this category only after an external faucet, hose, and fill check shows a recurring fill fault and a qualified diagnosis identifies an inlet component.
Inlet components vary by model and configuration; do not infer fit from the symptom alone.
When checks do not resolve it
Need a professional?
Arrange qualified Whirlpool appliance service when the controlled test still fails after the load, cycle, detergent, dispenser, supply, and approved maintenance checks; also arrange service for a recurring water error, poor fill, standing water, active leak, failure to agitate or spin, or a code you cannot identify from the model manual.
Safety scope: For smoke, burning odor, sparks, a hot electrical connection, repeated breaker operation, or water near electrical parts, stop using the washer and disconnect power only if it can be done without contact with water; use local emergency assistance for fire or immediate electrical danger. Do not run another test.
Common questions
FAQ
Why does my Whirlpool washer leave clothes dirty even though it completes the cycle?
Start with load movement, sorting, cycle and soil setting, fabric-safe temperature, and measured HE detergent. If the same result remains with a small controlled load, check water supply and dispenser delivery before arranging service.
Can too much detergent make a Whirlpool washer clean worse?
Yes. Whirlpool says non-HE detergent or too much detergent can create excess suds, reduce cleaning and spin performance, and leave wet loads or an error. Measure the dose for the load and product concentration.
What should go in a Whirlpool Clean Washer cycle?
Follow the exact model manual. The opened Whirlpool manual uses an empty washer and one approved washer-cleaner method, with no detergent or other chemical added to that procedure; do not combine cleaners.
Read the exact guide
Official sources
- Not Cleaning Clothing - Product Help | WhirlpoolWhirlpool Product Help · Use for supported Whirlpool top-load models; exact cycle names and options vary by model.
- Not Cleaning Clothing - Front Load Washer - Product Help | WhirlpoolWhirlpool Product Help · Use for supported Whirlpool front-load models; cycle, temperature, soil, and Extra Power availability vary by model.
- Owner's ManualWhirlpool · Use the displayed procedure only when the exact Whirlpool model's manual supports the same Clean Washer controls and cleaner method.
- Not Dispensing Detergent - Product Help | WhirlpoolWhirlpool Product Help · Use only for Whirlpool models whose dispenser construction matches the described fixed dispenser or removable drawer.
Community feedback
Share a repair observation
Share a plain-text repair observation. Accepted observations are published automatically; this page may take a moment to update.