
On this page
Start here
Quick answer
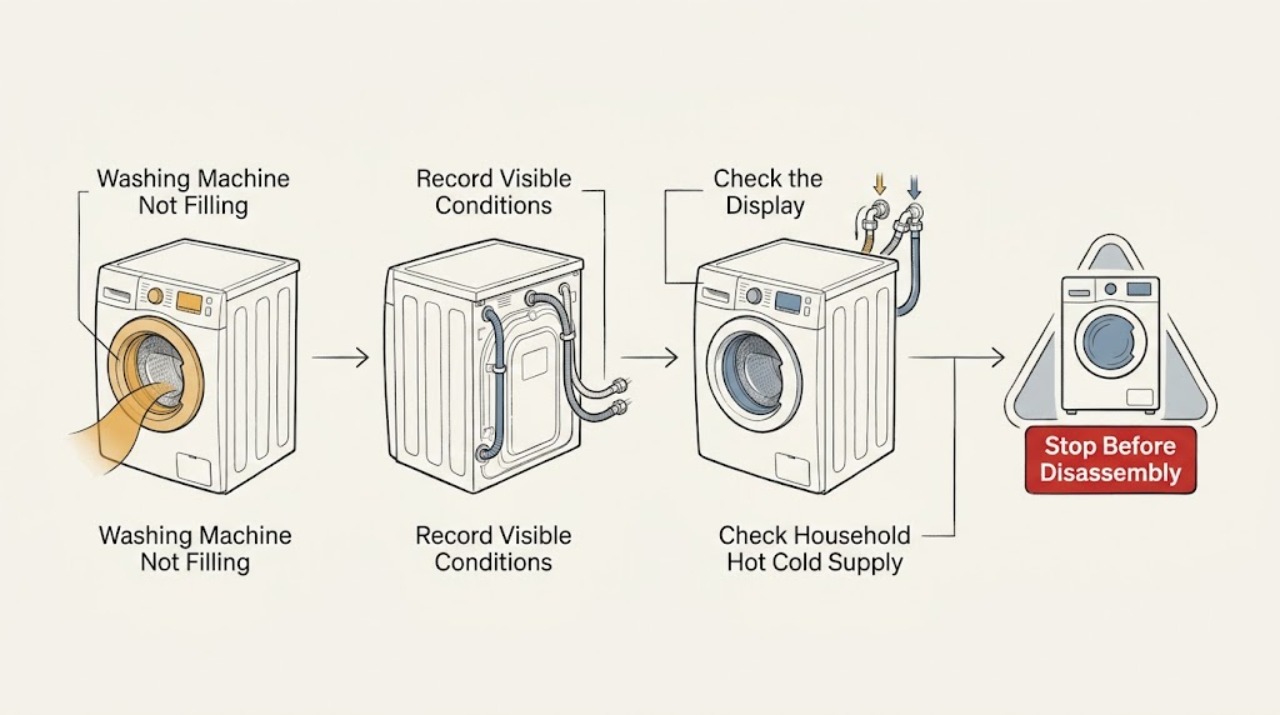
If a Whirlpool washer is not filling, first distinguish a normal low-water or sensing phase from no water entering at all. With the washer stopped and no leak, confirm the cycle, Start command, lid or door state, and whether the household hot and cold supplies are open. Then inspect the inlet hoses for kinks and, only as the exact model instructions permit with water shut off, inspect the inlet screens for debris. A slowly filling washer may have restricted supply, an anti-flood device, low household pressure, or a drain hose that is siphoning water as it enters. A model-specific code such as a low-flow or water-inlet code must be interpreted in that model's manual. Stop immediately for uncontrolled filling, a burst or leaking hose, water near electrical parts, smoke, burning odor, sparks, or repeated breaker trips; close a known water shutoff if safe and arrange qualified appliance or plumbing service.
Work through in order
Diagnostic checks
Use only checks that match the exact appliance or system and its official guide.
-
Check 1
Stop the cycle and record whether the washer is completely dry, fills slowly, fills and drains at once, pauses during sensing, or shows a code; also look from a dry position for uncontrolled flow, a leaking hose, water near electrical parts, smoke, burning odor, sparks, or a tripped breaker.
Expected result: A normal sensing or low-water appearance differs from no water, restricted flow, siphoning, and a safety hazard. A low-flow or inlet code is useful only with the model and manual that define it.
Next step: For a hazard, stop using the washer, close a known water shutoff if safe, keep clear of wet electrical equipment, and arrange qualified emergency, appliance, or plumbing help. Otherwise continue with the control and lid/door check.
Stop if: Do not keep running an uncontrolled fill, reproduce a leak, touch wet electrical parts, or repeatedly reset a breaker.
Why this matters
Why: The symptom stage determines whether to inspect controls, household supply, hoses, drain installation, or service. Safety symptoms override all fill checks.
-
Check 2
With no leak or electrical hazard, select the intended cycle and follow the exact model instructions for Start, water-level or sensing options, and the lid or door; make sure clothing or debris is not blocking the lid or door latch.
Expected result: A top-load model may not fill until the lid is closed or latched; a front-load model may not start until the door locks. A washer that accepts the cycle but remains dry has moved past a simple selection issue.
Next step: Correct only an obvious user-level cycle, lid, door, or water-level selection described by the manual. If the latch will not engage or a code returns, stop and arrange service.
Stop if: Do not bypass a lid or door lock, force the door, reach into a moving basket, or use an improvised closure.
Why this matters
Why: Whirlpool says lid and door behavior varies by model, and a lock self-test or sensing phase can look like a delay. A persistent no-fill after a valid start needs supply checks.
-
Check 3
From outside the machine, verify that the household hot and cold washer valves are clearly identified and fully open, and check another nearby fixture for ordinary water service; do not turn an unfamiliar valve or work in standing water.
Expected result: A closed valve, weak or absent household supply, or a supply issue affecting one side can explain no fill or slow fill. Normal water service with a dry washer moves the diagnosis toward hose, screen, drain, control, or internal valve service.
Next step: Restore only a clearly identified normal valve position if safe and retry the documented cycle once. If supply is weak, absent, or uncertain, contact a plumber or water provider; otherwise inspect visible hoses.
Stop if: Do not force a stuck valve, disconnect a pressurized hose, or continue if water is leaking or near electrical equipment.
Why this matters
Why: Whirlpool's fill guidance says applicable models need both connected hot and cold supplies for proper operation. The exact model may have a single-hose or different regional arrangement, so the manual controls.
-
Check 4
If the manual permits it and the washer is off, dry, and isolated from water, inspect the visible hot and cold inlet hoses for kinks and wear. Only with the water supply off and a bucket ready, inspect the inlet screens without removing or disturbing them, following the exact Whirlpool instructions.
Expected result: A kinked hose, debris at an inlet screen, or a restricted hose can explain slow or absent flow. Clear visible, model-authorized debris only as directed; a clean path with no fill still leaves the internal valve, control, pressure sensing, or supply branch.
Next step: Reconnect only as the manual specifies, reopen a known supply valve slowly, and perform one supervised start if no hazard exists. Persistent no-fill or any leak needs qualified appliance service.
Stop if: Do not remove inlet screens, open the cabinet, cut hoses, use tools on a corroded connection, or continue with a damaged or leaking hose.
Why this matters
Why: The screen and hose check is a flow observation, not proof that an inlet valve or other internal component should be replaced. Fitment and access vary by model.
-
Check 5
If water enters but the level never builds, inspect the visible drain hose and standpipe or laundry-tub arrangement against the exact Whirlpool installation instructions; also note whether the selected cycle is sensing or intentionally using a low water level.
Expected result: A hose that is too deeply inserted, sealed into the drain, kinked, or connected to an unsuitable drain arrangement can let water siphon out as it enters. A normal low-water or sensing cycle can look empty without a supply failure.
Next step: Correct only a clearly visible installation issue covered by the manual. If the hose is inaccessible, the drain is blocked, water backs up, or the symptom persists, stop and call appliance or plumbing service.
Stop if: Do not pull the appliance, seal a drain opening, alter hidden plumbing, or handle standing water near electrical equipment.
Why this matters
Why: Filling and draining at the same time is different from a washer that never opens its inlet. Water-level expectations vary by cycle and model.
-
Check 6
If a display code or flashing light appears, record it exactly with the model, cycle, and point at which filling stopped; use the matching Whirlpool manual or model-specific support page rather than a generic code list.
Expected result: Whirlpool uses low-flow or water-inlet indications on some models, while other codes can involve the door, dispenser, drain, or controls. A code that returns after the listed safe checks is a service signal.
Next step: Follow only the model's stated user-level step once. If the code persists, keep the washer off and arrange qualified Whirlpool appliance service.
Stop if: Do not bypass a safety lock, clear a code by disconnecting wiring, or repeatedly restart a washer that does not fill or leaks.
Why this matters
Why: Codes are not universal across Whirlpool washer families. The exact model determines whether a user-level acknowledgment or one power reset is appropriate.
-
Check 7
Prepare a service handoff with the exact model, top-load or front-load design, cycle, code, hot/cold supply result, hose and screen observations, lid or door behavior, drain-hose arrangement, and whether water enters at all.
Expected result: No fill after a valid cycle, normal supply, unobstructed visible hoses, and model-authorized checks points toward internal valve, control, pressure-sensing, or wiring diagnosis. Any leak or electrical event raises the urgency.
Next step: Keep the washer out of service if the symptom is persistent or unsafe and request qualified appliance service; use a plumber for a confirmed household water-supply or drain issue.
Stop if: Do not open the cabinet, perform live electrical testing, jumper the lid or door lock, or continue cycling to see whether water eventually appears.
Why this matters
Why: The evidence supports qualified diagnosis, not a guessed inlet valve or control-board replacement. A plumber may be needed when household pressure or drain plumbing is implicated.
Use your observations
Decision map
Find the observation that best matches what you see, then follow the next safe action.
-
PATH 01Next step
What you see
Uncontrolled filling, burst or leaking hose, water near electrical parts, smoke, burning odor, sparks, or repeated breaker trip
Do this next
Stop the washer, close a known water shutoff if safe, keep clear of wet electrical equipment, and use appropriate emergency, electrical, appliance, or plumbing help.
-
PATH 02Next step
What you see
The washer is in sensing or a model-specific low-water cycle and no water or electrical hazard is present
Do this next
Follow the exact manual's cycle guidance and observe whether the cycle progresses; do not add water manually or switch cycles repeatedly.
-
PATH 03Next step
What you see
The lid or door is open, blocked, or will not latch or lock
Do this next
Remove only an obvious obstruction and close it as the manual directs. If the lock still fails or a code returns, stop and arrange appliance service; never bypass the interlock.
-
PATH 04Next step
What you see
A hot or cold valve is closed, water pressure is weak, or a nearby fixture also lacks supply
Do this next
Restore only a clearly identified valve position if safe; otherwise call a plumber or water provider. Do not disconnect a pressurized hose.
-
PATH 05Next step
What you see
Supply is normal but an inlet hose is kinked, a screen is visibly restricted, or an anti-flood device is installed
Do this next
Follow the exact model instructions for a safe visible correction. If flow remains restricted or the device cannot be identified, arrange qualified service.
-
PATH 06Next step
What you see
Water enters but drains away, never builds, or the drain installation does not match the manual
Do this next
Correct only a visible manual-described arrangement; use plumbing or appliance service for inaccessible, blocked, backing-up, or persistent drain conditions.
-
PATH 07Next step
What you see
The washer has a valid start, normal supply, unobstructed visible hoses, and still does not fill or returns a code
Do this next
Keep it out of service and request qualified Whirlpool appliance diagnosis of the valve, controls, pressure sensing, wiring, and related components.
Helpful context
Understand the symptom
Not filling can be normal or a supply fault
High-efficiency cycles may use less water than older machines, and some models sense the load before adding water. A washer that is completely dry, fills slowly, fills and drains at the same time, or stops with a code has a different decision path. Record the cycle, display, sound, water movement, and whether the lid or door locks before moving a hose.
Check supply from the outside in
The safest first checks are the household valves, the visible inlet hoses, and the washer's lid or door state. Both supply hoses may matter even when a cold-water cycle is selected, depending on the model. A restricted screen or hose can produce a slow-fill symptom without proving that the internal valve has failed.
Do not confuse filling with siphoning
If water enters but disappears, the drain hose may be installed so the washer siphons while filling. Whirlpool also notes that load-sensing and selected water-level options change how much water is visible. Check the visible drain-hose arrangement against the exact installation instructions, but do not pull a heavy appliance or alter plumbing that is not safely accessible.
Safety boundary
Stop conditions
- Stop using the washer for uncontrolled filling, a burst or leaking hose, water near electrical parts, smoke, burning odor, sparks, or repeated breaker trips. Do not bypass a lid or door lock, open the cabinet, perform live electrical testing, disconnect a pressurized hose, remove inlet screens, or repeatedly reset and restart a washer with a persistent no-fill or leak.
When checks do not resolve it
Need a professional?
Arrange qualified Whirlpool appliance service for persistent no-fill, a recurring model-specific code, a failed lid or door lock, a clean supply path with no incoming water, or any internal electrical or water fault. Call a plumber or water provider for weak household supply, a blocked or backing-up drain, or a supply installation problem. Stop immediately for uncontrolled filling, active leaks, water near electrical equipment, smoke, burning odor, sparks, or a repeated breaker trip.
Common questions
FAQ
Why is my Whirlpool washer not filling with water?
Check the valid cycle and lid or door state first, then the household hot and cold supplies, visible inlet hoses, inlet screens when the model permits, and drain-hose installation. A code, weak supply, siphoning, or a persistent clean path points to a different branch.
Do both hot and cold washer valves need to be open?
Whirlpool says both supplies are needed on applicable models, even when a cold-water cycle is selected. Check the exact model manual because hose arrangements differ; do not force an unfamiliar valve or disconnect a pressurized hose.
Could the drain hose make a washer seem not to fill?
Yes. If water enters but drains away immediately, the hose may be installed in a way that allows siphoning. Compare the visible arrangement with the exact Whirlpool installation instructions and use plumbing or appliance service for inaccessible changes.
What does a Whirlpool low-flow or water-inlet code mean?
On some Whirlpool models it indicates insufficient incoming water. Record the exact code and model, then check the model-specific guidance for open supplies, kinked hoses, screens, and any permitted reset. Do not assume the same code means the same thing on every model.
When should I stop troubleshooting a washer that will not fill?
Stop for uncontrolled filling, an active leak, water near electrical parts, smoke, burning odor, sparks, or a repeated breaker trip. Also stop when the supply path is clean but the washer still will not fill; arrange qualified appliance or plumbing service instead of opening the cabinet.
Read the exact guide
Official sources
- Not Filling or Filling Slowly - Front Load WasherWhirlpool Product Help · Whirlpool front-load washer water supply, hose, screen, anti-flood, and drain-hose checks
- Lid Not Latching - WasherWhirlpool Product Help · Whirlpool top-load washer lid latch, sensing, and fill interlock guidance
- Error Codes in Front Load WashersWhirlpool Product Help · Whirlpool front-load washer model-specific error-code interpretation and safe first checks
- Checking the Fill Hoses if the Washer is not FillingWhirlpool Product Help · Whirlpool washer fill hoses, household supply, inlet screens, and model-specific hose guidance
- Not Filling or Long Fill - WasherWhirlpool Product Help · Whirlpool top-load washer fill timing, water-level, drain-hose, and supply guidance
Community feedback
Share a repair observation
Share a plain-text repair observation. Accepted observations are published automatically; this page may take a moment to update.