
On this page
Start here
Quick answer
Stop the cycle and close both washer water-supply valves immediately; if water is still entering, leave those valves closed. From a dry position, note whether water is entering continuously, leaving through the drain while the washer fills, backing up from the drain, spilling from the dispenser or door, or splashing over the tub. Whirlpool guidance points to inlet supply and hoses, drain-hose installation and siphoning, detergent and suds, load or level, and model-specific drain components as different paths. Do not keep running a washer that is overflowing. If water reaches electrics, the valves will not close, the flow is rapid, or the source is inside the cabinet, arrange appliance service after the immediate water hazard is controlled.
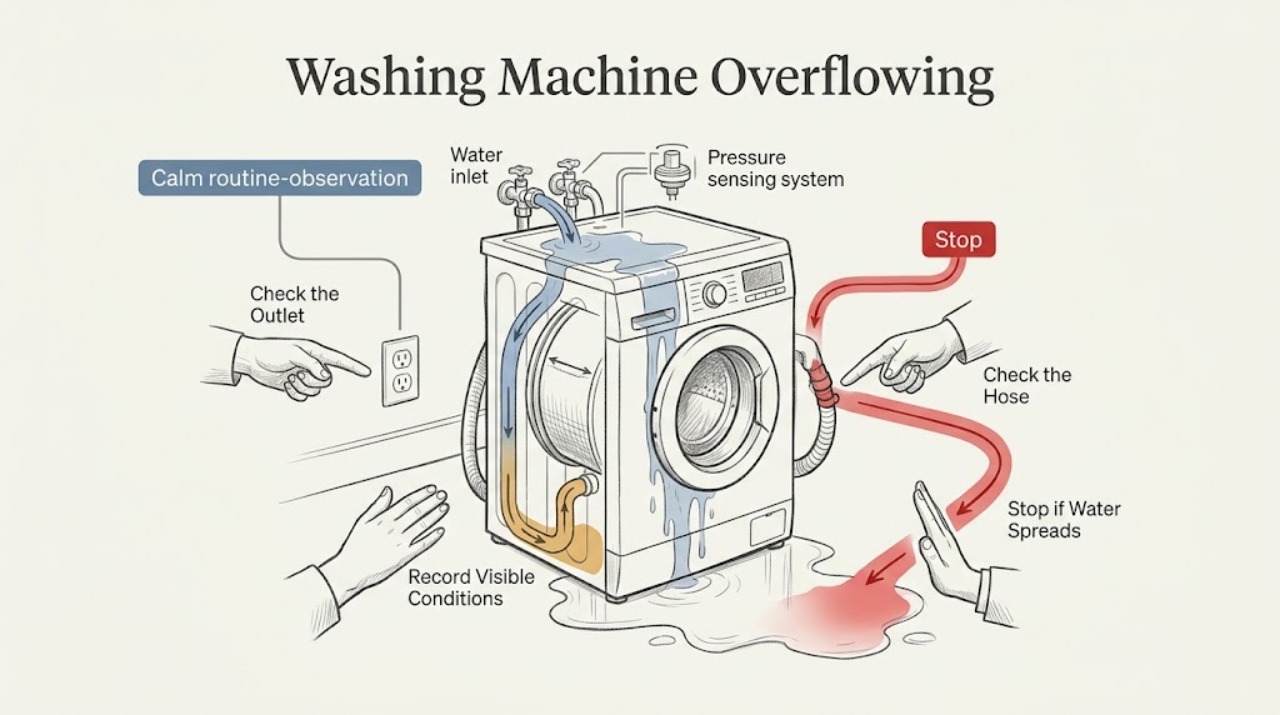
Work through in order
Diagnostic checks
Use only checks that match the exact appliance or system and its official guide.
-
Check 1
Press cancel or pause if the controls respond, close both hot and cold washer supply valves, and move away from any pooled water near an outlet or powered appliance. Keep the valves closed while water is uncontrolled.
Expected result: After the supply valves are closed, the water level should stop rising. If water continues to enter, note whether it is residual water draining from the tub or a continuing supply that was not fully isolated.
Next step: Do not restart the washer. If a valve will not close, flow is rapid, or water is near electrics, keep clear and call appliance service and qualified electrical help as appropriate.
Why this matters
Why: A level that keeps rising with the washer stopped and both valves closed indicates residual water or water from another path; water entering while a supply valve remains open points to the fill system or its control. Water near electrics adds a separate shock hazard.
-
Check 2
From a dry position, identify the washer style and the first exit point: over the top-load basket, through a front door or dispenser, out of the drain standpipe or tub, or from beneath the cabinet. Record the cycle stage when it appeared.
Expected result: Water over the basket during fill differs from water at the drain during fill; suds or water at a front door or dispenser differs from a leak under the cabinet. A leak that occurs only during drain has a different path from one that starts as soon as filling begins.
Next step: Use the matching branch below. Do not run another cycle merely to reproduce an active overflow; use only the information already visible after the water is isolated.
Why this matters
Why: The exit point and timing separate fill-control, drain installation or blockage, suds or door sealing, load and level, and internal pump or tub paths. A floor puddle alone cannot identify the source.
-
Check 3
With water still isolated, inspect the two inlet hoses and their wall valves from outside the cabinet for kinks, visible damage, or a valve that was accidentally left open. Do not loosen a hose or reach behind a wet machine.
Expected result: Both supply valves may be open, one may be partly closed, or an inlet hose may be kinked or damaged. Water at a hose connection or behind the cabinet is different from water coming over the tub.
Next step: Leave the supply valves closed if there was uncontrolled filling. Arrange service for a damaged hose, a leaking connection, or a washer that filled continuously before isolation.
Why this matters
Why: The supply path and hose condition affect filling, but an intact external hose does not rule out an inlet valve or water-level sensing problem inside the washer. A damaged or wet connection is a service boundary.
-
Check 4
If water was leaving through the drain while the washer filled, inspect the exposed drain hose routing without pulling it from the standpipe. Confirm that it is held in the manufacturer-specified shape, is not sealed shut with tape, and has the air gap and height required by the exact installation instructions.
Expected result: A hose pushed too far down, a sealed drain opening, a low standpipe, or a hose that is kinked can coincide with water entering and leaving at the same time. A correct-looking hose with a backed-up standpipe points to the household drain instead.
Next step: Correct only an obvious external routing issue allowed by the model instructions, with the washer water isolated. If the drainpipe backs up or the setup is uncertain, stop and call a plumber or appliance technician rather than repeating a fill test.
Why this matters
Why: Whirlpool explains that poor drain installation can create siphoning: water is pulled out while the washer fills, so the machine may keep adding water or appear unable to reach its expected level. Drain height and insertion limits vary by product documentation.
-
Check 5
If water or foam escaped at a front door, dispenser, or lid area, inspect only the visible seal, door or lid edge, and dispenser opening after the washer is empty and isolated. Look for clothing caught at the seal, a drawer that was not fully closed, residue, or visible tears; do not pry the door or lid.
Expected result: A clear stream from the dispenser, foam around the door, clothing outside a front seal, or a torn seal is different from water rising above the normal tub level. A blocked dispenser can redirect fill water, while excess detergent can create suds and apparent overflow.
Next step: Clean only an externally accessible area allowed by the manual and use only the detergent type and amount specified for the model. A torn seal, distorted door, repeated leak, or internal dispenser blockage needs service.
Why this matters
Why: The likely path is a dispenser flow restriction, door or lid sealing problem, excess suds, or an overloaded or poorly distributed load rather than a water-level control fault. The exact door and seal checks depend on top-load or front-load design.
-
Check 6
Check the detergent history and visible foam without adding more water: note whether non-HE detergent, too much detergent, a blocked dispenser, or a recently changed load or cycle preceded the event. Do not add chemicals to counteract the foam.
Expected result: Large foam that escapes at the door or dispenser, especially on a front-load model, points to a suds problem. No foam with a fast clear-water rise points away from detergent and back toward filling, sensing, or drain behavior.
Next step: After the water hazard is controlled, follow the exact manual for detergent type and amount. If clear water continues to enter, return to the fill-control branch and arrange service.
Why this matters
Why: Whirlpool states that non-HE or excess detergent can create excessive suds and leakage or drain concerns. Suds can make a normal water level look like an overflow, but they do not explain a clean-water stream that continues with the cycle stopped.
-
Check 7
If the spill occurred during agitation or spin rather than during filling, inspect the load position and washer level from outside. For a top-load model, note whether one bulky item moved the basket or water splashed over the rim; for a front-load model, note whether the machine moved or the door seal lost contact.
Expected result: A single bulky or tightly packed load, walking, or a cabinet that visibly leans is different from an overflow with an empty, stable tub. Whirlpool links an unbalanced load to movement and links a top-load washer that is not level to water splashing from the basket or load.
Next step: Do not reach into a moving or unstable washer. Once the water is removed and the manual permits, correct only an obvious load or external leveling issue; persistent movement, seal damage, or an internal fault needs service.
Why this matters
Why: Load distribution or level can create a spill that resembles overfilling, but it should not cause water to enter continuously while the washer is stopped. A recurring spill with a balanced load suggests a mechanical or sealing fault.
-
Check 8
If water remained in the tub or backed up at drain time, use the exact Whirlpool manual to decide whether an accessible drain-pump filter or drain tube exists for this model. Prepare a shallow container only as the manual directs, and do not open a filter with hot water, electrical exposure, or uncontrolled pressure.
Expected result: A blocked drain path, a pump that makes an unusual sound without moving water, or a drainpipe that backs up differs from a washer that drains freely but keeps filling. A top-load model may not have a user-accessible filter.
Next step: Stop if the manual does not clearly authorize the access, if water is hot, if the filter is stuck, or if the blockage is beyond the visible path. Arrange appliance service; call a plumber for a household drain backup.
Why this matters
Why: Drain restriction or pump behavior can leave water in the tub and make a later fill look like an overflow. Whirlpool notes that filter access and drain procedures vary by model, and internal pump, tub, inlet-valve, or sensing faults require a technician.
Use your observations
Decision map
Find the observation that best matches what you see, then follow the next safe action.
-
PATH 01Next step
What you see
Water continues entering while the washer is stopped or the cycle is canceled
Do this next
Keep both hot and cold supply valves closed. Treat an inlet valve, pressure-sensing, or control fault as a service issue; do not keep testing the fill system.
-
PATH 02Next step
What you see
Water leaves through the drain while the washer fills
Do this next
Check external hose routing, air gap, insertion, and standpipe height against the exact Whirlpool installation instructions. This is the siphoning path; stop if the drain setup or household plumbing is uncertain.
-
PATH 03Next step
What you see
Water backs up from the drain during the drain stage
Do this next
Stop the cycle and keep the washer water isolated. Inspect only the visible hose or household drain path; call a plumber for a backed-up standpipe and appliance service for an internal pump or filter fault.
-
PATH 04Next step
What you see
Foam or water escapes at a front door, lid, or dispenser
Do this next
Check the visible seal, door or lid edge, dispenser closure, load position, and detergent history without prying or restarting an active leak. Use the model manual and service for a tear, blockage, or repeated leak.
-
PATH 05Next step
What you see
The spill occurs only during agitation or spin and there is no continuous fill
Do this next
Consider load distribution, bulky items, cabinet level, and door or lid sealing. Correct only a safe external issue after water is controlled; repeated walking or splashing needs service.
-
PATH 06Next step
What you see
The source is under the cabinet, hidden, rapid, or cannot be isolated
Do this next
Stop using the washer, keep clear of wet electrics, close the accessible water valves from a dry position if they operate gently, and call appliance service. Use a plumber when the household drain or water connection is the source.
Helpful context
Understand the symptom
Control the water before troubleshooting
Overflow is an active water hazard, not a symptom to test repeatedly. Press the washer's cancel or pause control if it responds, then close the hot and cold supply valves at the wall. If water continues to enter, keep both valves closed. Do not reach through standing water to touch a plug, outlet, or appliance control.
Once the area is safe, identify where water is escaping and at what stage: during fill, during wash, during drain, during spin, or while the washer is idle. Water over the tub rim, from a front door or dispenser, from the drain standpipe, and from under the cabinet lead to different checks.
Why an apparent overflow can have several causes
A washer can look overfilled when a drain hose siphons during filling, when a drainpipe backs up, or when excess suds escape at the door or dispenser. A top-load washer can splash when it is not level or when the load moves the basket. Whirlpool also identifies inlet hoses, water supply, detergent use, hose routing, and selected cycles as model-dependent factors.
Use the exact Whirlpool manual for model-specific work
Whirlpool has both top-load and front-load designs, and accessible filters, drain pumps, water-level controls, and door seals vary. Use the model number to select the matching manual before opening a filter, moving a hose, or considering a component. Do not substitute a generic part or a generic drain setup for the installation instructions.
Safety boundary
Stop conditions
- Close both washer water-supply valves immediately for an active overflow or water that keeps entering after cancel.
- Do not touch a plug, outlet, cord, or powered appliance from standing water. Keep away and use qualified help for the electrical hazard.
- Do not keep restarting the washer to reproduce overflow, and do not open a filter or hose when water is hot, pressurized, uncontrolled, or near electrics.
- Do not force a supply valve, pull a drain hose from a backed-up standpipe, tilt the washer, or pry a locked door or lid.
- Stop for a rapid stream, a damaged hose or seal, a burning smell, smoke, sparking, repeated breaker trips, violent movement, or water entering a wall or cabinet.
Only after diagnosis
Potential parts
- water inlet valve
Consider this class only when water continues entering with the cycle stopped or when a technician confirms a fill-control fault.
Whirlpool washer valve designs and connectors vary by model; confirm the exact model documentation before sourcing anything. - water-level pressure sensor or sensing tube
Consider this class only when the washer overfills despite correct supply and drain installation and service testing points to level sensing.
Do not open the cabinet or replace a sensing component based on the symptom alone; use the model manual or a technician. - drain pump or model-specific pump filter
Consider this class only when water remains, the drain backs up, or a model-authorized check confirms a restriction or pump fault.
Filter access and pump arrangement differ between top-load and front-load Whirlpool washers. - door seal, lid seal, or dispenser component
Consider this class only when the first exit point is a door, lid, or dispenser and the matching external check confirms damage or blockage.
Identify the washer style and exact model; do not assume a front-load seal or dispenser fits another Whirlpool design.
When checks do not resolve it
Need a professional?
Call Whirlpool appliance service when the washer fills continuously, the water-level behavior is unexplained, the overflow repeats after safe external checks, or the source is inside the cabinet. Call a plumber for a backed-up household drain, a leaking supply connection, or a drain installation that cannot be safely corrected. Escalate any water near electrics to qualified electrical help without touching wet equipment.
Common questions
FAQ
What should I do first if my Whirlpool washer is overflowing?
Cancel or pause if the controls respond, close both hot and cold supply valves, and keep away from pooled water near electrics. Do not restart the washer until the source is understood.
Can a drain hose make a washer look as if it is overfilling?
Yes. Whirlpool explains that poor hose insertion, a sealed drain opening, or an unsuitable standpipe arrangement can cause siphoning while the washer fills. Check the exact installation instructions and do not repeat a risky fill test.
Can too much detergent cause overflowing?
Excess or unsuitable detergent can create heavy suds and leakage, especially at a front door or dispenser. Visible foam points to that path; a clear stream that continues after the cycle stops points elsewhere.
Can an unbalanced Whirlpool washer spill water?
A moving or unlevel washer can splash during agitation or spin, especially with a bulky or poorly distributed load. That does not explain water entering continuously while the washer is stopped.
Should I clean the pump filter when the washer is full?
Only if the exact model manual provides an accessible procedure and the water is safe to handle. Stop for hot water, a stuck filter, uncontrolled flow, electrical exposure, or a top-load design without user access, and arrange service.
Read the exact guide
Official sources
- Reasons Why Your Washing Machine Is LeakingWhirlpool · Whirlpool washer leak paths including hoses, drain pipe, pump, tub, door, detergent suds, load, and level
- Continuously Fills / Fills and Drains - WasherWhirlpool Product Help · Whirlpool top-load washer continuous filling, drain-hose siphoning, air gap, and standpipe installation guidance
- Not Filling or Long Fill - WasherWhirlpool Product Help · Whirlpool top-load washer supply hoses, drain-hose installation, water-level options, cycles, and service guidance
- Top Load HE Washer is Unbalanced or OverloadedWhirlpool Product Help · Whirlpool top-load washer load distribution, movement, spin behavior, and safe load correction
- Technical ManualWhirlpool service documentation · one Whirlpool washer technical-sheet example for overflow and siphoning checks; model-specific service use only
- Why is My Washing Machine Not Draining?Whirlpool · Whirlpool washer drain hose, drain pipe, filter access, residual water, and professional help boundaries
- Leveling a Top Load WasherWhirlpool Product Help · Whirlpool top-load washer level and splash-related installation guidance
- Leaking from Front - Front Load WasherWhirlpool Product Help · Whirlpool front-load washer door seal, dispenser, HE detergent, suds, load, level, and service checks
Community feedback
Share a repair observation
Share a plain-text repair observation. Accepted observations are published automatically; this page may take a moment to update.