
On this page
Start here
Quick answer
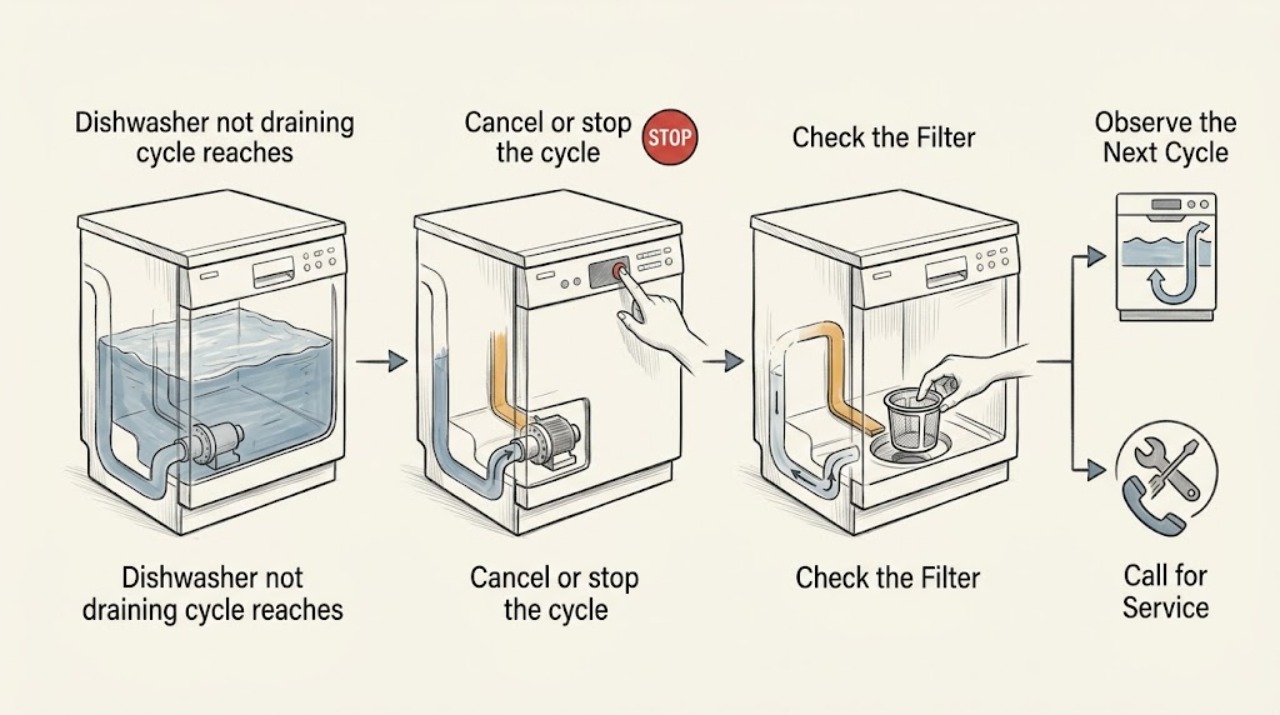
If a dishwasher reaches the drain portion of the cycle but leaves water in the tub, the control may be calling for drain while a filter, sump, pump inlet, drain hose, air gap, disposer connection, or sink drain is restricted. A humming pump with little water movement keeps an obstruction or jammed impeller in consideration; no pump sound keeps a door switch, wiring, pump, or control problem in consideration; water that leaves and then returns points toward hose routing, a missing high loop, a blocked air gap, or downstream plumbing. First stop the cycle, disconnect power before reaching into the tub or inspecting accessible parts, remove standing water safely, clean the filter only as directed by the model manual, and check the visible hose, air gap, disposer inlet, and sink drain. Do not use drain cleaner, reach into a disposer, force a sharp tool into a hose, or open energized panels. If the dishwasher still does not drain, leaks, smells hot, makes grinding noises, has damaged wiring, or the pump or control needs access, arrange qualified appliance service.
Before you begin
Safety first
- A qualified technician should diagnose and access the drain pump, motor, impeller, internal hoses, valves, door switch or latch, wiring, control, and hidden plumbing connections. Homeowner checks should remain limited to power-safe standing-water removal, the model-directed filter and sump, visible hose routing, accessible air-gap or sink observations, and documentation.
Work through in order
Diagnostic checks
Use only checks that match the exact appliance or system and its official guide.
-
Check 1
Cancel or stop the cycle, disconnect power at the breaker or an accessible disconnect, and close the dishwasher water-supply valve if you need to reach inside, remove standing water, or inspect an under-sink connection; keep towels and a shallow container ready.
Expected result: The tub is full but there is no leak, or water is leaking, wiring is wet or damaged, a burning odor is present, the breaker trips, or the door or tub is damaged.
Next step: For a leak near electrical parts, burning odor, damaged wiring, or repeated breaker trip, leave power off and arrange qualified appliance service. Otherwise remove only accessible standing water with a cup, sponge, or hand pump and continue with the model manual; never use drain cleaner.
Why this matters
Why: A full tub permits a controlled inspection after power is isolated. Leaks, heat, damaged wiring, or repeated breaker trips create electrical, water-damage, or fire risk and are not routine draining checks.
-
Check 2
Confirm whether the water covers the tub floor or is only recessed in the filter or sump area, and compare the level with the dishwasher’s owner manual; note whether the cycle reaches drain and then ends, pauses, or continues humming.
Expected result: Only a small amount remains in the documented filter area, the tub floor is covered, the water is near the door, or the machine stops or pauses during the drain call.
Next step: If the level is a normal sump amount, do not disassemble the drain system. If the tub is full, continue only after power isolation with filter and accessible-path checks; save any display code and the timing for service.
Why this matters
Why: A small model-allowed sump level may be normal. Water across the tub or near the door supports incomplete drainage; a pause without pump engagement keeps door-latch, electrical, or control causes in consideration, while continued humming keeps a flow restriction or pump obstruction in consideration.
-
Check 3
Following the model manual, remove and clean the accessible filter or screen with water and a soft brush, then inspect the visible sump area for food, labels, seeds, bones, toothpicks, or glass; wear gloves and do not force or remove a pump cover unless the manual clearly allows it.
Expected result: The filter is coated or blocked, debris is visible in the sump, a sharp object or glass is present, the filter was missing or improperly seated, or the area looks clear.
Next step: Remove only loose, reachable debris without reaching into an unseen impeller. Reinstall the filter exactly as documented, restore power, and run the model’s short test or drain function once. If water remains, power off again and continue with the external drain-path check; do not use chemicals.
Why this matters
Why: Food debris or an improperly seated filter can restrict the pump inlet or allow debris into it. Sharp hard debris may jam or damage an impeller. A clear filter and sump make the hose, air gap, downstream plumbing, pump, wiring, or control more likely.
-
Check 4
Inspect the visible drain hose under the sink or behind an accessible toe area for a kink, crush point, sag, disconnection, or a routing change; confirm the documented high loop or air-gap arrangement without pulling the appliance out or cutting the hose.
Expected result: The hose is kinked, sagging below the drain connection, disconnected, blocked at the end, routed without the required high loop, or appears correctly routed.
Next step: Correct only an obvious loose routing issue when the installation instructions support it and power remains off; do not detach a pressurized or inaccessible connection. If the hose is blocked, damaged, or inaccessible, arrange service rather than forcing sharp tools or compressed air through it.
Why this matters
Why: A kink, low loop, disconnection, or blockage can stop drainage or allow wastewater to return. Correct routing depends on the installation and local plumbing arrangement; a visually correct hose does not rule out an internal restriction.
-
Check 5
If present, inspect the air gap on the sink or the dishwasher connection at the garbage disposer and sink tailpiece; clean the air-gap cap and visible passage according to its instructions, never put hands into the disposer, and check whether the disposer was recently replaced.
Expected result: The air gap overflows, the cap or hose passage has debris, the sink or disposer is slow, the disposer inlet still has a knockout plug after recent installation, or the downstream path looks clear.
Next step: Clean only the accessible air-gap parts and clear a sink blockage using normal sink-safe methods. Do not reach into the disposer, remove a disposer plug unless its installation instructions and safe access support it, or disconnect a hidden hose. Run one short drain test; if water remains, arrange service.
Why this matters
Why: Air-gap overflow and sink or disposer restriction point downstream of the dishwasher outlet. A retained disposer knockout plug can block a newly connected dishwasher. A clear downstream path makes the internal pump, hose, wiring, or control more likely.
-
Check 6
During one drain test from a dry, safe position, listen and watch the outlet or air gap without touching the appliance; note a steady pump hum, grinding, no pump sound, a short burst of flow, or water that drains and then returns.
Expected result: There is strong flow, a hum with no flow, grinding, no pump sound while the cycle reaches drain, a brief flow followed by standing water, or backflow from the sink or air gap.
Next step: Stop testing for grinding, no flow, leaks, or repeated backflow and power off. Arrange qualified service for pump, motor, wiring, latch, control, internal hose, or plumbing diagnosis; do not remove a pump, apply live voltage, or keep cycling a jammed unit.
Why this matters
Why: Strong flow with residual water keeps a level or model-specific issue in consideration. Humming without flow supports an obstruction or pump problem; grinding supports hard debris; no sound keeps electrical, latch, pump, or control causes in consideration; brief flow or backflow supports a partial restriction or downstream routing problem.
-
Check 7
Record the dishwasher model, cycle and drain timing, water level, pump sound, filter and sump findings, hose and air-gap observations, recent disposer or plumbing work, detergent used, error codes, leaks, and any prior repair before arranging service.
Expected result: The problem began after an installation or disposer change, followed repeated filter cleaning, occurs intermittently, or has no obvious change or trigger.
Next step: Provide the record and model-specific manual to a qualified appliance technician. Request a complete drain-path and electrical/control diagnosis before ordering a pump, motor, valve, or control board; do not keep restarting a full or leaking dishwasher.
Why this matters
Why: A post-installation onset raises hose routing, high-loop, air-gap, disposer knockout, and connection issues. Recurrence after cleaning raises an internal restriction, failing pump, wiring, latch, or control issue. Intermittent behavior may require the timing and sound log to reproduce safely.
Use your observations
Decision map
Find the observation that best matches what you see, then follow the next safe action.
-
PATH 01Next step
What you see
The dishwasher reaches drain, the pump hums or grinds, little or no water moves, and the filter or visible sump has debris or sharp objects.
Do this next
Power off, remove only safe visible debris according to the model manual, and retest once. If flow does not return or grinding remains, arrange service for pump and internal drain-path inspection; do not force the impeller or remove panels.
Why this path and its safety boundary
Why it matters: A sump or pump-inlet obstruction, jammed impeller, or pump damage is more likely than a control that never called for drain.
-
PATH 02Next step
What you see
The pump is audible and sends water briefly, but the tub refills, the air gap overflows, or water backs up at the sink or disposer connection.
Do this next
Power off and inspect only the accessible air gap, hose routing, disposer inlet, and sink drain. Correct an obvious safe routing issue or clean an accessible air gap; persistent backflow needs appliance or plumbing service.
Why this path and its safety boundary
Why it matters: A downstream restriction, blocked air gap, kinked or low drain hose, disposer connection, or sink plumbing problem is more likely than a completely failed drain pump.
-
PATH 03Next step
What you see
The cycle reaches drain but there is no pump sound, no water movement, and the filter, hose, air gap, and sink path appear clear.
Do this next
Leave power off if access requires panels or live testing and arrange qualified appliance service. Do not measure live voltage, bypass the latch, or replace a control or pump without model-specific diagnosis.
Why this path and its safety boundary
Why it matters: A door-latch or switch, pump motor, wiring, control, or model-specific drain-control fault is more likely than a simple blockage.
-
PATH 04Next step
What you see
The filter and sump are clear, the pump has strong flow, and only a small amount remains in the documented filter area rather than across the tub floor.
Do this next
Reinstall the filter correctly and monitor the next normal cycle. If the water level rises, reaches the door, produces odor or leaks, or the manual says the level is abnormal, stop and arrange service.
Why this path and its safety boundary
Why it matters: The remaining water may be normal for that dishwasher design rather than a blocked drain; the condition should be judged against the model manual and wash performance.
-
PATH 05Next step
What you see
Drain failure remains after the filter and accessible external-path checks, or the dishwasher has a leak, damaged wiring, burning odor, repeated breaker trip, grinding, or an inaccessible pump or hose obstruction.
Do this next
Keep the dishwasher powered off and arrange qualified appliance service; use the timing, sound, water level, and path observations to target the visit. Do not use chemical drain opener or keep running a full or leaking unit.
Why this path and its safety boundary
Why it matters: The remaining possibilities include an internal pump, motor, hose, valve, latch, wiring, control, or plumbing fault that cannot be safely separated by visual homeowner checks.
Helpful context
Understand the symptom
Reaching drain does not prove water can leave
At the drain portion of a cycle, the control is expected to run a drain pump and move water through the dishwasher’s outlet path. That path may include a filter and sump, pump inlet, drain hose, air gap or high loop, disposer inlet, and sink plumbing. A dishwasher can make the expected drain sound while a restriction prevents flow, or it can remain full because the pump never starts. The condition narrows the timing of the failure; it does not identify one part.
First separate a normal sump water level from a full tub
Some models retain a small amount of water in the filter or sump area to keep seals from drying, while others specify a different normal level. Water covering the tub floor or reaching the door is a different symptom from water recessed around the filter. Use the exact owner manual for the model rather than assuming every visible amount is a failure.
The pump sound changes the next check
A steady hum without water movement keeps a blocked sump, pump inlet, or jammed impeller in consideration. Grinding can indicate hard debris, and no pump sound during an active drain call keeps electrical, door-latch, pump, or control causes in consideration. A pump that drains briefly and then leaves water may be restricted, intermittently failing, or sending water into a blocked or poorly routed downstream connection.
Keep checks model-specific and power-safe
Filter removal, pump-cover access, air-gap cleaning, hose inspection, and any standing-water removal should follow the dishwasher’s manual. Disconnect power before reaching inside or handling a filter or pump area, and never reach into a garbage disposer. Do not use chemical drain opener in the dishwasher. If access requires panels, live electrical testing, pump removal, or unfamiliar wiring, stop and arrange service.
Safety boundary
Stop conditions
- Disconnect power and arrange service for a burning odor, damaged or wet wiring, repeated breaker trips, a leak near electrical parts, grinding, a pump that does not run, or water that reaches the door or floor.
- Do not reach into a garbage disposer, handle an unseen pump impeller or sharp glass, open energized panels, bypass a door latch, apply live-voltage tests, or pull the dishwasher out to access hidden parts unless qualified and following the model instructions.
- Do not use chemical drain cleaner, sharp tools, improvised compressed-air flushing, or repeated forced cycles; these can damage the hose or components, spread wastewater, or create a safety hazard.
- Arrange qualified appliance or plumbing service when the filter, sump, hose, air gap, disposer connection, and sink path are clear but the dishwasher still does not drain, drains and backflows, or the correct model-specific repair is uncertain.
Only after diagnosis
Potential parts
- dishwasher filter or filter assembly
Consider this only when the model manual and inspection confirm a cracked, missing, damaged, or permanently blocked filter; cleaning a filter is not evidence that it needs replacement.
Match the exact dishwasher model, filter shape, locking arrangement, mesh, and manufacturer instructions before ordering. - dishwasher drain pump or pump motor
Consider this only after a technician confirms the pump or motor fails under a drain call or is damaged after the filter, sump, hose, air gap, and downstream path are checked.
Verify the exact model, pump design, connector, seal, voltage and control arrangement; pump removal involves water and electrical access. - dishwasher drain hose or hose connection
Consider this only when the hose is kinked, punctured, blocked, improperly routed, or its connection leaks and the installation instructions call for replacement rather than rerouting.
Match the exact appliance, hose length and fittings, high-loop or air-gap arrangement, clamps, and applicable installation instructions. - dishwasher door switch, latch, or control
Consider this only after professional testing shows the dishwasher reaches the drain portion but does not energize or sustain the pump because of a latch, switch, wiring, or control fault.
Confirm the exact model, control generation, connector and safety interlock arrangement; do not bypass or substitute an unverified part.
When checks do not resolve it
Need a professional?
Safety scope: A qualified technician should diagnose and access the drain pump, motor, impeller, internal hoses, valves, door switch or latch, wiring, control, and hidden plumbing connections. Homeowner checks should remain limited to power-safe standing-water removal, the model-directed filter and sump, visible hose routing, accessible air-gap or sink observations, and documentation.
Common questions
FAQ
Why does my dishwasher reach the drain cycle but not drain?
The control may be calling for the drain pump while water is blocked by the filter, sump, pump inlet, hose, air gap, disposer connection, or sink plumbing. If there is no pump sound, a latch, wiring, motor, or control issue is also possible. Check the model-directed filter and visible external path with power isolated, then arrange service if water remains.
Is a little water in the bottom of a dishwasher normal?
Some dishwasher designs retain a small amount of water in the filter or sump area, and the acceptable level varies by model. Water across the tub floor, near the door, or rising after the cycle is a different symptom. Check the owner manual and do not treat a full tub as normal just because water is present around the filter.
What should I check if the dishwasher drain pump hums?
A hum with no water movement keeps a blocked sump, pump inlet, or jammed impeller in consideration. Disconnect power, follow the manual to clean the filter and inspect only visible debris, and stop for grinding or sharp debris. A persistent hum without drainage needs pump and internal-path diagnosis; do not force the impeller or open live panels.
Can a kinked drain hose or missing high loop cause a dishwasher not to drain?
Yes. A kink, crush point, sag, blocked connection, missing high loop, or blocked air gap can stop flow or let wastewater return. Inspect only visible routing and connections according to the installation manual. Do not pull the appliance out or force a sharp tool into a hidden hose; persistent restriction needs service.
Could a garbage-disposer connection stop the dishwasher from draining?
Yes. A blocked disposer inlet, sink connection, or air gap can restrict the dishwasher outlet. After a disposer installation, a knockout plug left in the dishwasher inlet can block drainage. Never reach into a disposer; use its installation instructions or arrange appliance or plumbing service when the connection cannot be safely checked.
When does a dishwasher that is not draining need service?
Arrange service when the filter, sump, visible hose, air gap, disposer connection, and sink path are clear but water remains, or when there is no pump sound, grinding, a leak, damaged wiring, a burning odor, a repeated breaker trip, or backflow. Pump, motor, latch, wiring, control, hidden hose, and inaccessible plumbing work should be model-specific professional diagnosis.
Read the exact guide
Official sources
- Dishwasher - Not DrainingGE Appliances · GE lists model-dependent normal water levels and checks for filter, sump, hose kinks, sink or disposer restrictions, air gaps, knockout plugs, detergent, high loops, and unresolved service needs.
- Dishwasher Not DrainingWhirlpool Product Help · Whirlpool explains the drain path and gives model-aware checks for standing water, filters, sump debris, hose routing, disposer connections, pump sounds, and service boundaries.
- Not Draining - Water Remain at End of Cycle - DishwasherWhirlpool Product Help · Whirlpool distinguishes a small normal amount of water in the filter area from tub-wide standing water and explains air-gap, disposer, obstruction, and excess-suds clues.
- Dishwasher not drainingBosch Home Appliances · Bosch identifies food debris in the filter or pump as common causes, directs owners to the model manual, and warns that sharp debris requires caution before service if drainage remains poor.
- Dishwasher - Cleaning the Air GapGE Appliances · GE explains that an air gap is plumbing, not part of the dishwasher, and gives a limited cap, passage, and downstream-hose cleaning procedure.
- Newly Installed Dishwasher Not DrainingWhirlpool Product Help · Whirlpool identifies installation-related hose routing, missing loops or air gaps, and an unremoved disposer knockout plug as causes of a newly installed dishwasher not draining.
Community feedback
Share a repair observation
Share a plain-text repair observation. Accepted observations are published automatically; this page may take a moment to update.