
On this page
Start here
Quick answer
If a dryer takes too long on a moisture-sensing cycle, first check whether the load is actually contacting clean sensor strips and whether the dryer is level. Then check the lint filter, vent hose, outside hood, load size, and the heat result. If Timed Dry also runs long, restricted airflow, weak heat, excess water left by the washer, or a control or heating fault is more likely than the moisture sensor alone. If only the sensor cycle is abnormal after these checks, arrange model-specific service rather than opening the cabinet.
Before you begin
Safety first
- A professional should handle cabinet disassembly, electrical or gas diagnosis, sensor wiring, heating components, concealed vent cleaning, and any repeated overheating or burning symptom.
Work through in order
Diagnostic checks
Use only checks that match the exact appliance or system and its official guide.
-
Check 1
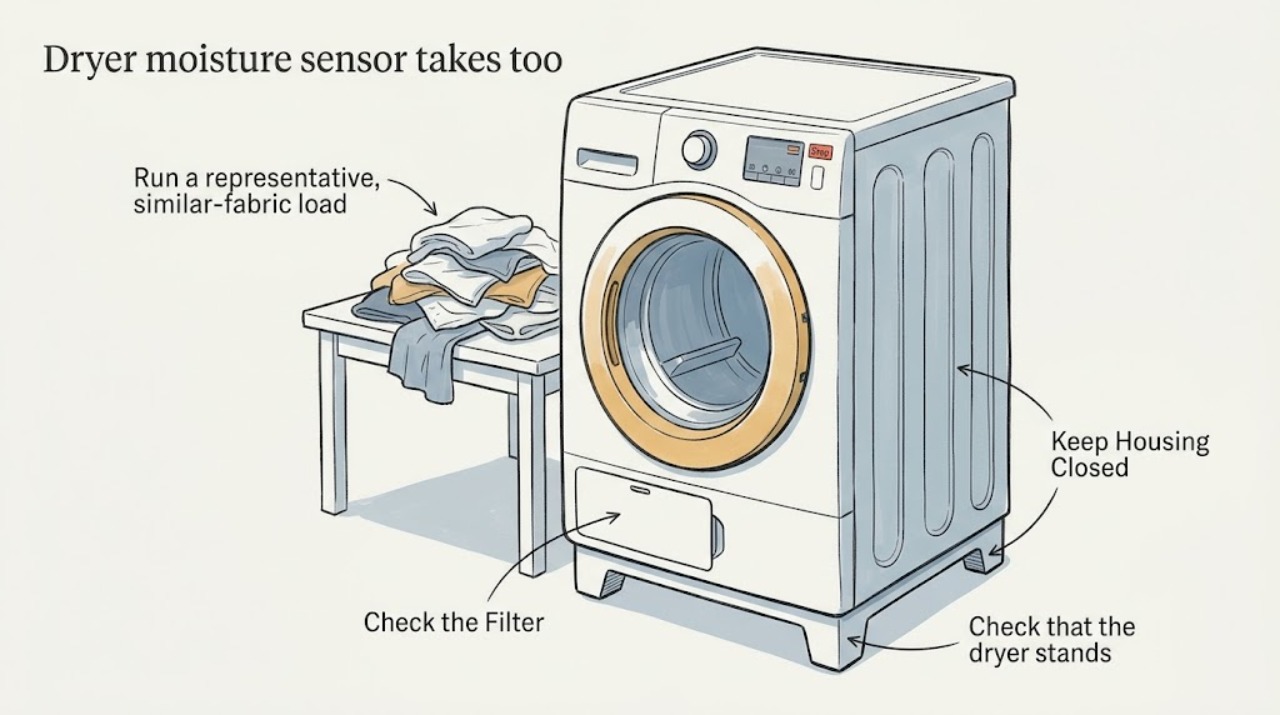
Run a representative, similar-fabric load on the dryer’s moisture-sensing cycle and note whether the clothes tumble freely, touch the sensor area, and remain damp after the cycle; avoid comparing a single bulky item with a normal load.
Expected result: The sensor cycle runs long with a normal, freely tumbling load, or the load is very small, tightly packed, or not contacting the sensor area.
Next step: Use a load size and cycle recommended by the model manual, then continue with the sensor, level, airflow, and heat checks if the timing remains abnormal.
Why this matters
Why: A small, poorly distributed, or non-contacting load can give the sensor less reliable moisture information. A normal load that still runs long keeps airflow, heat, and sensor condition in consideration.
-
Check 2
With the dryer stopped and disconnected from power, clean the lint filter and the accessible moisture sensor strips inside the drum using the method in the model’s instructions; dry the area before restoring power.
Expected result: The filter or sensor strips have visible lint or residue, or both are clean and the long cycle continues.
Next step: Run one comparable load again. Do not open the cabinet or probe sensor wiring; arrange model-specific service if the sensor cycle remains abnormal.
Why this matters
Why: Lint or residue can reduce airflow or interfere with consistent sensor contact. If cleaning changes nothing, the sensor itself is not proven defective because venting, heating, load moisture, and controls can produce the same symptom.
-
Check 3
Check that the dryer stands level and that the drum can tumble the load without it collecting at one side; use a level on an approved cabinet surface and adjust only the accessible feet if the manual allows.
Expected result: The dryer is out of level or a small load gathers away from the sensor area, or the dryer is level and clothes distribute normally.
Next step: Correct only the accessible leveling issue according to the manual, then repeat a representative sensor load. Stop if the appliance rocks, the feet cannot be adjusted safely, or the cabinet appears damaged.
Why this matters
Why: An uneven dryer or poorly distributed small load can prevent reliable contact with the moisture sensors. A level, normally tumbling load shifts attention toward airflow, heat, sensor circuitry, or the selected dryness setting.
-
Check 4
Inspect the vent hose behind the dryer without opening the appliance, and while the dryer runs on a heated cycle observe from outside whether the exhaust hood opens and airflow feels strong; disconnect power before moving the dryer or clearing an accessible connection.
Expected result: The hose is kinked, crushed, excessively long, or lint-filled, the outside hood opens weakly, or the vent path appears clear with strong outdoor airflow.
Next step: Correct only a clearly accessible lint or hose issue as allowed by the installation instructions; arrange professional vent cleaning or appliance service for a concealed, long, damaged, or recurring restriction.
Why this matters
Why: Restricted airflow is a leading cause of long dry times and can leave clothes warm but damp. Strong airflow makes a blocked vent less likely, but does not rule out a heat, sensor, or control problem.
-
Check 5
Compare the same appropriate load on a model-approved Timed Dry cycle and check after a short heated run whether the drum and clothes become warm; do not bypass a safety control or open electrical panels.
Expected result: Timed Dry also runs long or the dryer is not heating, or Timed Dry dries normally while the moisture-sensing cycle alone remains long.
Next step: If the dryer is not heating, shows an error, or both cycle types remain slow, stop using it and arrange appliance service. If only Sensor cycle is abnormal, provide the model and test results for targeted service.
Why this matters
Why: Long or unheated Timed Dry points toward airflow, power or gas supply, heating, or another appliance fault rather than sensor timing alone. Normal Timed Dry with an abnormal sensor cycle makes sensor contact, sensor circuitry, load distribution, or the selected dryness setting more likely.
Use your observations
Decision map
Find the observation that best matches what you see, then follow the next safe action.
-
PATH 01Next step
What you see
A normal-sized, freely tumbling load dries normally on Timed Dry, but the moisture-sensing cycle stays long after clean strips and a level cabinet are confirmed.
Do this next
Stop at accessible checks and arrange service with the model number, cycle used, load description, and sensor-cycle behavior; do not open the cabinet to test the sensor circuit.
Why this path and its safety boundary
Why it matters: A sensor-contact, sensor-circuit, or model-specific dryness-setting problem is more likely than a general vent or heat failure.
-
PATH 02Next step
What you see
Both Sensor and Timed Dry run long, clothes are warm but damp, or the outside vent hood has weak airflow.
Do this next
Stop using the dryer if airflow is severely restricted or the area becomes unusually hot or humid, and arrange vent or appliance service after checking only accessible lint and hose conditions.
Why this path and its safety boundary
Why it matters: Restricted venting or a heat and airflow problem is more likely than the moisture sensor alone.
-
PATH 03Next step
What you see
A small or tightly packed load does not contact the sensor area, or the dryer is not level and clothes collect away from the strips.
Do this next
Use a representative load and correct accessible leveling according to the manual, then retest before requesting a sensor replacement.
Why this path and its safety boundary
Why it matters: The sensor may be receiving an incomplete moisture signal rather than failing electrically.
-
PATH 04Next step
What you see
The dryer does not heat, displays an error repeatedly, makes an unusual noise, or remains slow after the lint and vent checks.
Do this next
Stop the cycle and arrange qualified appliance service. Do not bypass a thermostat, open energized panels, or replace a sensor without model-specific diagnosis.
Why this path and its safety boundary
Why it matters: A heating, power, motor, control, or concealed vent fault needs professional diagnosis; a moisture-sensor cleaning cannot establish a safe repair.
Helpful context
Understand the symptom
Separate a sensor problem from a drying problem
A sensor cycle decides when the load reaches the selected dryness, so poor contact can make its timing unreliable. But the sensor cannot compensate for a blocked vent, weak heat, a heavy load, or clothes entering the dryer with too much water. A useful comparison is whether the same type of load dries normally on a model-approved Timed Dry cycle and whether the dryer produces normal heat and outdoor airflow.
Moisture strips need a real, clean contact
Many sensor dryers use metal strips inside the drum. Residue from fabric softener or dryer sheets, a very small load, or a dryer that is not level can keep clothes from contacting the sensing area consistently. Clean only the accessible sensor area as the model manual directs, and do not remove panels to reach wiring or the control.
Long time with warm, damp clothes is an airflow clue
If clothes are warm but still damp after a full cycle, look at the lint filter, hose, wall connection, and outside hood. A kinked or restricted vent can keep humid air from leaving and can also create a safety concern. If the dryer does not heat, displays an error, makes an unusual noise, or remains slow after accessible checks, stop troubleshooting and arrange service.
Safety boundary
Stop conditions
- Disconnect power before moving the dryer or clearing an accessible vent connection, and never open electrical panels or bypass a safety control as an ordinary user check.
- Stop using the dryer if it does not heat, the laundry area becomes unusually hot or humid, airflow is severely restricted, an error repeats, or a burning smell or unusual noise appears.
- Arrange qualified appliance or vent service when both cycle types remain slow, the sensor cycle alone remains abnormal after accessible checks, or the vent path is concealed, damaged, or difficult to clean safely.
Only after diagnosis
Potential parts
- replacement dryer moisture sensor strip or sensor kit
Only consider this after the model manual or a qualified diagnosis confirms a sensor or sensor-strip fault; long dry times can instead come from venting, heat, level, load, or washer extraction.
Match the exact dryer model, sensor design, harness connection, and installation procedure. Do not order or install a generic strip based only on the symptom.
When checks do not resolve it
Need a professional?
Safety scope: A professional should handle cabinet disassembly, electrical or gas diagnosis, sensor wiring, heating components, concealed vent cleaning, and any repeated overheating or burning symptom.
Common questions
FAQ
Why does Timed Dry work but the moisture-sensing cycle takes too long?
That pattern makes sensor contact, a dirty or damaged sensor strip, load distribution, level, or a dryness setting more likely than a general airflow failure. Clean only the accessible sensor area as the manual directs and arrange model-specific service if the behavior remains.
Can a blocked vent make the moisture sensor appear to be bad?
Yes. Restricted airflow leaves humid air in the dryer and can keep clothes warm but damp, so the sensor cycle continues. Check the lint filter, hose, and outside hood airflow safely before assuming the sensor is defective.
Why does a small load cause sensor-cycle trouble?
A very small load or one item may not tumble across the sensor area consistently, so the dryer may not receive a representative moisture signal. Use the cycle and load guidance for your model, or use a model-approved timed option for an occasional small load.
Should I replace the moisture sensor first?
Not from the long-time symptom alone. Confirm the cycle type, load contact, level, lint filter, vent airflow, and heat first. Replace a sensor or strip only when the model instructions or a qualified diagnosis identifies it as the failed part.
Read the exact guide
Official sources
- Clothes DryersENERGY STAR · General explanation of sensor-based dryer cycle termination
- Dryer is not Drying or Experiencing Long Dry TimesMaytag · Dryers that take too long or leave clothes damp, including sensor-cycle complaints
- F3 E2 - Error Code - DryerMaytag · Model-specific example of a moisture-sensor issue and diagnostic boundary
- Dryer - Taking Too Long To Dry Clothes or Not Drying at AllGE Appliances · General GE dryer troubleshooting for long dry time symptoms
Community feedback
Share a repair observation
Share a plain-text repair observation. Accepted observations are published automatically; this page may take a moment to update.