
On this page
Start here
Quick answer
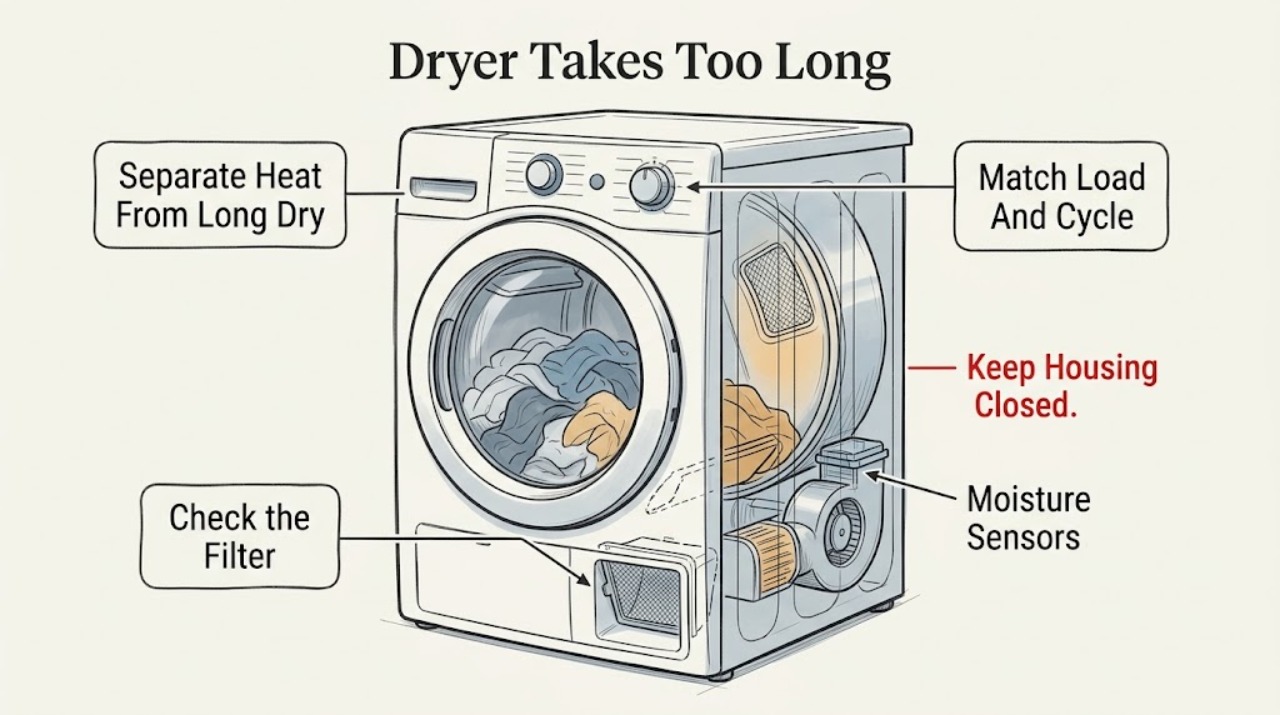
When a dryer runs but clothes remain damp, first determine whether the drum is producing heat. A heated dryer with weak airflow most often points to lint or a restricted exhaust path, while an air-only or energy-saving setting, oversized or very wet load, and a sensor cycle can also lengthen or end a cycle early. Clean the lint filter, inspect the accessible hose and outside hood for kinks or blockage, and use a cycle and load that match the owner's manual. If the dryer has no heat, displays an error, has abnormal airflow or noise, or remains slow after the vent path is clear, stop relying on repeated cycles and arrange qualified appliance or vent service. Do not open the cabinet or test energized parts.
Work through in order
Diagnostic checks
Use only checks that match the exact appliance or system and its official guide.
-
Check 1
Check the selected cycle and confirm it is intended to heat rather than Air Fluff, Air Dry, or another no-heat or reduced-heat setting. If there is no burning smell, smoke, sparking, damaged cord, or unusually hot cabinet, use the owner's manual to select a short heated timed cycle and observe safely from outside; do not put hands near the exhaust or open the cabinet.
Expected result: The cycle is no-heat or reduced-heat, the drum produces warm air, the drum is completely cold, or an error or unsafe symptom appears.
Next step: Use a model-approved heated setting only when safe, then continue with airflow and load checks if heat is present. Leave the dryer off and arrange qualified service for no heat, an error that returns, smoke, sparking, burning odor, or a hot or damaged electrical connection.
Stop if: Do not keep running repeated heated cycles to compensate for damp clothes, bypass a safety device, or open panels to test the heater.
Why this matters
Why: A no-heat setting explains damp clothing without a failure. Warm air means the drying problem is more likely airflow, load, or moisture removal. Completely cold air points toward supply, heating, or control diagnosis, while an error or unsafe symptom raises the service urgency.
-
Check 2
Turn the dryer off and clean the lint filter before the next test as directed by the owner's manual. Inspect the accessible hose behind the dryer without forcing the appliance for crushing, sharp kinks, excess lint, or an obstructed connection. Check the exterior hood for lint, debris, or a flap that cannot open freely; do not dismantle a hidden duct.
Expected result: The filter is coated, the hose is crushed or blocked, the outside hood has debris or weak discharge, or the accessible path is clean and airflow appears normal.
Next step: Clean only the accessible filter, hood, and vent area, restore a smooth route when it can be done without moving or opening the appliance, and retest one appropriate load. Arrange qualified vent service for a hidden or persistent restriction, and stop using the dryer if airflow is very weak or heat builds up.
Stop if: Do not run the dryer with a missing, loose, damaged, or blocked lint filter, insert tools into the duct, or continue operation when the vent is crushed or overheating is suspected.
Why this matters
Why: Restricted airflow prevents warm, moist air from leaving and is a common reason clothing stays warm but damp. A clean visible path does not rule out a hidden wall-duct obstruction or blower problem; normal airflow shifts attention to load, cycle, supply, or internal components.
-
Check 3
Compare the damp result with the load: remove items from an overfilled drum, separate heavy towels or bedding from lightweight fabrics, and note whether the washer left the load unusually wet. Select the model-recommended cycle and dryness level; for a Sensor Dry cycle, clean accessible moisture-sensor bars with a soft cloth only if the manual permits.
Expected result: A smaller or better-sorted load dries, only bulky or soaking-wet loads remain damp, a tiny or mixed load ends too soon, or every normal load remains damp despite heat and clear airflow.
Next step: Run one appropriately sized, similarly weighted load using the model's recommended cycle. If it remains damp, record whether the air is warm, the cycle duration, and the airflow result before moving to the supply or service branch.
Stop if: Do not pack the drum tightly, repeatedly dry a soaking-wet load to compensate, scrape sensor bars, or continue using the dryer if it becomes unusually hot.
Why this matters
Why: Load size, fabric mix, and incoming moisture can explain longer drying without an appliance failure. A small or mixed load can also cause sensors to decide that the cycle is complete before heavy pieces are dry. Damp clothing across normal loads points away from load selection and toward vent, supply, or component diagnosis.
-
Check 4
If the dryer is still slow, identify whether it is electric or gas and whether the problem began after installation or moving the appliance. From a dry, safe position, check that the plug and outlet show no visible damage and that the gas supply condition follows the owner's manual; do not test voltage, open a terminal box, or loosen a gas fitting.
Expected result: The dryer is electric with an uncertain supply, gas supply appears unavailable, the cord or outlet is damaged, the issue began after a move, or visible supply and installation conditions are normal.
Next step: Keep the dryer off and use qualified electrical, gas, appliance, or vent service for damaged or uncertain supply, repeated breaker action, persistent no heat, or a recurring long-dry condition after airflow and load checks.
Stop if: Do not measure live voltage, reset a repeatedly tripping breaker, move wiring, adjust gas fittings, or keep using the dryer when the cord or outlet is hot or damaged.
Why this matters
Why: Incorrect or incomplete supply can affect heating even when the drum turns, and an installation change can introduce vent or connection problems. Normal visible supply with persistent warm-but-damp results makes a hidden vent, blower, temperature control, or other component fault more likely.
Use your observations
Decision map
Find the observation that best matches what you see, then follow the next safe action.
-
PATH 01Next step
What you see
The dryer produces warmth, clothing remains damp, the lint filter or vent is blocked, the outside hood has weak discharge, or the laundry area is unusually humid.
Do this next
Clean the accessible filter and hood, correct a visible kink without opening the appliance, and arrange full vent inspection or cleaning when the restriction is hidden or persists. Stop using the dryer if heat builds up or airflow remains poor.
Why this path and its safety boundary
Why it matters: Restricted exhaust is more likely than a failed heater because heat and moisture are not leaving efficiently.
-
PATH 02Next step
What you see
Airflow is normal, the load is very small, mixed, bulky, or unusually wet, and a different load or cycle changes the drying result.
Do this next
Sort comparable fabrics, use the model's load guidance and suitable dry level, and clean accessible sensor surfaces as directed. Escalate if normal loads remain damp or a cycle ends with a persistent warning.
Why this path and its safety boundary
Why it matters: The cycle or moisture-sensing decision and the amount or distribution of moisture are more likely than a failed component.
-
PATH 03Next step
What you see
A proper heated cycle produces no warmth, the issue followed installation or relocation, an electric supply is uncertain, or a gas supply is unavailable.
Do this next
Leave the dryer off and arrange qualified appliance, electrical, gas, or installation service. Do not open wiring, test energized parts, or repeatedly reset protection.
Why this path and its safety boundary
Why it matters: A supply, installation, heating, or control problem is more likely than ordinary long drying; a turning drum does not prove the heater is powered or fueled.
-
PATH 04Next step
What you see
The filter, accessible vent, load, cycle, and visible supply are appropriate, but normal loads remain damp or the dryer makes unusual noise, shows an error, or overheats.
Do this next
Stop relying on repeated cycles and schedule qualified appliance or vent service. Provide the model, warm-versus-cold observation, cycle and load, airflow result, error, noise, and steps already taken.
Why this path and its safety boundary
Why it matters: A hidden vent obstruction, blower, motor, temperature control, sensor, or other internal fault requires diagnosis; the symptom alone does not identify a replacement part.
Helpful context
Understand the symptom
Check heat before assuming the vent is the only problem
Warm but damp clothing and completely cold clothing are different branches. A brief, model-approved heated-cycle check can show whether the dryer is heating at all. If there is no heat, check only the accessible cycle and supply conditions described in the manual and arrange service when those are normal. If there is heat, focus first on removing moist air through the lint filter and exhaust path.
The load and sensor decision can change the result
An overloaded drum, mixed heavy and light fabrics, or laundry that entered soaking wet can need more time even when the dryer is operating correctly. Conversely, an extremely small or mixed load can contact moisture sensors unevenly and end a Sensor Dry cycle while heavier items remain damp. Compare like fabrics and use the cycle guidance for the specific model.
Only after diagnosis
Potential parts
- dryer lint filter or exhaust vent component
Only consider this category when the filter or vent is damaged, or qualified vent service confirms a restriction or failed vent component after the accessible path is checked.
Confirm the exact dryer model and its installation requirements before replacing or modifying any filter or vent component. - dryer blower wheel or motor
Only consider this category when airflow remains weak or the motor or blower has abnormal noise or thermal behavior after the vent path is confirmed clear and a technician identifies the fault.
Blower and motor parts are model-specific and require safe disassembly and installation by qualified service. - dryer moisture sensor or temperature-control component
Only consider this category when a technician confirms a sensor or temperature-control fault after cycle, load, airflow, and supply checks.
Do not bypass a sensor or safety control; verify the exact model and have qualified service install the correct component.
When checks do not resolve it
Need a professional?
Arrange qualified appliance or vent service when long dry times persist after the lint, accessible airflow, cycle, load, and visible supply checks; the dryer has no heat; an error returns; airflow is weak; or unusual noise, overheating, or repeated breaker action occurs. Use a licensed electrician for a hot, loose, or damaged cord or outlet and qualified gas service for a gas-supply concern. Stop using the dryer for smoke, burning odor, sparking, or suspected fire risk. Internal blower, motor, heating, temperature, sensor, wiring, and control diagnosis should not be attempted by opening the cabinet or testing energized parts.
Common questions
FAQ
Why does my dryer take a long time but still leave clothes damp?
If the dryer is warm, restricted airflow from a lint filter, crushed hose, blocked hood, or hidden vent is a leading possibility. An oversized or very wet load and a low-heat or energy-saving cycle can also extend drying. Check heat, lint, accessible airflow, load, and cycle before arranging service.
How can I tell whether the dryer has enough heat?
Follow the owner's manual and, only when there is no danger sign, use a short heated timed-cycle check. If the drum or exhaust is warm, pursue airflow and load checks; if it stays completely cold, check only visible supply and installation conditions and arrange qualified diagnosis. Do not feel near a hot exhaust opening or open the dryer cabinet.
Can a sensor cycle stop while clothes are still damp?
Yes. A small or mixed load can contact moisture sensors unevenly, allowing lighter items to signal dryness while heavier items remain damp. Sort similar fabrics, follow the model's load guidance, clean accessible sensor surfaces as directed, and use a suitable cycle. If normal loads stay damp, check airflow and arrange service.
Read the exact guide
Official sources
- Dryer is not Drying or Experiencing Long Dry TimesMaytag Product Help · Manufacturer checks for long dry times and damp clothing, including heat, power or gas, load, lint filter, vent, cycle, and service escalation
- Clothes are not dry after using Samsung dryerSamsung · Manufacturer distinction between no heat, weak heat, early-ending cycles, vent blockage, load and moisture-sensor behavior
- Not DryingWhirlpool Product Help · Manufacturer lint, airflow, outside-hood, vent-cleaning, load, and service guidance for a dryer that is not drying
Community feedback
Share a repair observation
Share a plain-text repair observation. Accepted observations are published automatically; this page may take a moment to update.