
On this page
Start here
Quick answer
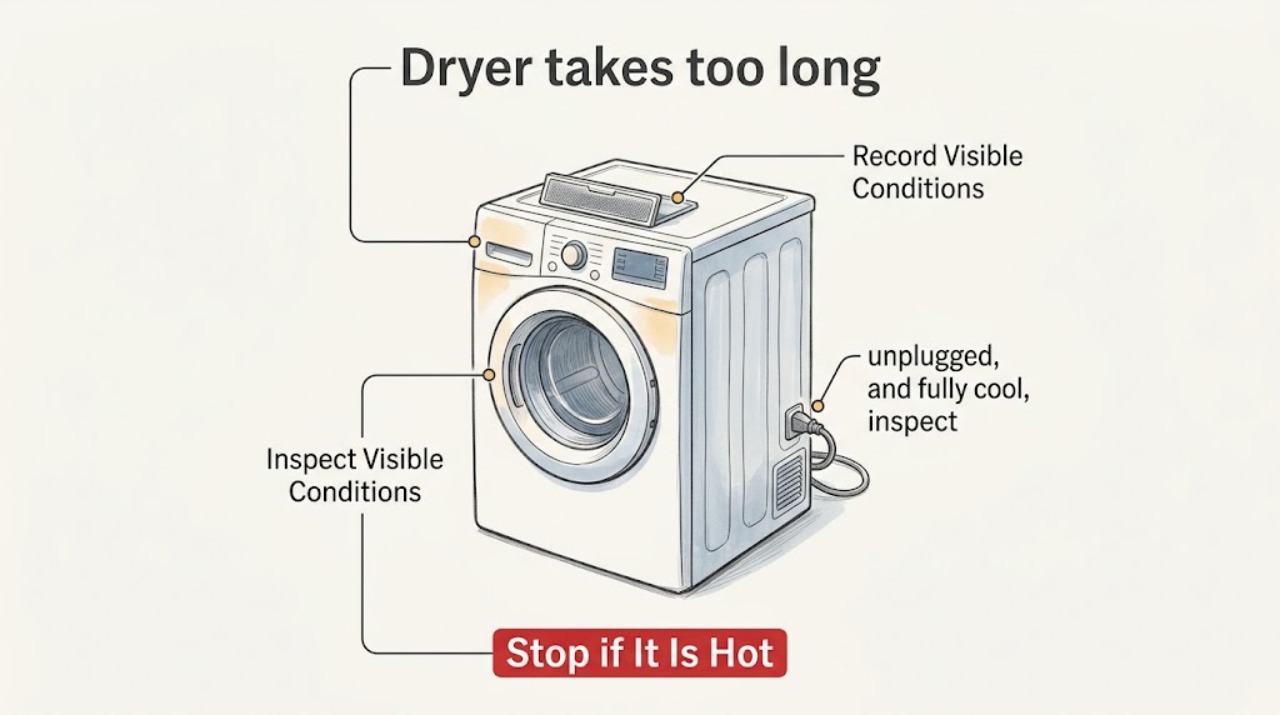
Long dryer times usually come from restricted airflow, a loaded or very wet load, a cycle or sensor expectation, or a heating, drive, or control problem. Start by recording the cycle, load, and whether clothes are warm or cool when they remain damp. With the appliance off, unplugged, and cool, inspect the accessible lint screen; from a safe position, note the outside exhaust airflow and any visible hose damage without moving the appliance. If airflow remains weak, the dryer is unusually hot, or there is a burning smell, smoke, sparking, repeated power loss, or a breaker trip, stop using it and arrange professional service. Do not open the dryer or work on its vent, gas, electrical, or heating components.
Work through in order
Diagnostic checks
Use only checks that match the exact appliance or system and its official guide.
-
Check 1
Record the selected cycle and options, the load type and size, the moisture left in the clothes, and whether the dryer ends normally or simply continues for an unusually long time.
Expected result: Note whether the load is light, bulky, mixed-weight, tightly packed, or very wet from the washer, and whether the control panel shows a normal completion, sensor result, reminder, or error.
Next step: Keep this symptom record with the model number and owner manual. Do not repeatedly run cycles solely to compare times, especially if heat or odor is abnormal.
Stop if: Stop using the dryer immediately for smoke, a burning smell, abnormal heat, sparking, a breaker trip, or repeated unexplained power loss.
Why this matters
Why: A large or mixed load and a sensor cycle can legitimately behave differently from a small timed load. Damp clothing after an appropriate cycle, or a cycle that never reaches normal completion, points to airflow, heat, power, drive, sensor, or control diagnosis rather than a simple setting difference.
-
Check 2
With the dryer off, unplugged, and fully cool, inspect the accessible lint screen and its visible seating area without reaching into the cabinet.
Expected result: Look for a lint-loaded screen, residue that blocks the mesh, a torn screen, or a screen that will not sit correctly. Note whether damp clothes and long times occur together.
Next step: If the owner's guide permits routine screen cleaning, clean and dry the screen before reinstalling it. If it is damaged, cannot seat, or long times continue, arrange service rather than opening the housing.
Stop if: Stop if the screen area is damaged, packed with inaccessible lint, hot, wet, or contaminated, or if cleaning would require tools or cabinet access.
Why this matters
Why: Lint or residue can restrict airflow and extend drying time, but a clean screen does not prove that the hidden vent or dryer is clear.
-
Check 3
From a safe ground-level position, observe the exterior exhaust outlet during one normal operation only when the dryer has no warning signs; do not move the dryer, access a roof or wall, or run another cycle for comparison.
Expected result: Note whether air exits consistently, is weak, or is accompanied by excess humidity, lint, or heat around the outlet. If visible without moving the appliance, note a crushed or kinked hose behind it.
Next step: Stop use and request professional vent or appliance evaluation when airflow is weak, the outlet is obstructed, or the laundry area becomes unusually hot or humid.
Stop if: Stop immediately for smoke, burning odor, unusual heat, lint blowing into the room, sparking, or any need to climb or dismantle the vent.
Why this matters
Why: Weak or changing exhaust can indicate a restricted vent path and can account for long drying times or excess heat. An exterior observation cannot locate a concealed blockage or establish that a vent hose needs replacement.
-
Check 4
Observe the dryer from outside the cabinet during the existing cycle or the last safe event: note whether the drum turns, whether heat seems present without touching hot surfaces, and whether the panel stays powered when drying slows.
Expected result: Warm but damp clothing with weak airflow, cool clothing with a normal drum movement, a drum that stops, a panel that goes dark, or an error indication are different patterns.
Next step: Record the pattern and provide it to an appliance repair professional. Do not open the cabinet, test wiring, access a heating element, or repeatedly reset the appliance.
Stop if: Stop if the dryer overheats, smells burned, smokes, sparks, trips a breaker, or the cord or outlet shows visible damage.
Why this matters
Why: Warm but damp with restricted airflow supports a vent or lint investigation; cool clothes can point toward a heating-system or cycle issue; loss of drum motion or display suggests a drive or power/control issue. These clues do not identify an internal part by themselves.
-
Check 5
Compare the load and cycle with the care labels and the model's owner guidance without adding items or changing several settings at once.
Expected result: Note whether the selected setting is air-only or low heat, whether heavy fabrics are mixed with light items, whether the drum is tightly packed, and whether clothes entered the dryer unusually wet.
Next step: Use the model's documented cycle guidance only when there are no safety warnings. If long times persist, stop experimenting and schedule appliance service.
Stop if: Stop if the dryer becomes hotter than normal, produces a burning odor or smoke, loses power, or shows a fault indication.
Why this matters
Why: A setting or load mismatch can lengthen drying without a failed part. If an appropriate load and documented cycle still take too long, the repeatable pattern supports a service diagnosis.
Use your observations
Decision map
Find the observation that best matches what you see, then follow the next safe action.
-
PATH 01Next step
What you see
The load is large, mixed, tightly packed, or unusually wet, and there are no heat or power warnings.
Do this next
Compare the load and selected cycle with the owner's guidance. If a suitable load still dries unusually slowly, document the pattern and request service.
-
PATH 02Next step
What you see
The lint screen is visibly blocked, damaged, or cannot seat correctly.
Do this next
Use only the manufacturer's safe, user-level screen-care procedure if the appliance is cool and unplugged. Stop and request service if the screen area or hidden lint path is damaged or inaccessible.
-
PATH 03Next step
What you see
The outside exhaust airflow is weak, changing, or associated with hot and humid room conditions.
Do this next
Stop using the dryer and arrange professional vent and appliance evaluation. Do not move the appliance, dismantle the vent, or clean a concealed run yourself.
-
PATH 04Next step
What you see
The dryer is cool inside, the drum or panel behaves abnormally, or an error indication appears.
Do this next
Record the exact display and behavior and schedule appliance repair. Do not open the cabinet or test heating, electrical, gas, or control components.
-
PATH 05Next step
What you see
There is abnormal heat, smoke, a burning smell, sparking, a damaged connection, or repeated breaker tripping.
Do this next
Stop use immediately, keep people clear, and arrange qualified professional or emergency help as appropriate. Do not run another cycle.
Helpful context
Understand the symptom
Separate a long cycle from a fault
Cycle time depends on the selected setting, load size, fabric mix, and how much water entered the dryer. Sensor cycles can end at a sensed dryness level, while a timed cycle follows its selected time. Clothes that are still damp, a hot laundry area, weak outside airflow, an error indication, or a dryer that is not heating are more useful clues than a single elapsed-time comparison.
Safe user-level checks
Only handle an accessible lint screen after turning the dryer off, unplugging it, and letting the drum cool. Do not move the appliance, open panels, reach into the cabinet, dismantle or clean a concealed vent, or touch gas and electrical components. An exterior vent observation is enough to decide whether professional service is needed.
When a part should be considered
A lint screen, vent hose, or moisture sensor may be relevant only after the observed symptom and model-specific guidance point that way. A compatible replacement part cannot be selected from long dry time alone. A technician should diagnose heating, airflow, drive, and control faults before an internal part is ordered.
Only after diagnosis
Potential parts
- dryer lint screen
Consider this category only if the visible screen is damaged or cannot be cleaned and seated correctly, and the exact model's guidance identifies it as replaceable.
Confirm the exact dryer model, screen location, dimensions, and manufacturer fitment before ordering. - dryer vent hose
Consider this category only after a qualified assessment finds a damaged or unsuitable accessible hose and confirms that it is the cause or part of the airflow problem.
Confirm the installation requirements, routing, materials, and exact model or local requirements with a professional; do not infer suitability from appearance. - dryer moisture sensor
Consider this category only when the model uses a moisture-sensing cycle and professional diagnosis links the early or extended result to the sensor rather than load, airflow, or heat.
Confirm the exact dryer model and manufacturer-approved sensor fitment; many sensor assemblies are not interchangeable.
When checks do not resolve it
Need a professional?
Arrange appliance repair when long drying times persist after safe user-level checks, clothes remain damp on an appropriate cycle, airflow is weak, the dryer is not heating normally, the drum or display stops, an error appears, or unusual noise develops. Treat abnormal heat, smoke, burning odor, sparking, damaged power connections, and breaker trips as immediate stop-use conditions.
Have this ready
- Provide the brand and model, cycle and options, load description, approximate dry-time pattern, moisture result, lint-screen condition, exterior airflow observation, drum and panel behavior, error indication, and any heat or odor warning. Do not guess at an internal part from the symptom alone.
Common questions
FAQ
Why is my dryer taking much longer than it used to?
A restricted lint or exhaust path, a changed load or cycle, clothes entering unusually wet, or a heating, drive, sensor, or control fault can all extend drying. Record the cycle, moisture result, lint-screen condition, outside airflow, and any heat or power warning before scheduling service.
Can a dirty lint screen cause long drying times?
Yes. Lint or residue on the accessible screen can restrict airflow and lengthen drying. Handle the screen only with the dryer off, unplugged, and cool, and stop if the screen area is damaged or inaccessible.
How can I tell whether the vent is causing slow drying?
From a safe position, observe whether the outside exhaust airflow is weak or changing and whether the laundry area becomes unusually hot or humid. Do not move the dryer or dismantle a concealed vent. Weak airflow or persistent heat warrants professional vent and appliance service.
Should I replace the moisture sensor or heating part?
Not from long dry time alone. A moisture sensor, heating component, or another internal part should be selected only after model-specific professional diagnosis separates load and airflow causes from an appliance fault.
Read the exact guide
Official sources
- Dryer is not Drying or Experiencing Long Dry TimesMaytag Product Help · Manufacturer troubleshooting for dryer long dry times, lint, load, cycle, airflow, and service symptoms
- How Long Does a Dryer Take to Dry Clothes?Maytag · Manufacturer explanation of cycle-time variation by setting, load, fabric, moisture, lint care, and airflow
- Cleaning the Lint Screen on a DryerWhirlpool Product Help · Manufacturer lint-screen condition, airflow, cleaning, drying, and long-time warning guidance
- Four Reasons Your Dryer Isn't Drying Your ClothesWhirlpool · Manufacturer overview of lint-screen, vent-hose, airflow, load, heat, and professional-service clues
Community feedback
Share a repair observation
Share a plain-text repair observation. Accepted observations are published automatically; this page may take a moment to update.