
On this page
Start here
Quick answer
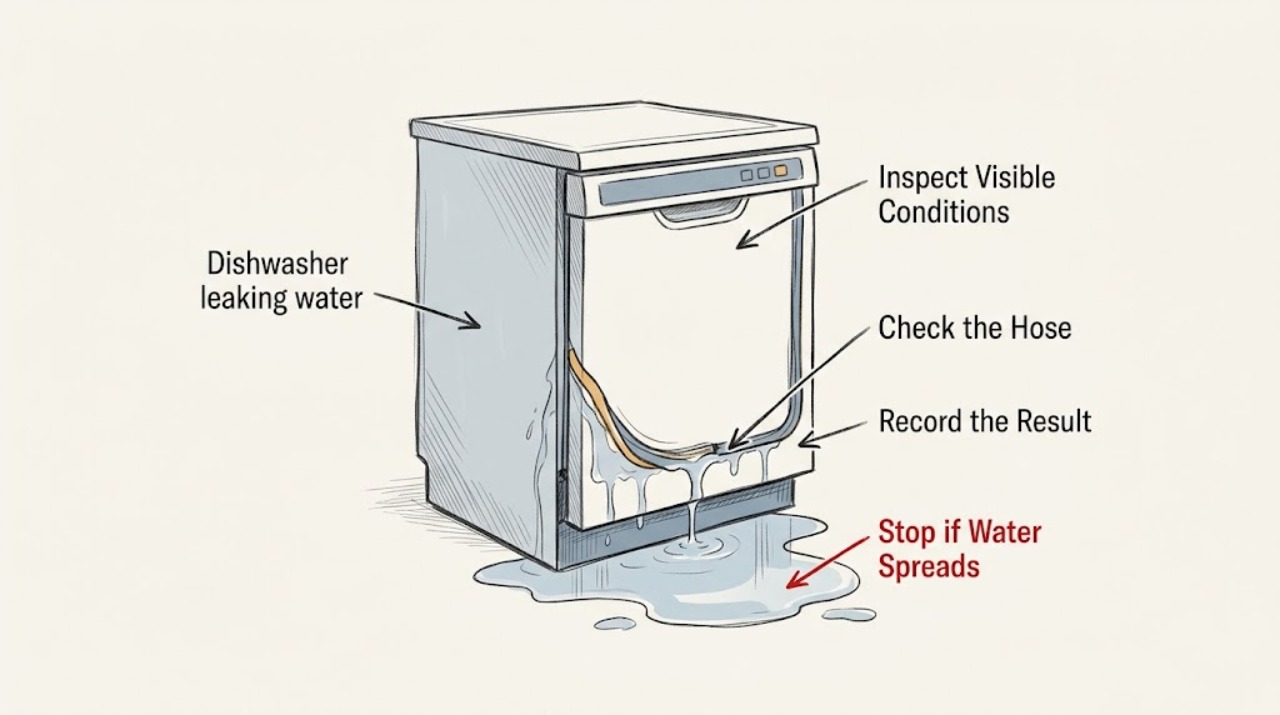
First determine whether the water is a spill or returns during operation. If water is actively leaking, a hose is damaged, or the dishwasher shows a leakage warning such as LE or LC, stop the cycle, turn off power at the breaker when safe, and close the water supply. With the machine isolated, inspect the water-supply hose at both ends, the visible drain-hose connection and routing, and the door seal for moisture, loose fittings, kinks, misalignment, or debris. Excess suds from hand dish soap, an unlevel dishwasher, a blocked spray nozzle, or an installation problem can also send water past the door. A damaged seal, a leak anywhere along the dishwasher-side hose, a leak under the tub, recurring moisture with no visible source, or any leak that continues after safe external checks needs qualified appliance or plumbing service.
Before you begin
Safety first
- Homeowner-safe checks are distinguishing a spill from a returning leak, observing the leak location, inspecting accessible hose connections with power and water isolated, checking a visible drain route, cleaning an accessible door seal, confirming dishwasher detergent, and observing a supervised dry test. Electrical work, internal leak diagnosis, live testing, moving the dishwasher, plumbing disconnection, and damaged-component replacement belong to qualified professionals.
Work through in order
Diagnostic checks
Use only checks that match the exact appliance or system and its official guide.
-
Check 1
Wipe up the water and identify whether it came from a spill or returns during a cycle; if water is actively returning, stop the dishwasher rather than continuing a test. Note whether the wet area is at the door, under the sink, along a hose, or beneath the tub.
Expected result: The water does not return, returns only during operation, appears at a hose connection, forms at the door edge, or comes from underneath the appliance.
Next step: Treat any returning leak as active: stop the cycle, keep water away from electrical parts, and isolate power and water only when safe before inspecting further.
Why this matters
Why: A one-time spill is not proof of a dishwasher leak. The location of a returning leak narrows the path to the door area, an installation connection, or an internal component.
-
Check 2
With the dishwasher stopped and the circuit de-energized when safe, inspect the water-supply hose at the dishwasher connection, shut-off valve, and along its full visible length; look for moisture, damage, a loose fitting, or a gap.
Expected result: Moisture is concentrated at one connection, the hose is cracked or damaged, the hose is dry, or the source cannot be seen without moving the appliance.
Next step: If a connection is safely accessible, close the water valve before any hand check and follow the model installation instructions. Do not open panels or move the dishwasher alone; replace or service a damaged or inaccessible line through qualified help.
Why this matters
Why: A loose connection or damaged supply hose can leak independently of the dishwasher tub. A dry visible supply line shifts attention to the drain path, door area, or an internal leak; an unseen connection should not be reached by force.
-
Check 3
Inspect the visible drain-hose connection under the sink and the accessible hose routing for a loose clamp, kink, crush point, cut, or missing high loop or air-gap arrangement; check the sink or disposer connection without disconnecting plumbing.
Expected result: The leak is at the sink connection, the hose is kinked or damaged, the drain was recently installed or changed, the sink backs up, or the visible drain path looks normal.
Next step: Correct only an obvious, safe external routing or connection issue according to the exact installation guide and local rules. Use a plumber for a sink or disposer backup and appliance service for a damaged hose or hidden leak.
Why this matters
Why: A connection or routing problem can leak or allow backflow after installation. A sink backup indicates household plumbing, while a leak elsewhere along the dishwasher-side hose or a normal visible setup makes appliance service more likely.
-
Check 4
Inspect the door gasket and the lower door area for foreign material, a section pushed out of its channel, a torn seal, or a door that is not closing squarely; also check whether the dishwasher appears level without pulling it out.
Expected result: The seal has food or debris, is displaced but intact, is damaged, the door rubs cabinets or does not close evenly, or the seal and alignment look normal.
Next step: With power isolated, clean accessible seal surfaces using the model guidance and gently return an intact seal to its channel. Do not stretch, cut, glue, or replace a damaged gasket without confirming the exact model; arrange service if alignment or leveling requires moving the unit.
Why this matters
Why: Debris or misalignment can create a gap at the door. A damaged seal, a distorted opening, or an unlevel installation needs model-specific repair or adjustment rather than repeated cycles.
-
Check 5
Look for excessive suds, confirm that the product used is labeled for dishwashers, and inspect visible spray nozzles or jets for food or debris that could redirect water toward the door; do not add more detergent to test the result.
Expected result: A large amount of foam is present, hand dish soap was used, a nozzle is blocked, or the detergent and spray paths look normal.
Next step: Stop using hand dish soap and follow the model’s detergent instructions. Clear only accessible nozzle debris as the manual allows; if water still leaks or suds persist, leave the unit off and arrange service.
Why this matters
Why: Hand dish soap can create suds that escape at the door, and a blocked nozzle can direct spray through a seal gap. Normal detergent and no visible nozzle blockage shift attention back to the seal, leveling, hose, or internal leak path.
-
Check 6
If the display shows LE, LC, or a model-specific blinking-light leakage indication without a visible puddle, turn off or unplug the dishwasher as directed, inspect the supply connection and recent installation area, and check whether a recently connected disposer still has its cap.
Expected result: The warning clears after the area dries, moisture is found at a hose or connection, the disposer connection is recent, excess detergent is present, or the warning returns with no visible source.
Next step: Keep power off while moisture is present. Correct only a safe visible installation issue, allow the area to dry as the manual permits, and request appliance service if the warning returns or the source cannot be identified.
Why this matters
Why: Samsung uses these indications for moisture detected where it should not be; leftover installation water, a hidden leak, a disposer connection issue, or excess detergent can trigger the sensor. A recurring warning is not proof that the sensor itself has failed.
-
Check 7
After a safe external correction and only when no active leak, exposed wiring, or error remains, run at most one supervised test from outside the cabinet and watch for water at the same location; stop immediately if any leak returns.
Expected result: The test stays dry, the same leak returns, water appears under the tub, the unit repeatedly drains or errors, or the breaker trips.
Next step: Leave the dishwasher off and arrange qualified appliance service for any returning or under-tub leak, damaged seal, persistent leakage warning, or breaker trip. Use plumbing service when the household drain or supply is the source.
Why this matters
Why: A dry test supports a corrected spill, connection, or external installation issue. A recurring or under-tub leak indicates a seal, pump, tub, sensor, or other internal problem that the visible symptom cannot identify.
Use your observations
Decision map
Find the observation that best matches what you see, then follow the next safe action.
-
PATH 01Next step
What you see
Water appears only once and does not return after the area is dried, with no error, damage, or moisture at the hoses.
Do this next
Keep the area dry and monitor the next normal operation from outside. Stop and isolate the unit if water returns.
Why this path and its safety boundary
Why it matters: A spill is more likely than an active dishwasher leak.
-
PATH 02Next step
What you see
Water is at the supply-hose connection, shut-off valve, or drain-hose connection under the sink, especially after installation or recent plumbing work.
Do this next
Isolate water and power safely, then correct only the visible connection or routing issue from the installation instructions. Use plumbing or appliance service for a damaged hose, hidden connection, or backup.
Why this path and its safety boundary
Why it matters: An accessible connection, hose, clamp, or installation-routing issue is more likely than a tub leak.
-
PATH 03Next step
What you see
Water exits at the front edge during washing, with debris or misalignment at the gasket, excessive suds, blocked spray nozzles, or an unlevel door path.
Do this next
Use only dishwasher detergent, clean accessible seal and nozzle areas, and correct no more than an obvious safe external issue. Service a damaged gasket, distorted tub, or leveling problem that requires moving the appliance.
Why this path and its safety boundary
Why it matters: The door-sealing or spray path is more likely than the supply line.
-
PATH 04Next step
What you see
LE, LC, or a leakage light appears without an obvious puddle, particularly after the unit was moved or installed.
Do this next
Remove power while investigating, check safe visible connections and the disposer cap, allow moisture to dry as the manual permits, and request service if the indication returns.
Why this path and its safety boundary
Why it matters: The leak sensor may be detecting moisture from installation, a hidden leak, a disposer connection, or lingering detergent rather than a visible door drip.
-
PATH 05Next step
What you see
The leak continues, appears under the tub or along a damaged hose, reaches wiring, trips the breaker, or is accompanied by smoke, arcing, or a burning smell.
Do this next
Stop use. Close the water supply and disconnect power only when safe and without contacting water or energized equipment; arrange qualified appliance or plumbing service, and leave for smoke, fire, or immediate danger.
Why this path and its safety boundary
Why it matters: An active water or electrical hazard or an internal component failure is possible.
Helpful context
Understand the symptom
The leak location changes the next check
Water at the front edge is more consistent with a door-seal, leveling, suds, loading, or spray-direction problem; water under the sink points toward the supply or drain connection. A leak that starts after installation deserves extra attention to hose routing, clamps, and leveling. If the dishwasher shows LE or LC without an obvious puddle, Samsung describes this as moisture detected where it should not be and recommends removing power while you look for the source.
Make the area safe before looking underneath
Do not keep running a visibly leaking dishwasher to locate the drip. Turn off the circuit breaker when safe and close the dishwasher water supply if you can reach it without contacting water or energized equipment. Do not remove electrical covers, test live wiring, or pull out a built-in unit alone. A towel can help identify where water reappears, but it does not make an active leak safe to operate.
Small installation details can create a large puddle
Samsung identifies loose hose connections, a kinked or damaged drain hose, a missing drain-hose high loop or air-gap arrangement, an unlevel unit, excess suds, a dirty or displaced rubber seal, and blocked spray nozzles as different leak paths. Check only visible, accessible conditions against the exact model manual and local plumbing requirements; a component leak or distorted tub belongs to service.
Safety boundary
Stop conditions
- Do not continue running a visibly leaking dishwasher to locate a drip. Keep water away from outlets, wiring, and the junction box; isolate power and water only when it can be done safely.
- Do not remove electrical covers, test live wiring, alter the circuit, or work on an energized dishwasher. Samsung reserves electrical work for qualified professionals.
- Do not pull out a built-in dishwasher alone, disconnect plumbing, cut a hose, or loosen a hidden connection when the source is not safely accessible. Use qualified appliance or plumbing help.
- Stop for a damaged door seal, hose, tub, or cabinet; a leak under the tub; recurring LE or LC; a drain or sink backup; water near electrical parts; or a breaker that trips again.
- For smoke, fire, arcing, or immediate danger, leave the area and use emergency assistance from a safe location.
Only after diagnosis
Potential parts
- dishwasher door gasket or rubber seal
Consider this only when the exact model’s seal is torn, hardened, displaced beyond a simple reseat, or confirmed by diagnosis after cleaning and alignment checks; a front-edge leak alone does not prove gasket failure.
Seal profile, length, channel, and door design vary by model. Confirm the complete Samsung model number and manufacturer fit information before ordering or installing. - dishwasher water-supply hose
Consider this only when the visible supply hose is damaged or a model-specific diagnosis confirms it is the leak source after checking both connections.
Fittings, seals, length, and routing requirements vary. Confirm the exact model and installation instructions; do not substitute a hose based only on appearance. - dishwasher drain hose
Consider this only when the hose is visibly damaged or leaks along its dishwasher-side length and the connection, clamp, and household drain have been separated as possible causes.
Connection ends, clamps, high-loop or air-gap routing, and local installation requirements vary. Confirm fitment from the exact manufacturer information.
When checks do not resolve it
Need a professional?
Safety scope: Homeowner-safe checks are distinguishing a spill from a returning leak, observing the leak location, inspecting accessible hose connections with power and water isolated, checking a visible drain route, cleaning an accessible door seal, confirming dishwasher detergent, and observing a supervised dry test. Electrical work, internal leak diagnosis, live testing, moving the dishwasher, plumbing disconnection, and damaged-component replacement belong to qualified professionals.
Common questions
FAQ
How do I tell whether my Samsung dishwasher is leaking or someone spilled water?
Wipe up the water and see whether it returns during operation, but do not run another cycle if the leak is active or water is near electrical parts. A puddle that does not return is more consistent with a spill; a returning puddle should be located and safely isolated.
Why is my Samsung dishwasher leaking from the door?
A dirty or displaced gasket, an unlevel unit, an obstructed door, excess suds from hand dish soap, or a blocked spray nozzle can send water toward or through the door seal. Clean and reseat only an intact accessible seal, use dishwasher detergent, and service a damaged seal or alignment problem.
Can the drain hose make a Samsung dishwasher leak?
Yes. A loose connection, kink, damage, missing high loop or air-gap arrangement, or incorrect installation can cause leakage or backflow. Check visible routing under the sink against the exact installation instructions, and use plumbing or appliance service when the hose or connection is not safely accessible.
What do LE or LC mean on a Samsung dishwasher?
Samsung uses LE or LC, and some model-specific blinking-light patterns, to indicate that the leak sensor has detected moisture where it should not be. Remove power while checking for a visible leak, recent installation water, a disposer-cap issue, or excess detergent; request service if the warning returns.
Can too much soap cause a Samsung dishwasher leak?
Yes. Hand dish soap or another non-dishwasher product can make excessive suds that escape through the door. Stop using it, follow the detergent label and Samsung manual, and do not keep running cycles to flush a leak if water is returning.
When should a leaking Samsung dishwasher be serviced?
Arrange service for a leak under the tub, a damaged gasket or hose, a persistent LE or LC warning, a leak that returns after safe external checks, or any need to move the built-in unit or open electrical covers. Use plumbing help for a sink or household drain backup, and stop immediately for smoke, arcing, or water near energized equipment.
Read the exact guide
Official sources
- Samsung dishwasher is leaking or has a leakage error codeSamsung Support US · Samsung dishwasher guidance; hose routing, seal design, error indications, and leveling details vary by model and installation.
- Steps to stop your Samsung dishwasher from leakingSamsung Support Canada · Samsung Canada dishwasher guidance; local plumbing rules and exact model procedures may differ.
- How to set up your Samsung DishwasherSamsung Support US · Samsung installation guidance; connection sizes, routing, and local code requirements vary by model and region.
- Samsung Dishwasher stinks or has a musty smellSamsung Support US · Samsung dishwasher maintenance guidance; cleaning components and cycles vary by model.
Community feedback
Share a repair observation
Share a plain-text repair observation. Accepted observations are published automatically; this page may take a moment to update.