
On this page
Start here
Quick answer
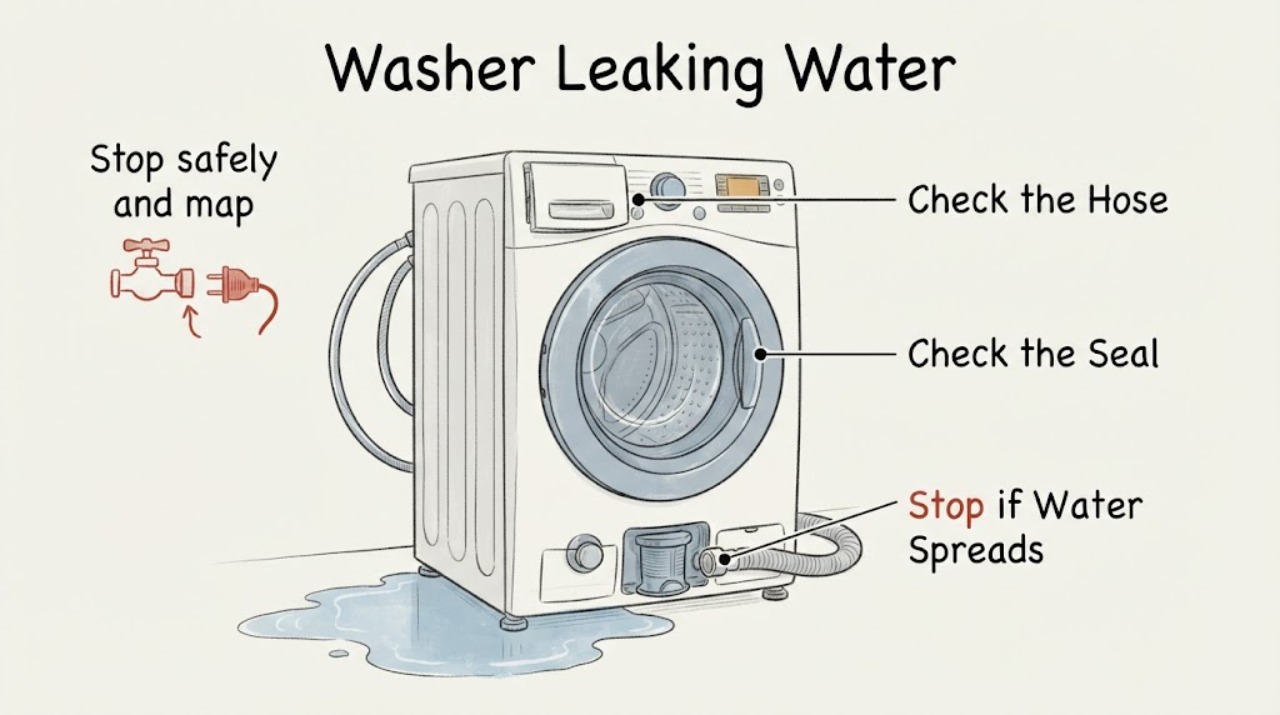
Stop the cycle and first determine where and when the water appears: at a supply connection before or during filling, around the front door, from the detergent drawer, from the drain hose while pumping out, or underneath the cabinet. Keep the washer off if water is near the cord, outlet, controls, or other electrical equipment; isolate power only from a safe, dry location. Samsung's safe visible checks include inspecting both ends of the supply hoses, the front-load door gasket and door closure, the detergent drawer and HE detergent use, the external drain-hose routing, the model-specific front-load pump filter, and washer level. Do not remove the rear drain-hose retaining screw, open the cabinet, or run a test cycle while a significant leak or electrical hazard remains. Replace only a visibly damaged external hose or seal through a confirmed model-specific part path; persistent, internal, or significant leaks need qualified service.
Before you begin
Safety first
- Keep the washer off for a significant or internal leak, water near electrical parts, smoke, sparks, heat, a burning or electrical odor, a hot plug or outlet, or a washer that will not turn off. Do not open the cabinet, bypass safety devices, or repeat test cycles.
Work through in order
Diagnostic checks
Use only checks that match the exact appliance or system and its official guide.
-
Stop safely and map the first wet point
Press Pause or Power, keep hands away from moving water and the tub, and do not restart while water is actively spreading. From a dry, safe position, note whether water is near the cord, outlet, controls, or other electrical equipment, and identify the first wet point: rear supply hoses, front door, detergent drawer, drain hose or standpipe, pump-filter area, or underneath the cabinet.
Expected result: Water reaches an outlet, plug, cord, controls, or other electrical equipment; the leak is large or rapidly worsening; smoke, sparks, a hot connection, or a burning odor is present; or the washer will not stop.
Next step: Keep clear and isolate power only from a safe, dry location. Do not touch wet electrical equipment or pull a wet plug. Close the water supply only if it is safely reachable from a dry position, then arrange qualified appliance or electrical service; use emergency help for smoke or fire.
Stop if: Do not run a test cycle, open the cabinet, or reach through pooled water.
Why this matters
Why: This is a shock, fire, or water-damage event, not a routine hose adjustment.
-
Check both ends of the water-supply hoses
With the washer off and the area dry, inspect the full visible length of each water-supply hose and both ends: the household shutoff connection, washer inlet connection, rubber hose body, and sealing rings. Look for moisture, a split, a bulge, a missing or displaced seal, or a connection that is visibly loose. Do not loosen a pressurized connection or reach behind a wet appliance.
Expected result: Water first appears at a supply connection, a hose is damaged, a sealing ring is missing or damaged, or the supply side is dry while the leak starts later in the cycle.
Next step: Keep the washer off and have a damaged hose or sealing ring replaced with a model-appropriate component; if a dry, accessible connection needs attention, follow the exact installation instructions without forcing it. Request service if the washer body, inlet, or connection is damaged or the source is uncertain.
Stop if: Do not use tape, glue, or a makeshift clamp as a pressure-hose repair.
Why this matters
Why: A supply-hose or sealing-ring defect is more likely when water appears during filling or at the rear connection. A dry supply side makes the door, drawer, drain, tub, or internal path more likely.
-
Inspect the front-load door gasket and closure
If water appears at the front door on a front-load washer, wait until the drum is stopped and inspect the gasket and glass. Carefully fold back only the accessible lip to look for hair, thread, coins, or other debris, then check that laundry is fully inside the drum and nothing blocks the door from closing. Do not pry, stretch, or remove the gasket.
Expected result: The door was not fully closed, an object is caught in the seal, the gasket is torn or deformed, or water drips while the door is closed even after the visible debris is removed.
Next step: Remove only loose visible debris, close the door correctly, and keep the washer off if the gasket is damaged. Arrange qualified service for a torn or deformed gasket, a damaged door, or a leak that persists.
Stop if: Do not run the washer with a damaged door seal and do not glue or patch the gasket.
Why this matters
Why: A closure gap or foreign material can let wash water escape. A damaged gasket or leak with a clean, correctly closed door needs service rather than a home seal repair.
-
Separate detergent-drawer overflow from an internal leak
If water or suds emerge from the detergent drawer, leave the washer off and inspect the drawer, its inserts or cover, and the drawer opening for residue or a part that is not fully seated. Confirm that the detergent is HE and that no compartment exceeds its MAX line, using only the exact model's instructions. Do not add more detergent, force the drawer, or probe the inlet channel with a sharp tool.
Expected result: The drawer is dirty, an insert or cover is not seated, non-HE or excessive detergent was used, heavy suds are present, or the drawer path appears clean but water still escapes.
Next step: Clean the drawer and opening with the model-approved method, reassemble it fully, and correct detergent type and amount. If the drawer continues to leak, is cracked, or water comes from inside the cabinet, stop and request service.
Stop if: Never mix cleaning chemicals and never run a cycle while water is reaching electrical parts.
Why this matters
Why: Samsung links excess or non-HE detergent, residue, and an incompletely assembled drawer to suds, buildup, dispensing problems, and leaks. A clean, correctly assembled drawer with recurring water may have a blocked or internal water path.
-
Verify the external drain-hose routing
If water appears at the drain hose or standpipe during pump-out, inspect the visible hose for kinks, crushing, bends, damage, a loose end, or a connection that is airtight. Compare its insertion, support, and height with the exact Samsung installation instructions. Samsung's general standpipe guidance calls for insertion between 6 and 8 inches, secure support, a non-airtight connection, and the model-specified height; do not remove the rear retaining screw or use an extension kit.
Expected result: The hose is kinked, damaged, unsupported, inserted too far or not far enough, forms an airtight connection, sits outside the model's permitted height, or the household drain backs up.
Next step: Correct only a safe, visible routing issue documented for the model and secure the hose without removing its rear holder. Use plumbing service for a household drain backup and appliance service for a damaged hose, missing holder, leak from the washer body, or returning overflow.
Stop if: Do not pull out a retained hose, remove the rear screw, or disconnect a wet drain connection to experiment.
Why this matters
Why: A routing or household-drain problem can make water spill during draining even when the washer itself is intact. A damaged hose or missing retaining holder is not a safe improvised repair.
-
Check the front-load pump filter only when the model has one
For an applicable front-load model, use the exact Samsung instructions to inspect the pump or debris filter only after the washer is off, cool, and safely isolated. Prepare a towel and a container for residual water, and stop if the water is hot, the panel is not the documented access point, or water cannot be controlled. Do not assume a top-load washer has a removable pump filter.
Expected result: The filter is clogged with lint or debris, the filter or access area is damaged, residual water is hot or uncontrolled, or the washer is top-load or the filter procedure does not match the model.
Next step: Clean and refit the filter only as the exact manual allows, secure its cap and hose, and wipe the area dry. Request service for a damaged or stuck filter, uncontrolled water, a recurring leak, or an undocumented access point.
Stop if: Do not remove cabinet panels or force a filter that will not turn.
Why this matters
Why: Samsung identifies a clogged front-load debris filter as a cause of drainage problems and a contributor to leaks or odors. A damaged, inaccessible, or model-mismatched filter path needs service.
-
Check level, load, and suds before one supervised test
After visible water is cleaned up and no electrical or significant-leak condition remains, check that the washer stands firmly on a stable floor and does not rock. Use the correct HE detergent amount, avoid an overloaded drum, and do not begin a test if the tub contains unusually hot water. Do not move a heavy washer across connected services without proper assistance.
Expected result: The washer rocks, the floor is unstable, the drum was overloaded, excessive suds are present, or the washer is level and the prior leak point has been corrected.
Next step: Correct only the model-documented leveling or load condition. If the area is dry and all visible checks are complete, run one supervised test cycle and watch the previously wet point. Stop immediately if water returns, spreads quickly, or reaches electrical parts.
Stop if: Do not repeat test cycles for a returning leak or test while water is near electrics.
Why this matters
Why: Poor leveling, overloading, and excess suds can contribute to poor draining, overflow, or water escaping at the drawer or door. A stable, correctly loaded washer with a persistent leak points to a component or internal-path fault.
-
Record the pattern for service when the source is internal
If the leak persists after the matching visible check, record the model, front-load or top-load style, cycle stage, water temperature setting, leak location, amount, timing, error code, hose and door observations, detergent used, and whether the washer is level. Keep the washer off rather than opening the cabinet or replacing an internal component based on appearance.
Expected result: Water returns from underneath or inside the cabinet, a hose or gasket is damaged, the leak is significant, an error returns, or no safe external source can be confirmed.
Next step: Leave the washer off and arrange qualified appliance service. Provide the recorded pattern and photographs only if they can be taken from a dry, safe position; do not dismantle the appliance.
Stop if: Do not continue operating a washer with a recurring, significant, or internal leak.
Why this matters
Why: An internal tub, pump, valve, hose, seal, or control fault is possible, but the evidence does not identify a safe user repair.
Use your observations
Decision map
Find the observation that best matches what you see, then follow the next safe action.
-
PATH 01Next step
What you see
Water appears at a rear supply connection during filling, and the hose body or sealing ring is wet or damaged while the drain and door areas remain dry.
Do this next
Keep the washer off and have the damaged hose or seal replaced with a model-appropriate component. If the connection or washer inlet is damaged or cannot be safely accessed, request qualified service.
Why this path and its safety boundary
Why it matters: A supply hose, sealing ring, inlet connection, or household shutoff connection is more likely than a tub or drain leak.
-
PATH 02Next step
What you see
Water comes from the front of a front-load washer only while the door is closed, and debris is caught in the gasket or laundry prevents full closure.
Do this next
Remove only loose visible debris, ensure all laundry is inside the drum, and close the door correctly. Stop and request service for a torn or deformed gasket or a leak that continues with a clean, closed door.
Why this path and its safety boundary
Why it matters: A door-seal gap caused by foreign material or closure interference is more likely.
-
PATH 03Next step
What you see
Water or heavy suds emerge from the detergent drawer, the drawer is dirty or not fully assembled, or non-HE or excessive detergent was used.
Do this next
Clean and correctly reassemble the drawer, use only the model-appropriate HE detergent and amount, and stop if the drawer still leaks or the water comes from inside the cabinet.
Why this path and its safety boundary
Why it matters: Drawer residue, incorrect detergent, excess product, or oversudsing is more likely than a supply-hose failure.
-
PATH 04Next step
What you see
Water spills at the standpipe or drain connection during pump-out, the hose is kinked or incorrectly inserted, or the household drain backs up.
Do this next
Make only a safe, model-documented visible routing correction and keep the rear retaining holder in place. Use plumbing service for a backed-up household drain and appliance service for a damaged hose, missing holder, or recurring overflow.
Why this path and its safety boundary
Why it matters: External drain routing or household plumbing is more likely. Samsung warns that incorrect insertion, an airtight connection, damage, or missing support can cause spill or siphoning behavior.
-
PATH 05Next step
What you see
A front-load washer has a documented accessible pump filter, drainage is poor, and the filter contains lint or debris without hot or uncontrolled water.
Do this next
Clean and refit the filter only as the exact Samsung instructions allow, then wipe the area dry and observe once. Stop for a stuck or damaged filter, uncontrolled water, or a returning leak.
Why this path and its safety boundary
Why it matters: A clogged debris filter may be restricting drainage and contributing to the leak.
-
PATH 06Next step
What you see
The washer is level, the visible hoses, door, drawer, drain path, and applicable filter are correct, but water returns from underneath or the cabinet during a cycle.
Do this next
Leave the washer off and arrange qualified appliance service. Do not open the cabinet, continue test cycles, or select a replacement part by appearance.
Why this path and its safety boundary
Why it matters: An internal hose, pump, valve, tub, seal, or control-related leak is possible and cannot be safely confirmed from outside.
-
PATH 07Next step
What you see
Water is near an outlet, cord, controls, or other electrical equipment; the leak is significant; smoke, sparks, heat, or a burning odor appears; or the washer will not turn off.
Do this next
Keep clear, isolate power only from a safe dry location, and arrange qualified appliance or electrical service. Do not touch wet electrical equipment or restart the washer.
Why this path and its safety boundary
Why it matters: The immediate hazard is electrical, fire, or water damage, and ordinary troubleshooting must stop.
Helpful context
Understand the symptom
Water location is more useful than the size of the puddle
A leak that starts at a rear supply connection is a different problem from water escaping through a front-load door, overflowing a detergent drawer, or spilling from the drain path. Wipe up accessible water only if doing so is safe, then note the first place that becomes wet and whether it happens during filling, washing, draining, or after the cycle. Do not move a heavy washer across connected hoses or a power lead to see behind it.
Top-load, front-load, and combo models have different access
Samsung's pump-filter procedure is for applicable front-load models; top-load models do not have the same removable pump filter. Combination units can also have moisture in their heat-exchanger or lint-filter area that is normal after drying, while a large amount of water is not. Use the exact model manual before opening a panel, draining residual water, or selecting a test cycle.
A test cycle is the last step, not the first
A supervised test cycle is reasonable only after the door or lid is properly closed, visible debris is removed, hoses are correctly placed, the floor is dry, and no water is near electrical parts. If the leak is large, returns immediately, comes from inside the cabinet, or is accompanied by a power symptom, keep the washer off and arrange service instead of repeating cycles.
Safety boundary
Stop conditions
- Stop immediately for water near an outlet, plug, cord, controls, or other electrical equipment; smoke, sparks, a hot connection, or a burning odor; a leak that is large or rapidly worsening; or a washer that will not stop. Isolate power only from a safe, dry location and arrange qualified help.
- Do not open the cabinet, reach through pooled water, move a heavy washer across connected services, or continue testing an internal, recurring, or significant leak.
- Do not remove the rear drain-hose retaining screw, force a filter, disconnect a wet hose, or use tape, glue, or a makeshift clamp on a pressurized water connection.
- Do not run a test cycle after a recent hot cleaning or sanitizing cycle until the model instructions say the water is safe to handle, and never test while water is near electrical parts.
Only after diagnosis
Potential parts
- water-supply hose or sealing ring
Consider this only when inspection identifies a damaged supply hose or sealing ring at the leaking connection and the exact model or connection standard has been confirmed.
Hose ends, seals, and connection requirements vary by model and installation. Confirm the exact model and the leak diagnosis before selecting a replacement. - front-load door gasket
Consider this only when a front-load washer has a torn or deformed door gasket and service diagnosis confirms the gasket is the leak path.
Door seals are model-specific and may require professional installation. Confirm the model and diagnosis before ordering. - drain hose or pump assembly
Consider this only after visible drain routing and the applicable filter check show a damaged hose or qualified diagnosis identifies a failed pump or drain component.
Drain parts and access differ between Samsung front-load, top-load, and combination models. Confirm the exact model and service diagnosis first.
When checks do not resolve it
Need a professional?
Request service when the source is internal or uncertain, water returns after a documented visible correction, a gasket, hose, inlet, filter, pump, or holder is damaged, the leak is significant, or any electrical or heat warning occurs.
Safety scope: Keep the washer off for a significant or internal leak, water near electrical parts, smoke, sparks, heat, a burning or electrical odor, a hot plug or outlet, or a washer that will not turn off. Do not open the cabinet, bypass safety devices, or repeat test cycles.
Common questions
FAQ
Where should I look first when a Samsung washer leaks water?
Note the first wet point and the cycle stage. Check both ends of the supply hoses, the front-load door seal and closure, the detergent drawer, the external drain hose, and the applicable front-load pump filter. Keep the washer off if water is near electrical parts or the leak is significant.
Why is water leaking from the detergent drawer?
Samsung links drawer leaks to residue, an insert or cover that is not seated, exceeding the MAX line, non-HE or excessive detergent, and oversudsing. Clean and reassemble the drawer according to the model instructions and correct the detergent use. If it still leaks, request service.
Can a Samsung washer leak from the door even when the gasket looks mostly fine?
Yes. Samsung notes that a small foreign object such as hair or thread can create a gap, and laundry caught at the door can interfere with closure. Remove only loose visible debris, ensure the door closes correctly, and request service for a damaged gasket or a leak that continues with the door closed.
Can the drain hose cause a Samsung washer to leak?
Yes. A kinked or damaged hose, incorrect insertion, an airtight connection, unsuitable height, missing support, or a backed-up household drain can spill water during pump-out. Compare the visible setup with the exact model instructions and do not remove the rear retaining screw.
Should I clean a Samsung washer pump filter when it leaks?
Only if the exact washer is a front-load model with the documented accessible filter and the washer is off, cool, and safely dry. Prepare for residual water as Samsung instructs, and stop for hot or uncontrolled water, a stuck or damaged filter, or a top-load model without that filter path.
When is a Samsung washer leak an emergency?
Stop immediately for water near an outlet, plug, cord, controls, or other electrical equipment; smoke, sparks, a hot connection, a burning odor, a rapidly worsening leak, or a washer that will not turn off. Keep clear and isolate power only from a safe, dry location. Do not restart the washer; arrange qualified service or emergency help as appropriate.
Read the exact guide
Official sources
- How to clean your Samsung washerSamsung · Samsung cleaning overview; follow the exact model's manual for access and cycle details.
- Dispenser drawer issues in Samsung washing machineSamsung · Samsung dispenser guidance; drawer design and inserts vary by model.
- Samsung washing machine is leakingSamsung · Samsung support guidance; exact controls, access points, and installation requirements vary by model and region.
- Samsung washing machine will not drainSamsung · Samsung support guidance; drain dimensions and filter access must be checked against the exact model.
- Samsung Bespoke AI Laundry Combo is leaking waterSamsung · Only for Samsung Bespoke AI Laundry Combo units; do not generalize its normal heat-exchanger moisture note to ordinary washers.
- Power issues with Samsung washing machineSamsung · Samsung support guidance; electrical installation and model behavior vary.
Community feedback
Share a repair observation
Share a plain-text repair observation. Accepted observations are published automatically; this page may take a moment to update.